This topic describes how to create a process in the Cloud Architect Design Tools (CADT) console. In this example, the process of initializing a PolarDB database is created. The process consists of the following operations: creating a user, creating a database, granting access permissions to the user, and executing SQL statements.
Prerequisites
A whitelist is configured for the CADT process.
Procedure
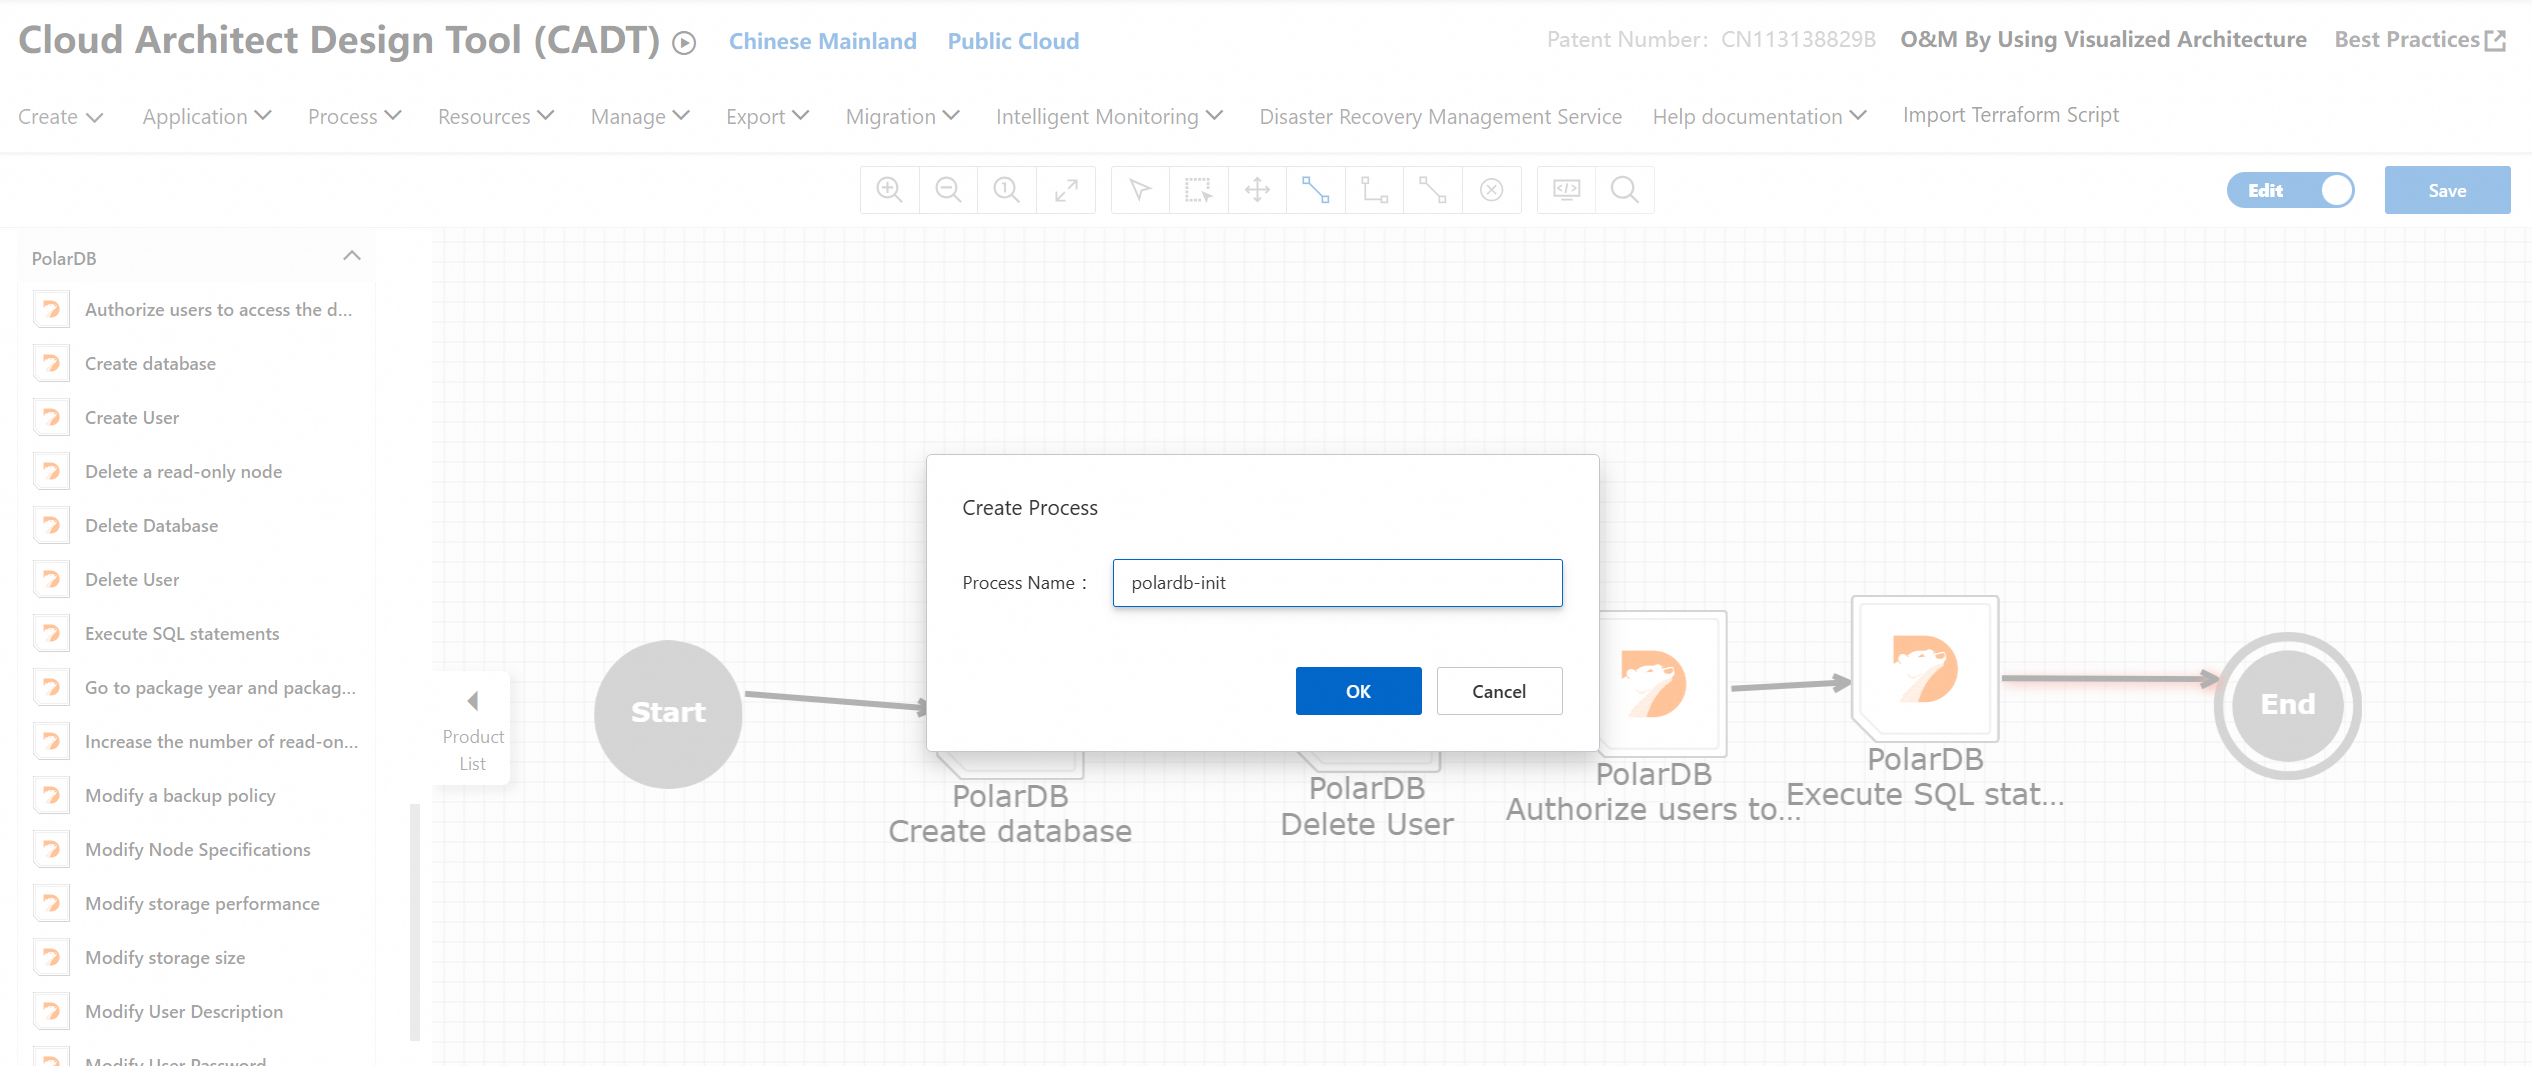
1. Create a process from scratch
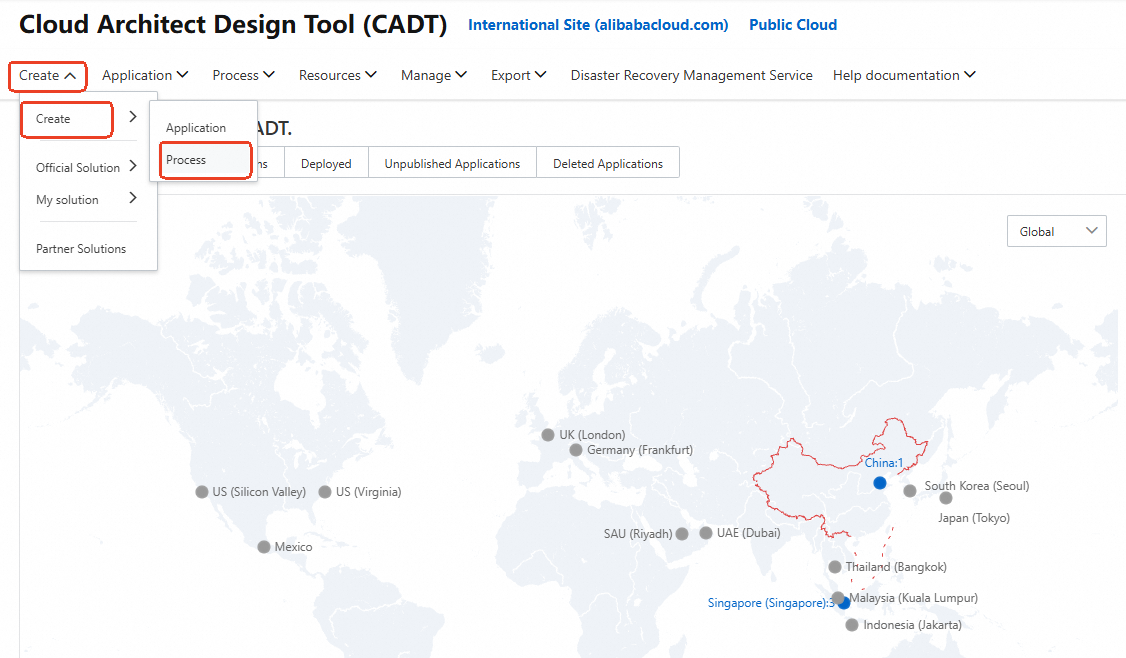
Log on to the CADT console. In the top navigation bar, choose Create > Create > Process.
2. Edit the process
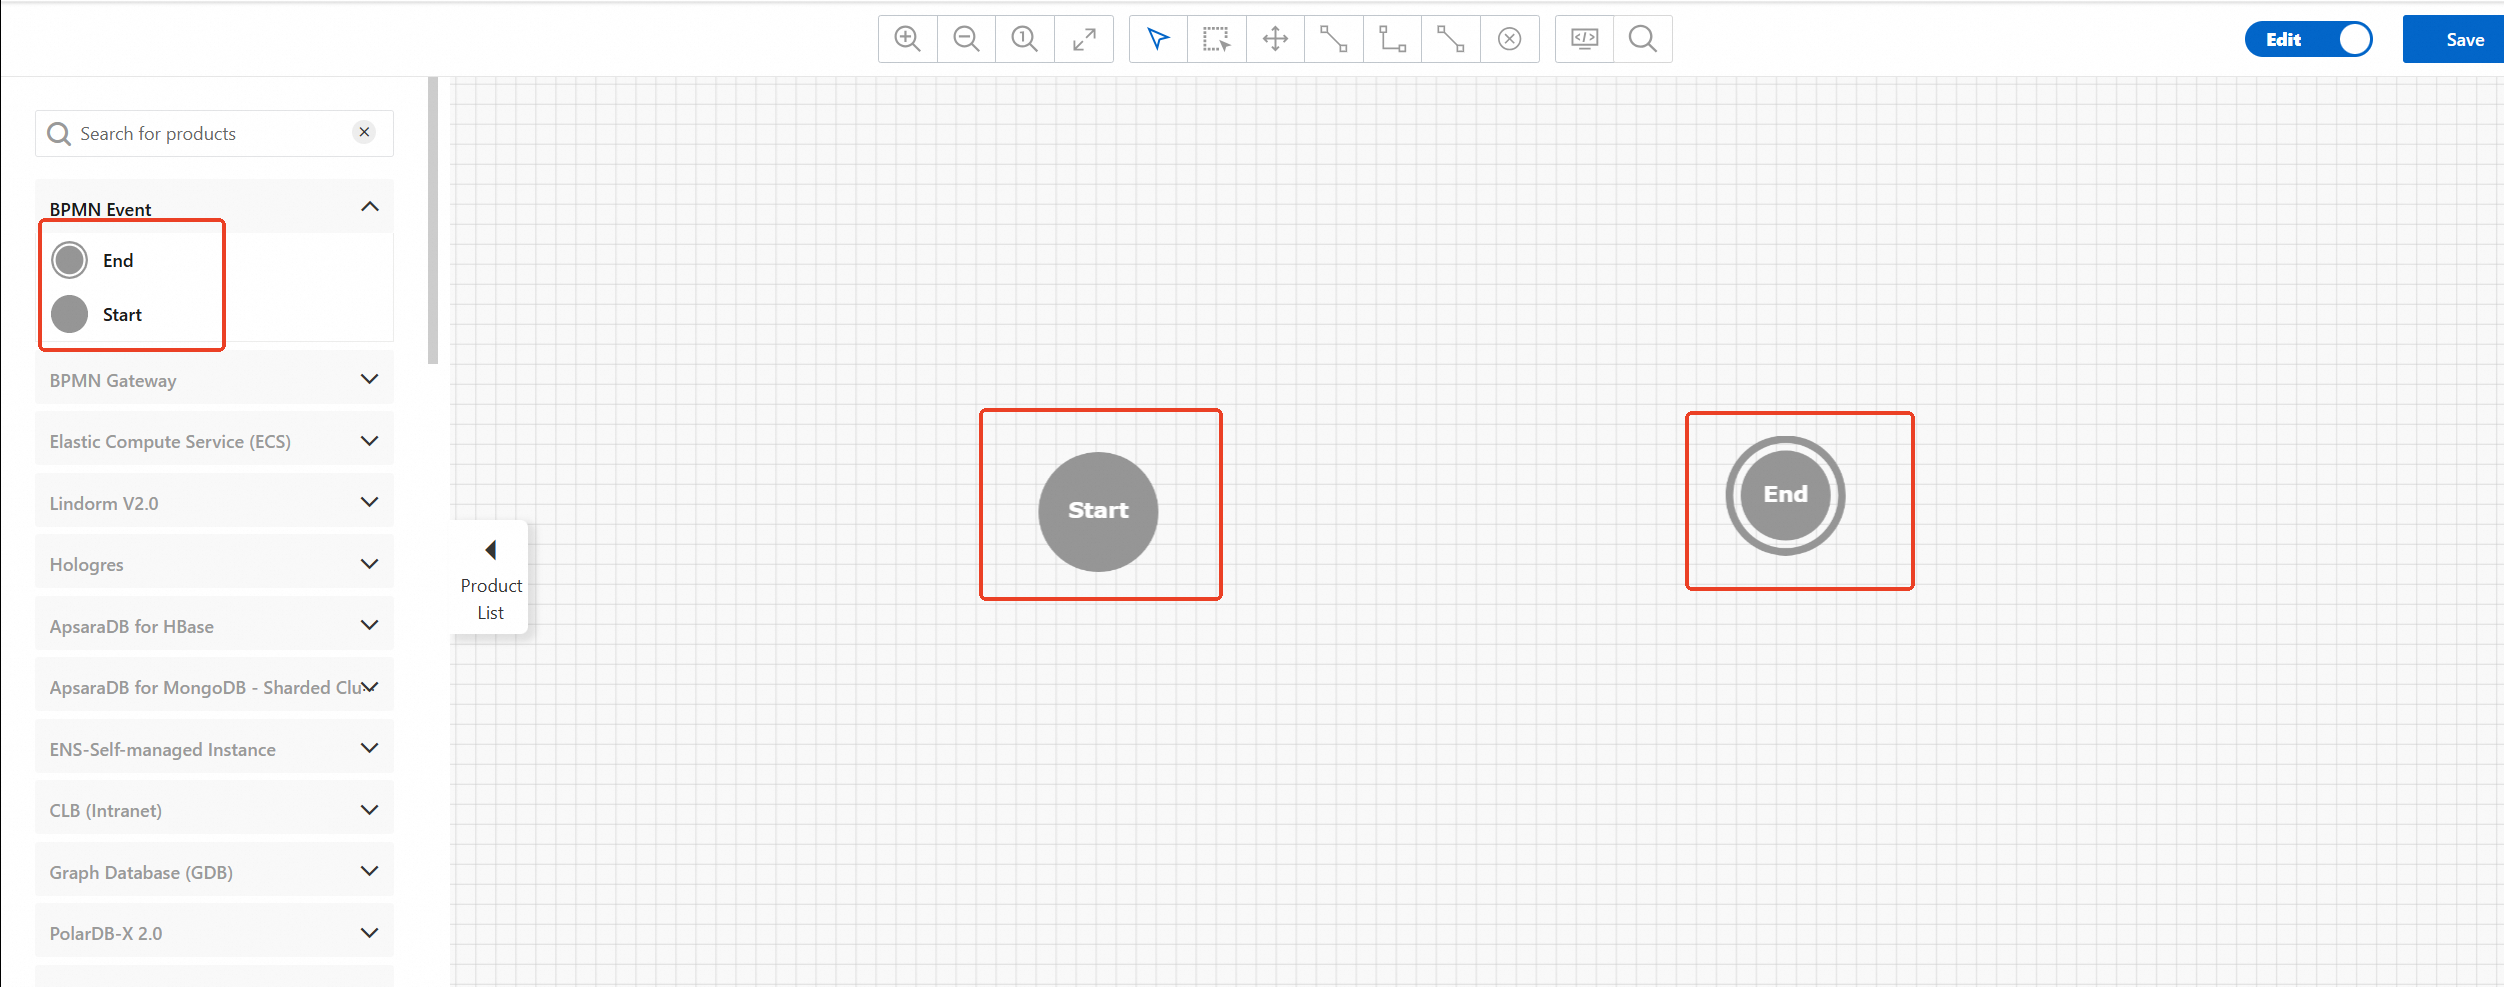
In the left-side navigation pane of the CADT console, click BPMN Event. From the BPMN Event section, drag the Start Event and End Event nodes to the canvas.
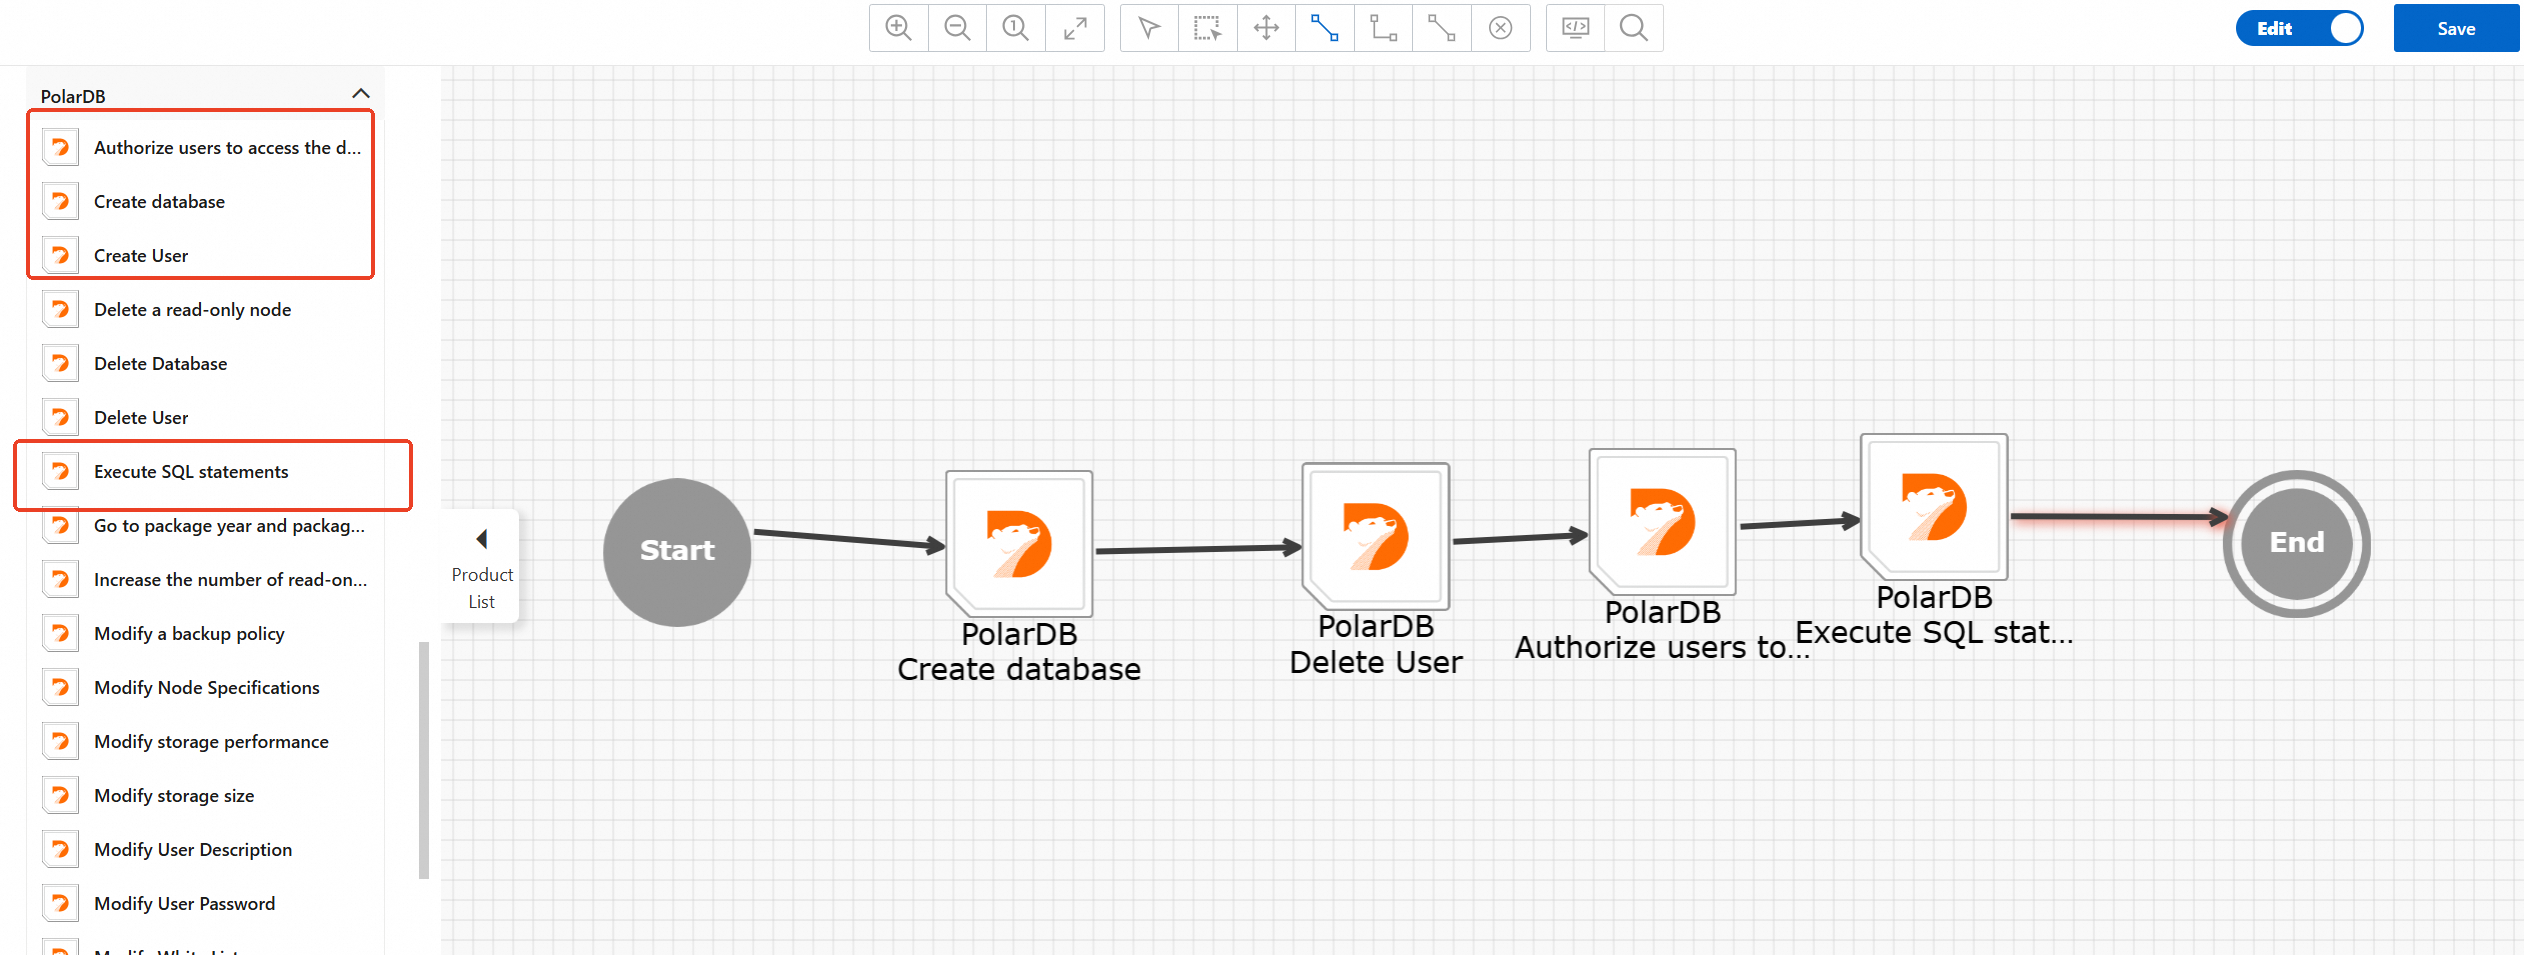
In the left-side navigation pane of the CADT console, click PolarDB. From the PolarDB section, drag the Create user, Create database, Authorize users to access the database, and Execute SQL statements nodes to the canvas. Connect the nodes based on an execution sequence. Pay attention to the direction of the arrows.
Click Save in the upper-right corner and save the process as prompted.
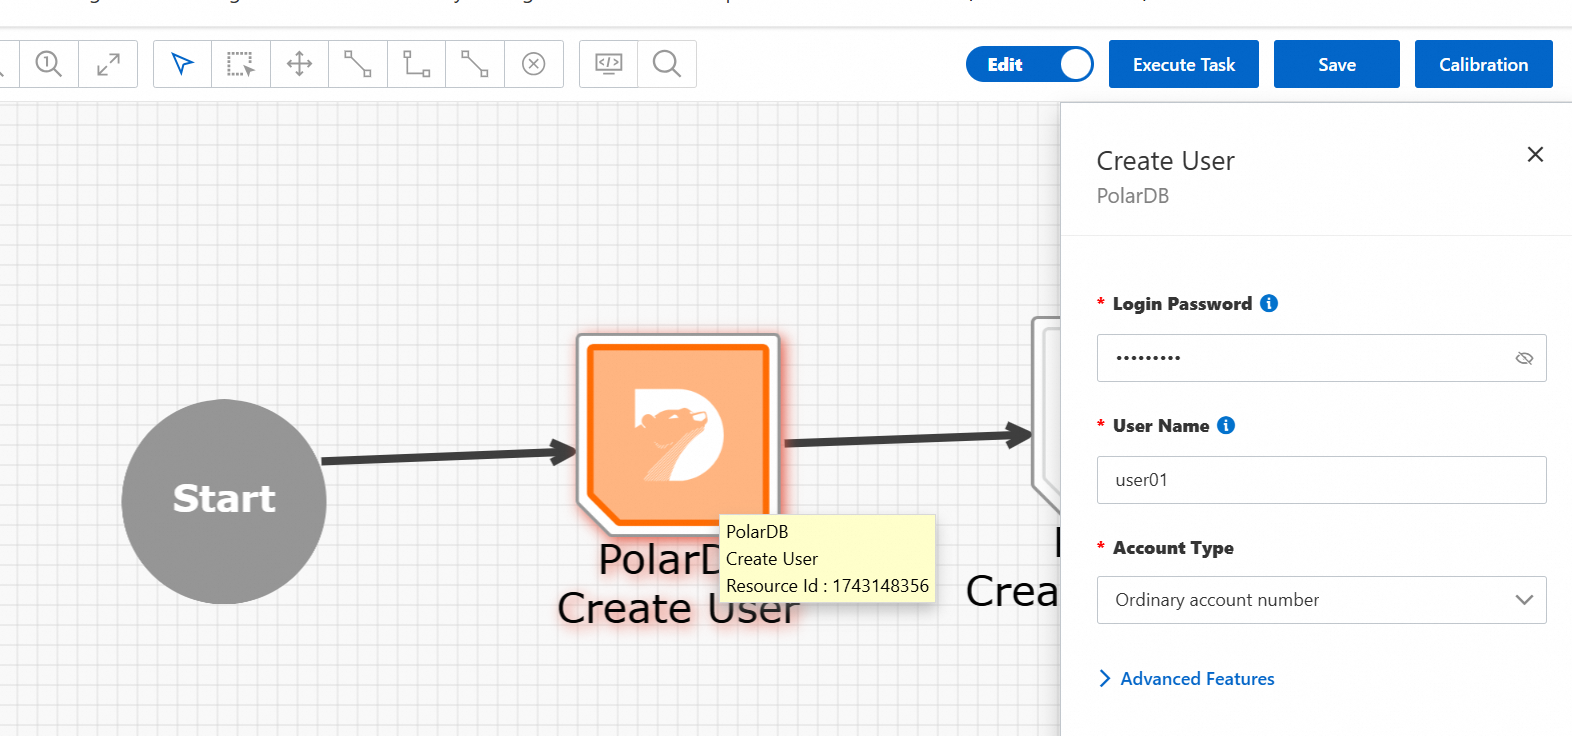
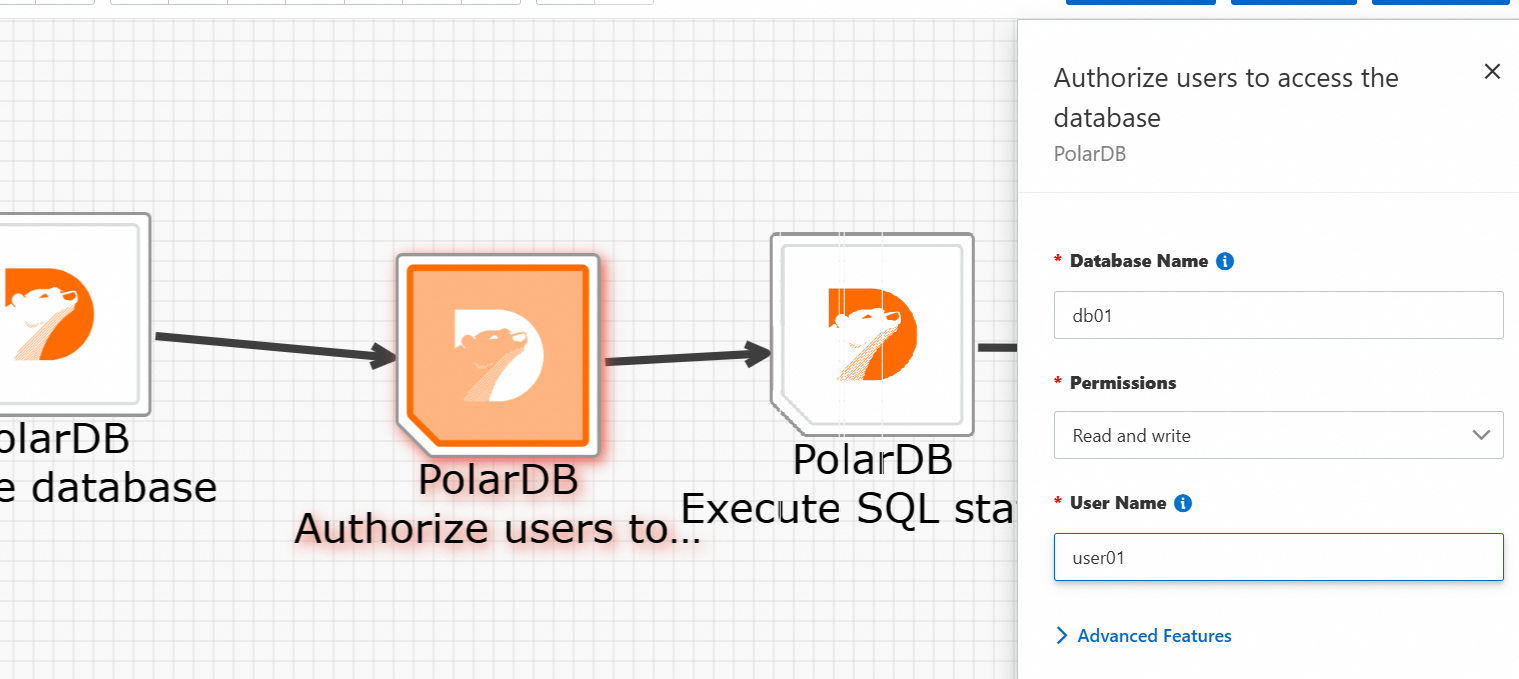
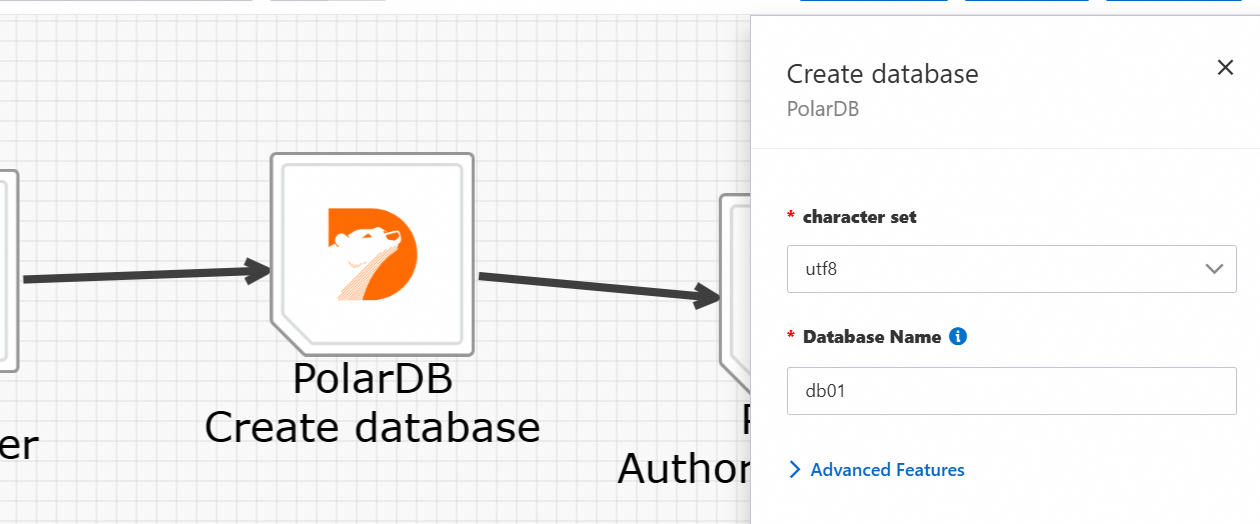
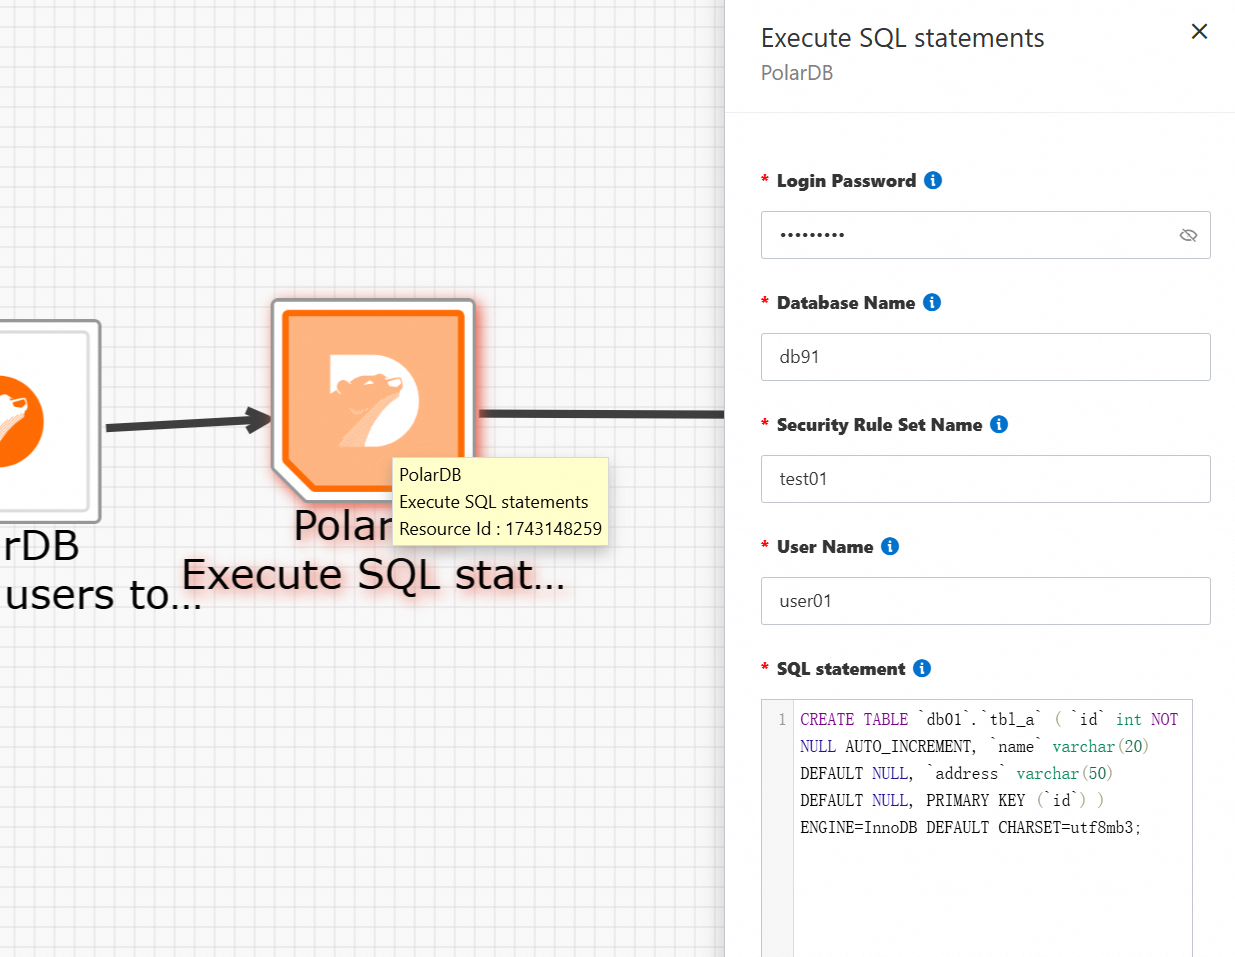
Double-click each operation node. In the panel that appears, configure the operation information. After the configurations are complete, click Save.
ImportantTo execute SQL statements, you must configure security rules. For more information, see Create a DMS security rule.
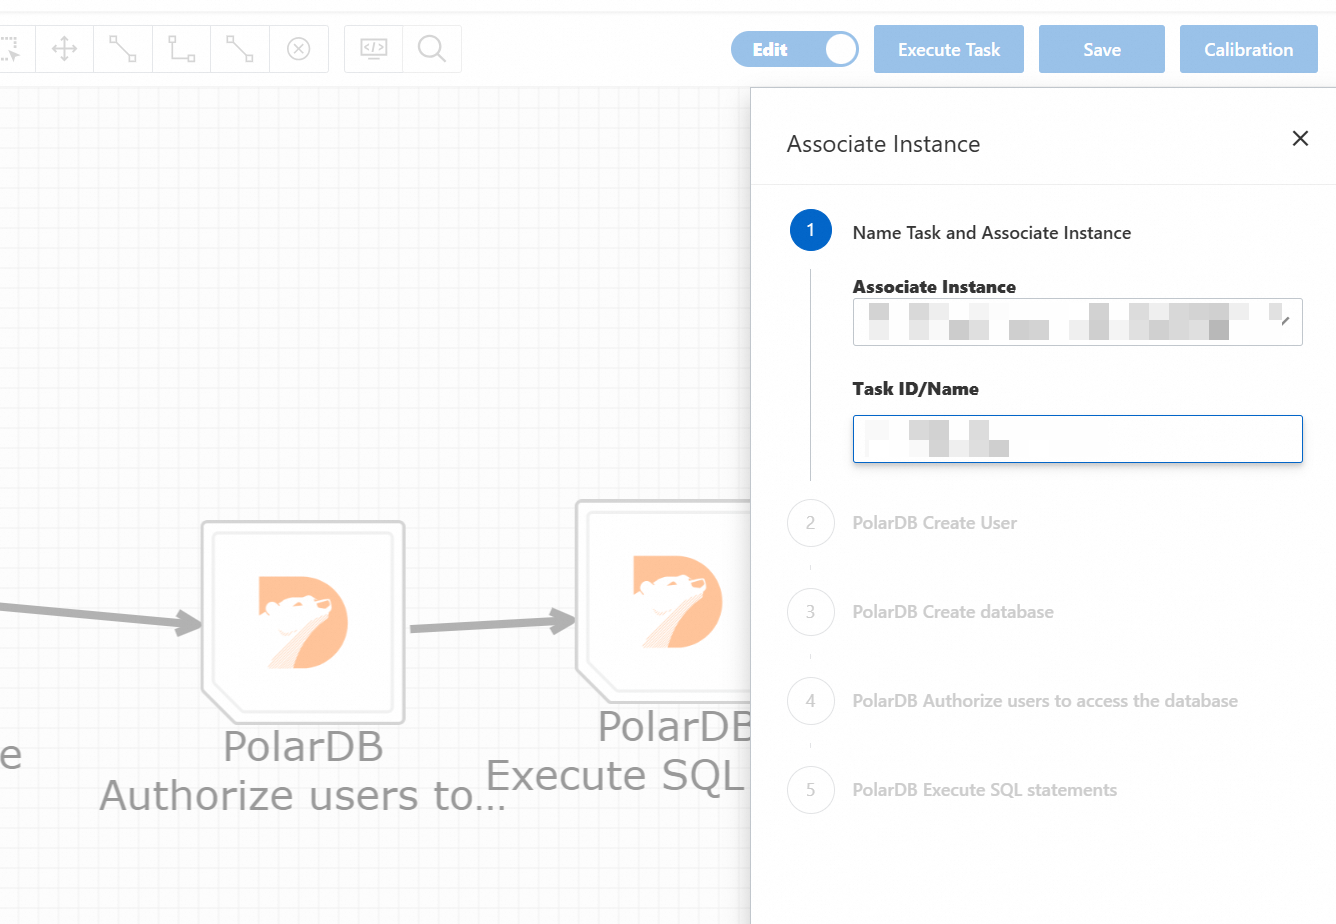
Click Execute Task in the upper-right corner. In the panel that appears, select an instance to be associated with the process, check the configuration information as prompted, and then click Save and Execute to test the process.
 Note
NoteYou can select a PolarDB instance in the Running state. You can also select a PolarDB instance that is in an application or template and is not created. For more information, see Associate a process with an instance.
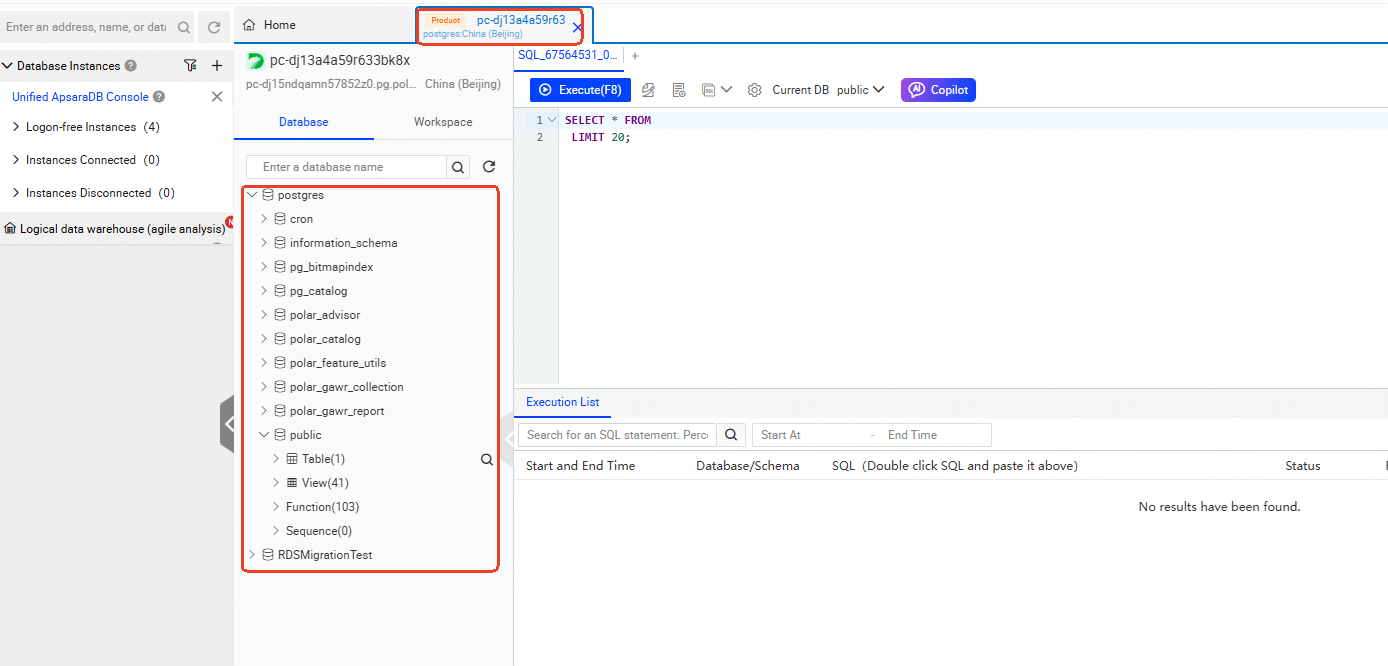
After the test is successful, log on to the PolarDB console and then log on to the PolarDB database to view the execution result.