This guide covers the end-to-end setup for ApsaraMQ for Kafka: getting access permissions, deploying an instance, creating topics and consumer groups, and sending and receiving your first messages.
Workflow
The following diagram shows the getting started workflow. Steps vary depending on your network type and endpoint configuration.
Figure 1. ApsaraMQ for Kafka quick start process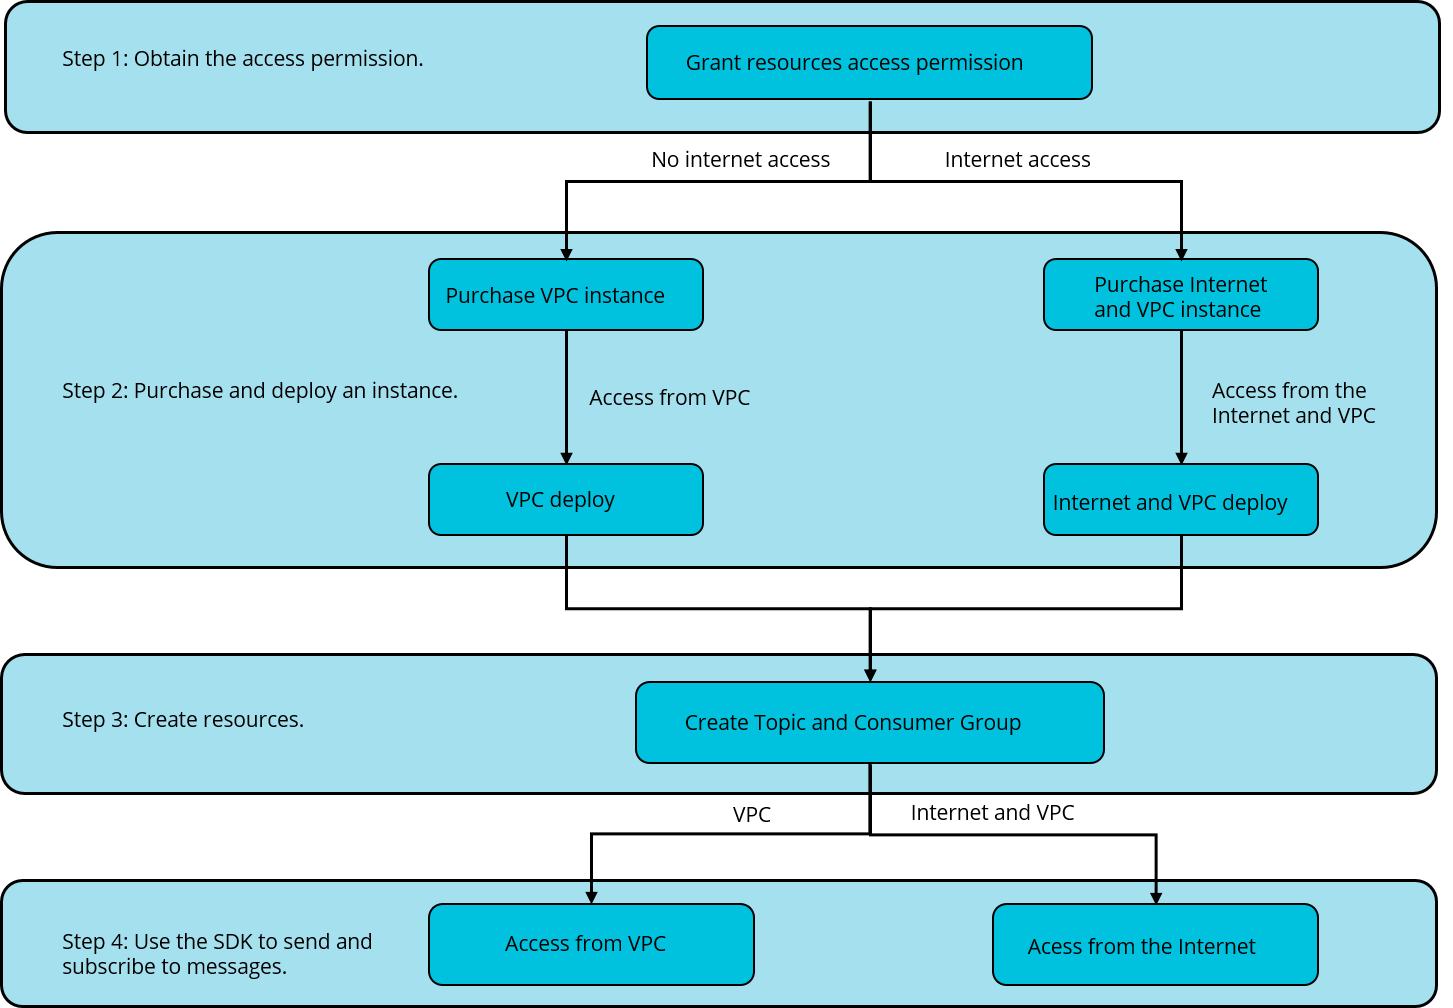
Step 1: Get access permissions
Grant your account or RAM users the permissions required to manage ApsaraMQ for Kafka resources.
Next step: Get access permissions
Step 2: Purchase and deploy an instance
Create and deploy an ApsaraMQ for Kafka instance. Choose a deployment option based on how your producers and consumers connect to the instance:
| Deployment option | When to use |
|---|---|
| VPC-connected instance | Producers and consumers run within the same VPC. |
| Internet- and VPC-connected instance | Producers or consumers connect over the public internet in addition to VPC access. |
Next step: Choose the option that matches your network requirements:
Step 3: Create resources
Create the topics and consumer groups your applications need. Topics hold messages that producers send and consumers read. Consumer groups track consumption progress across partitions.
Next step: Create resources
Step 4: Send and receive messages
Use an SDK to produce messages to a topic and consume them from a consumer group. Choose an endpoint type based on your deployment:
| Endpoint type | When to use |
|---|---|
| Default endpoint | Connect from within a VPC. |
| SSL endpoint with PLAIN authentication | Connect over the public internet. Messages are encrypted with SSL, and clients authenticate with PLAIN authentication. |
Next step: Choose the option that matches your instance type: