Build a Flutter AI image-editing app without a traditional backend. This tutorial walks you through generating frontend code with Qoder, setting up Backend-as-a-Service (BaaS) with AnalyticDB for PostgreSQL Supabase, and integrating the Qwen Image Edit model through an edge function — all in a single end-to-end workflow.
Audience: Mobile developers familiar with Flutter who want to validate an AI-native prototype quickly.
If you get stuck at any point, refer to the complete example on GitHub.
How it works
The app uses three components, each with a clearly defined responsibility:
-
Qoder — an AI-driven IDE agent that generates Flutter code from natural-language descriptions. You describe the features; Qoder writes the UI and interaction logic.
-
AnalyticDB for PostgreSQL Supabase — handles data storage, object storage, and edge function execution, replacing the need for a traditional backend.
-
Qwen Image Edit model — performs AI image editing, invoked securely through an AnalyticDB Supabase edge function.
Request flow
-
The user selects an image. The Flutter app uploads it to the
imagesbucket in Supabase Storage and generates a signed URL. -
The app sends the signed URL and the user's prompt to the
image-editedge function. -
The edge function retrieves the
BAILIAN_API_KEYsecret and calls the Qwen Image Edit model. The model returns the edited image URL. -
The app writes the original image URL, edited image URL, and prompt to the
edited_imagestable as a history record.
Prerequisites
Before you begin, make sure you have:
-
A Supabase project created in AnalyticDB for PostgreSQL
-
Public network access enabled for the project
-
A Model Studio API key for calling the Qwen Image Edit model
Step 1: Generate the Flutter app with Qoder
-
Create a new Flutter project. Press
Command + Shift + P(macOS) orCtrl + Shift + P(Windows/Linux), search forflutter, and select Flutter: New Project. -
Describe the app requirements to Qoder and iterate through a few debugging rounds. The following prompt produces the example app used in this tutorial:
build a flutter image edit app, powered by supabase, using edge function invoke image model to edit image by uploaded by users
Step 2: Configure AnalyticDB Supabase
Set up API access
In the project root directory, create a .env file with the following content. Replace the placeholder values with your actual configuration. To find these values, see Get API keys.
SUPABASE_URL=https://sbp-xxxxx.supabase.opentrust.net
SUPABASE_SERVICE_KEY=xxxxxxxx
Create the database table
Log in to the Supabase Dashboard and run the following SQL to create the edited_images table. This table stores each image-editing session, including the original image URL, edited image URL, and user prompt.
CREATE TABLE public.edited_images (
    id TEXT PRIMARY KEY,
    user_id UUID NOT NULL REFERENCES auth.users(id) ON DELETE CASCADE,
    prompt TEXT NOT NULL,
    original_image_url TEXT NOT NULL,
    edited_image_url TEXT NOT NULL,
    created_at TIMESTAMPTZ NOT NULL DEFAULT NOW()
);

-- Enable row-level security (RLS)
ALTER TABLE edited_images ENABLE ROW LEVEL SECURITY;

-- Users can view only their own images
CREATE POLICY "Users can view their own edited images"
ON edited_images
FOR SELECT
TO authenticated
USING (auth.uid() = user_id);

-- Users can insert only their own images
CREATE POLICY "Users can insert their own edited images"
ON edited_images
FOR INSERT
TO authenticated
WITH CHECK (auth.uid() = user_id);

-- Users can delete only their own images
CREATE POLICY "Users can delete their own edited images"
ON edited_images
FOR DELETE
TO authenticated
USING (auth.uid() = user_id);
Create the storage bucket
-
In the Supabase Dashboard, click Storage in the left navigation pane.
-
Create a bucket named
imagesand enable Public bucket to store user-uploaded images. -
Run the following SQL to set access policies for the bucket:
-- Authenticated users can upload to their own folder
CREATE POLICY "Allow authenticated users to upload images"
ON storage.objects
FOR INSERT
TO authenticated
WITH CHECK (
  bucket_id = 'images' AND
  auth.uid()::text = (storage.foldername(name))[1]
);

-- Authenticated users can read their own files
CREATE POLICY "Allow authenticated users to read their own images"
ON storage.objects
FOR SELECT
TO authenticated
USING (
  bucket_id = 'images' AND
  auth.uid()::text = (storage.foldername(name))[1]
);

-- Public read access for generating public URLs
CREATE POLICY "Allow public read access to images"
ON storage.objects
FOR SELECT
TO public
USING (bucket_id = 'images');
Step 3: Integrate the AI service
Store the API key as a secret
In AnalyticDB Supabase, Alibaba Cloud provides native configuration and centralized management of edge function secrets. Store your AI API tokens, such as those for DashScope and Model Studio, in the secret store of the function runtime environment so the edge function retrieves them at runtime with Deno.env.get — keeping the tokens out of your code and away from the client.
-
In the Supabase Dashboard, go to Edge Function > Secrets.
-
Add a secret named
BAILIAN_API_KEYand set its value to your Model Studio API key.
Deploy the edge function
-
In the Supabase Dashboard, go to Edge Function > Functions.
-
Click Deploy a new function in the upper-right corner and select Via Editor.
-
Create a function named
image-editwith the following code. SetBASE_URLbased on your network access method:-
Internal network: see Access Alibaba Cloud Model Studio over an internal network
-
Public network: see Qwen Image Edit guide
const DASHSCOPE_API_KEY = Deno.env.get('BAILIAN_API_KEY'); const BASE_URL = 'https://vpc-cn-beijing.dashscope.aliyuncs.com/api/v1'; async function callImageEditAPI(image_url, prompt) { const messages = [ { role: "user", content: [ { image: image_url }, { text: prompt } ] } ]; const payload = { model: "qwen-image-edit", input: { messages }, parameters: { negative_prompt: "", watermark: false } }; try { const response = await fetch( `${BASE_URL}/services/aigc/multimodal-generation/generation`, { method: 'POST', headers: { 'Authorization': `Bearer ${DASHSCOPE_API_KEY}`, 'Content-Type': 'application/json' }, body: JSON.stringify(payload) } ); if (!response.ok) { console.error(`Request failed: ${response.status} ${response.statusText}`); return null; } const data = await response.json(); return data.output?.choices?.[0]?.message?.content ?? null; } catch (error) { console.error("Request error:", error.message); return null; } } Deno.serve(async (req) => { try { const { image_url, prompt } = await req.json(); if (!image_url || !prompt) { return new Response( JSON.stringify({ error: "Missing image_url or prompt" }), { status: 400, headers: { 'Content-Type': 'application/json' } } ); } const result = await callImageEditAPI(image_url, prompt); return new Response( JSON.stringify({ message: result }), { headers: { 'Content-Type': 'application/json', 'Connection': 'keep-alive' } } ); } catch (error) { console.error("Server error:", error); return new Response( JSON.stringify({ error: "Internal server error" }), { status: 500, headers: { 'Content-Type': 'application/json' } } ); } }); -
Run and verify
-
Install dependencies and start the app:
flutter pub get flutter run -
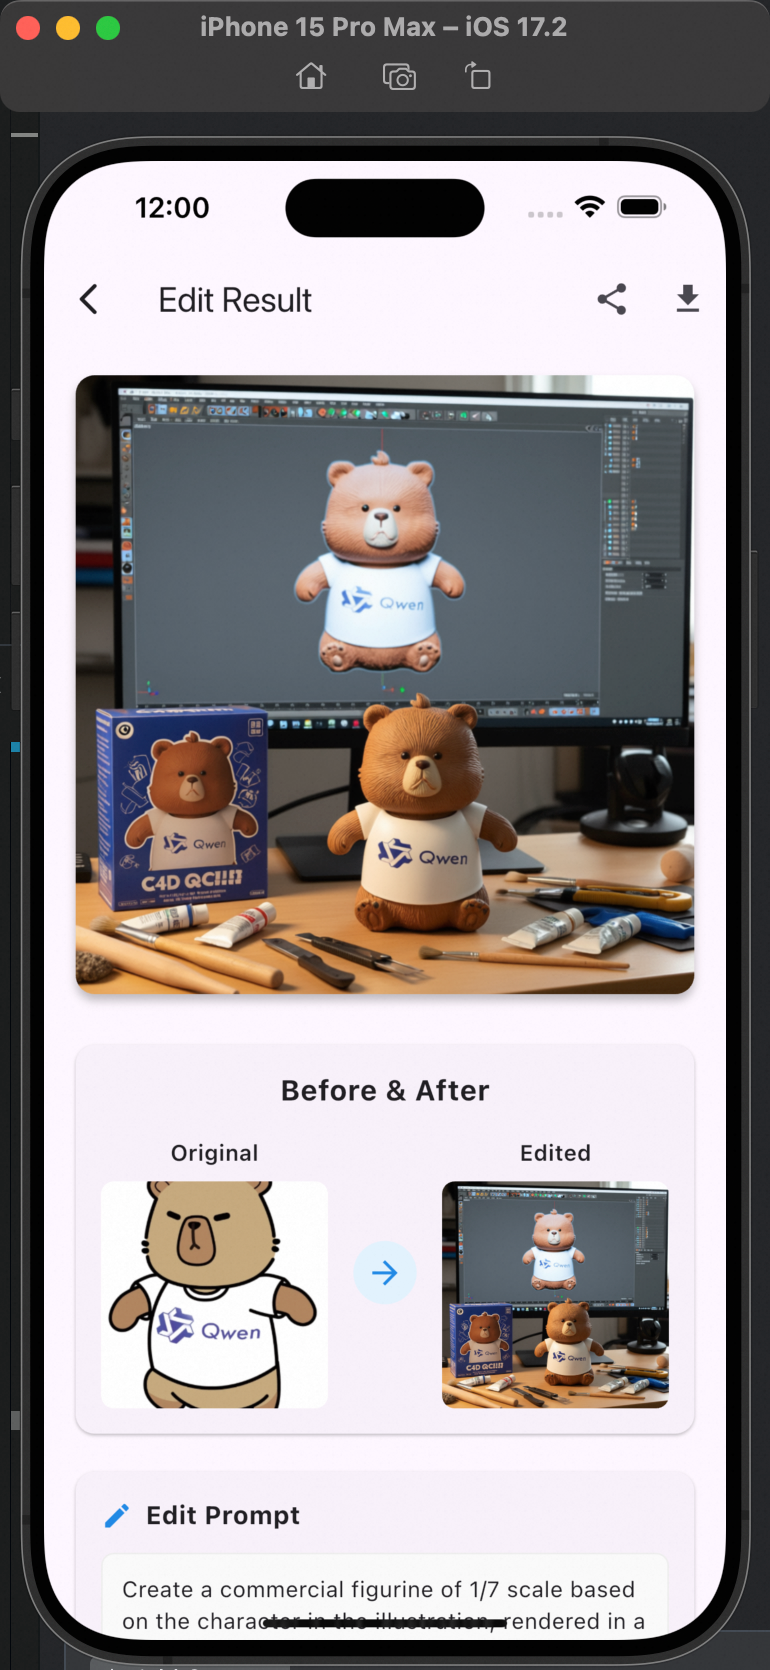
Test the AI figurine generation feature on a device or emulator. The following prompt demonstrates the kind of result the model can produce:
Example prompt
Create a 1/7 scale commercial figurine of the character in the image, in a realistic style and a real-world setting. Place the figurine on a computer desk. The computer screen displays the C4D modeling process for the figurine. Next to the computer, place a plastic toy box with the original artwork printed on it. The desk should also have figurine-making tools, such as brushes, paints, and small knives.Test example Result example 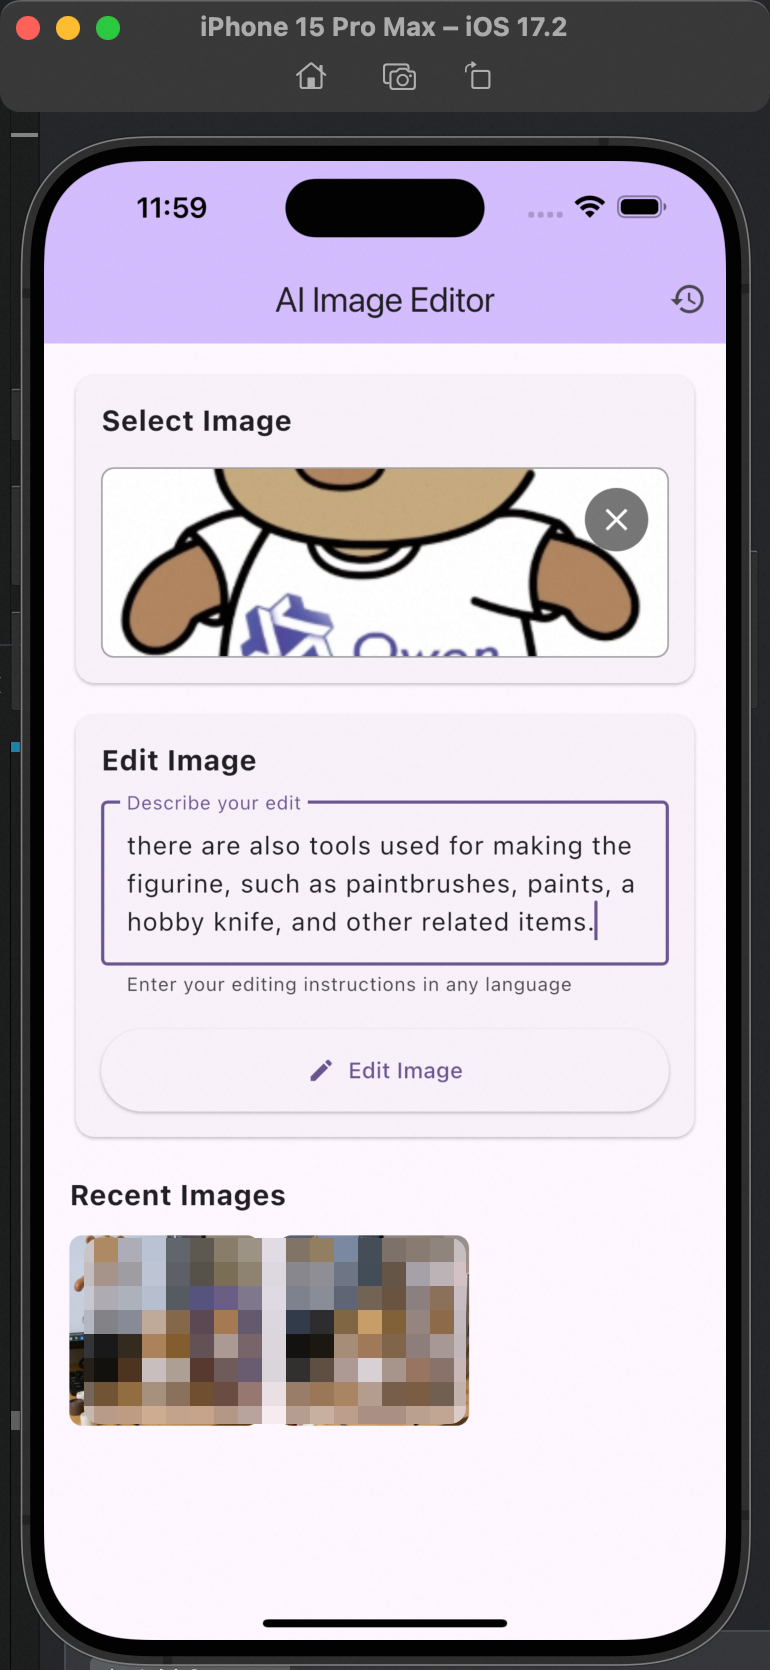
What's next
-
Explore the Supabase project setup guide to add authentication or additional storage policies.
-
See the Qwen Image Edit guide to experiment with different model parameters and prompting techniques.