For enterprise teams that collaborate on email handling, Alibaba Mail’s shared mailbox feature enables administrators to create a shared account and grant multiple members access. Team members can switch identities with a single click to jointly manage emails without sharing passwords. This improves team collaboration efficiency and response times.
Overview
A shared mailbox (also called a team mailbox) is an email account designed specifically for team collaboration. Unlike personal mailboxes, a shared mailbox is not owned by a single user. Instead, multiple team members are granted shared access and management.
Example scenario
An enterprise IT support department needs a unified external email address support@example.com to receive employee service requests. The department has five engineers.
Solution:
Create a shared mailbox
support@example.com.Add the personal email accounts of the five engineers as members of this shared mailbox and grant them Read and Manage and Send As permissions.
Result: The five engineers can log in to their own mailboxes and switch to the
supportmailbox with a single click to view tickets and reply to emails without knowing the shared mailbox password.
Core value
No password sharing: Members log in with their own accounts and access the shared mailbox through authorization, eliminating security risks associated with shared passwords.
Easy switching: Switch between personal and shared mailboxes with a single click to improve handling efficiency.
Fine-grained permissions: Supports multiple permission levels, including Send As, Send On Behalf, and Read/Write only.
Prerequisites
Before you begin, ensure the following conditions are met:
Account permissions: You must be an enterprise email administrator (Postmaster) or a delegated administrator with the Shared Mailbox Management permission.
Edition limitation: This feature is not available in the Free Edition. For more information about edition differences, see Edition overview.
Limits
Member limit: Each shared mailbox can be assigned to up to 200 members.
Client support: Currently supported on the Alibaba Mail web client and DingTalk Mail (PC and mobile).
The Alibaba Mail desktop and mobile apps do not currently support switching between associated mailboxes.
Quota usage: A shared mailbox consumes one mailbox quota. Ensure that your account has sufficient quota.
Create and assign a shared mailbox (administrator tasks)
This topic describes how administrators can create resources and assign permissions in the backend.
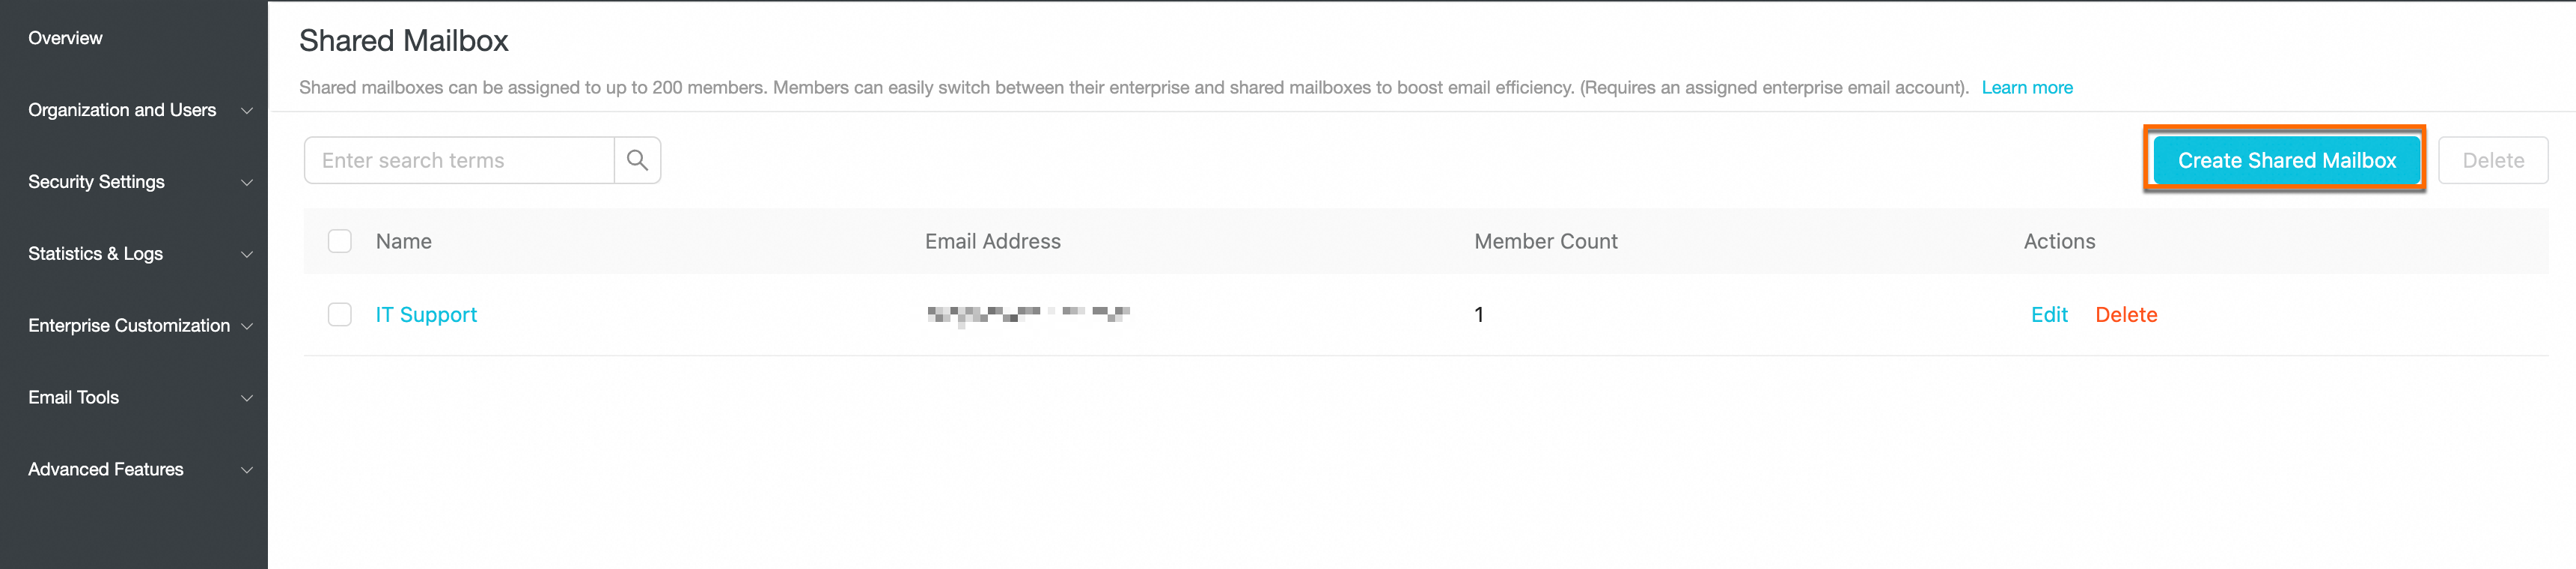
Step 1: Create a shared mailbox
Log on using your administrator account.
In the navigation pane on the left, choose .
Click the Create Shared Mailbox button in the upper-right corner.
In the dialog box that appears, enter the following information and click OK:
Name: The display name of the shared mailbox (such as Technical Support Team).
Mailbox prefix: The unique identifier for the email address (such as support).
Password: Set an initial password (members typically do not need this password, but store it securely).
After successful creation, the mailbox appears in the shared mailbox list.
Step 2: Delegate permissions and add members
After creation, delegate the mailbox to specific employee accounts so that they can use it.
In the shared mailbox list, find the newly created mailbox. Click the Edit button on the right. Then, choose Delegate. In the delegation interface, click Add.

Select the target members (employees) from the organizational tree and click Confirm.
Configure permissions (critical step):
Check the permission icons next to each member, then click the Save icon.
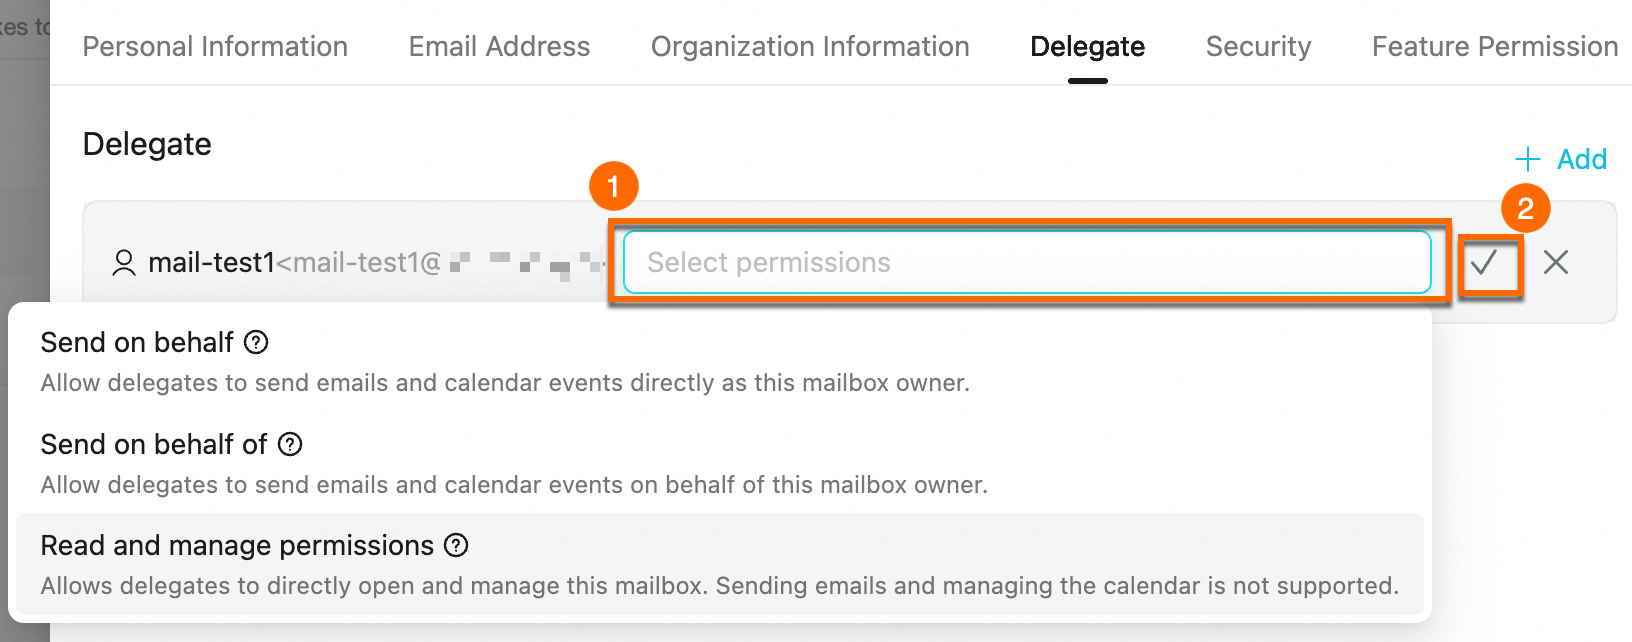
Permission types differ as follows:
Permission type
Permissions description
Typical use case
Send As
Allows the delegate to send emails and schedule meetings directly as the mailbox owner.
This permission supports sending only. To view and manage historical emails, also select Read and Manage.
Customer service or O&M teams that require full email management.
Send On Behalf
Send only on behalf. Members cannot access the shared mailbox interface to view emails. When composing a message, the sender can choose “(On Behalf) xxx@xx.com”.
The sender appears as “A on behalf of B”.
An assistant sends emails on behalf of a manager without accessing the manager’s private messages.
Read and Manage
Read/write only; sending disabled. Allows members to open the mailbox to view and organize emails. To send emails, also select Send As or Send On Behalf.
Audit or archival management.
Access and use a shared mailbox (employee tasks)
Authorized members do not need the shared mailbox password. Usage depends on the permissions granted.
Scenario 1: View emails in a shared mailbox
Applies to: Members with Read and Manage permission.
Web client
Log on to the Alibaba Mail web client.
Click the down arrow next to the Settings button in the upper-right corner and choose Associated Mailbox.
Click the corresponding shared mailbox in the list.

Result: Your browser opens a new tab showing the shared mailbox view, where you can view and manage emails.
DingTalk Mail (PC)
Click the drop-down arrow next to your account name in the upper-left corner. Under your current account, you will see an entry labeled “Associated.” Click this entry to switch to the associated mailbox.

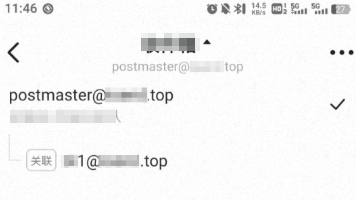
DingTalk Mail (mobile)
In the mobile app, tap the drop-down arrow next to the Inbox label at the top of the screen. Expand the account list and select the account marked “Associated” to switch.
Scenario 2: Agent sends email
Applies to: Members with Send As permission.
In your personal mailbox, click Compose.
Click the drop-down menu in the From field at the bottom-left of the compose window. Select the shared mailbox address (such as
support@example.com).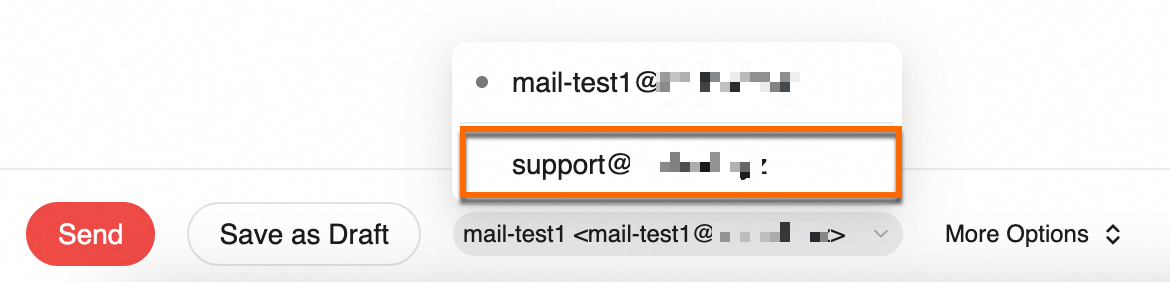
Recipients see the sender as the shared mailbox address directly, with no “on behalf” notation.
Scenario 3: Send Email on Behalf of Someone
Applies to: Members with Send On Behalf permission.
In your personal mailbox, click Compose.
Click the drop-down menu in the From field at the bottom-left of the compose window. Select “(On Behalf) support@example.com”.
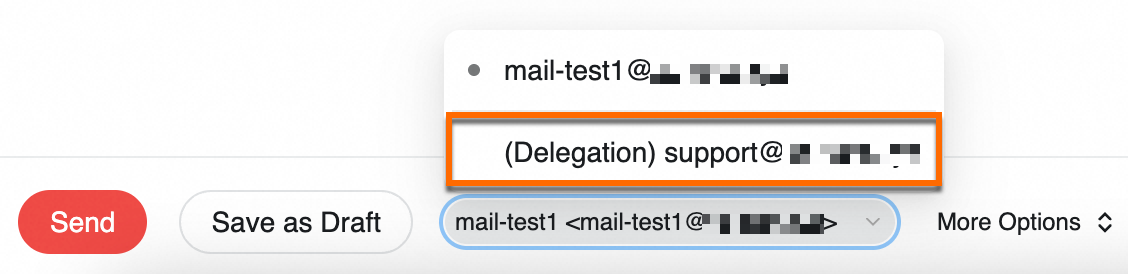
Recipients see the sender as “A on behalf of B”.
FAQ
Why don’t I see the shared mailbox management feature in my administrator account?
This is usually due to edition or permission issues. Troubleshoot in this order:
Check edition: Confirm your organization purchased a paid edition of Alibaba Mail. The Free Edition does not include this feature.
Check permissions: If you are not the Postmaster (primary administrator), ask the Postmaster to go to Enterprise Customization > Delegated Administrators and grant you the Organization & Users > Shared Mailbox permission. The Postmaster should perform the initial configuration.
When someone replies to an email sent from a shared mailbox, where does the reply go?
If you send the email directly from the associated mailbox interface, replies go to the shared mailbox inbox.
If you use Send On Behalf, whether replies go to the shared mailbox inbox depends on how the recipient addresses their reply.
How do I revoke access when a member leaves the company?
You do not need to change the shared mailbox password. Go to . Click Edit. Then, go to the Delegate page. Find the departed employee and click the Delete icon (
 ). The member immediately loses access.
When I try to send from an associated mailbox, I get “You do not have permission to send from this mailbox (error code: 80003).” Why?
This means you have only been granted Read and Manage permission and not Send As permission. Ask your administrator to assign you Send As permission in the shared mailbox delegation settings.