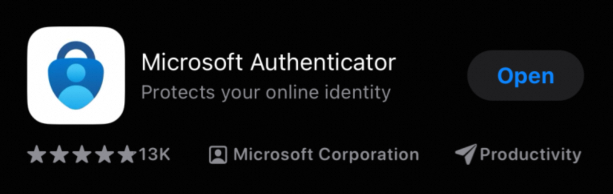
We support professional authentication apps: Microsoft Authenticator, Google Authenticator, and Authy. Please download one of these apps on your mobile phone first.
Here is a screenshot of Microsoft Authenticator and Google Authenticator App.
Steps to Bind The Authenticator
1. The two-factor authentication is enabled by the email administrator and the authentication method is selected. For more information, please check What Is The Two-factor Authentication?
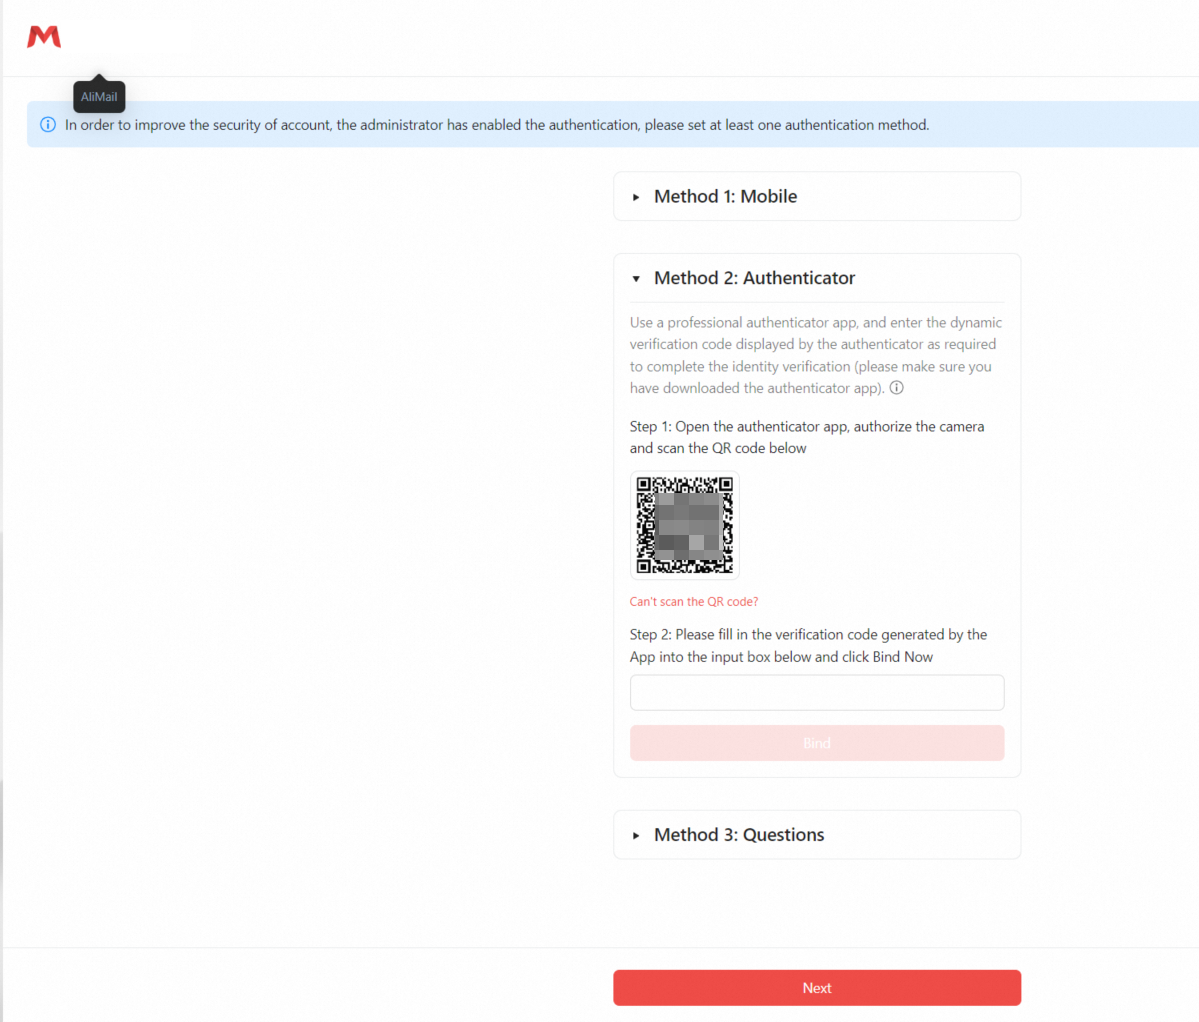
a. For accounts that have not been bound to secure mobile phones or security questions, the login interface of "Method 1" below will appear in the login mailbox;
b. A historical account that has been bound to a secure mobile phone or security questions will not require an authenticator to bind when logging in. You need to bind it in the settings by referring to Method 2 below.
2. Both the mobile phone number and the security risk number are bound, and the authenticator is also bound. Only one of the methods needs to be selected for verification when logging in.
3. Login to third-party email clients will not require mobile phone, security questions or authenticator verification.
1. Method 1: Bind the authenticator when you log on in the Webmail. Prerequisites: The administrator has enabled two-factor authentication, and the authentication method is set to be Authenticator, the account is not bound to a secure mobile phone and security questions.
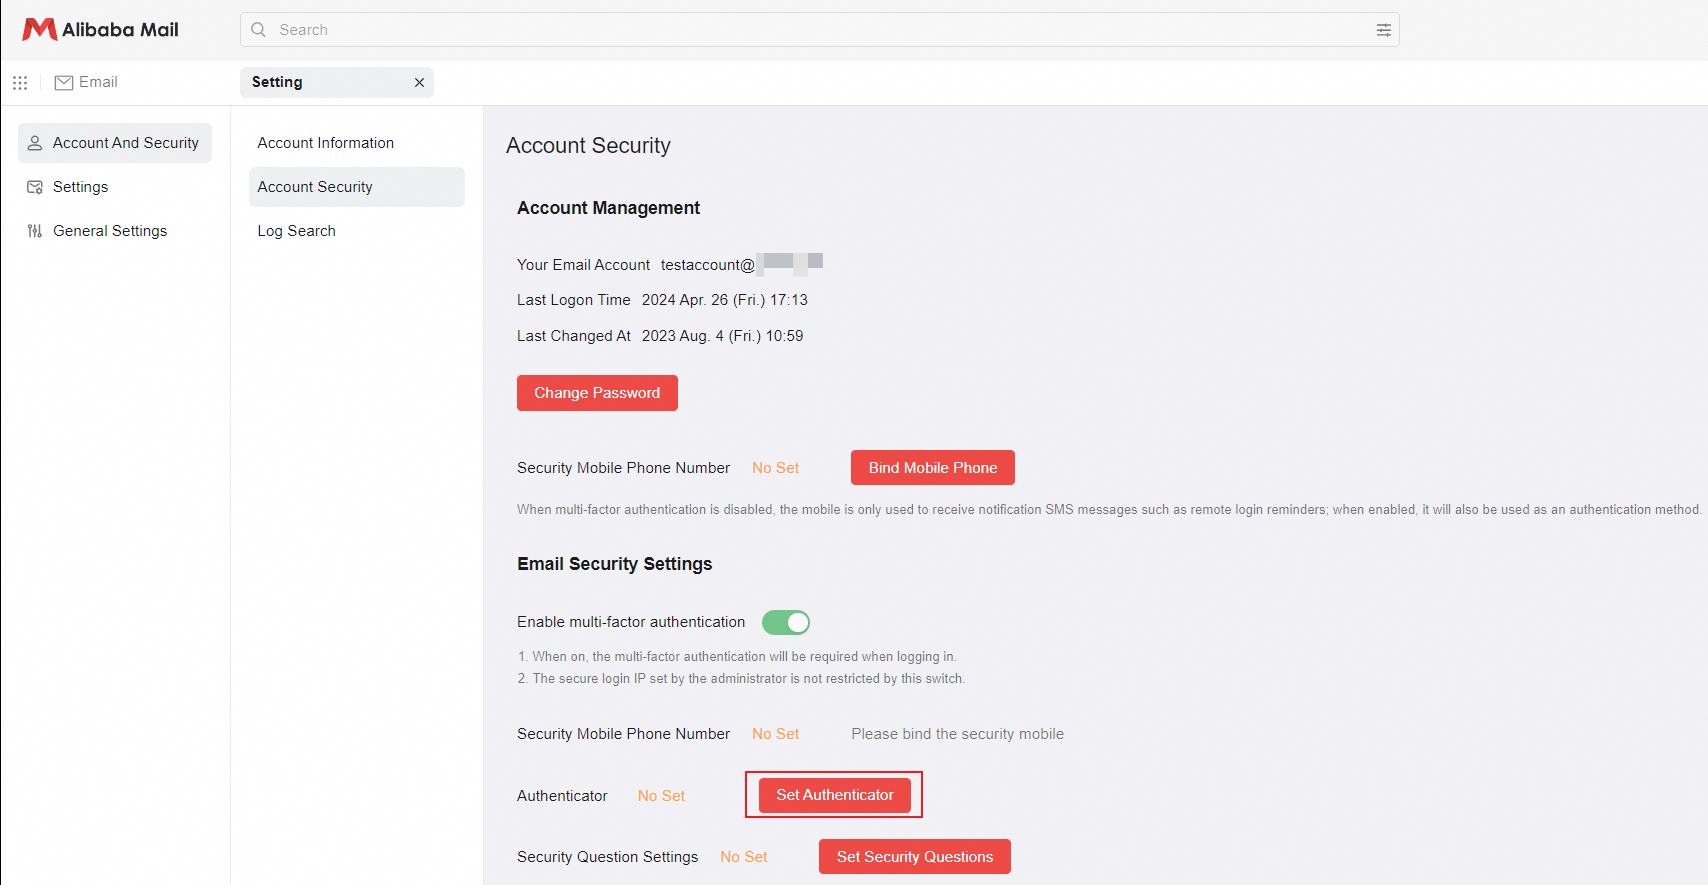
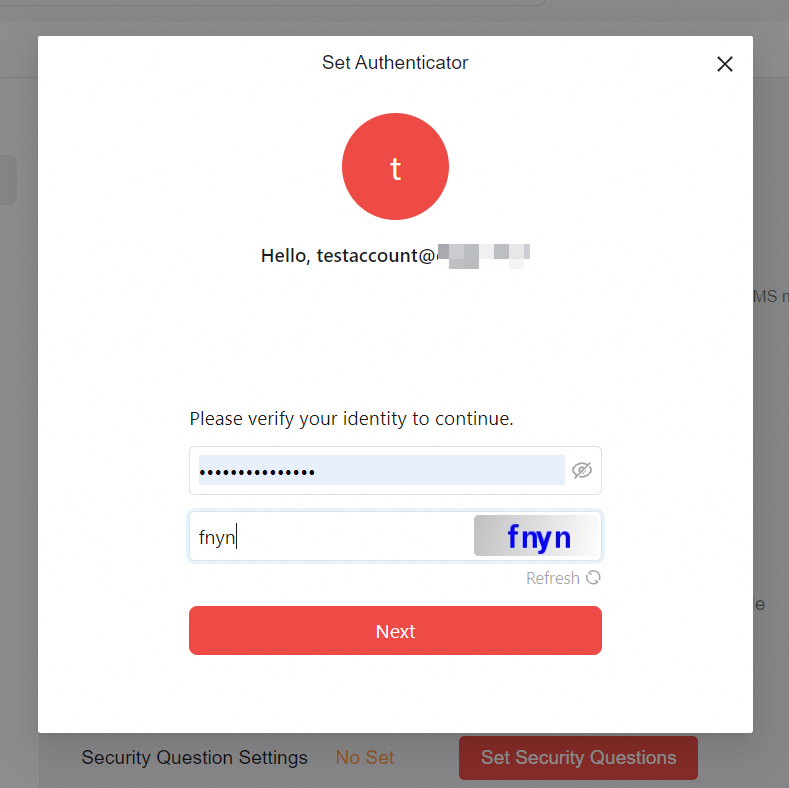
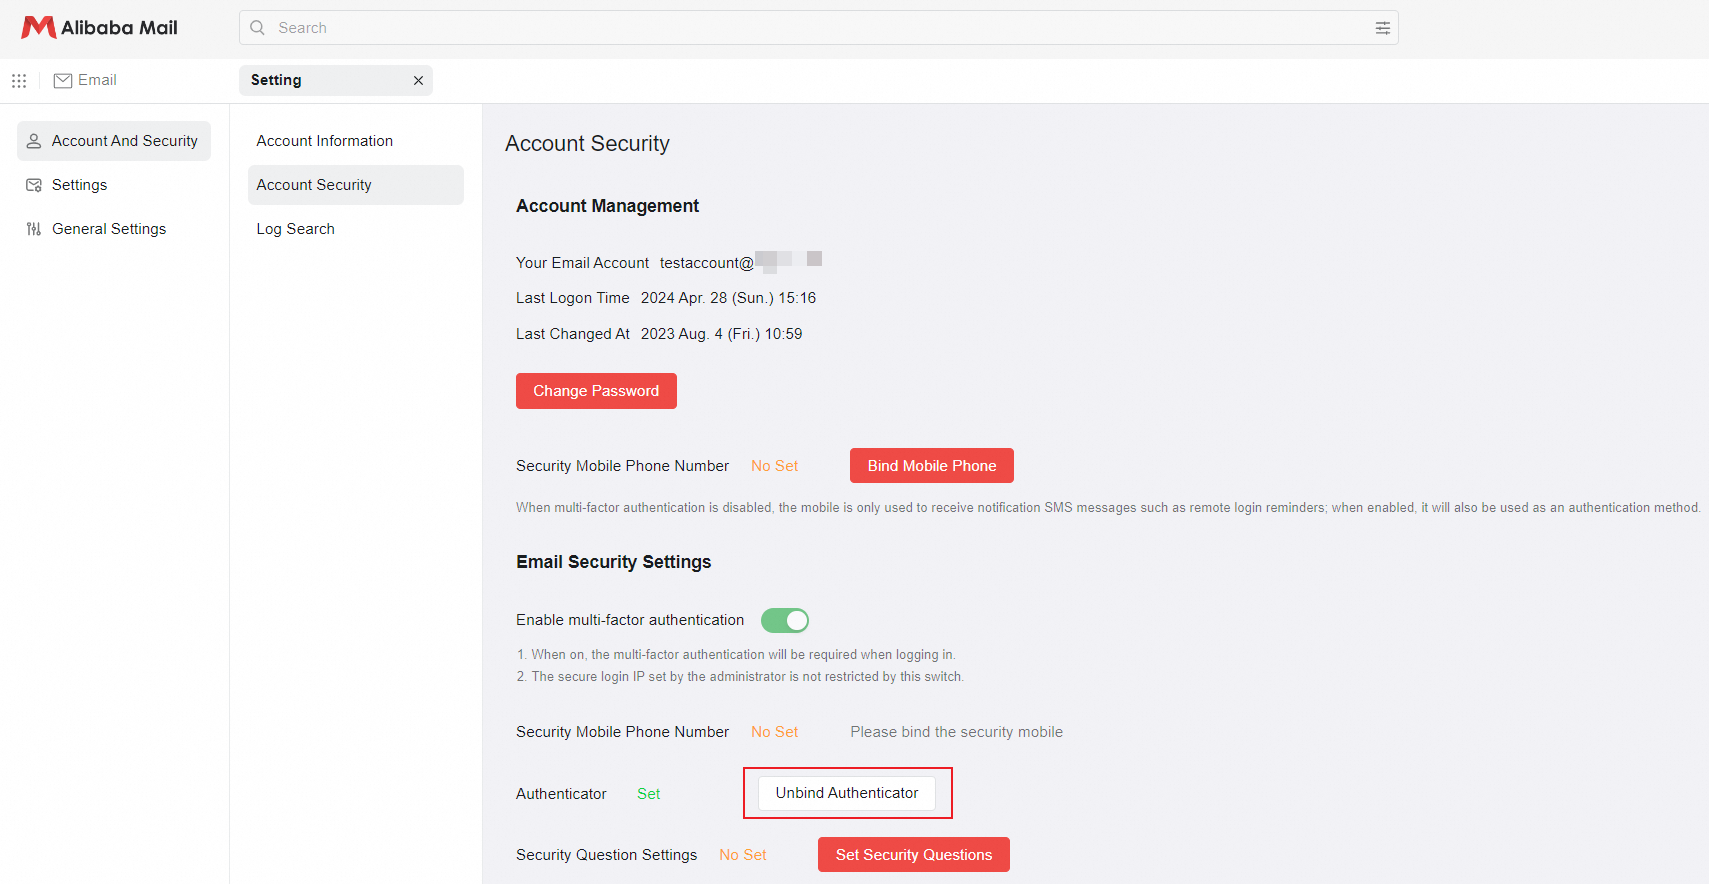
Method 2: Click Set Authenticator in the Settings> Account and Security> Account Security.

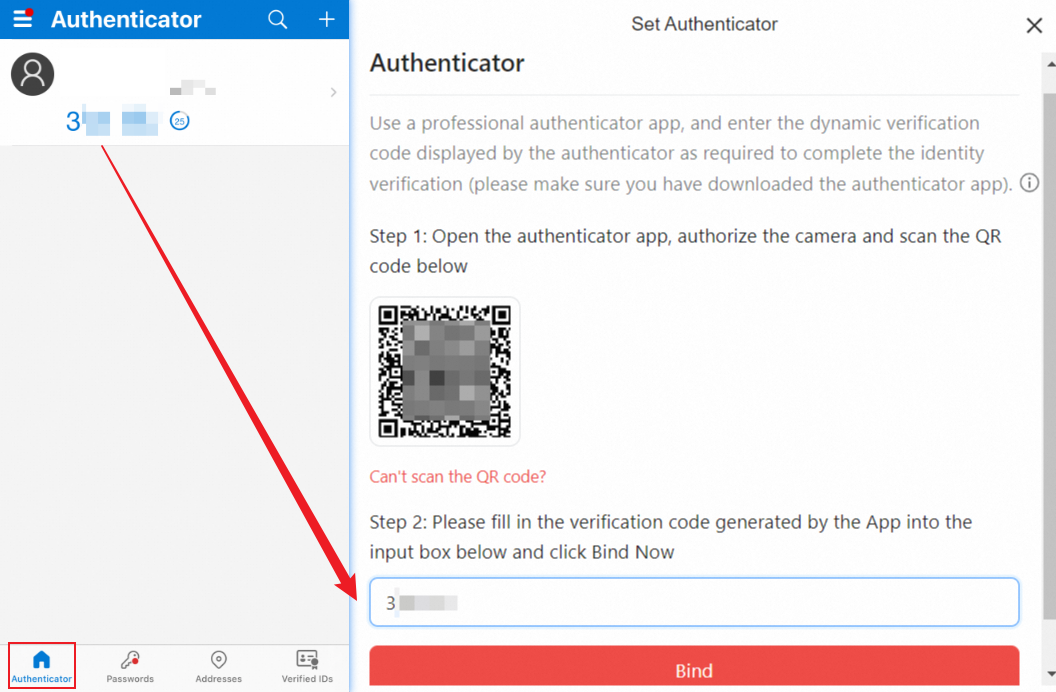
2. Open the authenticator App and scan QR code of the mailbox page (take Microsoft Authenticator as an example);

3. Fill in the verification code generated by App into the input box and click Bind;
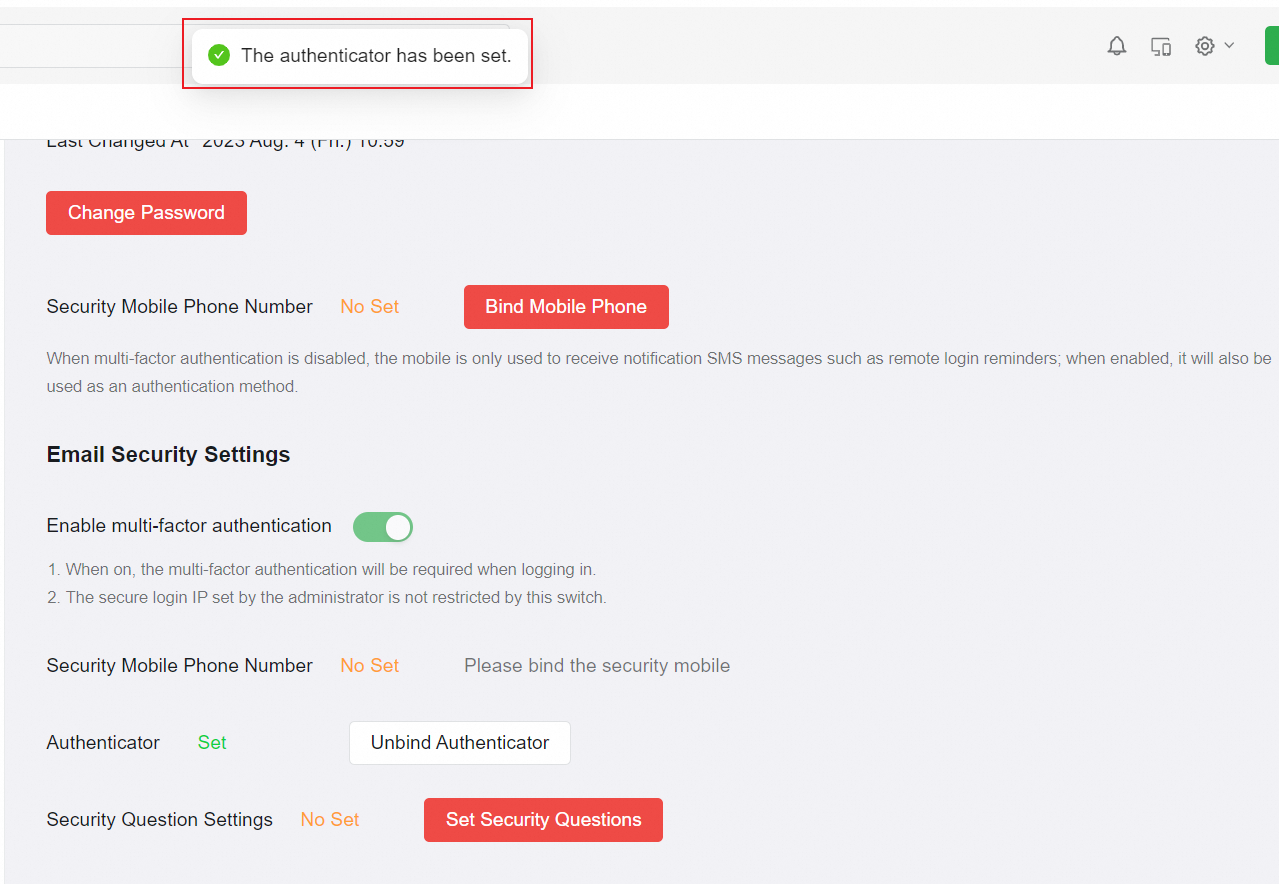
4. Prompt that The authenticator has been set.
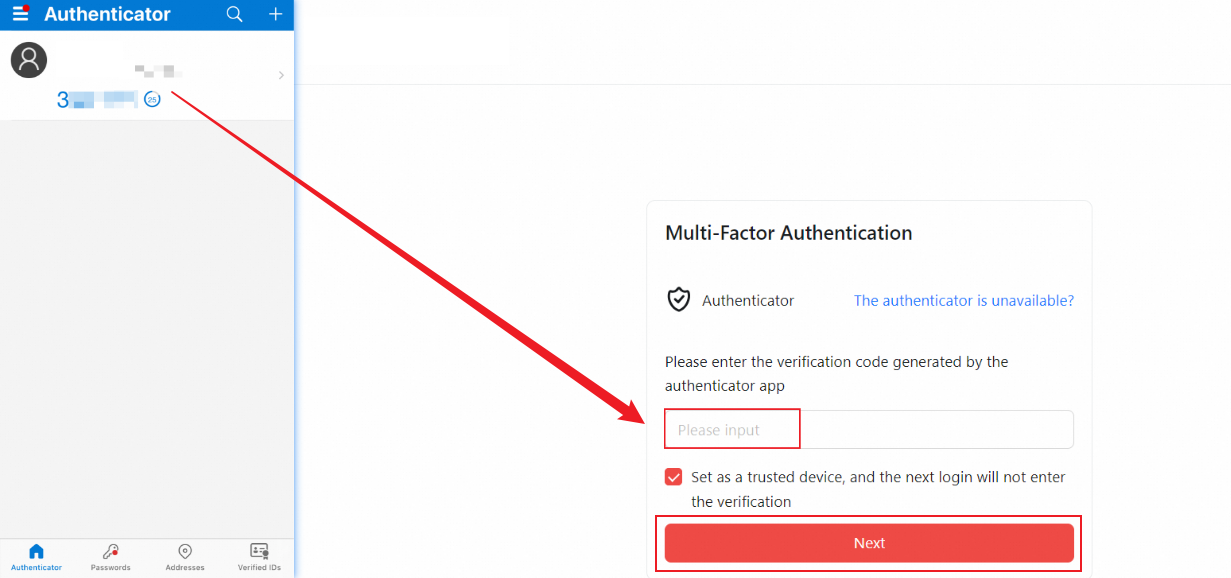
Logon Verification
After the authenticator is bound, the user will be asked for authenticator verification the next time they log in. Enter the verification code generated by the authenticator app. You can select Set as a trusted device. Logging in under a trusted device will no longer require authentication.
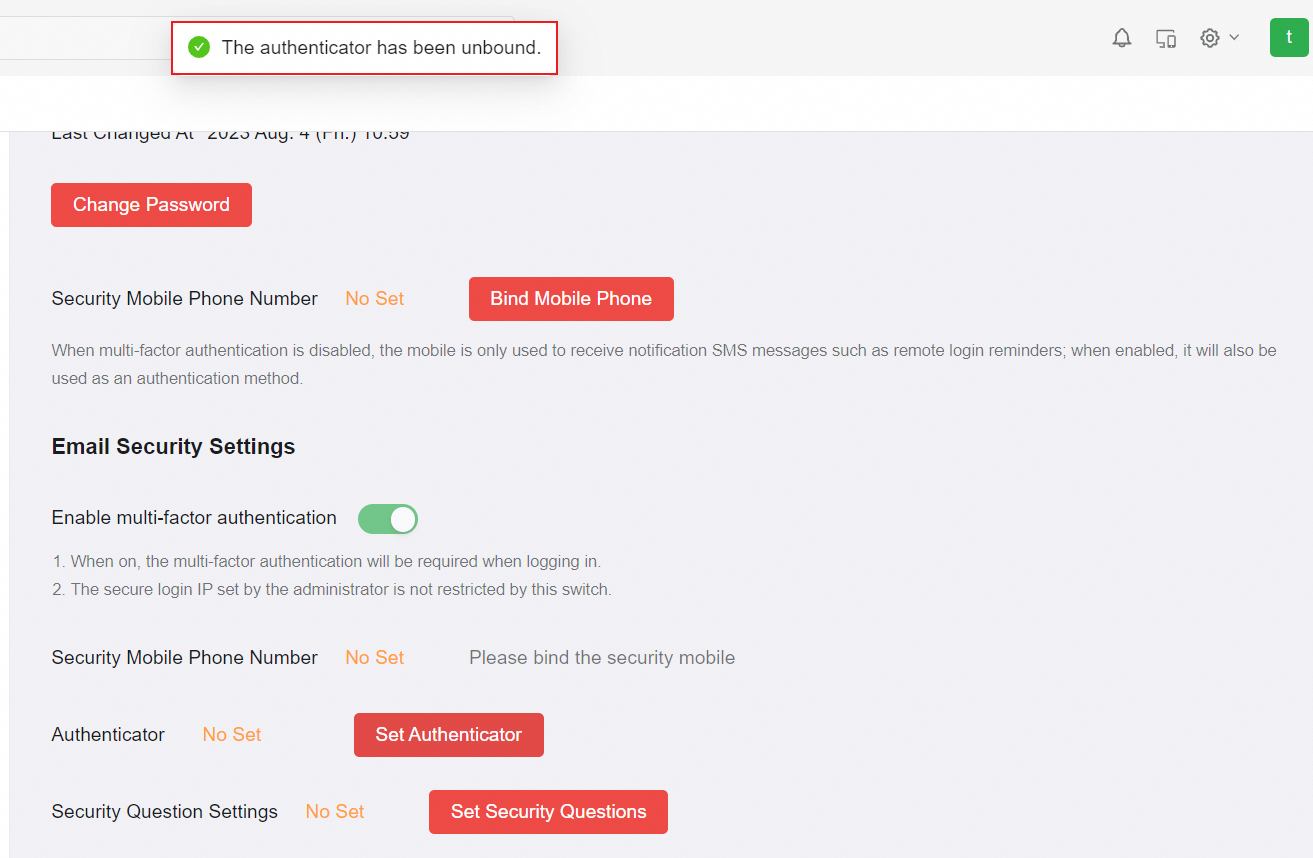
Procedure to Delete The Authenticator
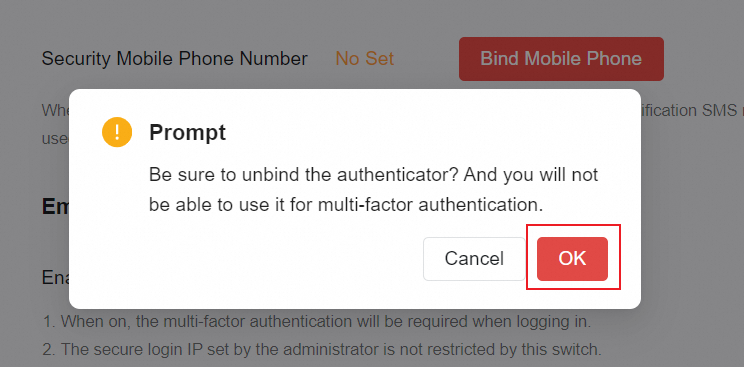
1. Click Unbind Authenticator in the Settings> Account and Security> Account Security;
2. Fill in the verification code generated by the authenticator App and click Next;
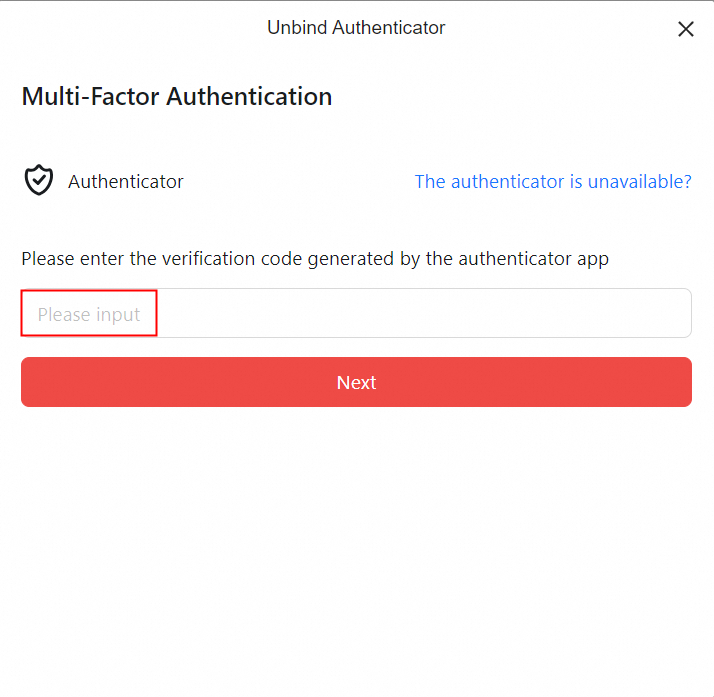
3. The authenticator was deleted successfully.