If you connect to a Linux Elastic Compute Service (ECS) instance by using the key pair-based authentication method from a third-party SSH tool, you can register a temporary public key that is valid for 60 seconds with the instance and use the corresponding private key to connect to the instance within the 60 seconds. Compared with permanent key pairs, temporary key pairs provide higher security in connections. This topic describes how to use Session Manager CLI (ali-instance-cli) to register a temporary public key with an ECS instance and connect to the instance with the corresponding private key instead of a password.
Temporary public keys
Temporary public keys allow you to securely connect to instances without the need to configure key pairs on the instances. Each time you want to connect to an instance over SSH, you can register a temporary public key that is valid for 60 seconds with the instance and then connect to the instance by using the corresponding private key instead of a password.
Temporary public keys are stored in the Cloud Assistant server.
Preparations
Enable the Session Manager service
Before you use ali-instance-cli, make sure that the Session Manager service is enabled for your Alibaba Cloud account. You can enable Session Manager only in the console. To enable Session Manager, perform the following steps:
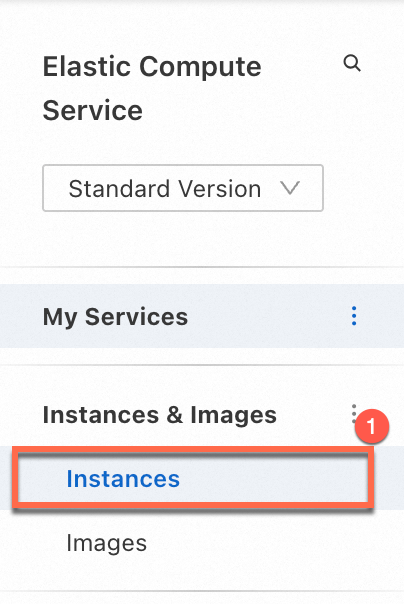
Go to ECS console - Instances.
In the top navigation bar, select the region and resource group for the instance.
On the Instances page, find the target instance and click Remote Connection in the Actions column.
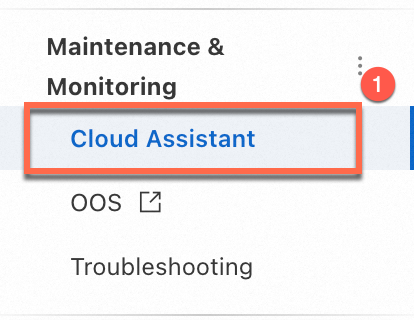
Click Show Other Logon Methods. Find Connect to an Instance by Using Session Manager. Turn on the switch next to Session Manager is disabled. Then, follow the on-screen instructions to enable the service.


Check whether the instance is in the Running state
You can connect to an instance using Session Manager only if the instance is in the Running state.
Console
You can view the status of the instance on the Instance page in the ECS console.
For information about how to check the status of the instance, see View instance information.
|
| |||

Alibaba Cloud CLI
If you have configured the Alibaba Cloud CLI, you can run the following command to query the instance status. For more information about the API parameters, see DescribeInstanceStatus.
This topic uses an instance with the ID i-bp1****** in the China (Hangzhou) region as an example.aliyun ecs DescribeInstanceStatus --region cn-hangzhou --RegionId 'cn-hangzhou' --InstanceId.1 'i-bp1******'If the value of Status for the instance is Running, the instance is running.
{
  "TotalCount": 1,
  "RequestId": "A413****-****-****-****-****611B",
  "PageSize": 1,
  "PageNumber": 1,
  "InstanceStatuses": {
    "InstanceStatus": [
      {
        "Status": "Running",
        "InstanceId": "i-bp1******"
      }
    ]
  }
}
In addition to this API, you can also use other APIs to query the instance status. For more information, see DescribeInstances.
API
To query the instance status using an API, see DescribeInstanceStatus or DescribeInstances.
Check whether Cloud Assistant Agent is installed
Session Manager depends on Cloud Assistant. You can use one of the following methods to check whether Cloud Assistant Agent is installed on the instance.
ECS instances created from official public images after December 1, 2017 are installed by default withthe Cloud Assistant Agent. If your instance was created before December 1, 2017 or was created from a custom image that you uploaded, you must install the Cloud Assistant Agent yourself. For more information, see Install Cloud Assistant Agent.
Console
Session Manager is implemented based on Cloud Assistant. You need to install Cloud Assistant Agent on the instance. You can view the status of Cloud Assistant Agent on the ECS Cloud Assistant page in the ECS console.
Cloud Assistant Agent is pre-installed on ECS instances that are created from Alibaba Cloud public images on or after December 1, 2017. For ECS instances created before December 1, 2017, you must manually install Cloud Assistant Agent. For more information, see Install Cloud Assistant Agent.
|
| |||
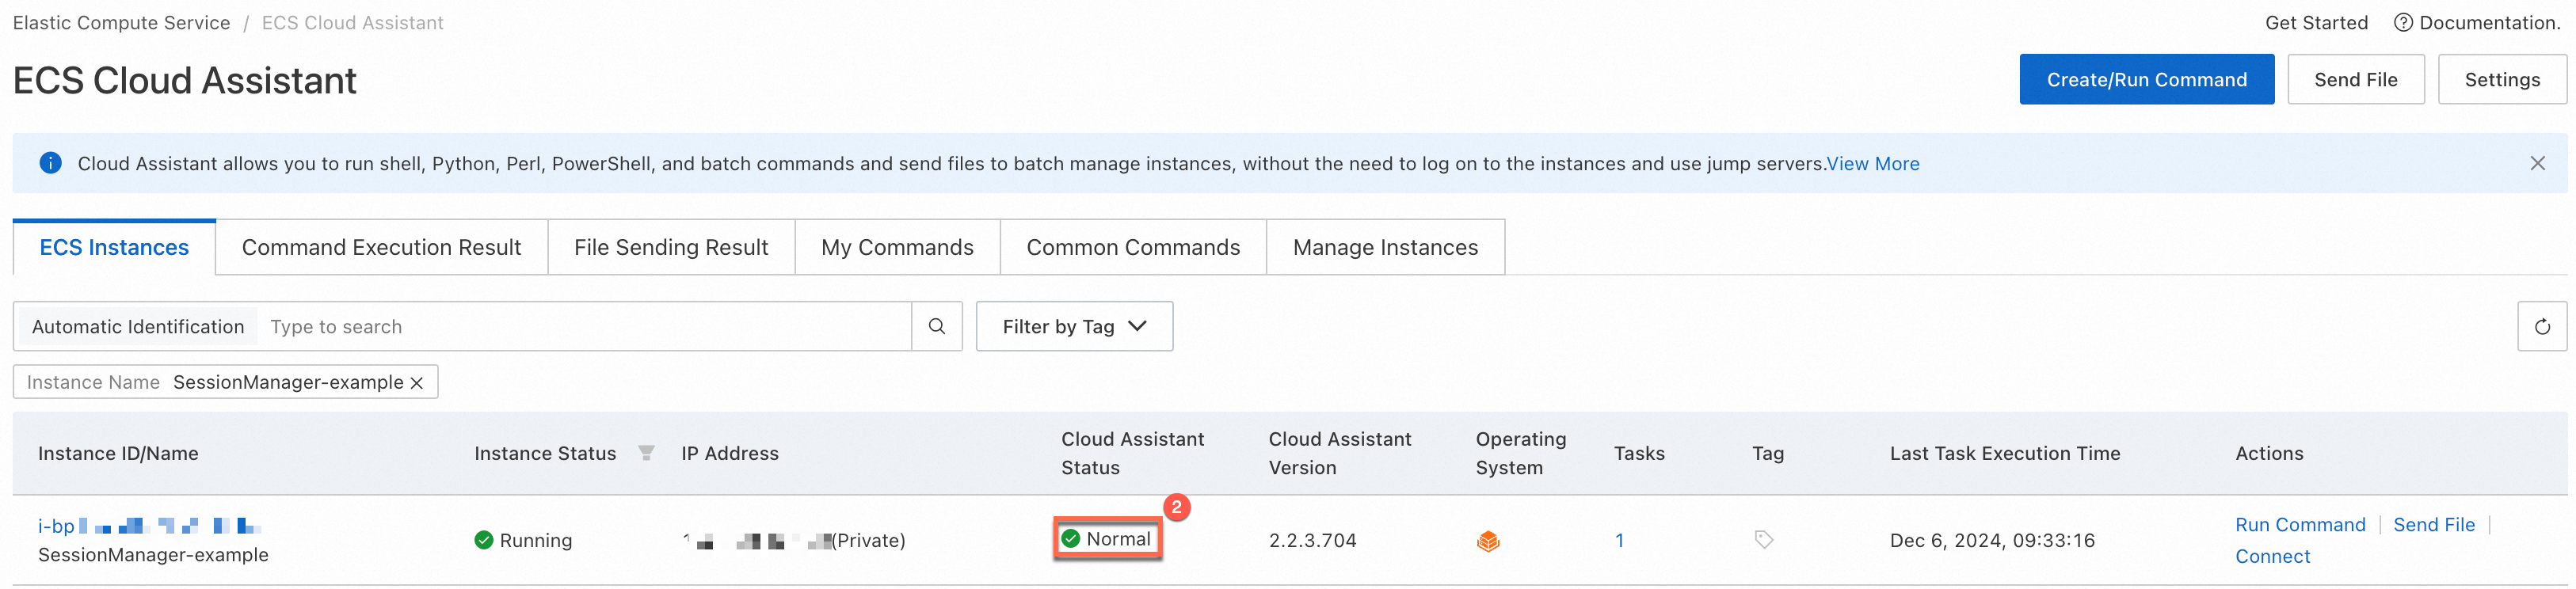
For information about how to view the status of the Cloud Assistant Agent and handle anomalies, see View the status of Cloud Assistant and handle anomalies.
Alibaba Cloud CLI
If you have configured the Alibaba Cloud CLI, you can run the following command to check whether Cloud Assistant Agent is installed and whether its version supports Session Manager. For more information about the parameters, see DescribeCloudAssistantStatus.
This topic uses an instance with the ID i-bp1****** in the China (Hangzhou) region as an example.aliyun ecs DescribeCloudAssistantStatus --region cn-hangzhou --RegionId 'cn-hangzhou' --InstanceId.1 'i-bp1******'If the value of CloudAssistantStatus (Cloud Assistant status) is true and the value of SupportSessionManager (Session Manager support status) is also true, you can connect to the instance using Session Manager.
{
  "TotalCount": 1,
  "PageSize": 1,
  "RequestId": "DB34****-****-****-****-****A749",
  "NextToken": "",
  "PageNumber": 1,
  "InstanceCloudAssistantStatusSet": {
    "InstanceCloudAssistantStatus": [
      {
        "CloudAssistantVersion": "2.2.3.857",
        "SupportSessionManager": true,
        "InstanceId": "i-bp1******",
        "InvocationCount": 4,
        "OSType": "Linux",
        "CloudAssistantStatus": "true",
        "LastHeartbeatTime": "2024-12-10T02:38:04Z",
        "LastInvokedTime": "2024-12-08T16:02:45Z",
        "ActiveTaskCount": 0
      }
    ]
  }
}
API
To query the status of Cloud Assistant Agent using an API, see DescribeCloudAssistantStatus.
Prepare the credentials of a RAM user for Session Manager
1. Install and configure the Session Manager CLI
If you have already installed and configured the Session Manager CLI, you can skip this step.
1.1 Install
First, install the Session Manager CLI (ali-instance-cli) on your computer. The installation method varies based on your operating system.
Windows
Click to download ali-instance-cli for Windows and save it to a local folder.
This topic uses the C:\Users\test folder as an example.macOS
In the macOS terminal, run the following command to download ali-instance-cli for macOS.
curl -O https://aliyun-client-assist.oss-accelerate.aliyuncs.com/session-manager/mac/ali-instance-cliAfter the download is complete, run the following command to grant execute permissions on ali-instance-cli.
chmod a+x ali-instance-cliLinux
Run the following command to install ali-instance-cli for Linux.
x86 architecture
curl -O https://aliyun-client-assist.oss-accelerate.aliyuncs.com/session-manager/linux/ali-instance-cliarm architecture
curl -O https://aliyun-client-assist.oss-cn-beijing.aliyuncs.com/session-manager/linux_arm/ali-instance-cliAfter the download is complete, run the following command to grant execute permissions on ali-instance-cli.
chmod a+x ali-instance-cli1.2 Configure
When you use ali-instance-cli on your computer to connect to an Alibaba Cloud instance, you must configure identity credentials, such as an AccessKey. For more information, see Prepare the credentials of a RAM user for Session Manager.
Windows
Click , enter cmd, and press the
Enterkey to open a command prompt window.Switch to the directory where ali-instance-cli.exe is located. This topic uses
C:\Users\testas an example.cd C:\Users\testConfigure credentials. The following three configuration methods are supported:
AccessKey
Run the following command and configure the AccessKey ID, AccessKey secret, and Region ID as prompted.
ali-instance-cli.exe configure --mode AKSTS Token
Run the following command to complete the configuration:
ali-instance-cli.exe configure set --mode StsToken --region "<region>" --access-key-id "<ak>" --access-key-secret "<sk>" --sts-token "<sts_token>"Replace
<region>,<ak>,<sk>, and<sts_token>with your actual region ID, AccessKey ID, AccessKey secret, andSTS token.CredentialsURI
Run the following command and enter the Credentials URI and Region ID as prompted.
ali-instance-cli.exe configure --mode=CredentialsURIIf the following content is returned, the configuration is complete.

macOS/Linux
Go to the directory where ali-instance-cli is located. This topic uses the root directory
~of the current user as an example.cd ~Configure credentials.
AccessKey
Run the following command and configure the AccessKey ID, AccessKey secret, and Region ID as prompted.
./ali-instance-cli configure --mode AKSTS Token
Run the following command to complete the configuration:
./ali-instance-cli configure set --mode StsToken --region "<region>" --access-key-id "<ak>" --access-key-secret "<sk>" --sts-token "<sts_token>"Replace
<region>,<ak>,<sk>, and<sts_token>with your actual region ID, AccessKey ID, AccessKey secret, andSTS token.CredentialsURI
Run the following command and configure the Credentials URI and Region ID as prompted.
./ali-instance-cli configure --mode=CredentialsURIIf the following content is returned, the configuration is complete.

2. Register a temporary public key with the instance to which you want to connect
2.1 Obtain the ID of the instance
Obtain the ID of the instance with which you want to register a temporary public key.
2.2 Generate a key pair
Generate a pair of key files on your computer. The public key file is used for the temporary public key in Step 2.3.
Windows computer
Open Command Prompt and run the following command to generate a key pair as prompted.
In this example, the OpenSSH client is used to generate a key pair in the C:\Users\test directory. ssh-keygen -t rsa -b 2048 -f id_rsa-t rsa: specifies theRivest-Shamir-Adleman (RSA)key type.-b 2048: specifies a key length of 2,048 bits.-f id_rsa: specifies that the key files named id_rsa are generated in the working directory.
After you run the preceding command, you are prompted to enter a passphrase to protect the private key. After you configure a passphrase for the private key, anyone who wants to use the private key must first obtain the passphrase.
If you do not want to configure a passphrase for the private key, you can press the Enter key to skip the passphrase configuration step.
After you run the preceding command, the id_rsa.pub file, which is the public key file, and the id_rsa file, which is the private key file, are generated in the working directory of the command line. In this example, the working directory of the command line is C:\Users\test.
macOS or Linux computer
Open Terminal and run the following command to generate a key pair as prompted.
In this example, the OpenSSH client is used to generate a key pair.
ssh-keygen -t rsa -b 2048 -f id_rsa-t rsa: specifies theRSAkey type.-b 2048: specifies a key length of 2,048 bits.-f id_rsa: specifies that the key files named id_rsa are generated in the working directory.
After you run the preceding command, you are prompted to enter a passphrase to protect the private key. After you configure a passphrase for the private key, anyone who wants to use the private key must first obtain the passphrase.
If you do not want to configure a passphrase for the private key, you can press the Enter key to skip the passphrase configuration step.
After you run the preceding command, the id_rsa.pub file, which is the public key file, and the id_rsa file, which is the private key file, are generated in the working directory of the command line.
2.3 Send the generated public key as a temporary public key to the instance
Windows computer
Open Command Prompt, switch to the directory where ali-instance-cli.exe resides, and then run the following command to send a temporary public key to register the key with an instance.
In the following command, replace<instance_id>with the ID of the instance with which you want to register a temporary public key,<public_key_path>with the path in which the public key file generated in Step 2.2 is stored, and<ecs_username>with the username to which you want to assign the temporary public key:
ali-instance-cli.exe send_public_key --instance <instance_id> --public-key <public_key_path> --user-name <ecs_username>For example, to register the temporary public key stored in the C:\Users\test\id_rsa.pub path on your computer with the instance whose ID is i-bp1****** and assign the key to the ecs-user user on the instance, run the following command:
ali-instance-cli.exe send_public_key --instance i-bp1****** --public-key C:\Users\test\id_rsa.pub --user-name ecs-userAfter the command is successfully run, log on to the instance by using the corresponding private key within 60 seconds.
macOS or Linux computer
Open Terminal, switch to the directory where ali-instance-cli resides, and then run the following command to send a temporary public key to register the key with an instance.
In the following command, replace<instance_id>with the ID of the instance with which you want to register a temporary public key,<public_key_path>with the path in which the public key file generated in Step 2.2 is stored, and<ecs_username>with the username to which you want to assign the temporary public key:
./ali-instance-cli send_public_key --instance <instance_id> --public-key <public_key_path> --user-name <ecs_username>For example, to register a temporary public key stored in the ~/id_rsa.pub path on your computer with the instance whose ID is i-bp1****** and assign the key to the ecs-user user on the instance, run the following command:
./ali-instance-cli send_public_key --instance i-bp1****** --public-key ~/id_rsa.pub --user-name ecs-userAfter the command is successfully run, log on to the instance by using the corresponding private key within 60 seconds.
3. Connect to the instance over SSH
If you are prompted that the specified password or public key is incorrect, check whether the public key has expired. A temporary public key is valid for 60 seconds.
Use an appropriate SSH tool to connect to the instance. Open Command Prompt or Terminal on your computer and run the following command to connect to the instance.
In the following command, replace<private_key_path>with the path in which the private key file generated in Step 2.2 is stored,<ecs-username>with the username that you specified for the public key in Step 2.3, and<ecs_ip>with the public IP address of the instance to which you want to connect.
ssh -i <private_key_path> <ecs-username>@<ecs_ip>For example, to use the private key file that is stored in the ~/id_rsa path to connect to the instance whose public IP address is 223.***.***.187 as the ecs-user user, run the following command:
ssh -i ~/id_rsa ecs-user@223.***.***.187You can also use the port forwarding feature of ali-instance-cli to connect to an instance that does not have a public IP address. For more information, see Use the port forwarding feature of Session Manager CLI to connect to an instance without a public IP address.
FAQ
The command line does not respond after you run a command (The instance is not in the Running state)
If the command line does not respond after you run an ali-instance-cli command, the instance may not be in the Running state. To view the instance status, see Check whether the instance is in the Running state in this topic.
The command line does not respond after you run a command (Security group configuration issue)
If the command line does not respond after you run an ali-instance-cli command, it may be because the required ports for outbound traffic are not open in the security group. By default, basic security groups allow all outbound traffic. This issue may occur if you change the outbound rules or use an advanced security group. The security group rules are described as follows:
When you use Session Manager to connect to an ECS instance, make sure that Cloud Assistant Agent running on the ECS instance is connected to the Cloud Assistant server by adding the following rules to an outbound security group:
Compared with connection methods, such as SSH and Remote Desktop Protocol (RDP), Cloud Assistant Agent actively establishes a WebSocket connection to the Session Manager server. You need to only open the outbound WebSocket port of the Cloud Assistant server in a security rule. For information about how Session Manager works, see the How Session Manager works section of this topic.
If you use basic security groups including the default security group, all outbound traffic is allowed. No additional configuration is required.
If you use an advanced security group, all outbound traffic is denied. You must configure the relevant rules. The following table describes the rules. For information about security groups, see Basic security groups and advanced security groups.
For information about how to add rules to a security group, see Add a security group rule.
Action | Priority | Protocol type | Port range | Authorization object | Description |
Allow | 1 | Custom TCP | 443 |
| This port is used to access the Cloud Assistant server. |
Allow | 1 | Custom TCP | 443 |
| This port is used to access the server on which the Cloud Assistant Agent installation package is stored when you want to install or update Cloud Assistant Agent. |
Allow | 1 | Custom UDP | 53 |
| This port is used to resolve domain names. |
If you want to connect to an instance by using only Session Manager, delete the inbound rules that allow the SSH port (default 22) and RDP port (default 3389) from a security group to improve the security of the ECS instance.
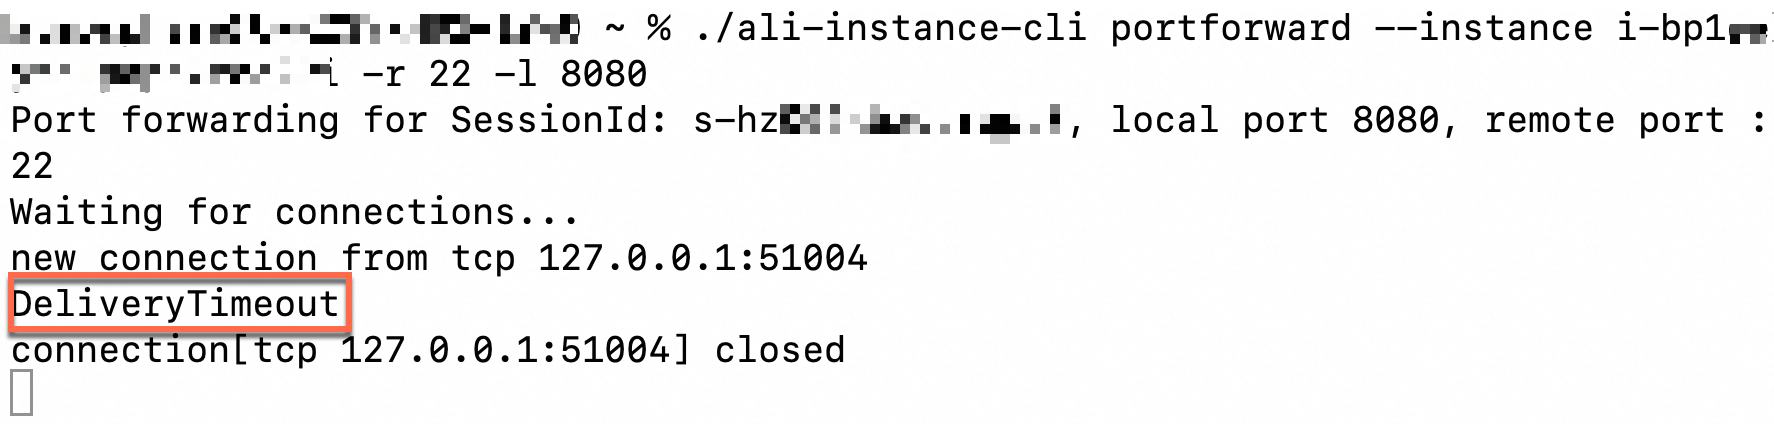
The DeliveryTimeout error is reported after you run a command (Cloud Assistant Agent is offline)
As shown in the following figure, if the DeliveryTimeout error is reported when you run an ali-instance-cli command, it may be because the Cloud Assistant Agent is unavailable. Check the status of the Cloud Assistant Agent. For more information, see Check whether the Cloud Assistant Agent is installed on the instance.

The "session manager is disabled, please enable first" error is reported after you run a command
If the session manager is disabled, please enable first error is reported after you run an ali-instance-cli command, it means Session Manager is disabled. You can enable Session Manager in the console. For more information, see Enable Session Manager.
The connection is automatically closed due to a long period of inactivity
After you connect to a target instance using Session Manager, the connection is automatically closed after a long period of inactivity. The default idle timeout is 3 minutes. You can use the --idle-timeout parameter to specify a custom maximum idle time.
For example, run the following command to connect to a target instance. The connection is automatically closed after 10 minutes of inactivity.
./ali-instance-cli session --instance instance-id --idle-timeout 600This feature requires that the ali-instance-cli version is one of the following versions or later:
Linux:
1.2.0.48Windows:
1.1.0.48macOS:
1.3.0.48
How to analyze ali-instance-cli logs
When an issue occurs with the Session Manager CLI, you can analyze the logs to identify the cause.
View the logs of the Session Manager CLI tool: When you use the Session Manager CLI (ali-instance-cli), a log folder, such as
~/log/aliyun_ecs_session_log.2022XXXX, is generated in the directory where the tool is located. You can find the relevant logs in this folder.View the Cloud Assistant Agent logs:
Linux
/usr/local/share/aliyun-assist/<Cloud Assistant Agent version>/log/Windows
C:\ProgramData\aliyun\assist\<Cloud Assistant Agent version>\log