MaxCompute Migration Service (MMS) migrates data from Databricks to MaxCompute. To start migrating, add a Databricks data source, establish network connectivity between the data source and MMS, and then synchronize the Databricks metadata so that migration jobs can be configured.
Billing
Data migration with MMS consumes resources across multiple platforms. The following table summarizes the billable items and responsible parties.
| Operation | Billable item | Billed by |
|---|---|---|
| Data source runtime and data migration task execution | Compute costs: Spark jobs run on MaxCompute and consume compute resources. | Alibaba Cloud (MaxCompute) |
| Reading data from Azure Blob Storage | Traffic costs: Data transferred out of Azure Blob Storage. | Azure |
| Reading data through Databricks JDBC | Compute costs: Running queries through Databricks JDBC. VM costs: Azure virtual machine usage for reading data. | Databricks |
| Data validation (if enabled) | Compute costs: Validation SQL statements run on both Databricks and MaxCompute. | Alibaba Cloud (MaxCompute) and Databricks |
| Network configuration | Network costs: If you use a leased line, related fees apply. If you access Databricks and Azure over the public network, SNAT (Source Network Address Translation) fees apply for allowing the Alibaba Cloud VPC to access the external network. | Leased line provider or Alibaba Cloud |
To reduce migration costs, use subscription compute resources and exclusive Data Transmission Service resources to run migration jobs.
Before you begin
Complete the preparations for the destination MaxCompute project, then prepare the following items on the Databricks and Azure side.
Databricks personal access token
Create a personal access token. For details, see Databricks personal access token authentication.
Grant the token at least the following permissions on the directories to migrate:
BROWSE
EXECUTE
SELECT
USE CATALOG
USE SCHEMA
Active compute resource
Make sure an active compute resource is available in Databricks. MMS uses this resource to run SQL statements during metadata synchronization.
Azure Storage credentials (required if reading from Azure Blob Storage)
If you read Databricks data directly from Azure Blob Storage instead of through Databricks JDBC, prepare one of the following authentication methods:
SAS for the Azure Storage Account -- The shared access signature (SAS) must have the following permissions on the corresponding container: Read, List, Write, and Add.
Azure service principal -- The principal must have the Storage Blob Data Contributor role on the corresponding Storage Account. To create a service principal and assign the role, see the Azure documentation. The following example uses the Azure CLI to create a service principal with the Storage Blob Data Contributor role: Sample response:
  az ad sp create-for-rbac \
      --name "blob_owner" \
      --role "Storage Blob Data Contributor" \
      --scopes /subscriptions/08****58-****-****-****-1f6d****48ff/resourcegroups/<resourcegroupName>/providers/Microsoft.Storage/storageAccounts/<storageAccountName>
Note: If the Storage Account was created by Databricks during instance creation, only Databricks can access it. To allow MMS to read data from Azure Blob Storage, request Azure to remove the deny assignment from the Storage Account.
Procedure
Step 1: Add the data source
Log on to the MaxCompute console, and select a region in the upper-left corner.
In the navigation pane on the left, choose .
On the Data Source tab, click Add Data Source.
In the MaxCompute Service-linked Role dialog box, click OK to create the role. If this dialog box does not appear, this means the role has already been created.
On the Add Data Source page, configure the data source information and then click Add to create the data source.
DataSource Basic Info
Parameter Required Description Name Yes A custom name for the data source. Supports letters, digits, and Chinese characters. Special characters are not allowed. Type Yes Select Databricks. Network Connection Yes Select the network connection to use. Network connections are created in the MaxCompute console under . MMS uses the connection to communicate with a VPC and reach the data source. The console displays this field as Network link. Databricks Workspace URL Yes The URL of the Databricks workspace. Find this URL by navigating to the Databricks instance from the Databricks menu in the Azure portal. 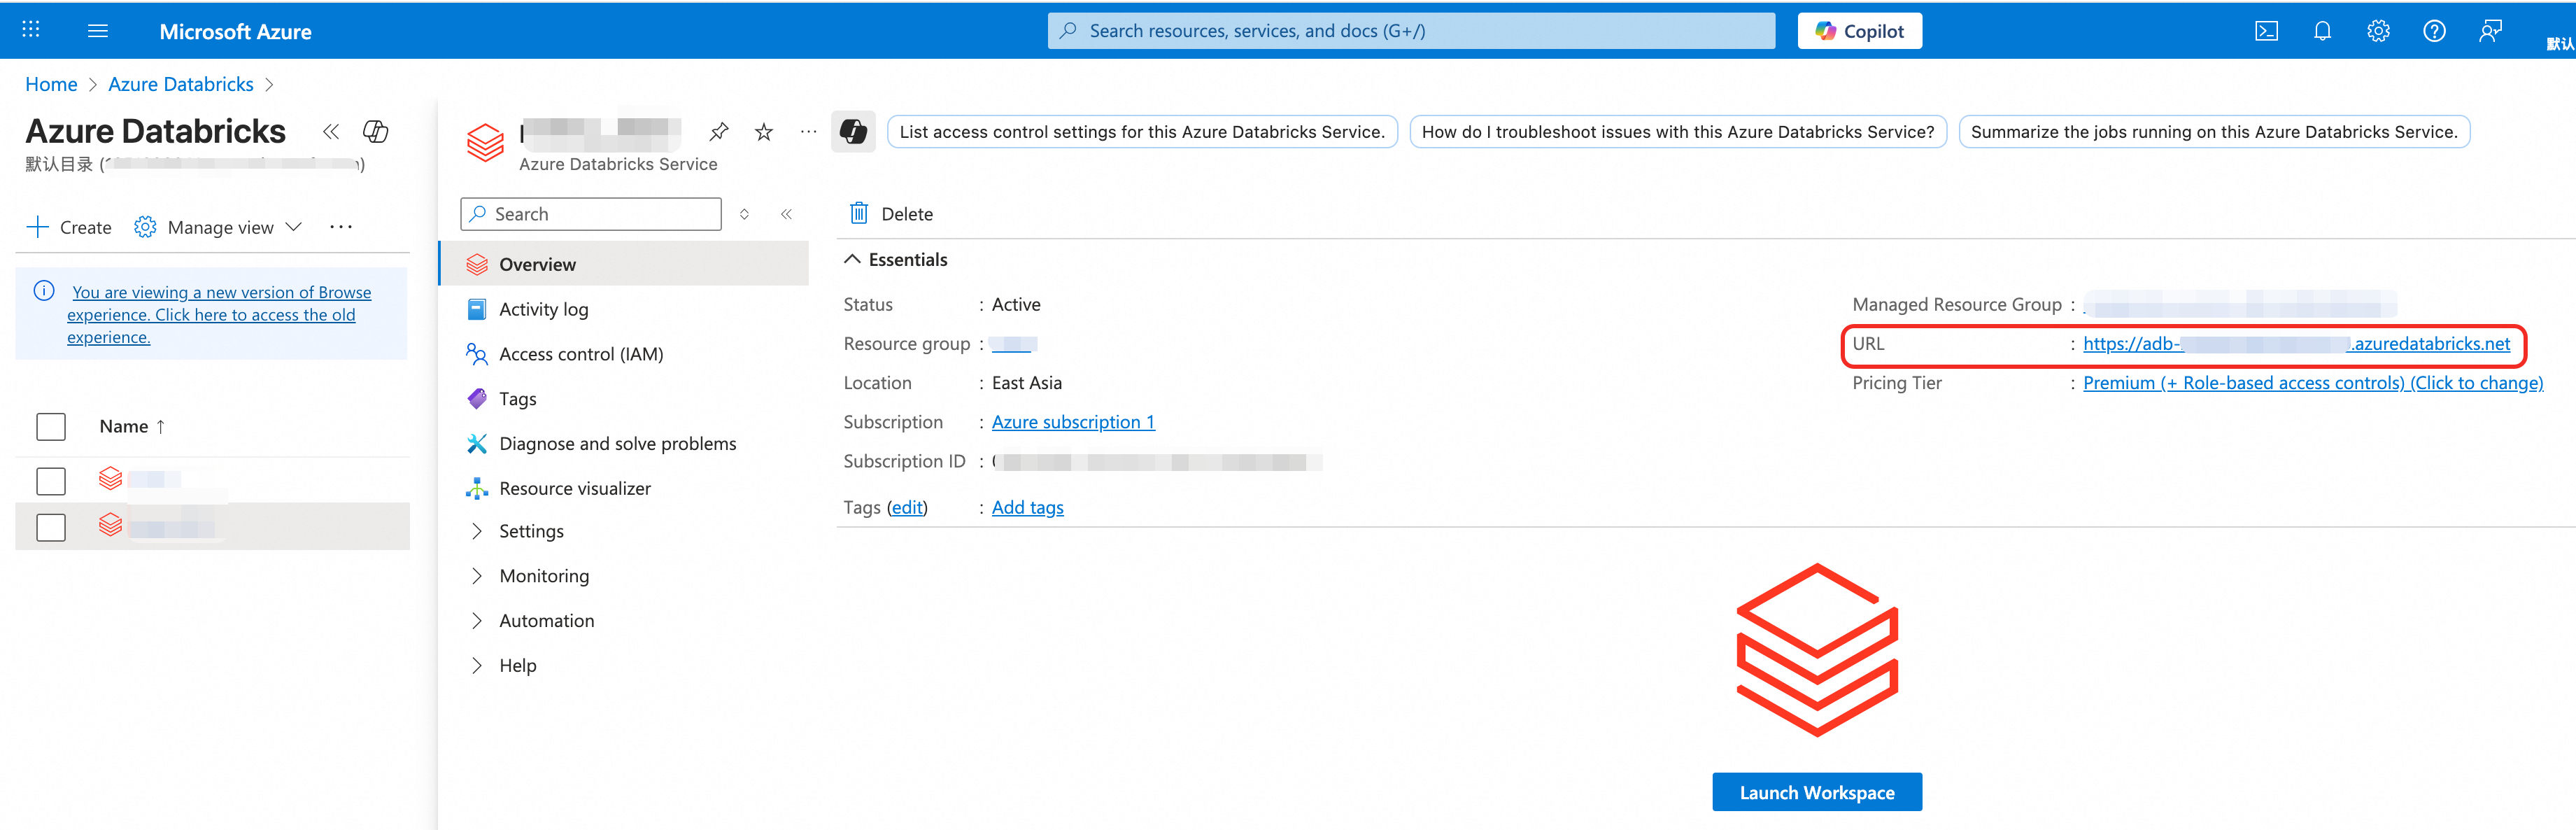
Databricks Unity Catalog Yes The Databricks Unity Catalog to migrate. Each MMS data source supports only one catalog. The console displays this field as Databricks Catalog. Databricks Cluster ID Yes The ID of the Databricks cluster used to run SQL statements during metadata pulling. Databricks Access Token Yes The personal access token for Databricks. For details, see Databricks personal access token authentication. Use Databricks JDBC to read table data No Whether to read Databricks tables through Databricks JDBC. Databricks JDBC URL No The JDBC URL for connecting to Databricks. Azure Authentication Yes Choose an authentication method for accessing the Azure Storage Account: SAS -- Enter the Azure Storage Account SAS Token. To create a token, see the Azure documentation. Service Principal -- Enter the Azure Application ID, Azure App Client Secret, and Azure Tenant ID. Default Destination MaxCompute Project Yes The destination project for data migration mapping. This parameter cannot be modified. Destination MaxCompute Project List No Additional destination projects, if data from one data source needs to go to multiple projects. MaxCompute Project For Migration Jobs Yes The project where Spark, SQL, and other migration jobs run. The default compute quota of this project is used. Other Info
The following parameters are optional. Configure them as needed.
Parameter Description Meta Timer Whether to periodically pull data source metadata. Enable: Pulls metadata on a schedule. Set the Update Cycle to Daily (runs once per day at a specified time, accurate to the minute) or Hourly (runs once per hour at a specified minute). Configure the Update Started At time. Disable: Metadata is not pulled on a schedule. Metastore Access Concurrency Number of concurrent connections to the metastore. Schema Whitelist Schemas to migrate. Separate multiple schemas with commas (,). Schema Blacklist Schemas to exclude from migration. Separate multiple schemas with commas (,). Table Blacklist Databricks tables to exclude from migration. Format: schema.tableortable. Separate multiple entries with commas (,).Table Whitelist Databricks tables to migrate. Format: schema.tableortable. Separate multiple entries with commas (,).Maximum Concurrency For Data Migration Tasks Maximum number of concurrent MMS migration tasks. A high value may overload Databricks compute resources. Default: 20. SQL Parameters For MaxCompute Migration Tasks SQL parameters for migration jobs. For details, see Flag parameters. Table Name Character Mapping JSON-format mapping of special characters in source table names to characters supported by MaxCompute. Example: {"%": "_"}.Column Name Character Mapping JSON-format mapping of special characters in source column names to characters supported by MaxCompute. Example: {"-": "_"}.Maximum Partitions Per Task Number of partitions migrated per MaxCompute Migration Assist (MMA) task. Migrating in batches reduces SQL submissions and saves time. Default: 50. Typically does not need to change. Maximum Data Size Per Task (GB) Maximum data size per migration task. Default: 5 GB. Typically does not need to change. Partition Value Character Mapping JSON-format mapping of special characters in source partition values to characters supported by MaxCompute. Example: {"/": "_"}.Migration Time Window The time window during which migration tasks run. Configure a start time and end time.
Step 2: Synchronize metadata
After the data source starts, MMS creates a job instance that connects the data source to the service and synchronizes the source metadata. This enables subsequent migration job configuration.
This job instance consumes 4 CU (Compute Unit) of compute resources. The system shuts down the data source when no migration or metadata synchronization jobs are pending or running. Restart the data source before using it again.
On the Data Source tab, find the target data source and click Update metadata in the Actions column.
On the Data Source tab, you can view the Status of the target data source.
If Meta Timer is enabled, the system automatically updates metadata at the configured interval. Manual synchronization is not required in this case.
Next steps
After the data source is configured, create a migration job.