A dataset is a collection of business-related data records that may contain numeric values, text, dates, or other types of information. When performing data analysis through Quick BI, datasets form the foundation for visual analytics. You can integrate business information scattered across different data tables into a single dataset for unified management, analysis, and extraction of value from the underlying data. Quick BI supports creating datasets through visual configuration or custom SQL. This topic describes how to create a dataset.
Prerequisites
You have obtained data. For more information, see connect to data sources.
Procedure
On the Quick BI product home page, the following entry points lead to the dataset creation page:
Entry point one: Create a dataset from the external resource entry.
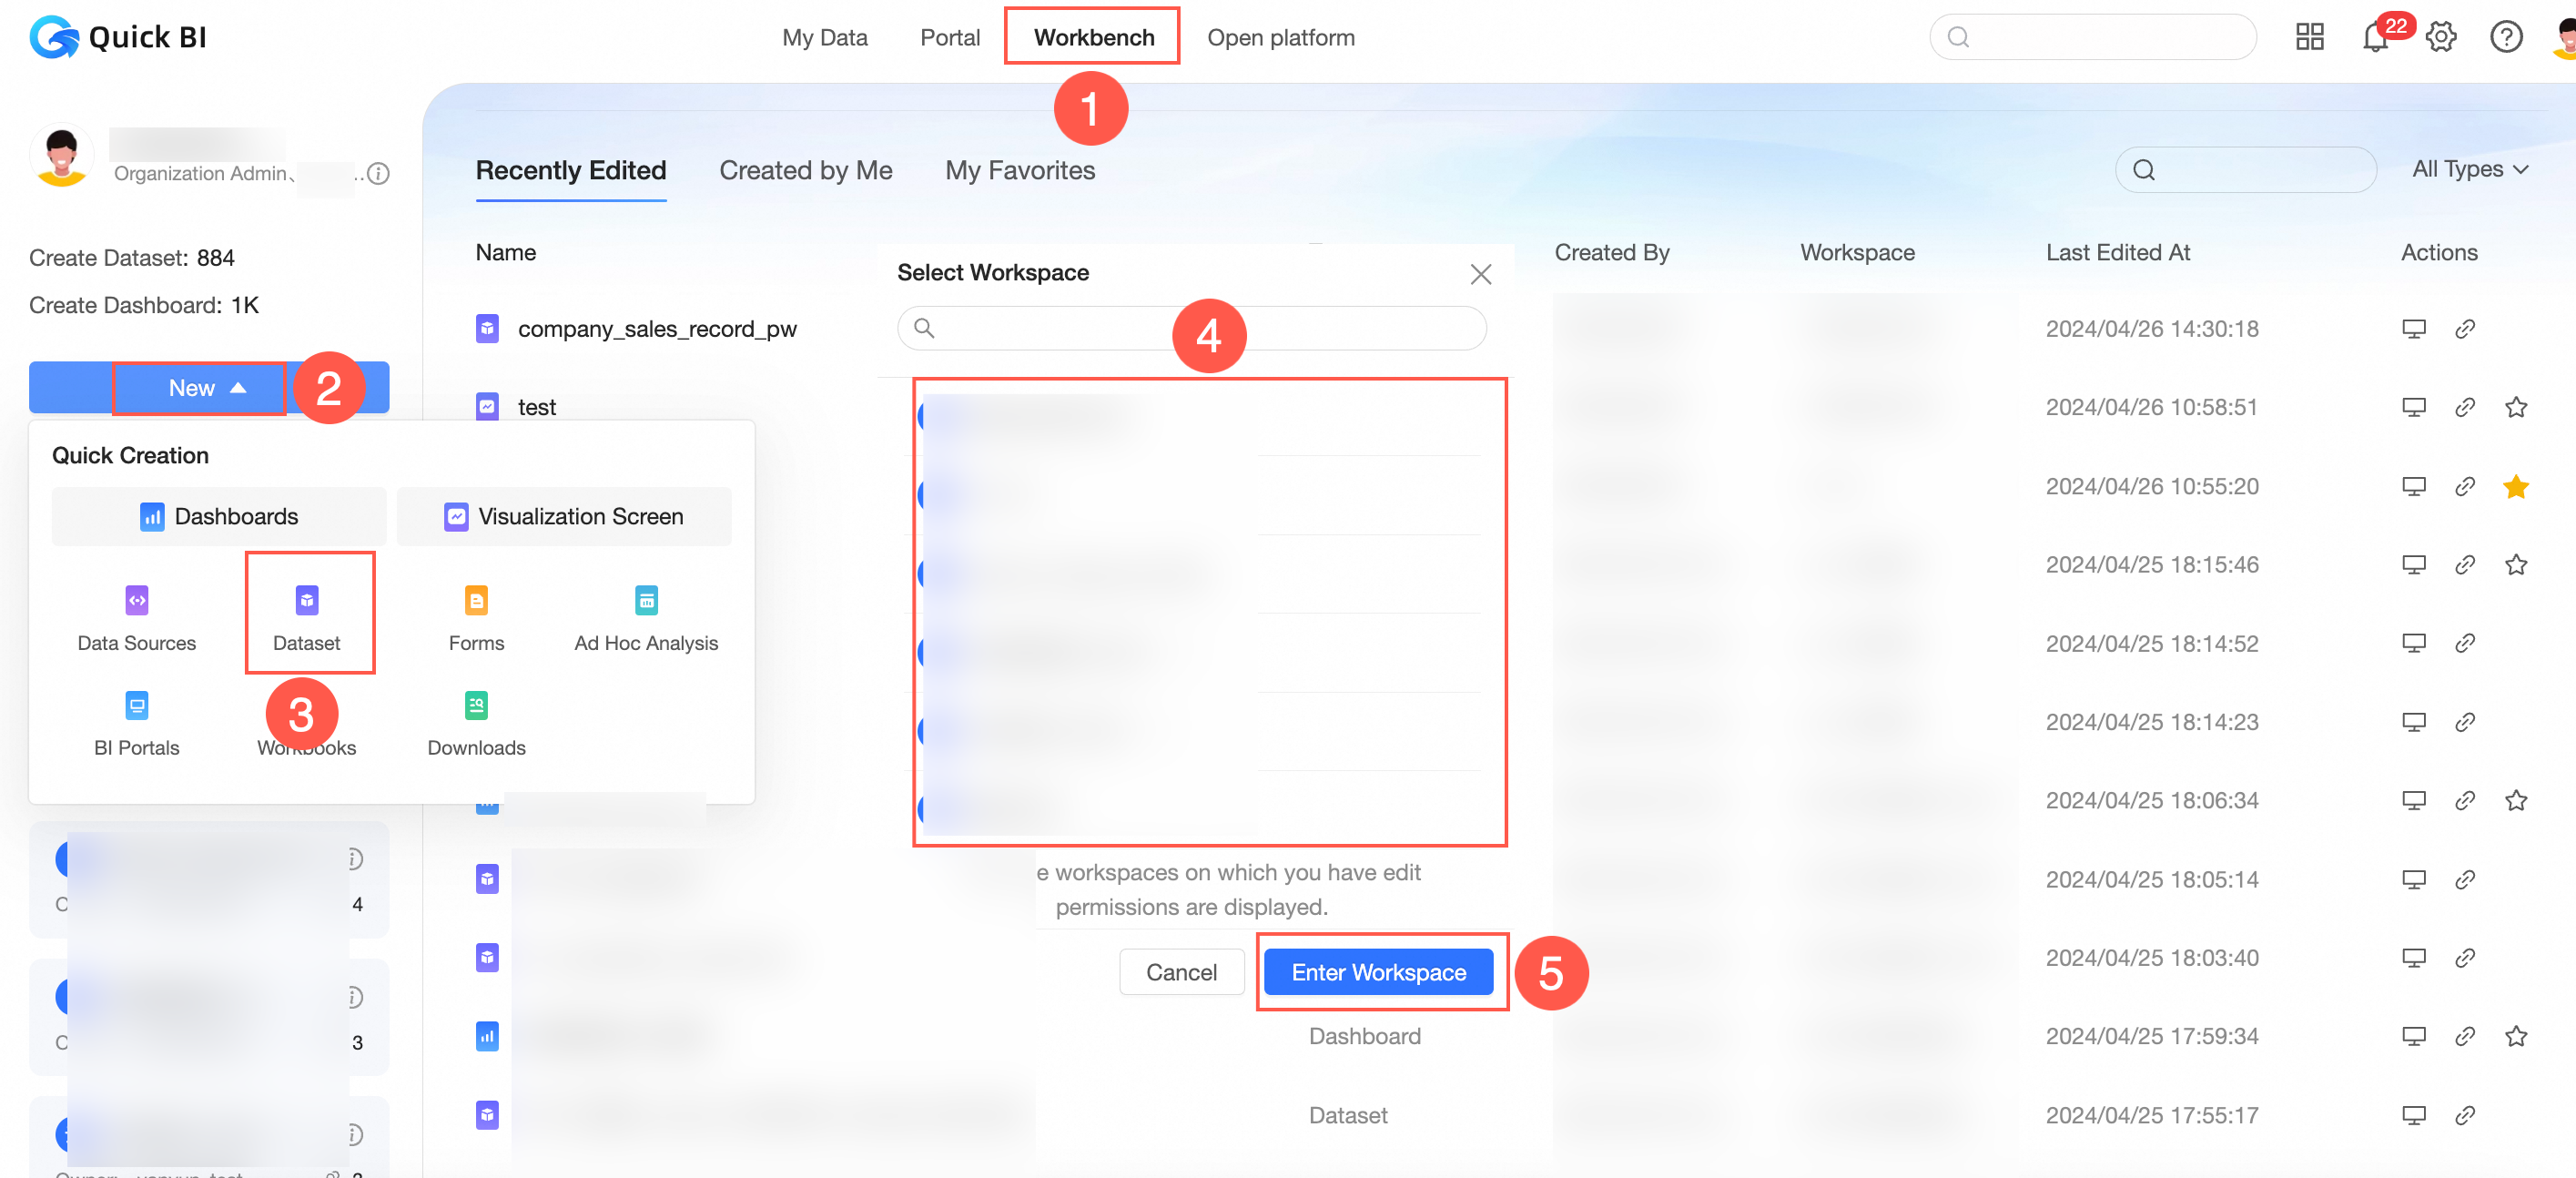
Entry point two: Quickly create a dataset from the resource list within the space.

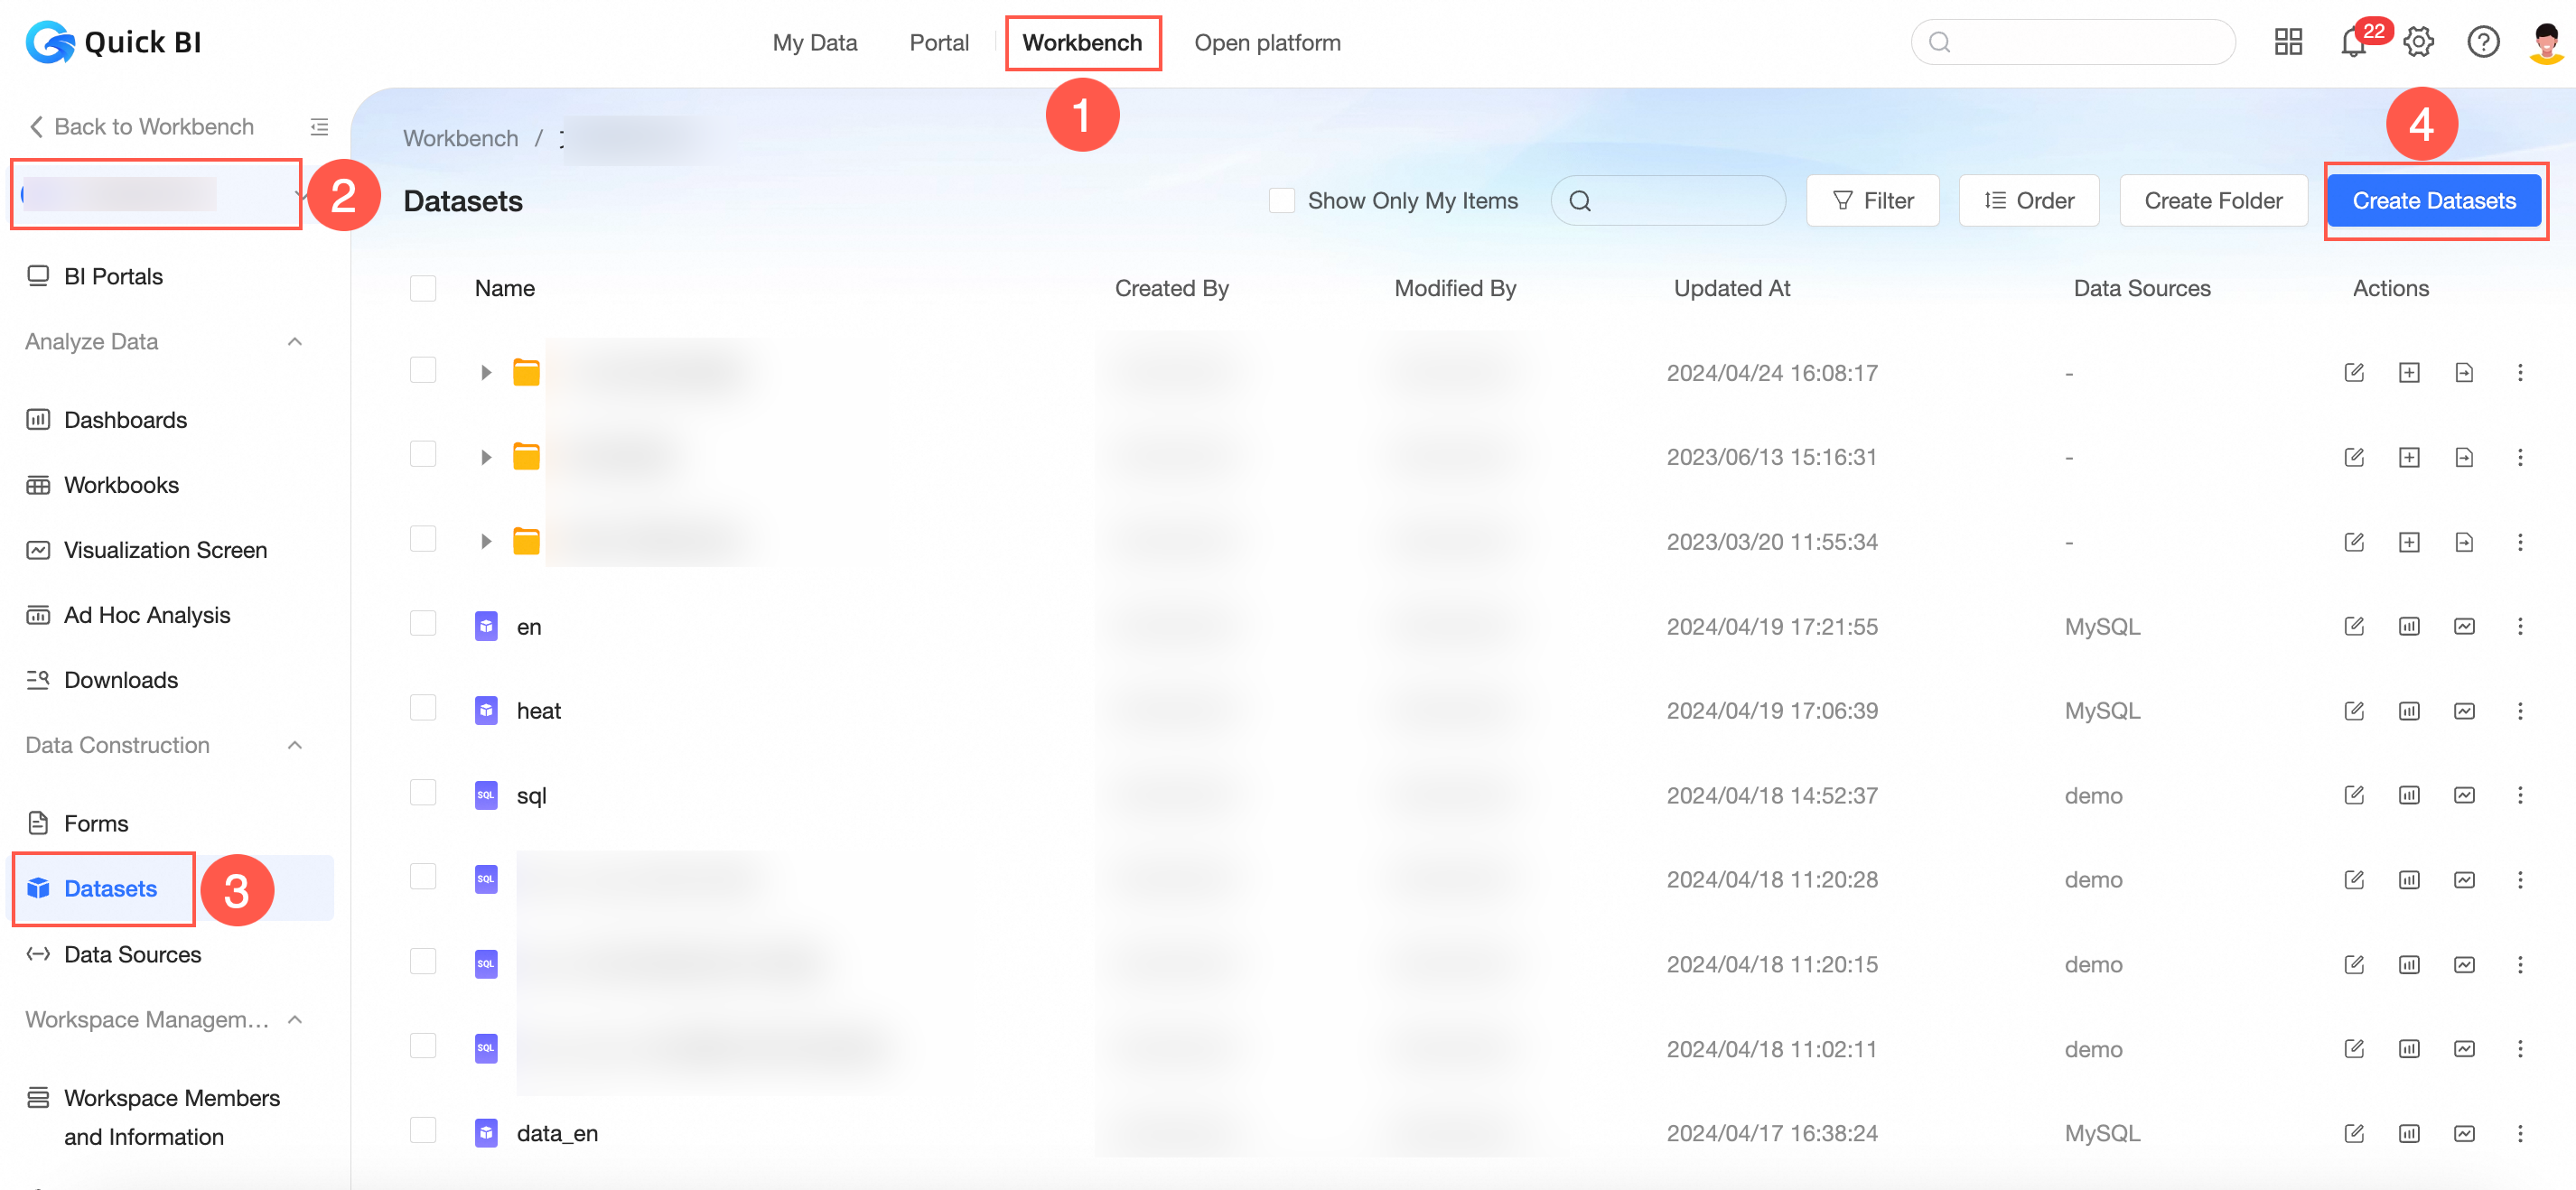
Entry point three: Create a new dataset on the dataset list page.
Entry point four: On the data source list page, click the
 icon next to the target data table to create a dataset.
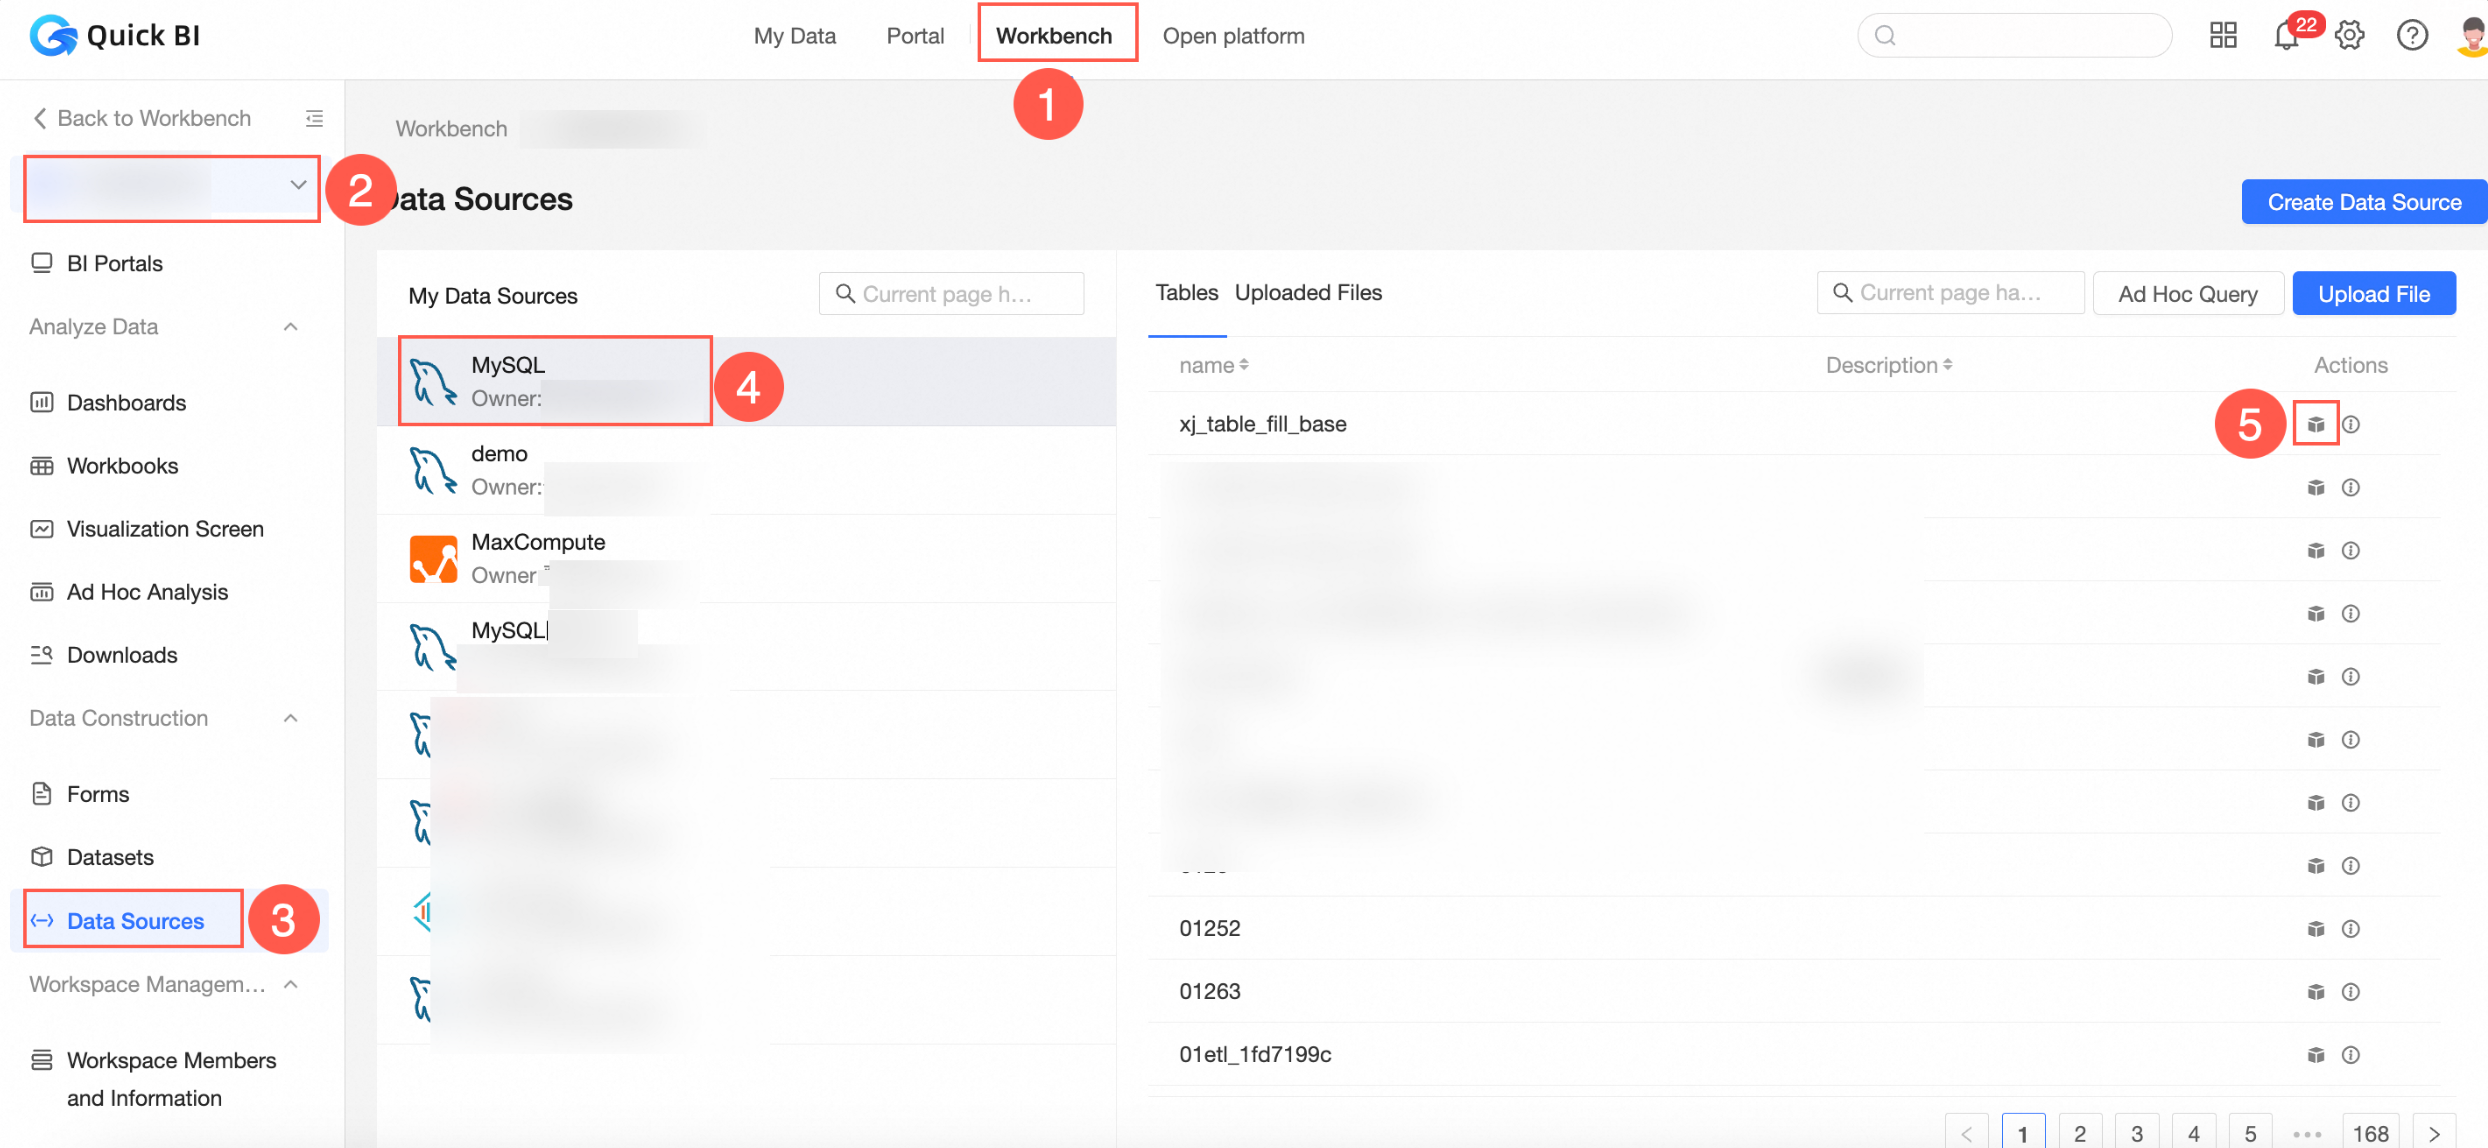 Entry point five: On the data source list page, click Create dataset using SQL.
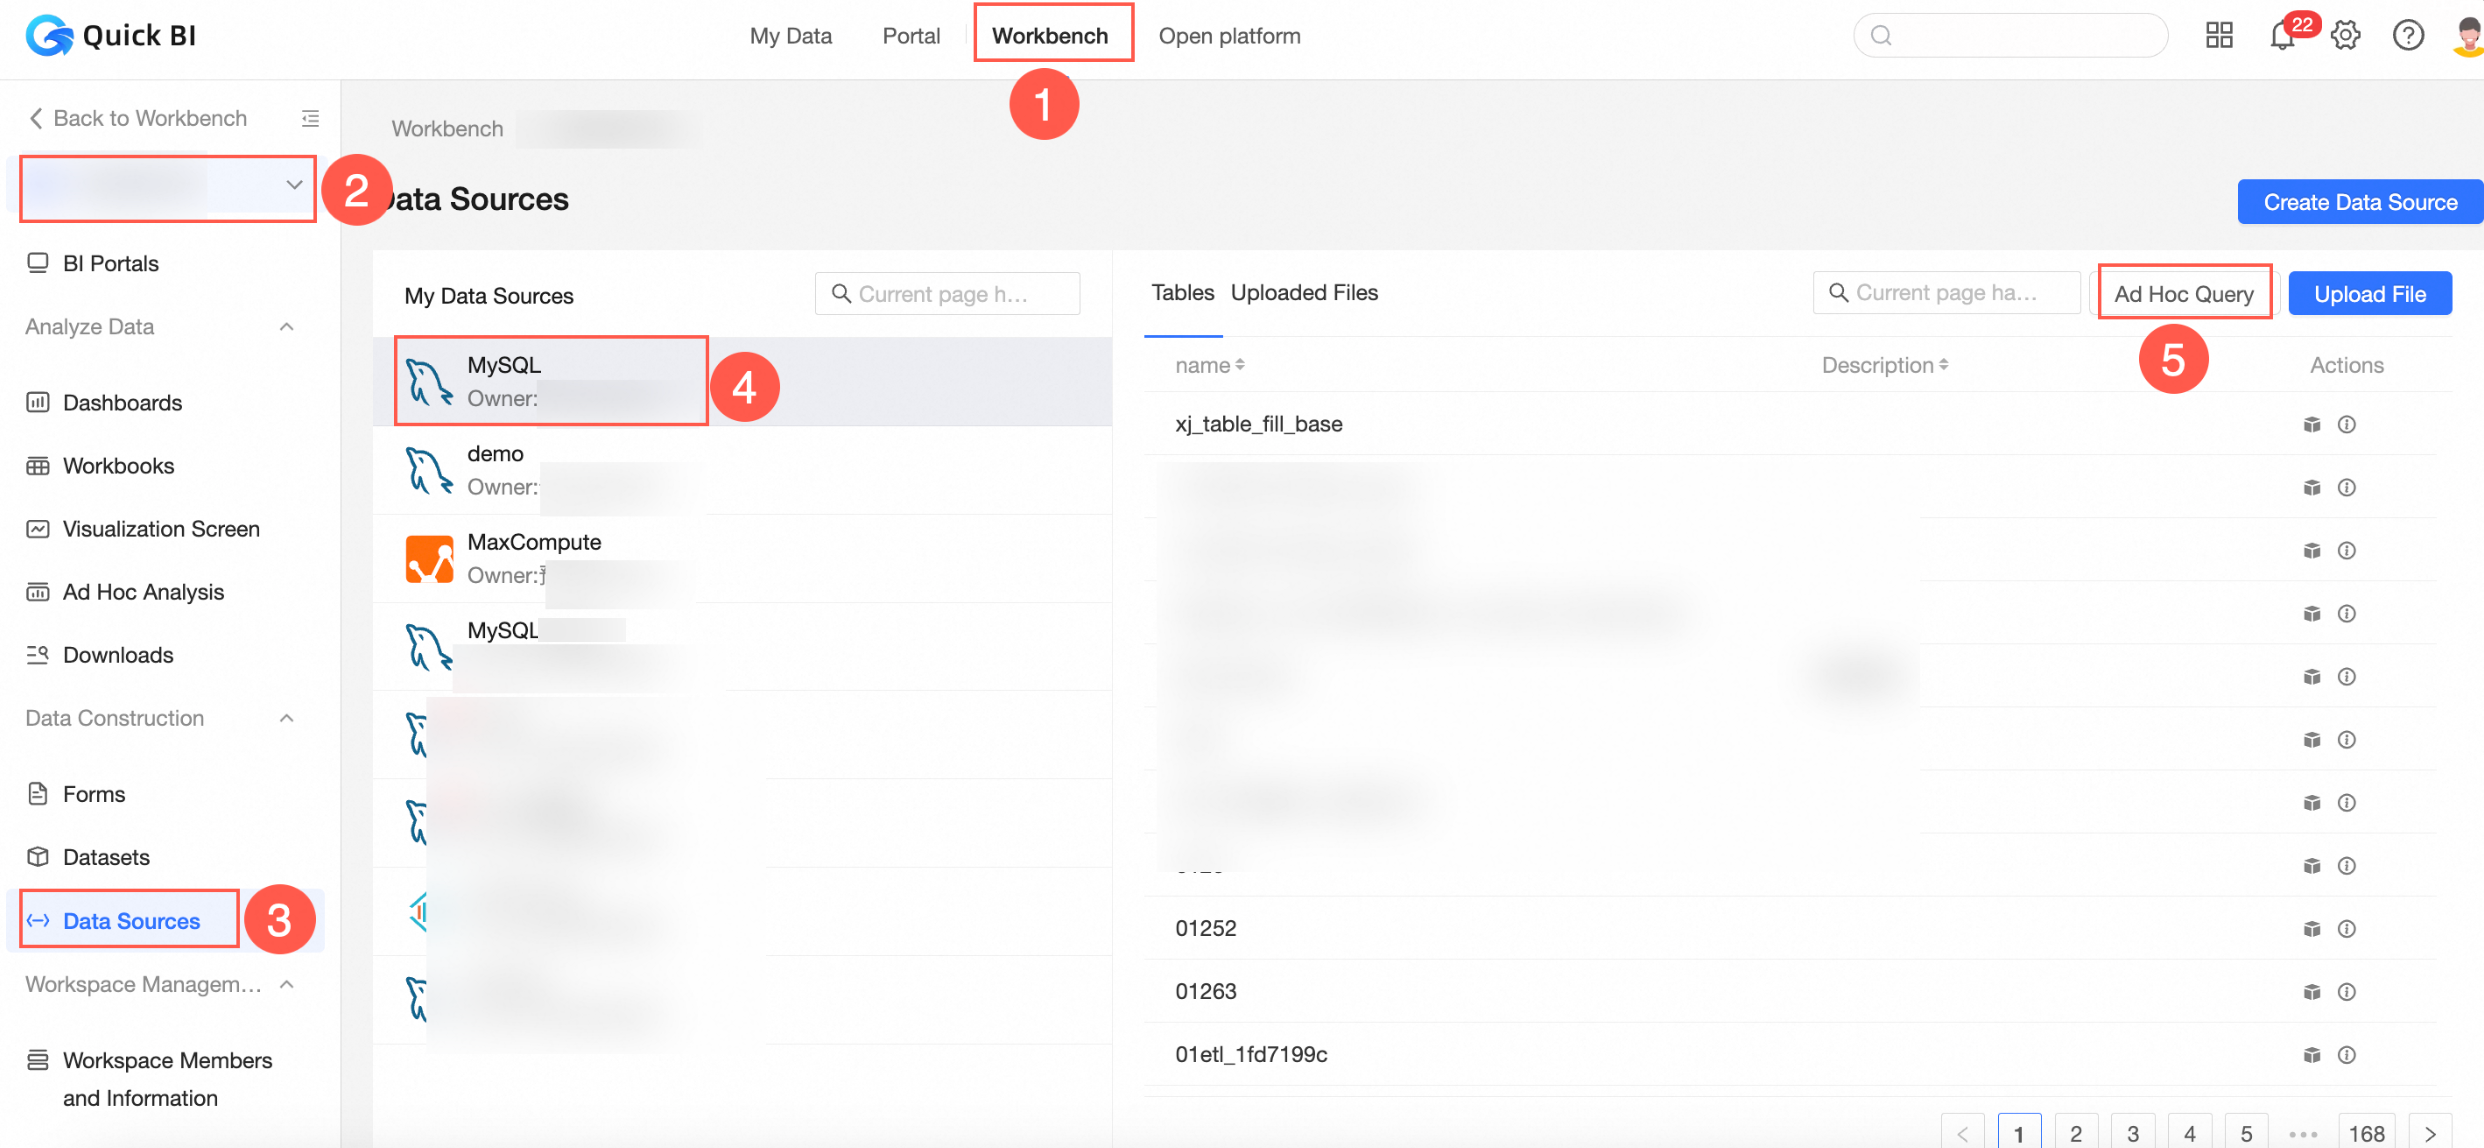
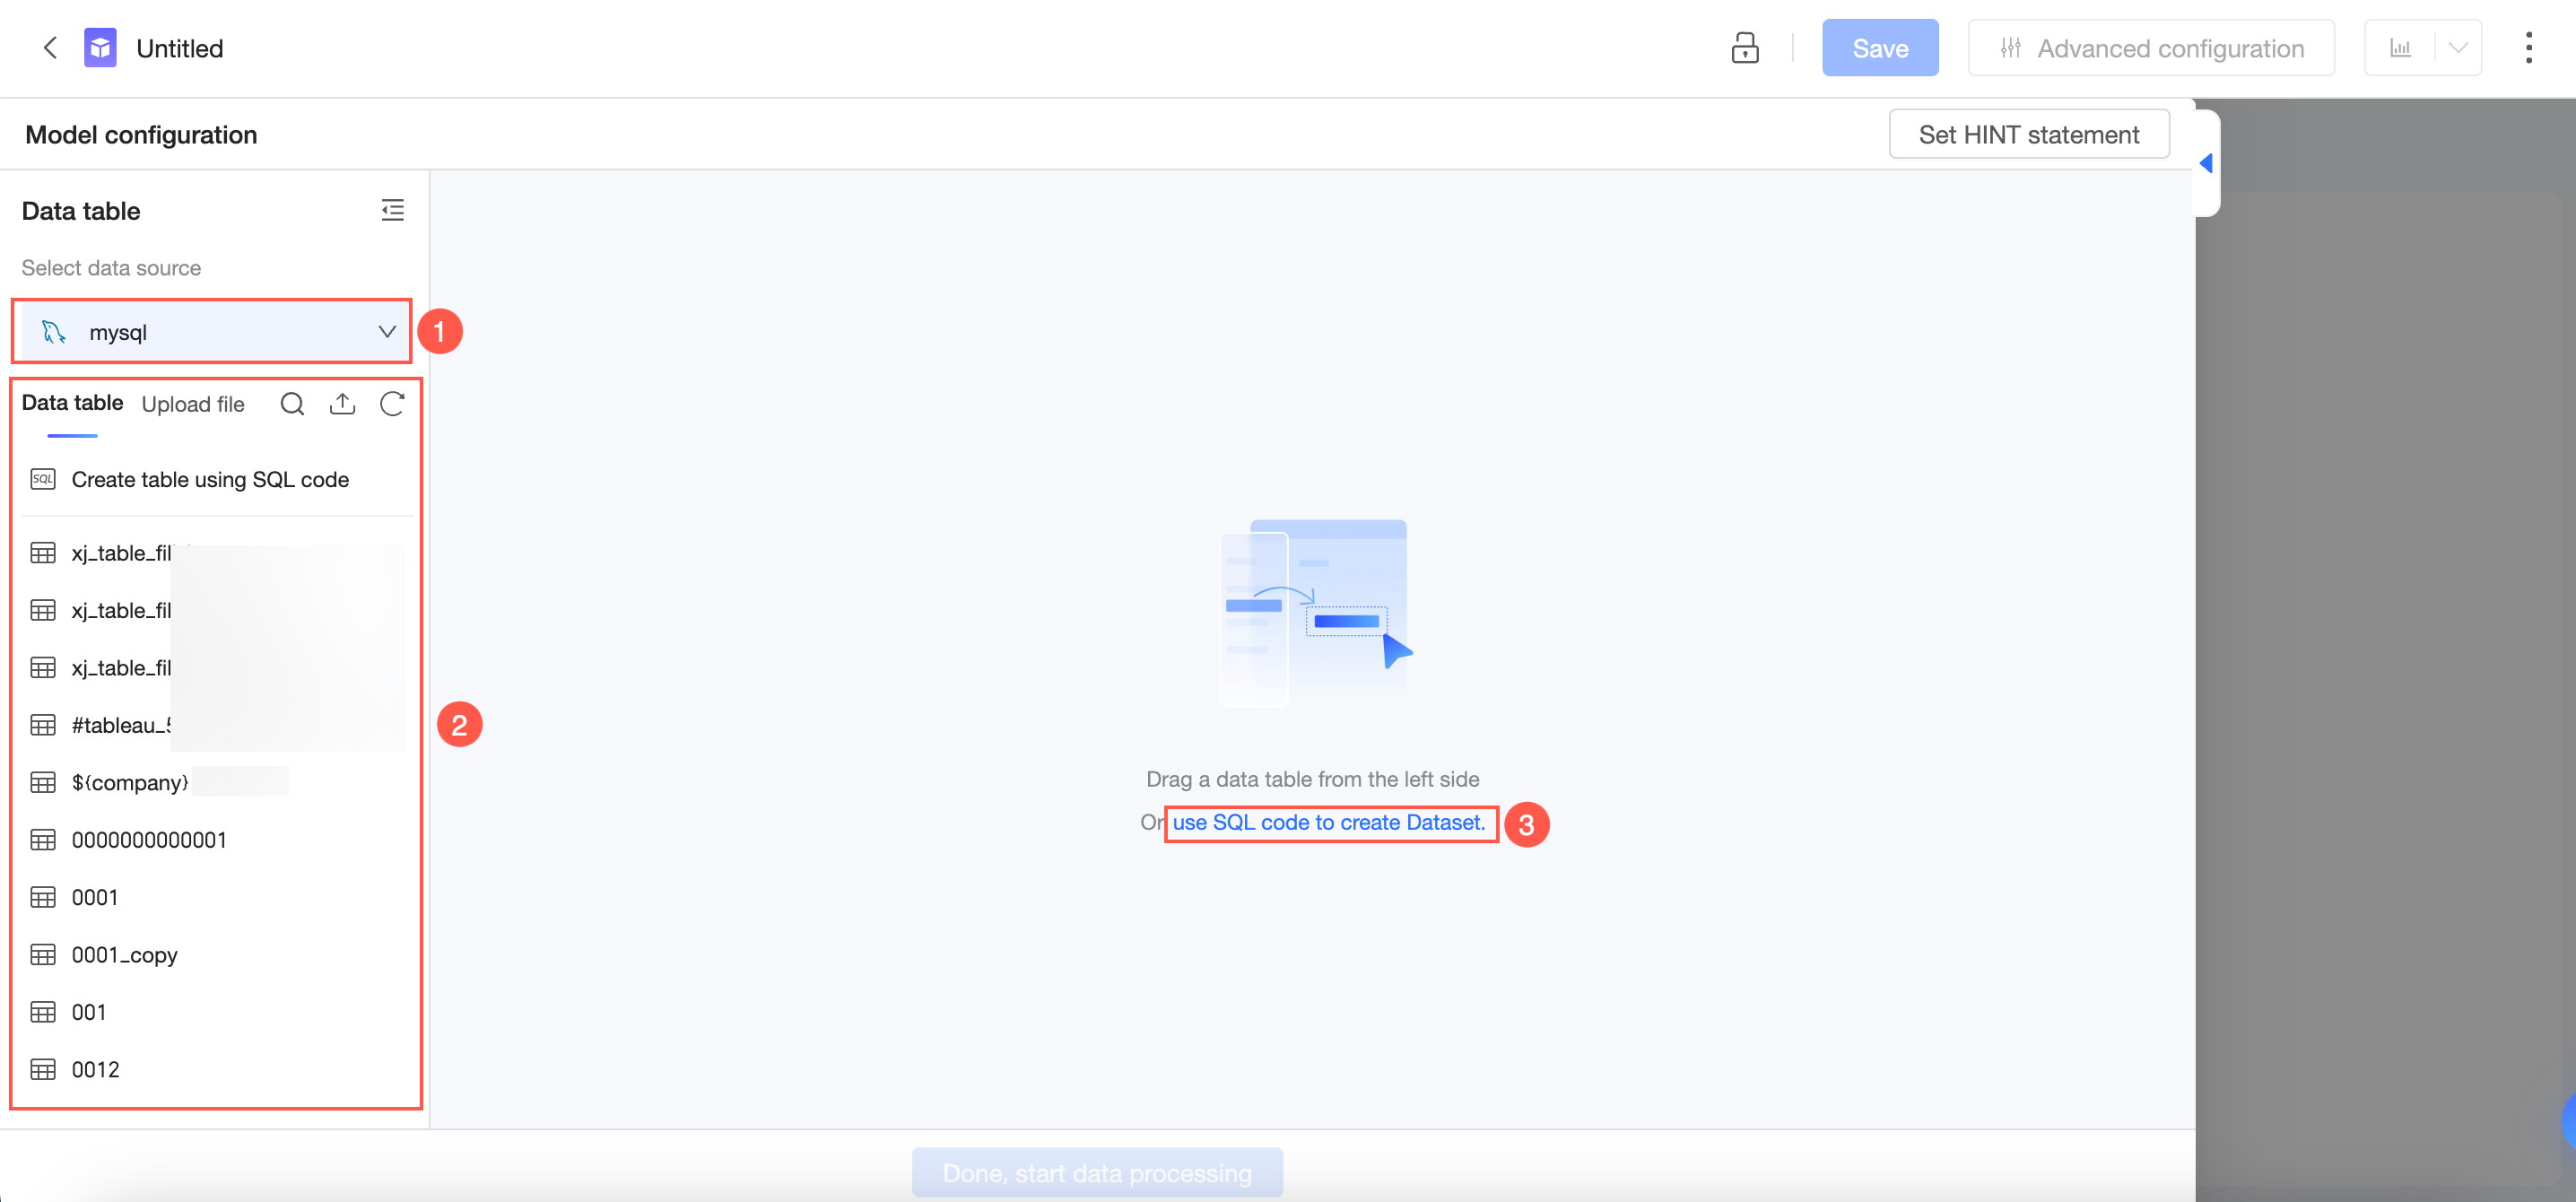
Access the dataset creation page. In the left operation bar, select the data source you want to use (①), and drag the target data source table (②) to the canvas on the right to start creating a dataset. You can also create a dataset by writing custom SQL code (③). For more information, see Use Custom SQL Statement to Create a Dataset.
What to do next
You can associate or merge tables from data sources and perform secondary data processing and analysis. For more information, see Build a Model.
After completing data modeling, you can create calculated fields and group dimensions based on the current data model. For more information, see Data Processing.
Configure Quick DPI engine, permission control, and other settings for the current dataset to improve dataset performance. For more information, see Advanced Configuration.
Manage created datasets. For more information, see Dataset Management.
Combine different existing datasets based on actual requirements. For more information, see Dataset Combination.
Combine different datasets. For more information, see FAQ.