This topic walks you through purchasing a Linux Elastic Compute Service (ECS) instance and deploying Apache web server. For detailed information about specific concepts, see the linked documents.
Preparations
You have created an Alibaba Cloud account on the Alibaba Cloud international site (alibabacloud.com).
(Optional) If you want to purchase an ECS instance within the Chinese mainland, you must complete account verification.
Basic concepts
ECS instances require the following resources:
Region: The geographic location where your ECS instance runs. Select a region close to your users to minimize latency. For more information, see Regions and zones.
Virtual Private Cloud (VPC): An isolated private network for your ECS instances. Instances in the same VPC can communicate over the private network. For more information, see VPCs and vSwitches.
vSwitch: A vSwitch is a basic network device that makes up a VPC. For more information, see VPCs and vSwitches.
Instance type: An instance type specifies the CPU model, number of cores, and memory size, such as 2 vCPUs and 4 GiB of memory. To learn about the instance families available for ECS, see Instance family classification and naming and Instance families.
Image: An image contains the operating system and version for the instance, such as Alibaba Cloud Linux 3.2104 LTS 64-bit or Windows Server 2022 Datacenter Edition 64-bit (Chinese). For more information, see Image overview.
Storage: Includes the system disk and data disks, which are used to store the OS image and business data. For more information, see Block storage overview.
Public IP address: Required for accessing the instance from the Internet.
Security group: A virtual firewall that controls inbound and outbound traffic. For more information, see Security group overview.
Key pair: A secure authentication method for logging in to instances. For more information, see SSH key pair overview.

Create an ECS instance
Use the Custom Launch method to create a Linux ECS instance. For other methods, see Create an instance.
Go to the Custom Launch page and configure the following settings. For detailed instructions, see Customize the purchase of an instance.
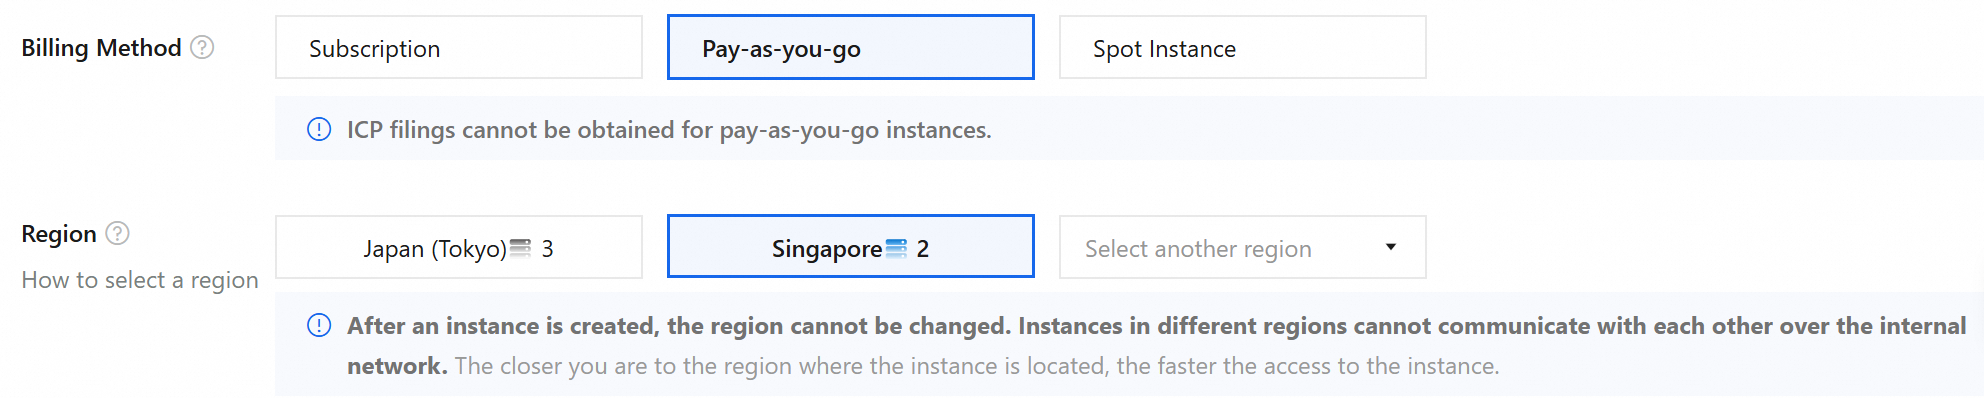
1. Select a region and billing method
Select Pay-as-you-go for flexible billing. For more information, see Billing overview.
Select Singapore (or a region close to your users).
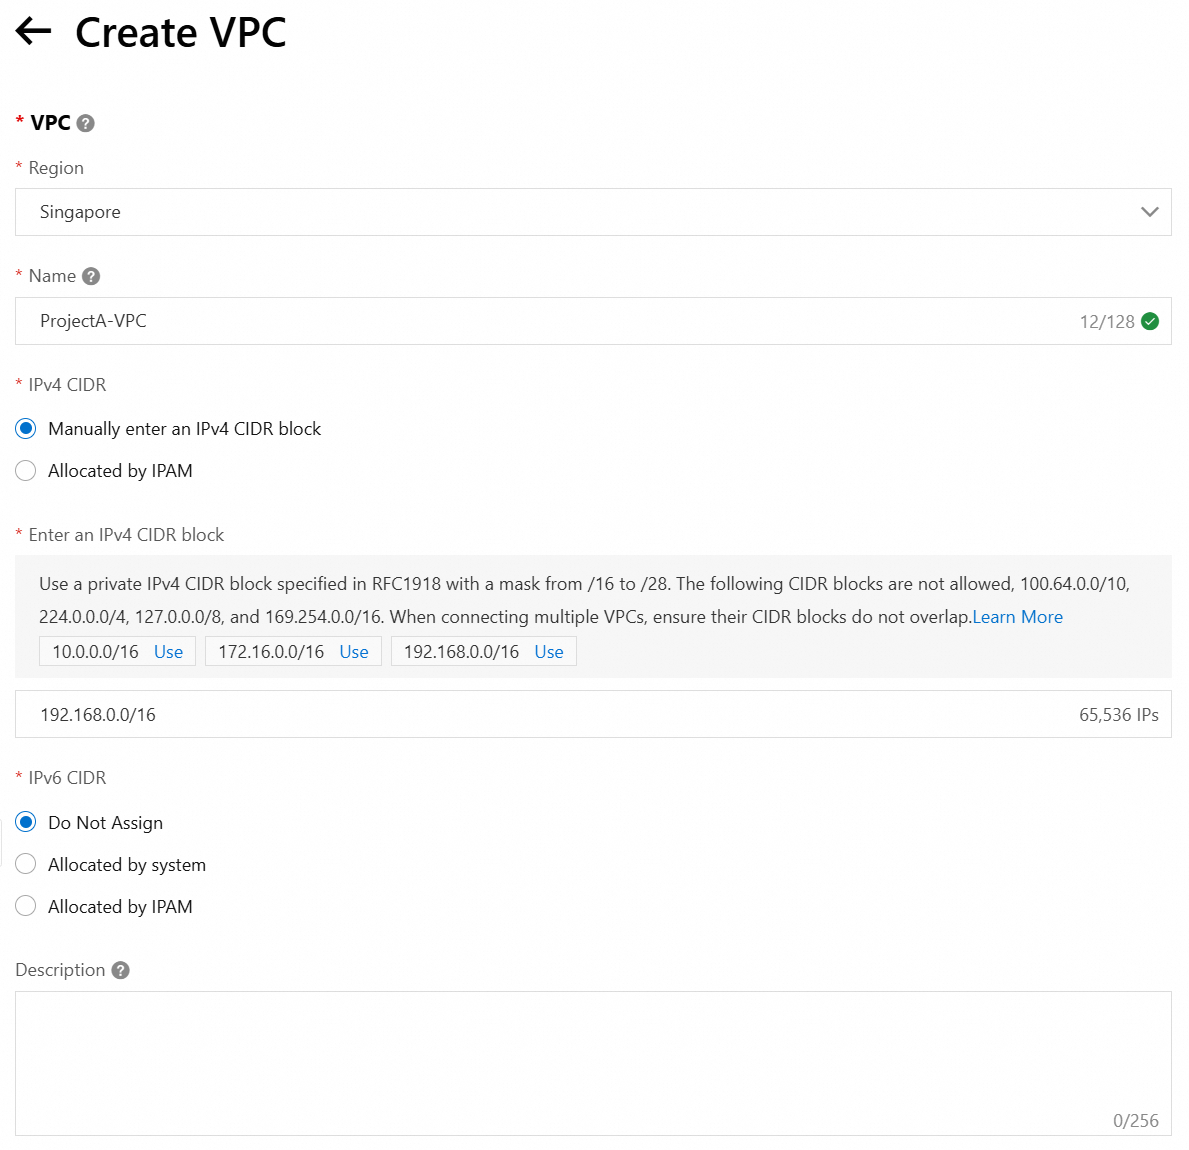
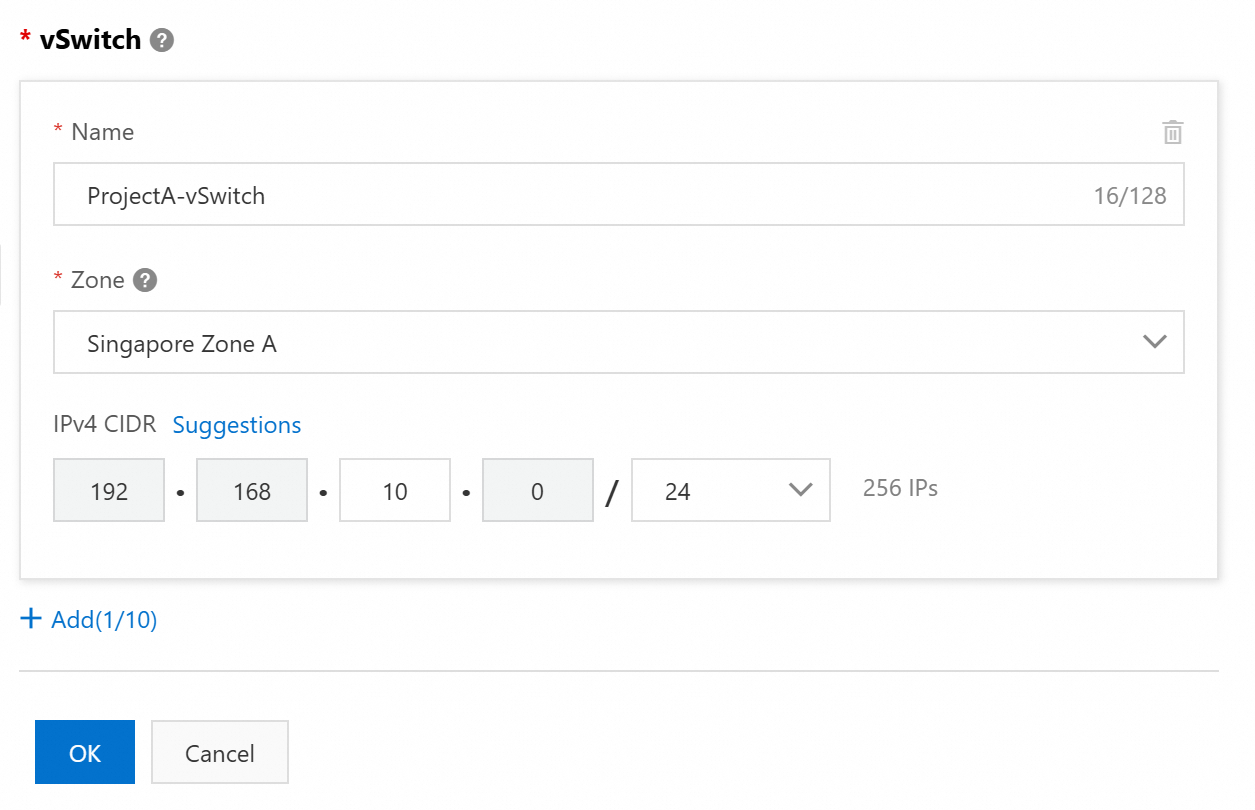
2. Create a VPC and a vSwitch
Create a VPC in the Singapore region. After creation, return to the ECS purchase page, refresh, and select the VPC and vSwitch.
You can create a vSwitch when you create a VPC.

3. Select an instance type and image
Select instance type ecs.e-c1m1.large (2 vCPUs, 2 GiB memory) and image Alibaba Cloud Linux 3.2104 LTS 64-bit.
Use the Add to Comparison feature in the section to help you select an instance type.

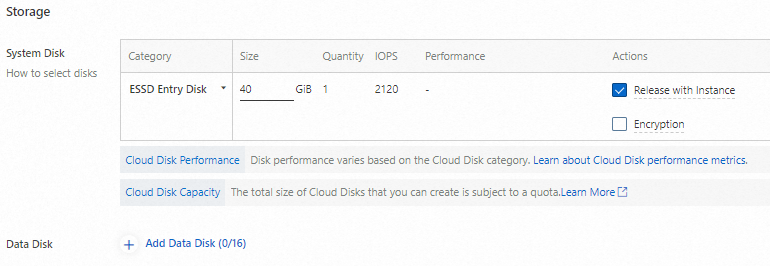
4. Select storage
Select a system disk. For this tutorial, a system disk is sufficient; no data disk is needed.
The System Disk is the boot disk of an ECS instance. It stores system-related data such as the operating system and program files.
A Data Disk is used to store non-system-related data such as user data, logs, and other applications.
For more information about storage, see Block storage overview.
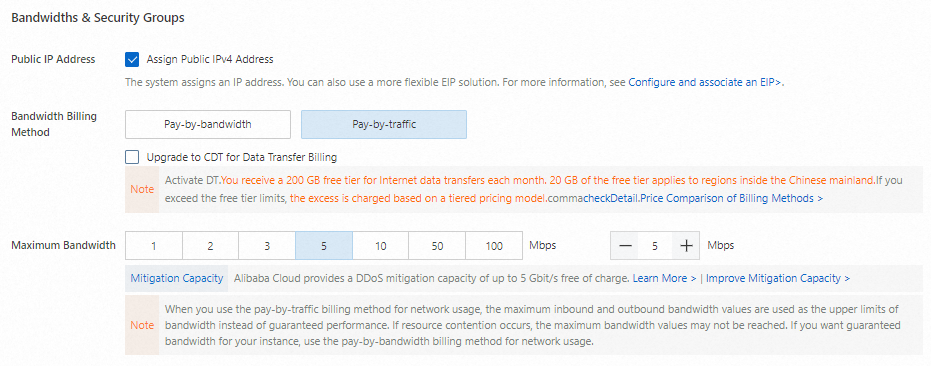
5. Assign a public IP address
Assign a public IP address for Internet access. Alternatively, associate an Elastic IP Address (EIP) after instance creation. For more information, see Associate an EIP with a cloud resource.
Without a public IP address, you cannot access the instance via SSH/RDP from the Internet.
Select Pay-by-traffic to pay only for consumed traffic. For more information, see Public bandwidth billing.
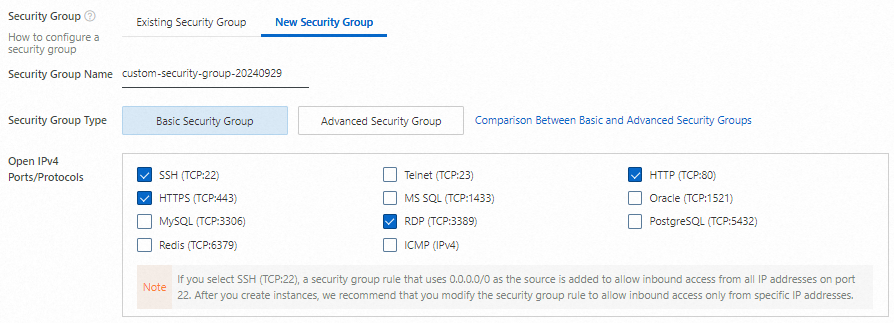
6. Create a security group
Create a security group and allow traffic on the following ports:
Port Range: SSH (22), RDP (3389), HTTP (80), and HTTPS (443).
These ports enable access to applications running on your instance.
The default source 0.0.0.0/0 allows access from any IP address. Restrict to specific IPs for production use. For more information, see Modify security group rules.
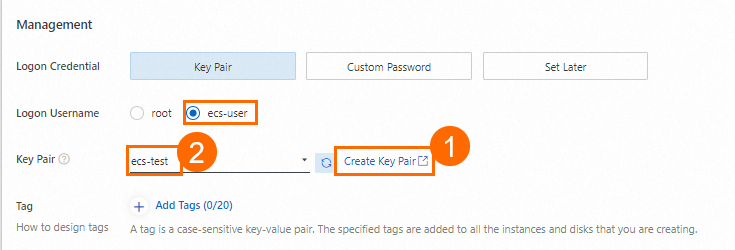
7. Create a key pair
Create a key pair and download the private key for connecting to the instance. Return to the ECS purchase page and select the key pair.
Select
ecs-useras the username. Avoid usingrootfor security reasons.
The private key (.pem file) is automatically downloaded. Save it securely.
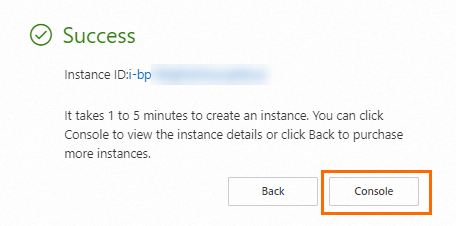
8. Create and view the ECS instance
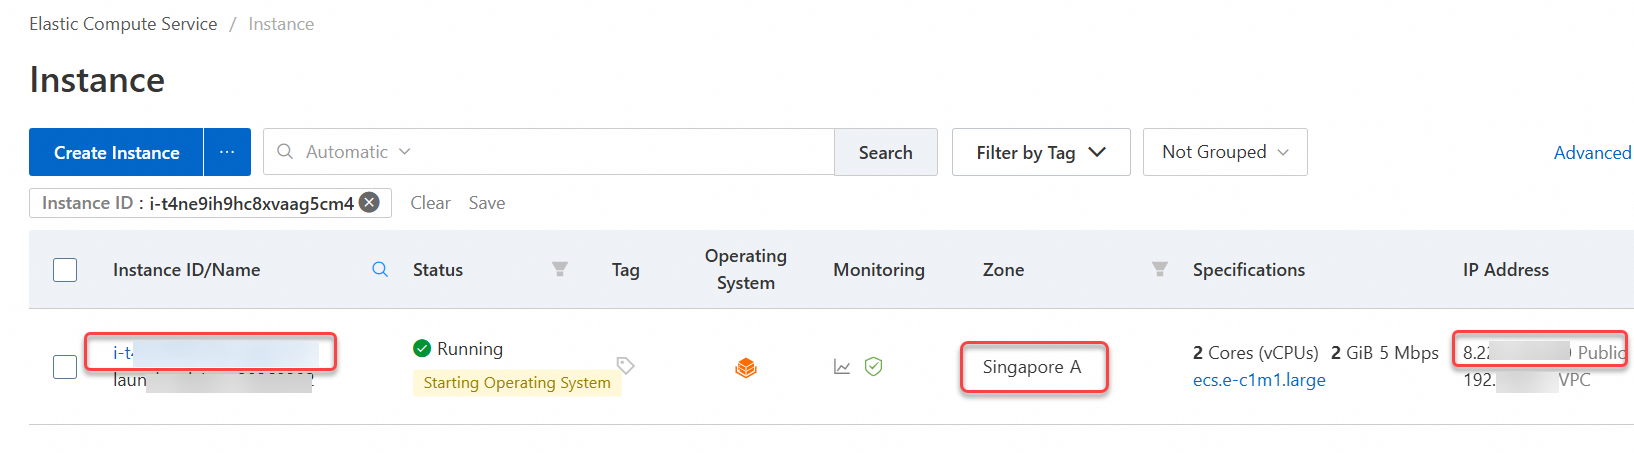
Review the Terms of Service and click Create Order. Click Console to view the instance. Note the following:
Instance ID: For locating the instance.
Region: For filtering instances.
Public IP address: For accessing the web service.
Connect to the ECS instance
Connect to your instance using a remote connection tool.
Go to ECS console - Instances.
In the top navigation bar, select the region and resource group of the resource that you want to manage.

Click the ID of the target instance. On the instance details page, click Connect.
In the Remote connection dialog box, click Sign in now in the Workbench section.
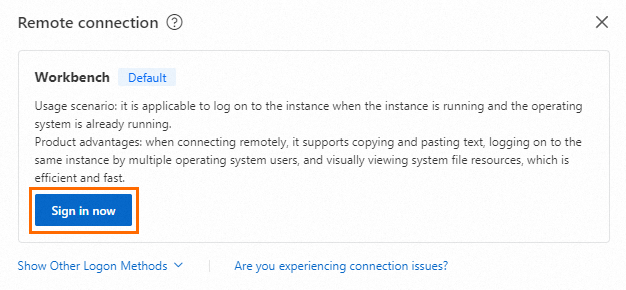 Note
NoteThis tutorial uses Workbench. For other methods, see Choose a connection method.
In the Instance Login dialog box, set Authentication to SSH Key Authentication, enter
ecs-userfor Username, enter or upload the private key file that you downloaded when you created the key pair, and then click Log In.NoteThe private key file is automatically downloaded to your local computer when you create the key pair. Check your browser's download history to find the
.pemprivate key file. If you did not associate a key pair with the instance when you created it, you must first create and associate a key pair for the instance.
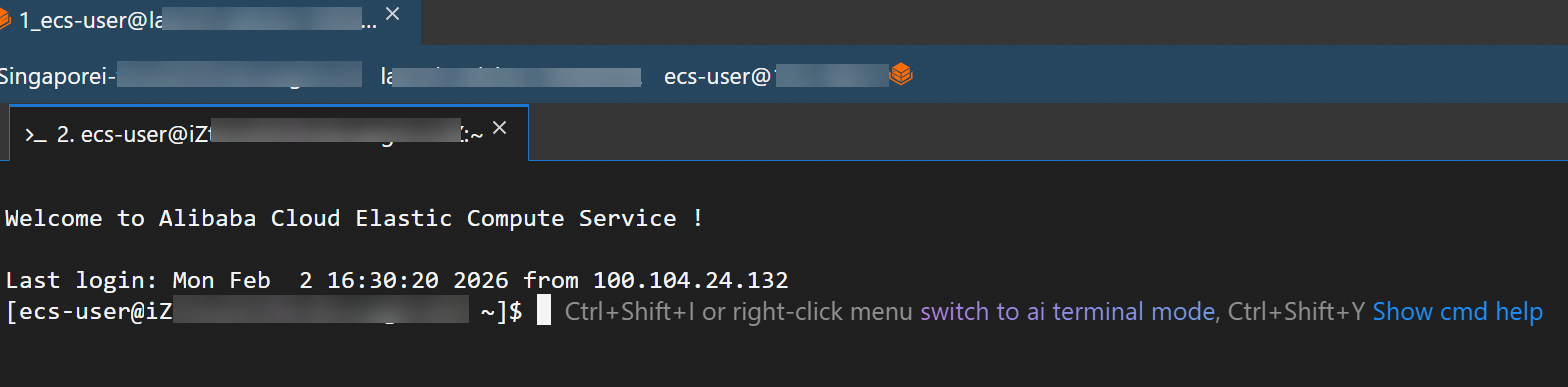
When the following page appears, you have successfully logged on to the ECS instance.
Use the ECS instance
Deploy Apache web server to verify your instance is working correctly.
Install the Apache service:
Run the following command in the instance.
sudo yum install -y httpdComplete!indicates successful installation.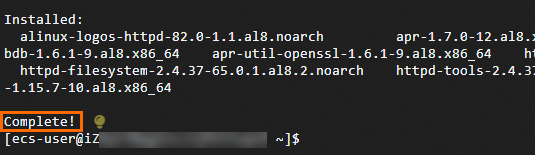
Start the Apache service: Run the following command in the instance. No result is returned.
sudo systemctl start httpdCheck the Apache service status:
Run the following command in the instance.
systemctl status httpdactive (running)indicates Apache is running.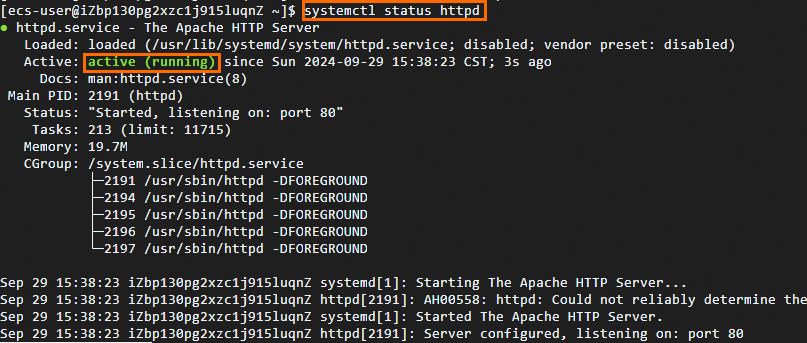
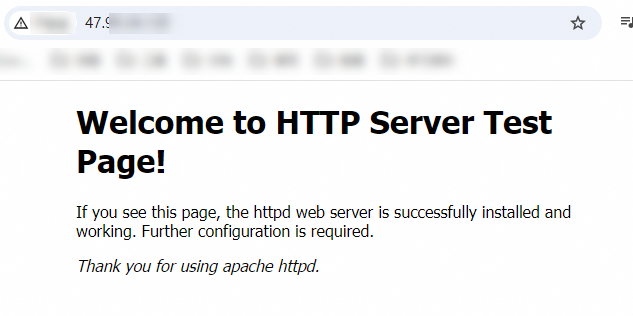
Verify the result: Open
http://<Public IP address>in your browser. The Apache test page confirms successful deployment.NoteFind the public IP address on the Instances page. If you didn't assign one, associate an EIP. For more information, see Elastic IP Address.
For building production websites, see Build a website.
Release the ECS instance
Release the instance when no longer needed. Billing stops and data cannot be recovered.
Go to ECS console - Instances.
In the top navigation bar, select the region and resource group of the resource that you want to manage.
Click the ID of the target instance to go to the instance details page. Click All Actions to expand the operations panel, and then find and click Release.
After you confirm the instance details, select Release Now and click Next.
Confirm the associated resources that you want to release and understand the related data risks. Then, click OK to release the ECS instance.
The system disk and the assigned public IP address are released with the instance.
Security groups, vSwitches, and VPCs are not released with the instance. However, they are free resources. You can delete them as needed.
EIPs are not released with the instance and are not free resources. You can delete them as needed. For more information about EIP billing, see Billing overview.
View bills
View your bills to check costs. Bills are updated with a one-day delay.
Go to the Expenses and Costs console and choose .
Search by the ECS instance ID to retrieve the cost details of the instance.
References
Learn more:
To learn how to programmatically integrate with ECS, see Integration overview.