This topic describes how to migrate a standalone instance or a replica set instance across regions by using Data Transmission Service (DTS). You can perform full data migration and incremental data migration for a replica set instance. You can perform only full data migration for a standalone instance.

Prerequisites

Background information

You may need to migrate the data of an ApsaraDB for MongoDB instance across regions in the following scenarios:

  • Restructure your business.
  • Use an ApsaraDB for MongoDB instance to provide database services for applications deployed on an Elastic Compute Service (ECS) instance. However, the ApsaraDB for MongoDB instance and the ECS instance are not in the same region.

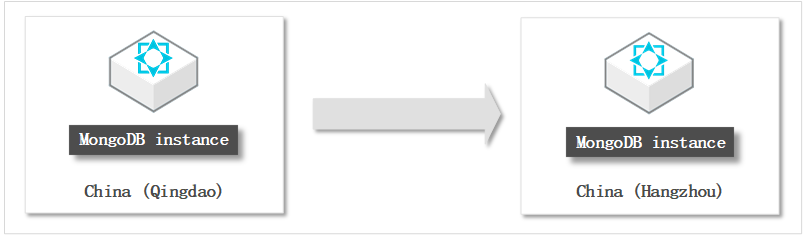
In this example, an ApsaraDB for MongoDB instance in the China (Qingdao) region is migrated to an ApsaraDB for MongoDB instance in the China (Hangzhou) region.

Migrate data between ApsaraDB for MongoDB instances across regions
Note This example describes only how to migrate data from the source instance. After data is migrated, you can release the source instance if you no longer need the source instance.

Usage notes

  • DTS consumes the resources of the source and destination databases during full data migration. This may increase the loads on the database servers. If the loads on the database servers are high or the server specifications do not meet the migration requirements, database services may become unavailable. Before you migrate data, evaluate the impact of data migration on the performance of the source and destination databases. We recommend that you migrate data during off-peak hours.
  • DTS does not support incremental data migration from a standalone instance. To ensure data consistency, do not write data to the source instance during full data migration.
  • If the source and destination ApsaraDB for MongoDB instances have different versions or storage engines, make sure that the versions or storage engines are compatible. For more information, see MongoDB versions and storage engines.
  • ApsaraDB for MongoDB automatically updates the minor version of the instance to the latest version if the minor version of an ApsaraDB for MongoDB instance expires or is not included in the maintenance list and when you perform some operations. This ensures that the ApsaraDB for MongoDB instance can provide higher performance and stability. For more information, see Database version upgrade, Data migration, Overview, Restore backup data to a new ApsaraDB for MongoDB instance by backup point, Restore backup data to a new ApsaraDB for MongoDB instance by point in time, and Restore one or more databases of an ApsaraDB for MongoDB instance.
  • The data is concurrently written to the destination database. Therefore, the storage space occupied in the destination database is 5% to 10% larger than the size of the data in the source database.
  • Make sure that the destination MongoDB database does not have the same primary key as the source database. The default primary key is _id. Otherwise, data loss may occur in the destination database. If the destination database has the same primary key as the source database, clear the related data in the destination database without interrupting the services of DTS. If the same primary key is _id, you can delete the data in the destination database that has the same _id as the source database.

Billing

Migration typeTask configuration feeInternet traffic fee
Full data migrationFree of charge. Charged only when data is migrated from Alibaba Cloud over the Internet. For more information, see Billing overview.
Incremental data migrationCharged. For more information, see Billing overview.

Migration types

Migration typeDescription
Full data migrationDTS migrates the existing data of objects from the source MongoDB database to the destination MongoDB database.
Note The following types of objects are supported: database, collection, and index.
Incremental data migrationAfter full data migration is complete, DTS migrates incremental data from the source MongoDB database to the destination MongoDB database.
Note
  • The create and delete operations that are performed on databases, collections, and indexes can be migrated.
  • The create, delete, and update operations that are performed on documents can be migrated.

Permissions required for database accounts

DatabaseFull data migrationIncremental data migration
Source ApsaraDB for MongoDB instanceRead permissions on the source databaseRead permissions on the source, admin, and local databases
Destination ApsaraDB for MongoDB instanceRead and write permissions on the destination databaseRead and write permissions on the destination database
Note For more information about how to create a database account and grant permissions to the database account, see Manage user permissions on MongoDB databases.

Procedure

  1. Log on to the ApsaraDB for MongoDB console.
  2. In the left-side navigation pane, click Replica Set Instances or Sharded Cluster Instances.
  3. In the upper-left corner of the page, select the resource group and region to which the instance belongs.
  4. On the page that appears, find the instance that you want to manage and click its ID.
  5. In the upper-right corner of the page that appears, click Migrate Databases.
  6. On the Create Migration Task page, create a data migration task.
    1. Configure the source and destination databases.
      Configure the source and destination databases
      SectionParameterDescription
      N/ATask NameThe task name that DTS automatically generates. We recommend that you specify a descriptive name that makes it easy to identify the task. You do not need to specify a unique task name.
      Source DatabaseInstance TypeThe instance type of the source database. Select ApsaraDB for MongoDB.
      Instance RegionThe region in which the source ApsaraDB for MongoDB instance resides. In this example, China (Qingdao) is selected.
      MongoDB Instance IDThe ID of the source instance.
      Database NameThe name of the authentication database. The database account is created in this database.
      Note If you want to use the root account, enter admin in the Database Name field.
      Database AccountThe username of the account that is used to connect to the source instance. For information about the permissions that are required for the account, see Permissions required for database accounts.
      Database PasswordThe password of the database account.
      Note After you specify the information about the source database, you can click Test Connectivity next to Database Password to check whether the information is correct. If the information is correct, the Passed message appears. If the information is incorrect, the Failed message appears and you must click Check next to the Failed message to modify the information.
      Destination DatabaseInstance TypeThe instance type of the destination database. Select MongoDB Instance.
      Instance RegionThe region in which the destination ApsaraDB for MongoDB instance resides. In this example, China (Hangzhou) is selected.
      MongoDB Instance IDThe ID of the destination instance.
      Database NameThe name of the authentication database. The database account is created in this database.
      Note If you want to use the root account, enter admin in the Database Name field.
      Database AccountThe username of the account that is used to connect to the destination instance. For information about the permissions that are required for the account, see Permissions required for database accounts.
      Database PasswordThe password of the database account.
      Note After you specify the information about the destination database, you can click Test Connectivity next to Database Password to check whether the information is correct. If the information is correct, the Passed message appears. If the information is incorrect, the Failed message appears and you must click Check next to the Failed message to modify the information.
    2. In the lower-right corner of the page, click Set Whitelist and Next.
      Warning
      • If the source or destination database instance is an Alibaba Cloud database instance, such as an ApsaraDB RDS for MySQL or ApsaraDB for MongoDB instance, or is a self-managed database hosted on Elastic Compute Service (ECS), DTS automatically adds the CIDR blocks of DTS servers to the whitelist of the database instance or ECS security group rules. For more information, see Add the CIDR blocks of DTS servers to the security settings of on-premises databases. If the source or destination database is a self-managed database on data centers or is from other cloud service providers, you must manually add the CIDR blocks of DTS servers to allow DTS to access the database.
      • If the CIDR blocks of DTS servers are automatically or manually added to the whitelist of the database instance or ECS security group rules, security risks may arise. Therefore, before you use DTS to migrate data, you must understand and acknowledge the potential risks and take preventive measures, including but not limited to the following measures: enhance the security of your account and password, limit the ports that are exposed, authenticate API calls, regularly check the whitelist or ECS security group rules and forbid unauthorized CIDR blocks, or connect the database to DTS by using Express Connect, VPN Gateway, or Smart Access Gateway.
      • After the DTS task is completed or released, we recommend that you manually detect and remove the added CIDR blocks from the whitelist of the database instance or ECS security group rules.
    3. Select the migration types and the objects to be migrated.
      Select the migration types and the objects to be migrated
      SettingDescription
      Select the migration types
      • To perform only full data migration, select only Full Data Migration.
      • To ensure service continuity during data migration, select Full Data Migration and Incremental Data Migration.
      Note
      • DTS does not support incremental data migration for standalone instances.
      • If Incremental Data Migration is not selected, we recommend that you do not write data to the source database during full data migration. This ensures data consistency between the source and destination databases.
      Select the objects to be migratedTo select the objects to be migrated, perform the following steps:
      1. Select one or more objects from the Available section.
      2. Click the icon to add the objects to the Selected section.
      Note
      • DTS cannot migrate data from the admin or local database.
      • The objects that you can migrate are databases, collections, and functions.
      • By default, after an object is migrated to the destination instance, the name of the object remains unchanged. If you want to rename an object in the destination instance, you can use the object name mapping feature. For more information, see Object name mapping.
      Specify whether to rename objectsYou can use the object name mapping feature to rename the objects that are migrated to the destination instance. For more information, see Object name mapping.
      Specify the retry time range for a failed connection to the source or destination databaseBy default, if DTS fails to connect to the source and destination databases, DTS retries within the following 12 hours. You can specify the retry time range based on your business requirements. If DTS is reconnected to the source and destination databases within the specified time range, DTS resumes the data migration task. Otherwise, the data migration task fails.
      Note Within the time range in which DTS attempts to reconnect to the source and destination databases, you are charged for the DTS instance. We recommend that you specify the retry time range based on your business requirements. You can also release the DTS instance at the earliest opportunity after the source and destination databases are released.
    4. In the lower-right corner of the page, click Precheck.
      Note
      • Before you can start the data migration task, DTS performs a precheck. You can start the data migration task only after the task passes the precheck.
      • If the task fails to pass the precheck, click View Details next to each failed item. After you troubleshoot the issues based on the causes, run a precheck again.
      • If an alert is triggered for an item during the precheck:
        • If an alert item cannot be ignored, click View Details next to the failed item and troubleshoot the issues. Then, run a precheck again.
        • If an alert item can be ignored, click Confirm Alert Details. In the View Details dialog box, click Ignore. In the message that appears, click OK. Then, click Precheck Again to run a precheck again. If you ignore the alert item, data inconsistency may occur, and your business may be exposed to potential risks.
    5. After the data migration task passes the precheck, click Next.
    6. In the Confirm Settings dialog box, configure the Instance Class parameter. Then, read and select the check box to agree to Data Transmission Service (Pay-As-You-Go) Service Terms.
    7. Click Buy and Start to start the data migration task.
  7. View the progress of the migration task.
    • Full data migration

      We recommend that you do not manually stop the task during full data migration. Otherwise, the data migrated to the destination database may be incomplete. You can wait until the full data migration task automatically stops.

    • Incremental data migration

      An incremental data migration task does not automatically stop. You must manually stop the task.

    1. Wait until Incremental Data Migration and The migration task is not delayed appear in the progress bar of the data migration task. Then, stop writing data to the source instance for a few minutes. The latency of incremental data migration may be displayed in the progress bar.
    2. Wait until the status of incremental data migration changes to The migration task is not delayed again. Then, manually stop the migration task.
  8. Switch your workloads to the destination ApsaraDB for MongoDB instance.

What to do next

If you no longer need the source instance, release the source instance.

  • If the source instance is charged based on the pay-as-you-go billing method, you can release the instance. For more information, see Release an instance or a node.
  • If the source instance is charged based on the subscription billing method, you are not allowed to release the instance.