By Léon Rodenburg, Alibaba Cloud MVP.
Serverless applications are awesome. The zero-maintenance and low-cost solutions that you can build with serverless technologies like API Gateway, Function Compute and Table Store scale massively as your product becomes more and more popular. Although you can outsource a lot of the tasks necessary for running your code and storing your data, application security is one of the aspects that you have to manage yourself. Unfortunately, security is hard to get right. Especially when it comes to OAuth 2 flows, it can be extremely complicated to implement the standards correctly. Luckily though, there are a lot of third-party providers that offer you authentication and authorization out of the box. In this article I will show you how you can secure Alibaba Cloud API Gateway using Auth0, one of the more popular authentication providers.
Assuming you have an API Gateway in place with a backend you want to secure, let's start with setting up your Auth0 account. If you don't know how to provision an API Gateway with a backend, like a Function Compute function, there are a lot of online sources that can point you in the right direction. You can find a great introductory tutorial here. If you have everything set up, let's continue.
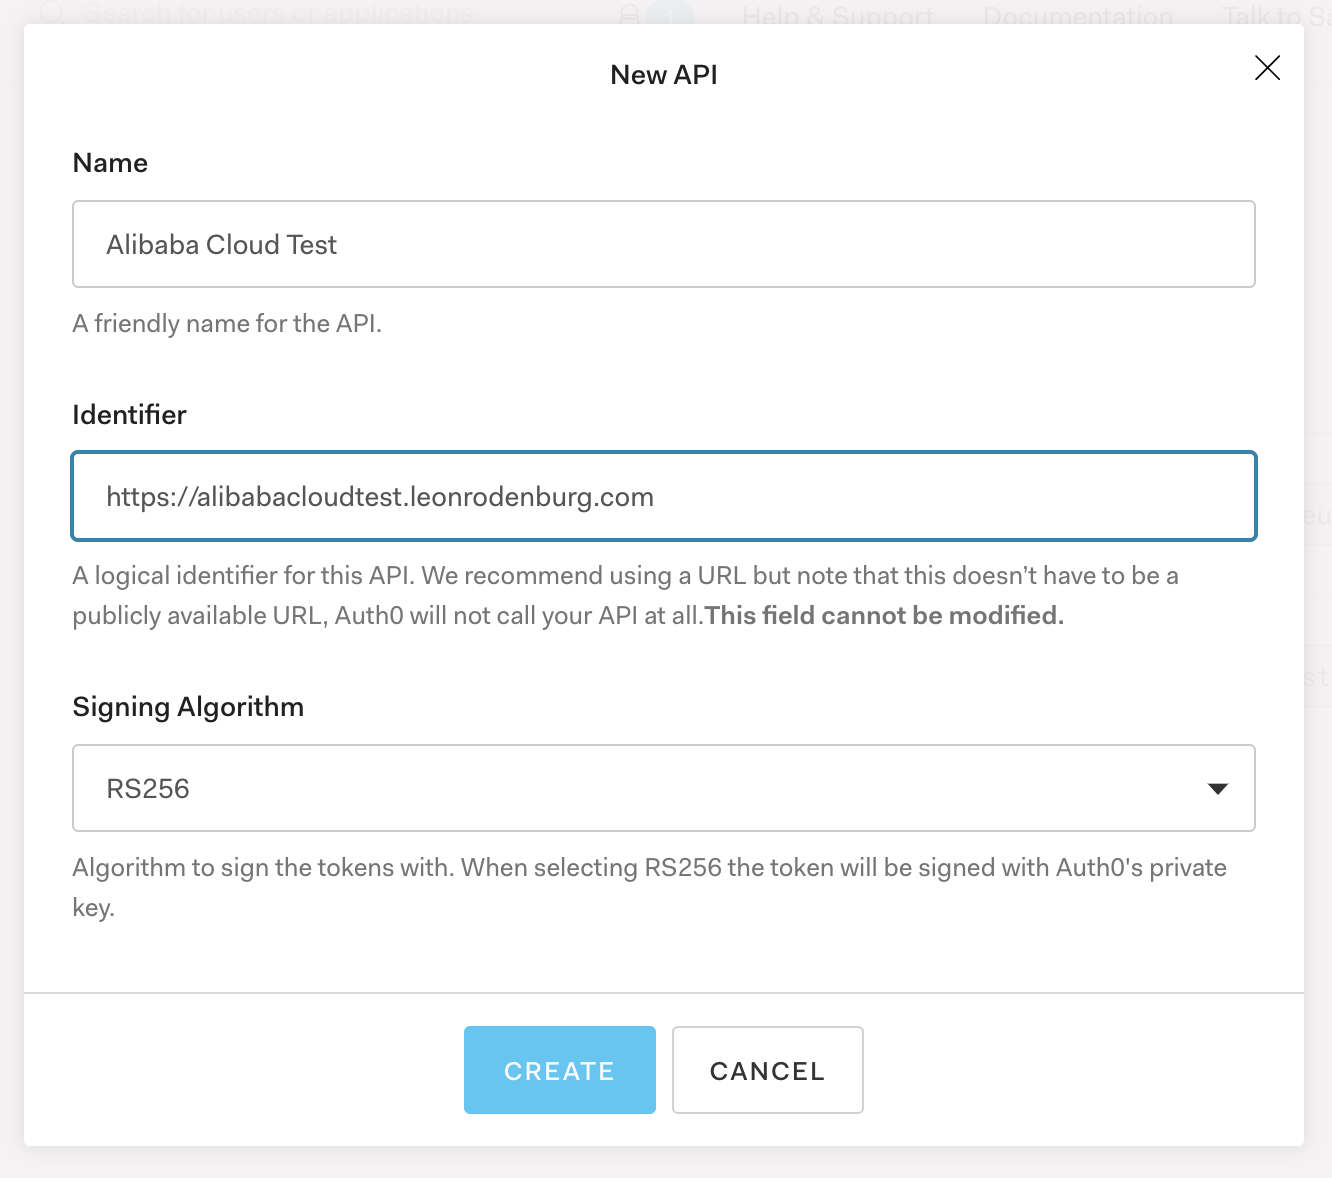
It is very easy to get started with Auth0. You can register an account here if you don't have one yet. When you are logged in, go to the APIs tab to create a new API resource for your application. Click the Create API button in the top-right corner and fill in a name and identifier. You can keep the signing algorithm at RS256. Click Create to set up the API. Keep the rest of the settings as-is.

Auth0 uses JSON Web Tokens (JWTs) for authentication and authorization. JWTs are a well-documented standard and used throughout the web. A JWT is nothing more than a simple JSON blob with identity information of the logged in user. It includes a signature that can be verified by the backend API. When a user logs in, the JWT is created and signed by the authentication provider using a JSON Web Key (JWK). As JWKs are asymmetric keys, there is also a corresponding private key. The private key is never shared with anyone, so only the authentication provider can sign tokens using that key. The signed JWT is then sent to the backend API with every request. The backend API verifies the token by checking the signature using the public key. If everything is okay, it knows that nobody tampered with the token and the application can proceed with providing the requested information. It's okay if the flow seems a bit complicated, it will become clearer once you get to work with it. For now it's enough to know that a JWK with a private and public key are used to sign JWTs so no one can tamper with them.
Before we can configure API Gateway to verify the tokens we sent it, we need to note down the public key that Auth0 has generated for your account. You can find the public key at the following URL:
https://YOUR_DOMAIN/.well-known/jwks.jsonReplace YOUR_DOMAIN with the Auth0 domain you created when registering your account. It is either an auth0.com subdomain or, if configured, your own domain. If you browse to the URL, you should get a JSON response in roughly the following format:
{
  "keys": [
    {
      "alg": "RS256",
      "kty": "RSA",
      "use": "sig",
      "x5c": ["MIIDDzCCAfegAwIBAgIJXDc/N4ZmbgiB..."],
      "n": "1Qnn_3M70a-meFMBNTiRP7fUWGQjTp...",
      "e": "AQAB",
      "kid": "MDZCMkU3RTMyMThGMDZDQzc0N...",
      "x5t": "MDZCMkU3RTMyMThGMDZDQzc0N..."
    }
  ]
}
Copy your JSON into a text file and store it somewhere you can find it easily for the next step.
Although it is not the most well-documented feature of API Gateway, plugins can be used to extend the functionality that API Gateway provides. When you open the Alibaba Cloud console, go to API Gateway and then click Plugin on the left. Make sure to pick the region where your API is also deployed, as you can only apply plugins that were created in the same region.
Click Create Plugin to create a new plugin. Give the plugin a name (like Auth0) and select the JWT (OpenID Connect) plugin type. In the Script Configuration tab, you should see an example of the plugin configuration that needs to be done. You can study the comments in the example to learn more about the capabilities of the plugin (although some of it is in Chinese). For now, clear the script and replace it with the following:
---
parameter: Authorization
parameterLocation: header
jwk:
  alg: "RS256"
  kty: "RSA"
  use: "sig"
  x5c:
    - "MIIDDzCCAfegAwIBAgIJXDc/N4ZmbgiB..."
  n: "1Qnn_3M70a-meFMBNTiRP7fUWGQjTp..."
  e: "AQAB"
  kid: "MDZCMkU3RTMyMThGMDZDQzc0N..."
  x5t: "MDZCMkU3RTMyMThGMDZDQzc0N..."
In the configuration we specify where the token can be found when a request comes in. In this case, we specify that API Gateway must look in the Authorization header on every request for the token.
The fields under the jwk property should look familiar, as these are exactly the public key fields that you copied earlier. So, take out the file you stored and replace the values for the one that apply to you. When you are done, click Create to create the plugin.
Back on the plugin overview, click the Bind API link for the plugin you just created. Select the right group and stage from the dropdowns and click the Add button next to the API that you want to bind. If you can't find your API, make sure it was published to the Test, Pre or Release stages and that it is in the same region as your plugin. Correct this if necessary and click OK to save the changes.
Your API is now bound to the plugin! In the last step we need to configure the API to expect the Authorization header as a parameter.
Now click APIs in the left menu to go to the APIs that you want to secure. You will need to repeat these steps for all the APIs that need to be secured. Click the API name and then Edit to start editing the API.
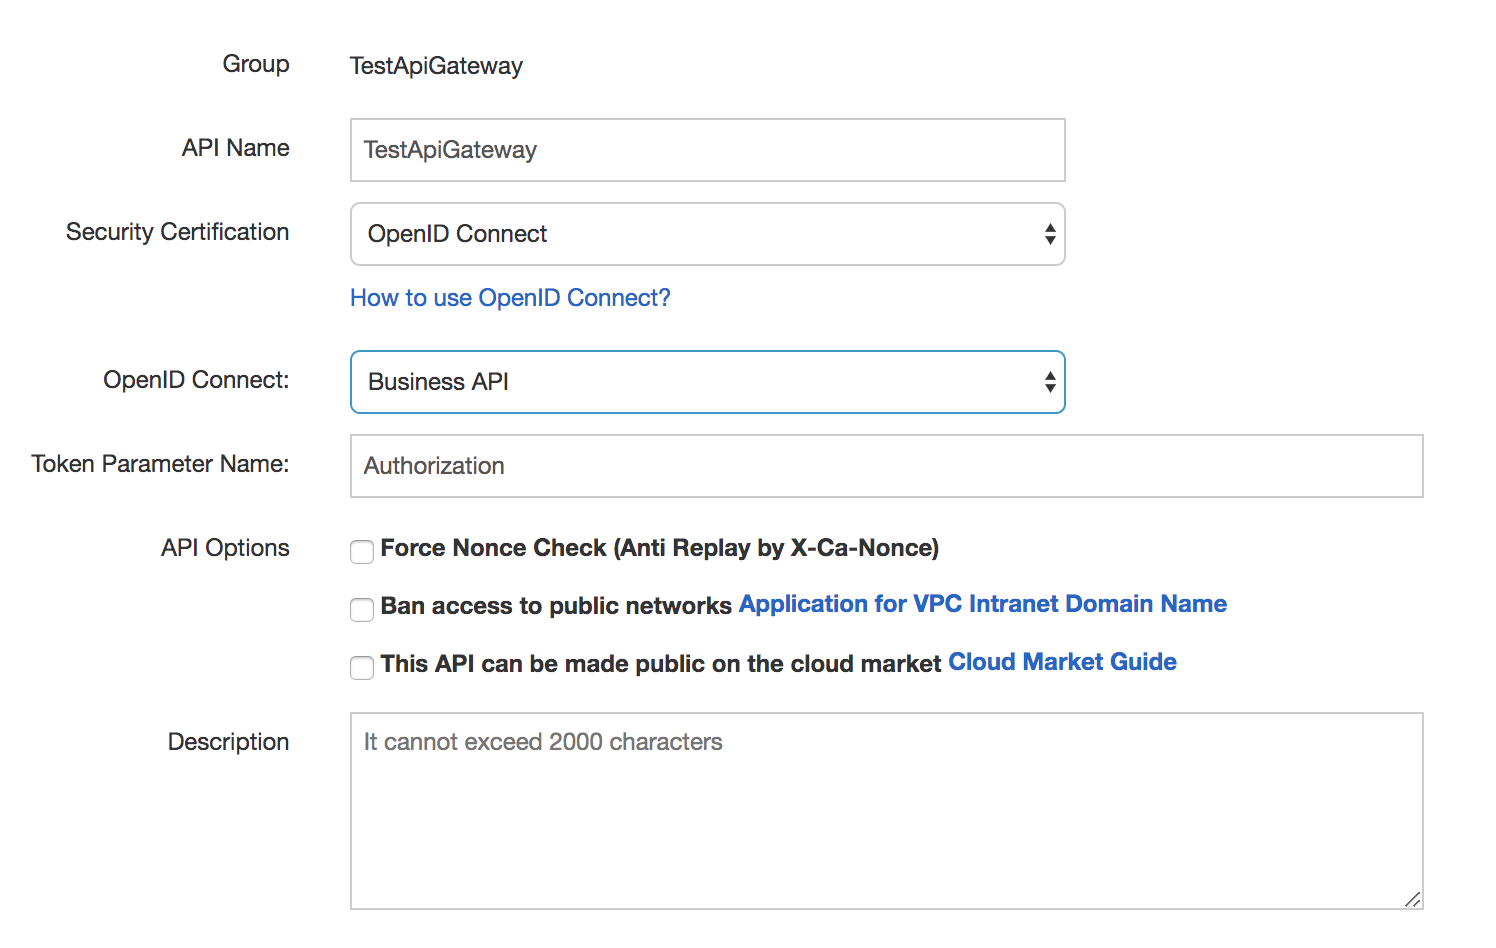
We need to change the Security Certification value to OpenID Connect. The OpenID Connect field will show up below. Select Business API here. Then, fill in Authorization for the Token Parameter Name. The form should reflect the following:

When that is done, click Next.
On the next page, look down to the Input Parameter Definition and click Add to add an input parameter. The Param Name should be Authorization, the Param Location is Head and it is a string. Also make sure to check the Required checkbox so people are forced to include it. When your parameter reflects the setting below, click Save to save the API and go back to the dashboard.

Finally, we can deploy the new version of the API that includes the Authorization parameter. Click Deploy and select the right stage to deploy the secured API.
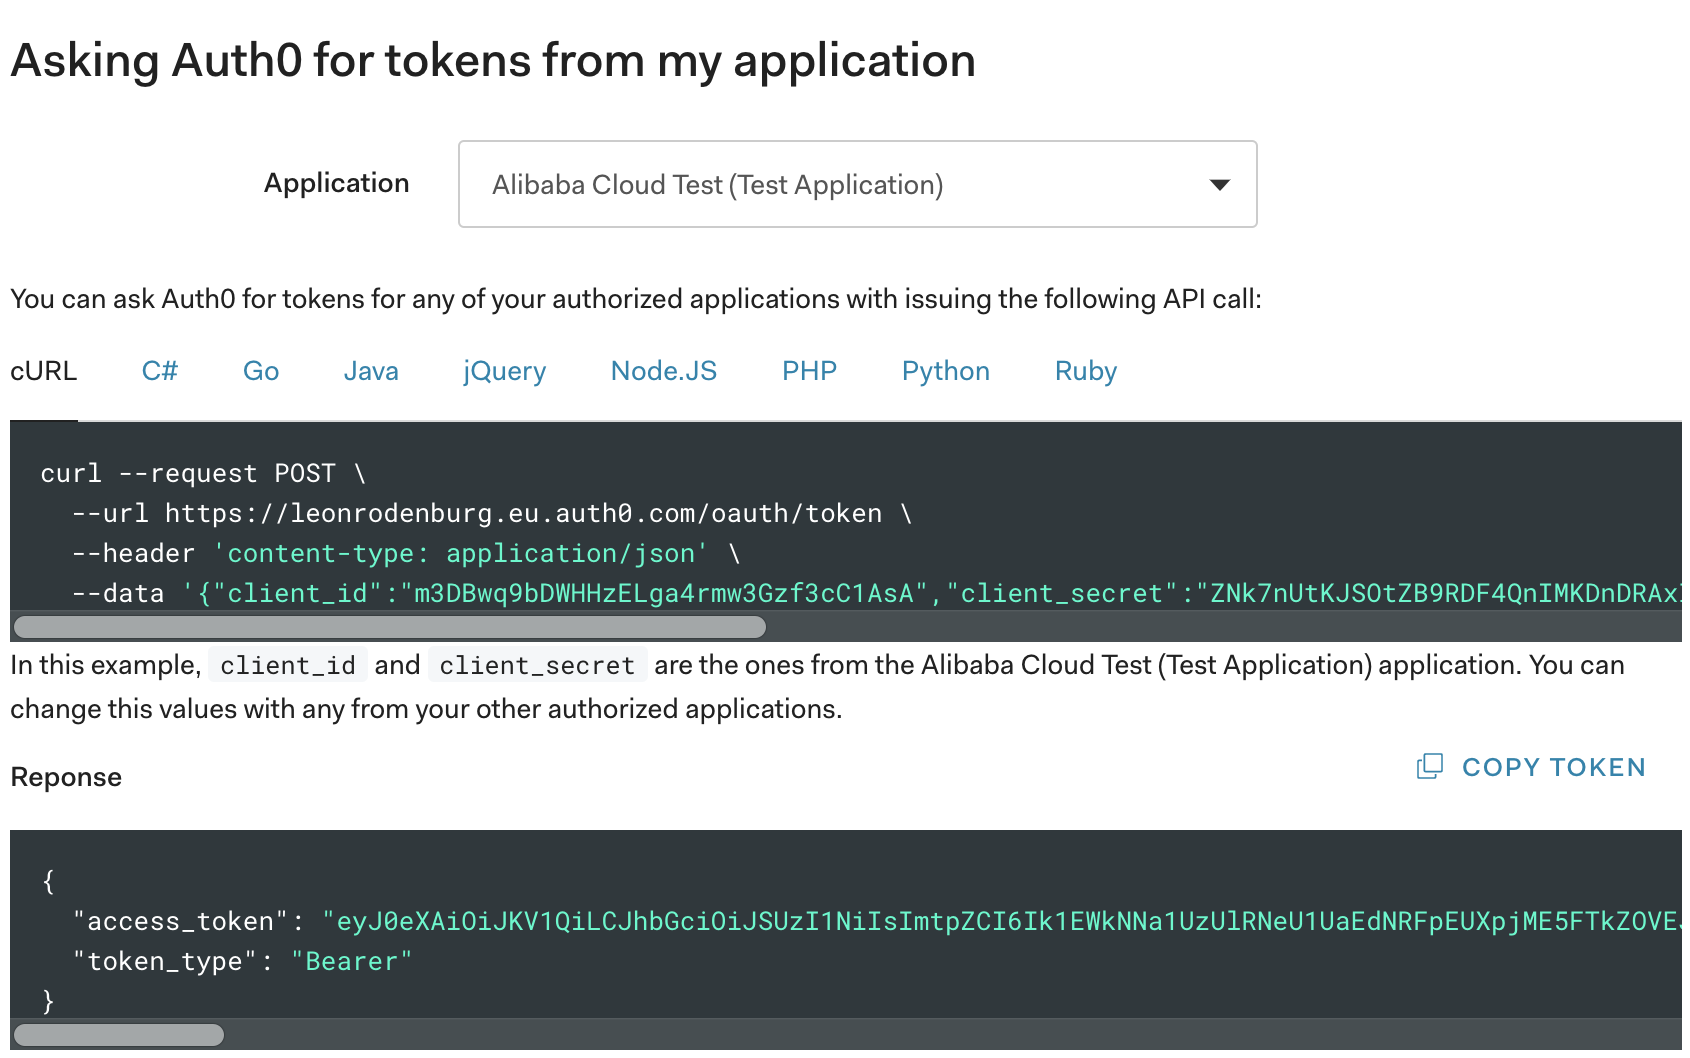
Now that everything is configured correctly, we can check to see if the setup has worked. Although we won't go into a lot of detail on how you can acquire a JWT from a client application with Auth0 (this is explained pretty well in their documentation), there is an easy way for us to get a token quickly. To get it, log into the Auth0 dashboard and go to APIs. Then, click the API you created a few steps before. Below the title, you should see several tabs, one of which is called Test. Click this tab to get a token.
On the Test page, there is an example request and response for getting a token. The response should already be shown with an access_token and a token_type. Copy the access token by hand or click the Copy Token button to copy it. The access token is a Base64 encoded JWT. If you are interested, you could try finding out what is in it using the great online tool jwt.io. For now, keep the page open so you can grab the token in a second.

Now, find the URL of the API you want to hit. This is built up from the URL of the API Group plus the request path of the API. First go to the API Gateway dashboard and click API Groups. Click the group your API was deployed in and copy the Internet Subdomain. This is the base URL of your API.

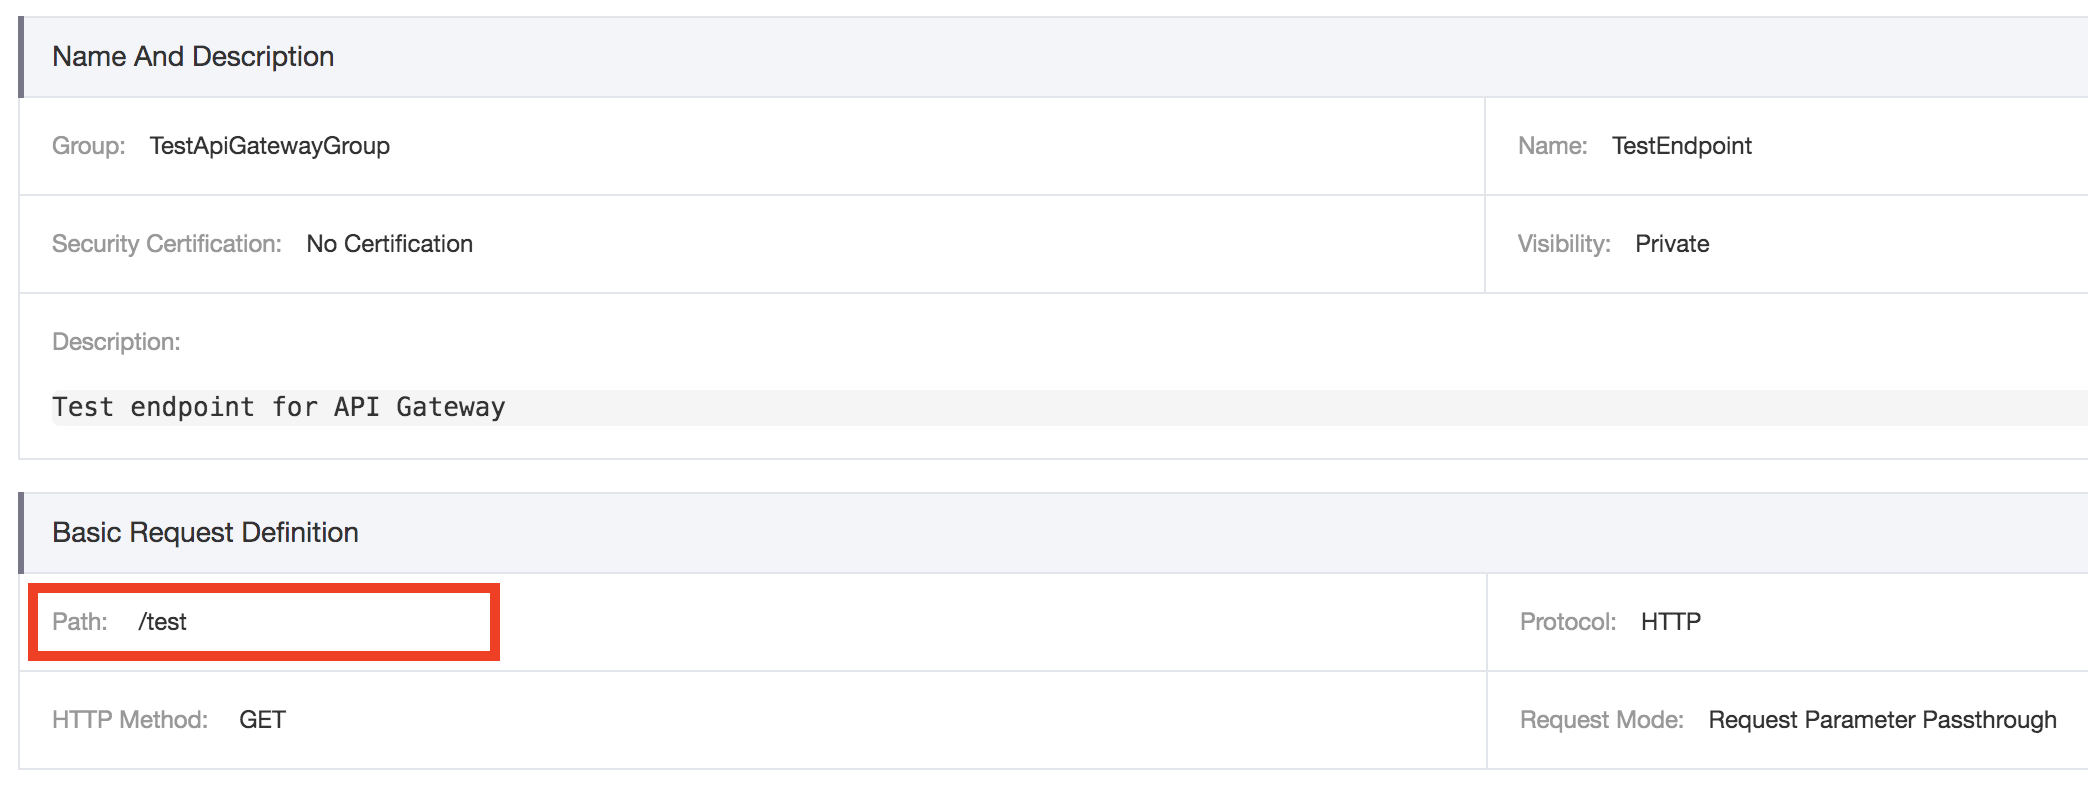
Next, go to the APIs page and select the specific endpoint you want to hit. Under the Basic Request Definition you should see the path. In this case, the path is /test.

To get the final URL, combine the Internet Subdomain and the request path into a single string. Assuming you have configured the HTTP protocol, the final URL for this example would be http://bce6a957fc6d417b85b37847b5db3147-eu-central-1.alicloudapi.com/test.
Open a terminal and paste in the following command, replacing <URL> with the final URL you just combined and <TOKEN> with the access_token property value you grabbed earlier:
curl -v -H Authorization:"<TOKEN>" <URL>
If everything worked, you should get the expected output from your backend! Now remove the Authorization header and try again:
curl -v <URL>
You should get a 400 Bad Request response with an X-Ca-Error-Message header that says Missing JWT Parameters. As an exercise, you can try what happens if you put in an invalid token (modifying the Base64 encoded string by changing a few digits) or using an invalid token (for example, one that has expired).
And we're done! As a small recap, let's reiterate on what we've done. We have set up an Auth0 account and configured an API in the Auth0 dashboard. Then we used an API Gateway plugin that can verify JWT tokens and bound it to our API. The plugin configuration specifies where API Gateway can find the token parameter, so we made sure our API expects an Authorization header. Finally, we tested the setup by calling the API with a token provided by the Auth0 dashboard. In a real application, the frontend application would call Auth0 for a token and provide that to the backend.
A next step would be to update your backend to also parse the JWT. One of the more important fields in the JWT is the sub (subject) field, that contains the username of the user that has logged in through Auth0. You could use that to only return the data from that specific user in your API responses. There are many libraries out there that will parse JWTs for you and verify their signature. Using the configuration discussed in this article, you can build a pretty robust API on Alibaba Cloud while all the hard parts of security are already done for you!
Decoupling Application Components Using Alibaba Cloud Message Notification Service

2,605 posts | 747 followers
FollowAlibaba Clouder - August 16, 2019
Xi Ning Wang - August 30, 2018
Alibaba Clouder - September 10, 2020
Xi Ning Wang - August 17, 2018
Alibaba Clouder - November 3, 2020
Alibaba Clouder - July 28, 2020

2,605 posts | 747 followers
Follow ECS(Elastic Compute Service)
Elastic and secure virtual cloud servers to cater all your cloud hosting needs.
Learn More API Gateway
API Gateway provides you with high-performance and high-availability API hosting services to deploy and release your APIs on Alibaba Cloud products.
Learn More Function Compute
Alibaba Cloud Function Compute is a fully-managed event-driven compute service. It allows you to focus on writing and uploading code without the need to manage infrastructure such as servers.
Learn MoreMore Posts by Alibaba Clouder
RICKY11 September 26, 2020 at 3:40 am
Is the plugin for jwt not mentioned here? is it the same way to add jwt ?