By Tonino Jankov
Alibaba Cloud is a provider that is gaining significant visibility as of late. One of the main products it offers is ECS (Elastic Compute Service) or, to put it into simpler terms, a flexible, cloud-based VPS. Those acquainted with the market of cloud computing products will notice similarities with competitor products – and they'd be right. Upon testing the Alibaba Cloud's ECS, we can say it is a strong competitor to other cloud vendors in the cloud computing space.
In fact, if we judge by the diversity of products Alibaba Cloud has in its offering, we could perhaps say they are already there.
For this article, we took the practical task of moving a fully-fledged, production e-commerce website to an Alibaba Cloud ECS instance (we used an actual live website running on another domain, and moved it to a test domain).
The installation we used was a WooCommerce website with hundreds of products, users, and significant disk space usage.
Once we register with Alibaba Cloud, we are offered US$300 worth in Free Trial to try out its products (once you confirm our payment methods, such as a credit card, or PayPal account). These funds can go toward deploying and testing an ECS instance.
After logging in, we navigate to our management console, select Elastic Compute Service in the menu on the left, and then Instances. Once we click this link, we are presented with a button on the right to Create Instance.
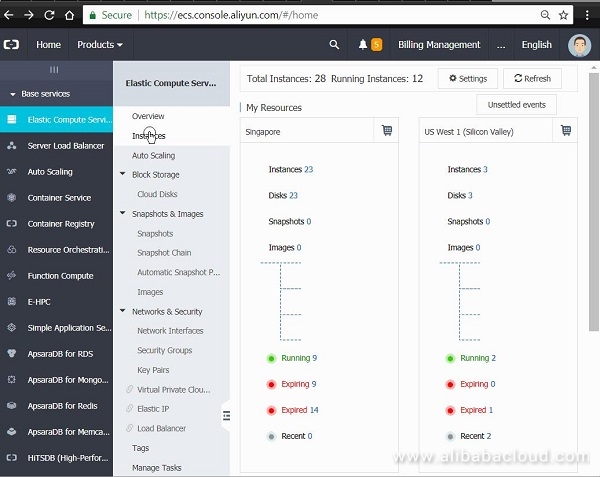
We are then presented with options we can choose for the instance – Billing Method, Region – meaning the location of our server – and Instance Type. We can select from several architectures (we went with x86 Architecture) and categories such as General Purpose, Compute Optimized, Memory Optimized, High Clock Speed and other types.
We can then select one of the offered server sizes – by memory size, virtual core count, clock speed, and so on.
Below this, we can select one of the offered images – there are a number of operating systems we can choose, including Alibaba Cloud's own Aliyun Linux, CentOS, Ubuntu, Windows Server, and others. Among Marketplace Images, there is a large selection of preconfigured application images we can select.
Here we are selecting the Plesk free image, since it offers us a number of convenient ways to manage our server – domain management, database management, and WordPress application management – all in one web interface.

If we have a Plesk license obtained separately, or we want to pay more, we can get premium version of Plesk with even more features that make professional server management a lot simpler.
Another convenience of Plesk instances is that they have been hardened and secured with configured firewall rules. It also comes with phpMyAdmin preinstalled. This is great because, considering that we are using a LEMP server stack, installing and configuring phpMyAdmin can take some work.
We then select storage – SSD disk is the recommended option, with up to 500GB in size.
We can then select networking options – here we will probably be okay if we go with the default preselected options. We can also configure security groups – a useful thing if we have more than one server instance.
Now we come to SSH access configuration. Here we can configure our SSH keys for password-less access, which is generally recommended. However, since we are doing a migration, we will configure password access, so we don't have to copy public SSH keys from the server we are migrating from.
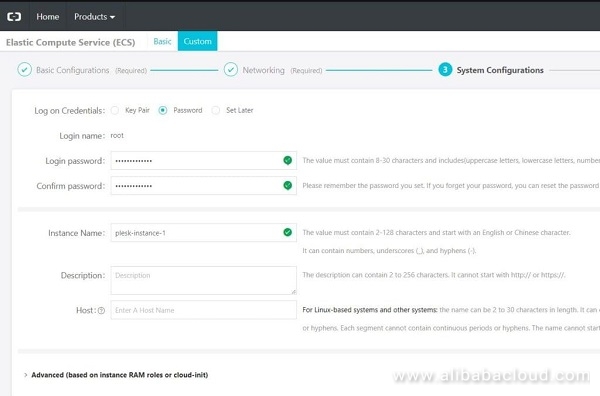
We should take a note of the password we created here. If we forget the password, we can reset it in the ECS console.
After we complete our order, we can go back to the web console and wait for a minute or two till our instance is created. Once the instance is running, we can connect to the system shell through a VNC session in our browser. Once we do this, our instance spits out further instructions in the shell:
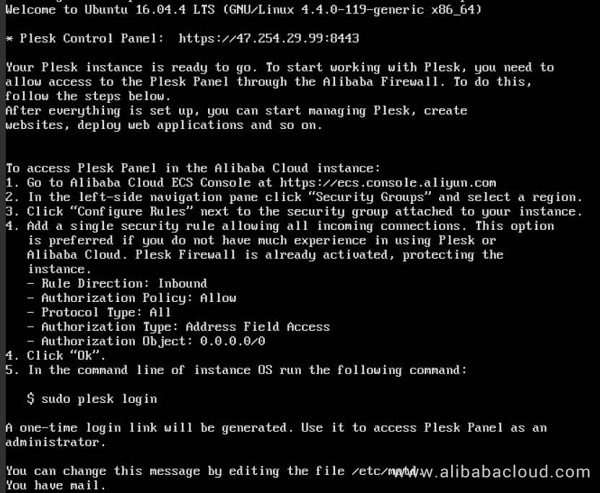
We need to create a security rule which will open the ports we need, and enable us to access our instance. Once we have done this, we can connect to our instance via SSH shell (or continue our VNC session), and generate our Plesk admin account:
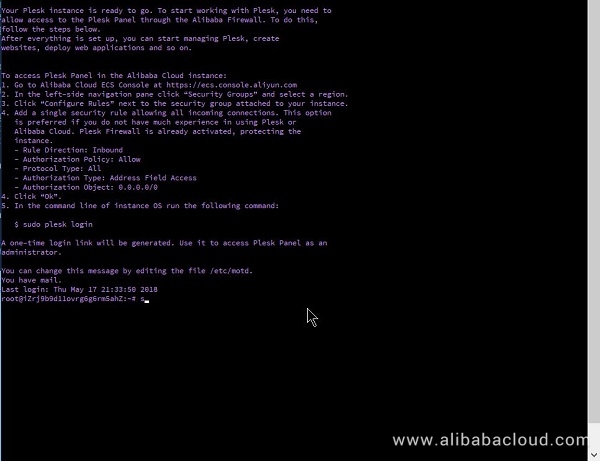
We will copy the second URL which will allow us web access to the Plesk admin.
Once we visit this URL in our browser, we will create our account:
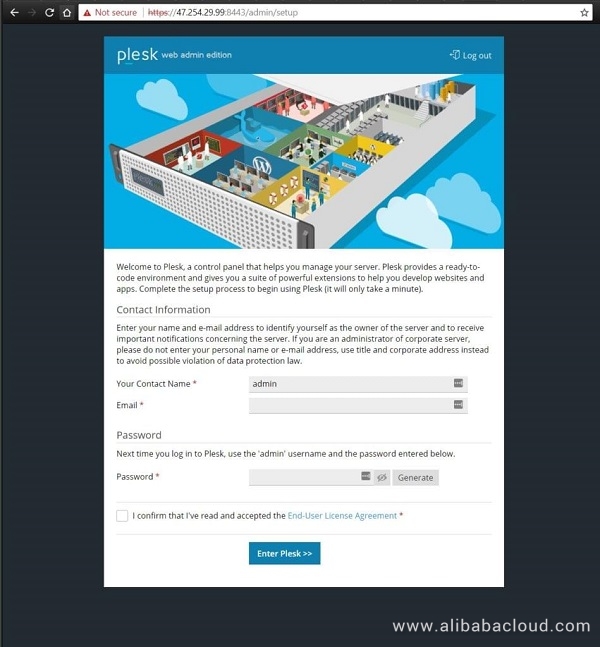
We presume here that we have a domain, and we have pointed our domain – or subdomain – to our instance's public IP address. If not, we are shown our IP once we are logged into Plesk admin console. Once we have pointed our domain to this IP, we can create a Webspace – basically a virtual host for our website. We would otherwise need to manually configure nginx for this, but with Plesk, we have the convenience of doing this the easy way.
We can also secure the domain with a Let's Encrypt certificate. Again, we would otherwise do this manually, installing certbot and creating a certificate for our virtual host / website. Here, it is just a checkbox we need to check.
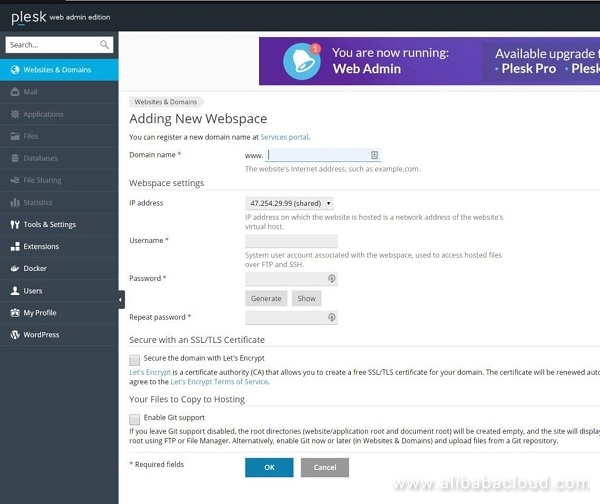
In this guide we needed to preserve the integrity of our existing WordPress and WooCommerce installation, and to avoid conflicts, we cloned an entire WordPress directory to our created website / domain root. But for the purposes of new installations, Plesk offers one click deployment of WordPress – along with dozens of other applications, such as OpenCart, Magento, Prestashop, Drupal, Typo3 and others.
The convenience of using the Plesk interface is that we will be able to manage our entire stack from a unified web interface, from managing our server configuration, editing our php.ini file, to installing and updating our WordPress and plugins.
If we migrated our website through SSH / rsync like we did, we will need to click the scan button for Plesk to detect our website.
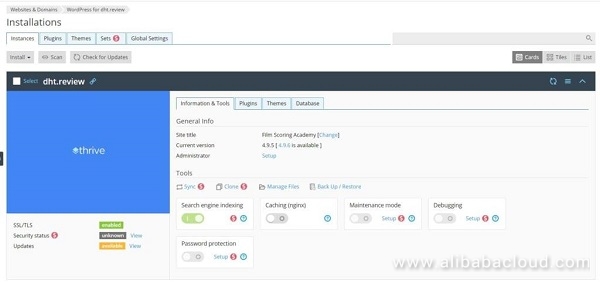
From the Plesk interface, we can also turn on nginx caching, and backup and restore our website. There are more options available for paying users of Plesk (we can easily upgrade our license), and it will make website management a lot easier.
But to reach this stage, we will first clone our website to the new instance.
To migrate our existing eCommerce store, we will log in to our existing server, through SSH, and create a database dump:
mysqldump -u ourusername -p ourdatabasename > ourdatabase.file.sqlThe query above (with, obviously, our own specific database name and desired file name) will leave us with our website database file, which we will transfer to our new server instance with scp:
scp ./ourdatabase.file.sql root@ourdomainname:/var/www Here, with our domain or new server IP in place of ourdomainname, we will enter our new server password and transfer the database.
We will transfer our entire website folder (presumably under /var/www/ on our old server – or in one of the subfolders) to our new server:
rsync -avzh /var/www/our-website-folder/ root@ourdomainname:/var/www/vhosts/ourdomainname/httpdocsWe will interchange ourdomainname above with the domain name that we assigned to our website in Plesk interface. The path /var/www/our-website-folder/ presumes that our website folder with some name is under /var/www, on our old server, and Plesk will, typically, place our new website root into /var/www/vhosts/ourdomainname/httpdocs.
One thing to pay attention to using rsync is the slash after our source folder path – here /var/www/our-website-folder/. If we omit the slash, rsync will copy the entire folder into our new folder. If we use the slash at the end, it will copy our source folder contents. So that is one thing to keep note of.
Provided that this copying went okay, we now have our file system in place. We need to create our database, and import the contents from the database dump file we transferred to /var/www.
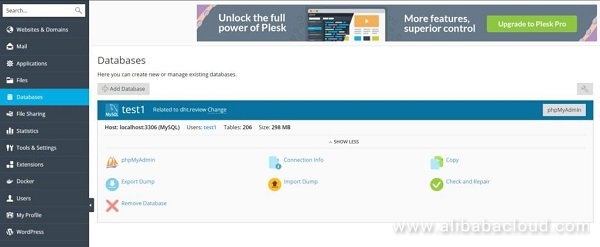
In our database section, we can easily add databases, and export and import them. In our migration case, we will import our dump through the shell, because our production website has a database as large as couple of hundreds of megabytes. For smaller databases, we can import them easily through the web interface.
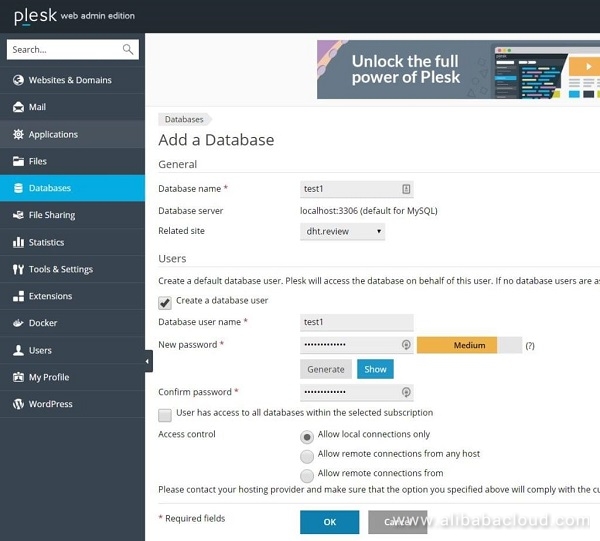
Once this is done, we will import our file through the shell:
mysql -u test1 -p test1 < /var/www/ourdatabase.file.sqlNow mysql will prompt us for the password we created, and upon entering it, it will import our database file to our new database.
We now have our website root folder migrated, our virtual host and domain are fully configured, our SSL certificate is set up and active, and we have created a database and imported our database dump file into it. Now we need to configure our new website to use the new database.
We presume that our new website is in /var/www/vhosts/ourdomainname/httpdocs – Plesk's default setup. We will switch to that folder and edit the wp-config.php file to enter the database details. This is all we need to do. Our website should be available under our domain that we directed to our new instance.
In the case that we migrated our website to another domain than the one it had on the old server, or to a subdomain – which is a standard practice until we make sure that our migrated website is functioning properly – we will need to conduct a search-replace procedure to replace our old URLs in the database for our new URLs / domains.
For the website to function properly, the URLs in the database need to be consistent with the website URLs.
Now, we can't conduct this directly on the database file like it was any other textual file, because URLs in a WordPress database are saved in serialized format, and if conducted directly, our database will be broken.
So we need a tool. The fastest tool here is WP-CLI – installing it is a bit out of scope of this article, but the instructions here are rather simple and straightforward, so you shouldn't experience problems with this.
Once WP-CLI is installed, we can simply use wp search-replace //olddomain //newdomain --allow-root, and WP CLI will change all instances of the given URL (in our case, it was tens of thousands).
If we experience any issues with our new installation, we will also want to flush the cache using wp cache flush --allow-root. We'll also need to delete transients or flush the rewrite rules.
All these commands presume we are in our website root directory with our shell (/var/www/vhosts/ourdomainname/httpdoc). In case WP-CLI complains about memory, we will want to change the memory_limit value in php.ini – WP-CLI uses the cli php.ini file, found in this case in /etc/php/7.0/cli.
If you're starting a website from scratch, Alibaba Cloud's Plesk image will make things really simple – we will be able to pull multiple online websites, and perform advanced configurations in only a couple of clicks. One interface lends itself to a fast and simple workflow. Premium licenses are here to give us features suitable for web hosts, with client accounts.
This, together with the flexibility of Alibaba Cloud ECS instances, allows us to scale our stack up or down as needed, making it a solid choice for web professionals.
Source: https://www.sitepoint.com/how-to-migrate-woocommerce-to-alibaba-cloud-ecs-with-lets-encrypt/

2,593 posts | 791 followers
FollowAlibaba Clouder - August 31, 2018
Alibaba Clouder - February 10, 2020
Alibaba Clouder - August 14, 2019
Alibaba Cloud Community - August 26, 2025
Alibaba Clouder - July 5, 2019
Alibaba Clouder - July 2, 2019

2,593 posts | 791 followers
Follow ECS(Elastic Compute Service)
Elastic and secure virtual cloud servers to cater all your cloud hosting needs.
Learn More OSS(Object Storage Service)
An encrypted and secure cloud storage service which stores, processes and accesses massive amounts of data from anywhere in the world
Learn MoreLearn More
More Posts by Alibaba Clouder
5660337002755929 April 18, 2019 at 11:43 am
Thanks a lot for the detailed explanation. I am looking forward to moving my website https://woogang.net to Alibaba Cloud soon..!!