By Evan Wong, Solutions Architect
Before going through the step-by-step guides, the user should have the following prerequisites:
This tutorial uses a number of third party resources including the sample application source codes. Special thanks to Satya Depareddy for the application source codes on GitHub -
https://github.com/depareddy/java-webapp-docker
This document provides a fundamental DevOps best practices guide on Alibaba Cloud. In this guide, you will understand the best practices on how to implement the continuous integration and continuous deployment (CI/CD) on using the cloud services on Alibaba Cloud.
This document describes the practical approach of implementing the lifecycle of CI/CD for a real-world scenario. The software industry is rapidly seeing the value of using containers as a way to facilitate development, deployment, and environment orchestration for application developers. That's because containers effectively manage environmental differences, allow for improved scalability, and provide predictability that supports Continuous Delivery (CD) of new features. In addition to the technical advantages, containers have been shown to dramatically reduce the cost model of complex environments.
Large-scale and highly-elastic applications that are built in containers definitely have their benefits, but managing the environment can be daunting. This is where an orchestration tool like Kubernetes really shines.
Alibaba Cloud Container Service is based on Kubernetes, which is a platform-agnostic container orchestration tool created by Google and heavily supported by the open source community as a project of the Cloud Native Computing Foundation (CNCF). Alibaba Cloud is a platinum member of the CNCF. Alibaba Cloud Container Service allows you to spin up the number of container instances and manage them for scaling and fault tolerance. It also handles a wide range of management activities that would otherwise require separate solutions or custom code, including request routing, container discovery, health checks, and rolling updates.
Alibaba Cloud Container Service is compatible with the majority of CI/CD tools which allows developers run tests, deploy builds in Kubernetes and update applications with no downtime. While Alibaba Cloud Container Service does work with other open source tools, it comes with CI and CD automation capabilities.
The first article of this series focuses on configuring CI/CD pipelines using Alibaba Cloud Container Service and Container Registry automation features.
A financial institution that have deployed a customer facing website portal that allows investor to view their portfolio, invest new fund, purchase additional funds, view the funds' performance and statistics. At the moment, the customer is using the ECS, SLB and Auto Scaling to host their application workloads. The customer is using traditional way to do deployment, once the developer changes the source code from the source code repository, it would continue for unit testing. After successful testing, the developer would manually package it into customer image and store it on the Cloud. Then, it would be used to create ECS based on the image.
In the real world scenario, application tends to change often, in this case the customer almost change the sources daily. The application team also require to test and release as quick as possible. Traditionally, it would require the hassle of going through the cycle of change, test and redeploy application to the application servers and if things failed, they will require tedious way to roll it back to the previous version. The developers are already doing some research and development on Docker container. In this case, this guide provides the steps in continuing the CI/CD earlier but this time the application is package into Docker container and deploy to the Alibaba Cloud Container service that is based on Kubernetes technology. The ability of switch multiple version of application that is running on the container service is very seamless and useful for the developer.
Let's take a closer look into the tutorial. In this tutorial, we will be using Alibaba Cloud Container Service and Container Registry.
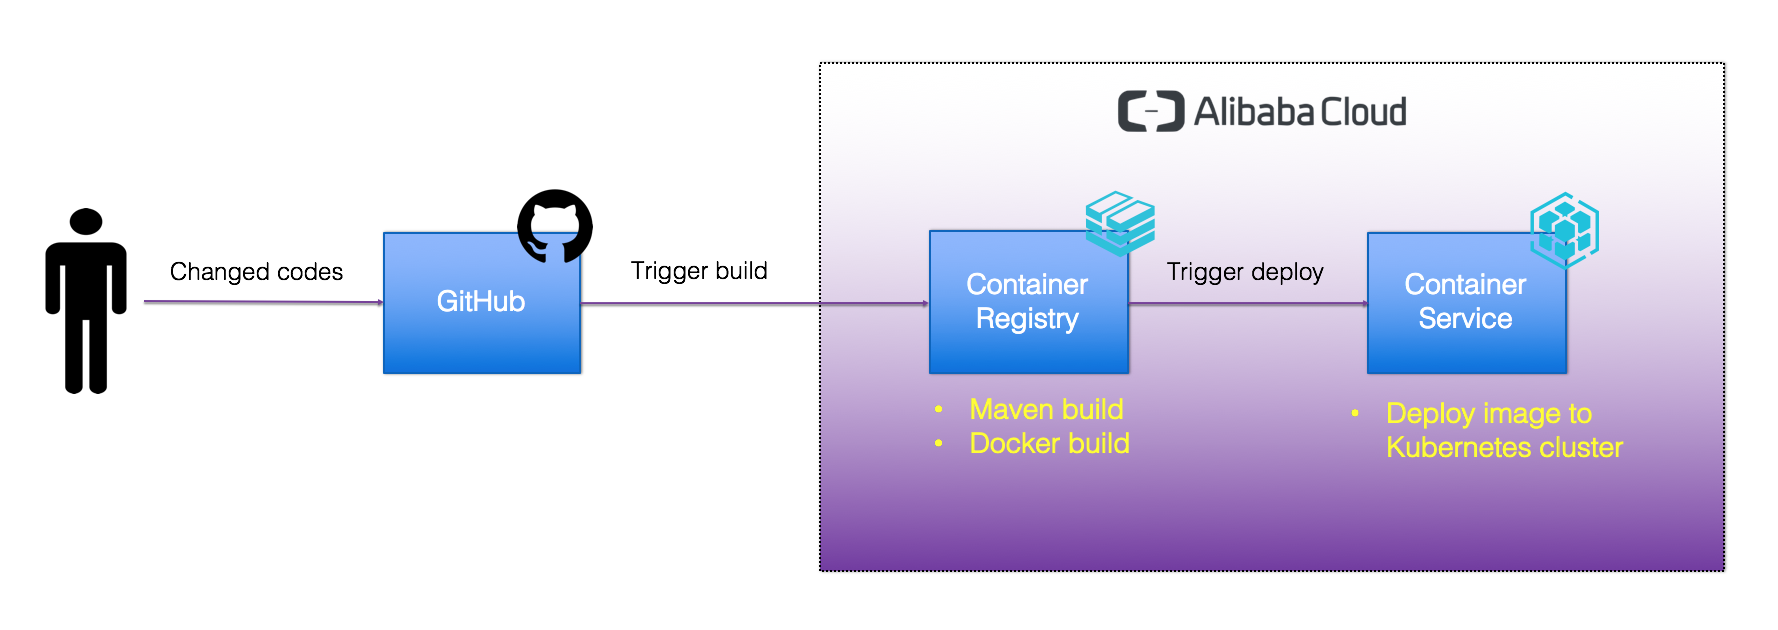
Architecture Diagram
CI/CD process generally follows the following scheme:
In this section, you would be creating a new server to act as a development/CI server. You would be installing docker on the server, clone a sample application to the server. After that, you would run docker build and package it into a container. At last, you will be running the application on the server.
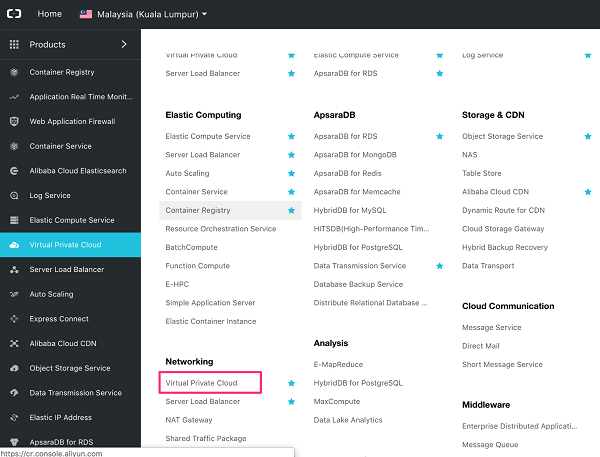
On the home menu, go to Products -> Networking -> Virtual Private Cloud
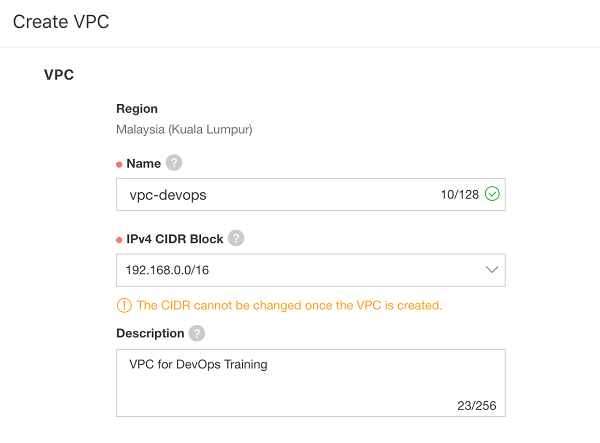
Enter the name of the VPC, for e.g. vpc-devops and the description.
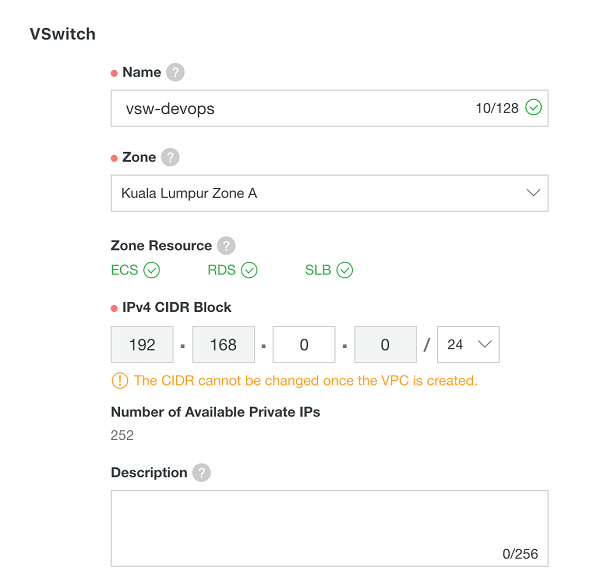
Then, enter the VSwitch details. Key in vswitch-devops for the name, use the default CIDR block and click submit button.
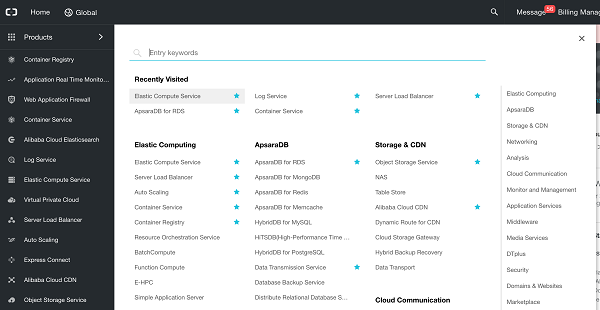
Go to the Home -> Products -> Elastic Computing -> Elastic Compute Service
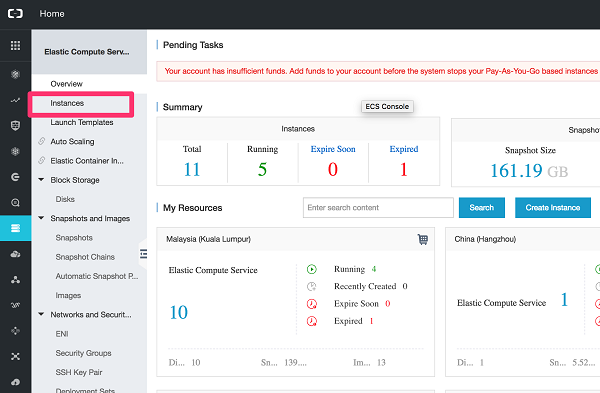
On the ECS landing page, click on the Instances menu on the left.
Once on the instances page, click on the "Create Instance" button.

Choose the Pay-As-You-Go for billing method. Region of your choice. For server specification, it is recommended to use 2 vCPU and 4GB RAM.
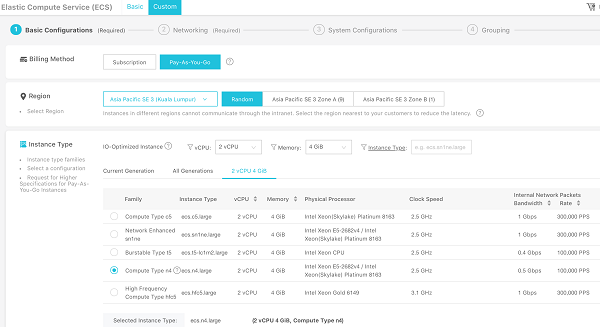
Choose the CentOS as the public image and use default 40GB as storage. Click Next: Networking.
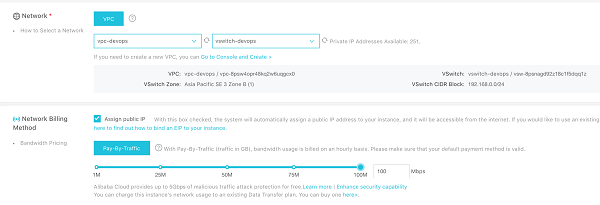
On the networking page, select the VPC: "vpc-devops" and VSwitch: "vswitch-devops" that was created in the earlier section. In a real world scenario, it is recommended to not assign public IP for ECS, instead only allow access through SLB, jump host or SSL-VPN. For this lab purpose, we will be ssh directly into the host. Check on the assign public IP checkbox. Choose the maximum bandwidth.
On the security group section, use the default security group. If it is not available, you can create a new security group by clicking on the "Create Security Group".

On the security groups page, click on the Create Security Group button.

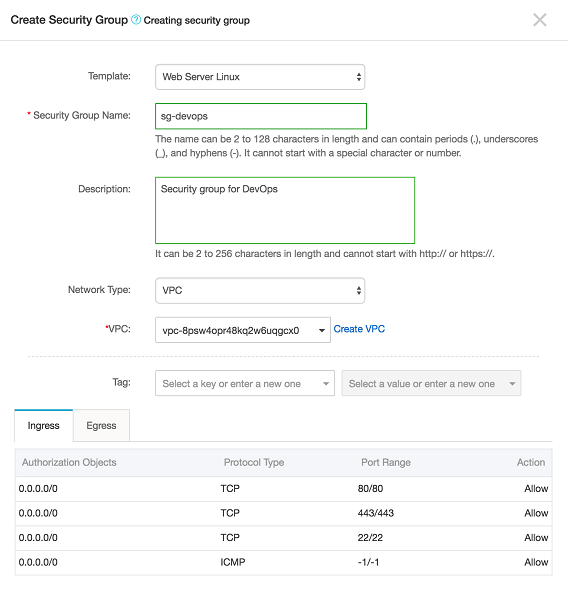
Choose Web Server Linux as the template, give a name and description for the security group. Choose VPC as network type, choose the VPC created earlier. Leave the default rules for ingress and egress.
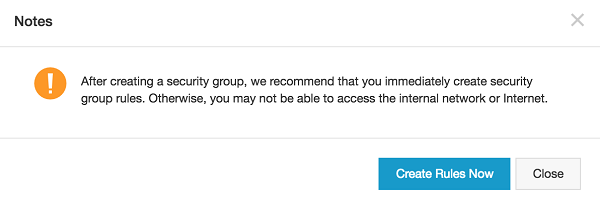
Ignore the prompt if you encounter this to requests to add new rules, as the default port for ssh 22 is already added.
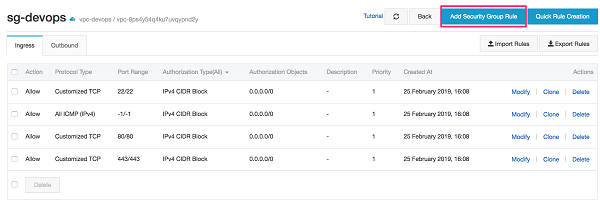
Click on the Add Security Group Rule.
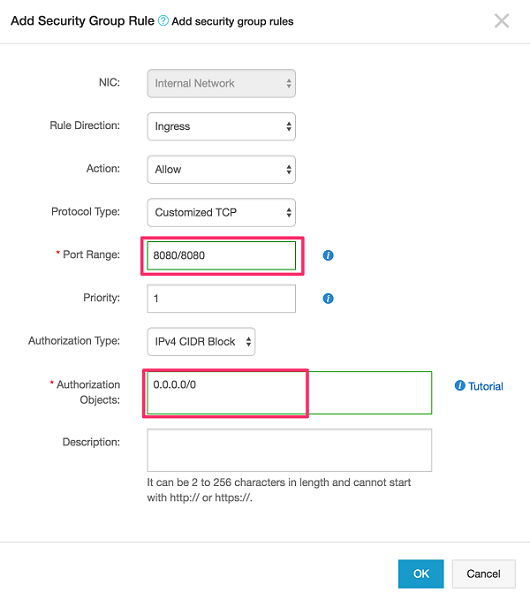
On the pop-up screen, key in 8080/8080 for the Port Range and 0.0.0.0/0 for the Authorization Objects. Click OK.
The security group show now have the following rules.
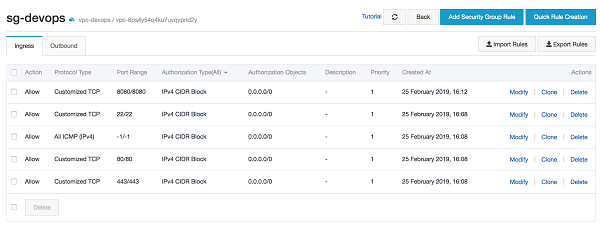
Go back to the ECS->Networking screen, choose the security group that was created earlier.

Click on the Next: System Configurations button.
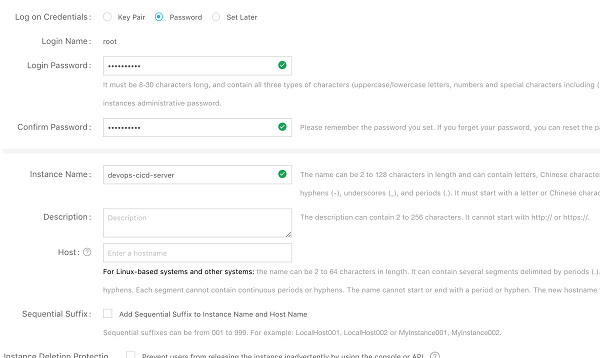
Choose Password on Logon Credentials, enter the password for the root user name. Give a name for the ECS server and click preview.
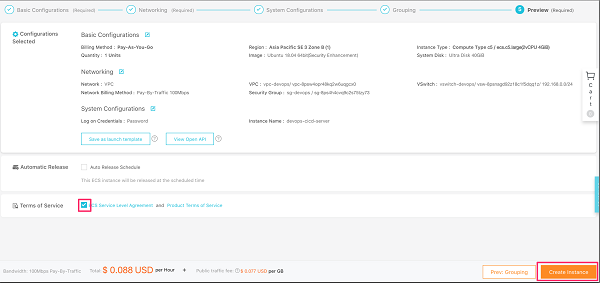
On the preview page, once the information is correct, check on the Terms of Service checkbox and click on Create Instance.
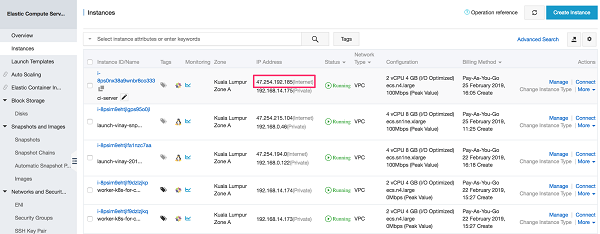
Once the ECS is created, on the landing page, observe the new ECS being created. After the ECS is successfully created, there would be a public internet IP address associated. Take down this IP address to be used for the later exercises.
Logon to the CI server that was created in the earlier lab. On the PC or laptop, open a terminal or command prompt or Putty. To logon to the ECS, use ssh command.
$ ssh root@x.x.x.xOn the password, use the password that was entered on the root during ECS setup earlier. After successful login, you should see the screen below.

Older versions of Docker were called docker or docker-engine. If these are installed, uninstall them, along with associated dependencies.
$ sudo yum remove docker docker-common docker-selinux docker-engineIt's OK if yum reports that none of these packages are installed.
The contents of /var/lib/docker/, including images, containers, volumes, and networks, are preserved. The Docker CE package is now called docker-ce.
Install required packages. yum-utils provides the yum-config-manager utility, and device-mapper-persistent-data and lvm2 are required by the devicemapper storage driver.
$ sudo yum install -y yum-utils device-mapper-persistent-data lvm2Use the following command to set up the stable repository. You always need the stable repository, even if you want to install builds from the edge or test repositories as well.
$ sudo yum-config-manager --add-repo https://download.docker.com/linux/centos/docker-ce.repoInstall the latest version of Docker CE, or go to the next step to install a specific version.
$ sudo yum install docker-ce -yWarning: If you have multiple Docker repositories enabled, installing or updating without specifying a version in the yum install or yum update command will always install the highest possible version, which may not be appropriate for your stability needs.
If this is the first time you are installing a package from a recently added repository, you will be prompted to accept the GPG key, and the key's fingerprint will be shown. Verify that the fingerprint is correct, and if so, accept the key. The fingerprint should match 060A 61C5 1B55 8A7F 742B 77AA C52F EB6B 621E 9F35.
Docker is installed but not started. The docker group is created, but no users are added to the group.
Start Docker.
$ sudo systemctl start dockerVerify that docker is installed correctly by running the hello-world image.
$ sudo docker run hello-worldThis command downloads a test image and runs it in a container. When the container runs, it prints an informational message and exits.
Docker CE is installed and running. You need to use sudo to run Docker commands. Continue to Linux postinstall to allow non-privileged users to run Docker commands and for other optional configuration steps.
Install the latest version of git.
$ sudo yum install git -yNext, you would need to clone the codes to the local computer.
$ git clone https://github.com/echoesian/java-webapp-docker
To build the docker, first change to the directory of the source codes that have cloned locally.
$ cd java-webapp-dockerType the below command to build the docker image:
$ docker build -t simplewebapp .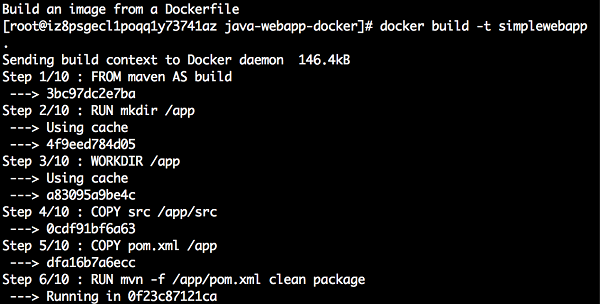
Verify if the docker image is built successfully.
$ docker images
Before the docker being pushed to the Kubernetest, let's try to run it locally to make sure everything is running properly.
$ docker run -p 8080:8080 simplewebappOpen your browser and enter the URL of the web application, for e.g. if the CI server IP address is 47.254.192.185: http://47.254.192.185:8080/simplewebapp/
The response should be as below:

If you do not have a GitHub account, go to www.github.com and sign up for a new account. Fill in the username, email and password. Then, after verification, choose the Free account.
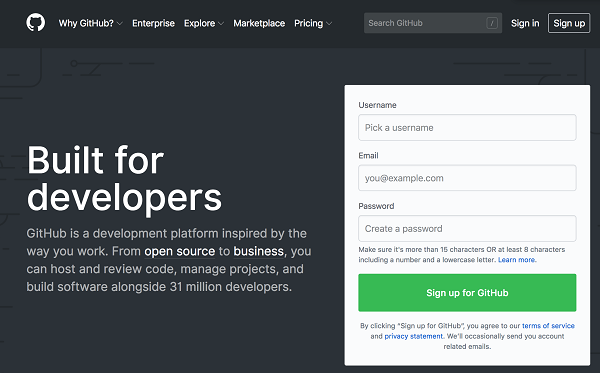
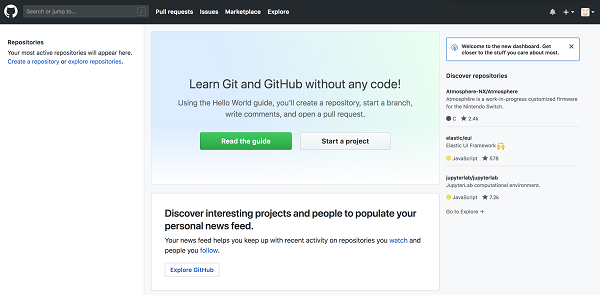
After registration is completed, it shall bring you the main landing page.
In this lab, we are using GitHub as the source code repository. First, you would need to fork the source codes from existing Git repository: https://github.com/echoesian/java-webapp-docker. To do this, login into your own GitHub and navigate to this repository https://github.com/echoesian/java-webapp-docker. Click on the Fork on the top right hand corner on the screen.
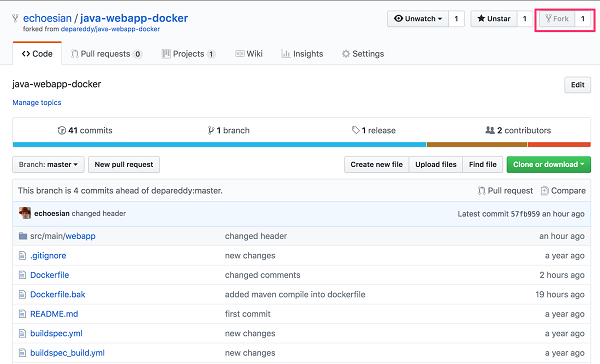
After forking successful, you should have the source codes in your own repository.
Go to the Alibaba Cloud console, click Home in the upper left corner of the page, and select Container Registry.
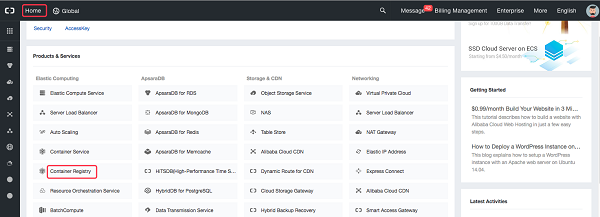
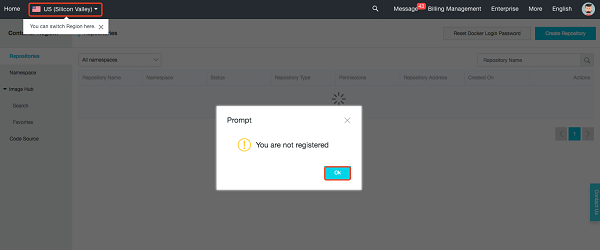
The prompt shown in the following figure appears upon your first logon. Select Malaysia (Kuala Lumpur) or any other region of your choice in the upper left corner and click OK.
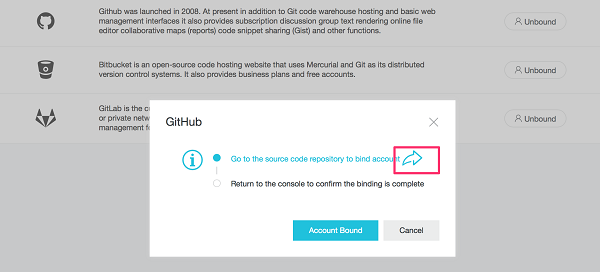
Go to Code Source and click Bind Account

On the pop-up dialog, click on the right arrow. It will open a new link to sign in to the GitHub account.
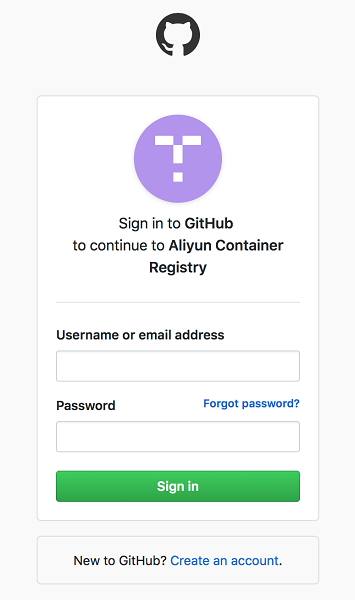
On the GitHub sign-in page, input the login details and click Sign In.
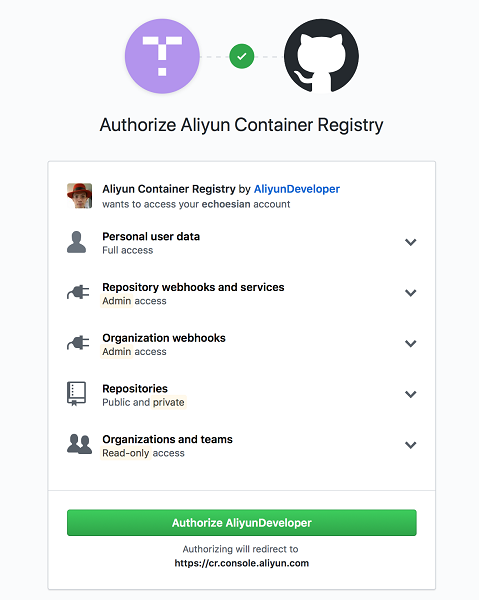
On the Authorization page, click on "Authorize Aliyun Developer"
Once it is authorized, you should receive a notification email. Go back to the Container Registry page. Click on the Account Bound button.
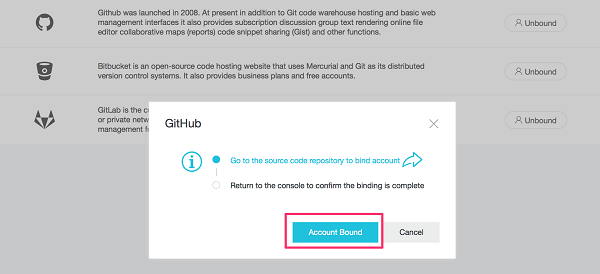
By now, it should show "Bound" on the GitHub code source section.

Go back to the Namespace page. On the default prompt, click OK.
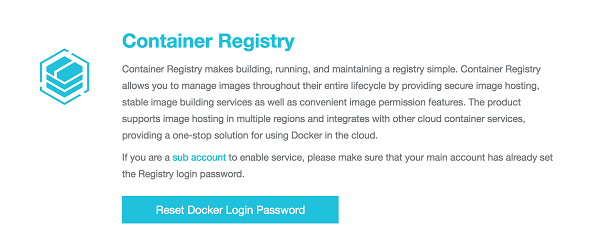
If it is the first time, click on the Reset Docker Login Password.
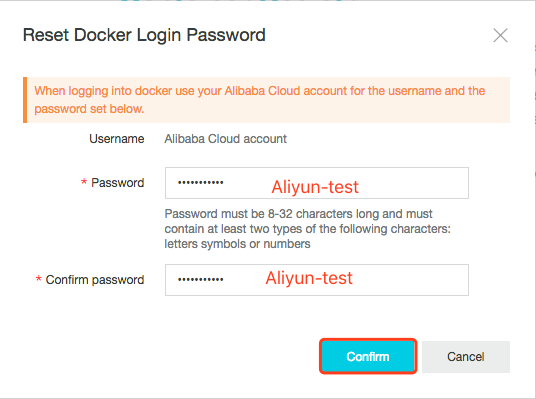
Set the Docker logon password to [Aliyun-test] or [your choice of password].
A namespace is a collection of repositories. We recommend that you group the repositories of a company or organization in one namespace.
Create a namespace according to the following figure. The new namespace cannot be the same as an existing one. If the namespace you entered already exists, enter another one.
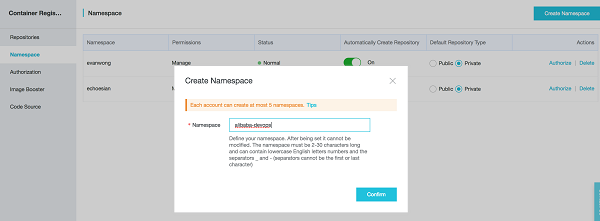
The following figure shows that the namespace has been created.

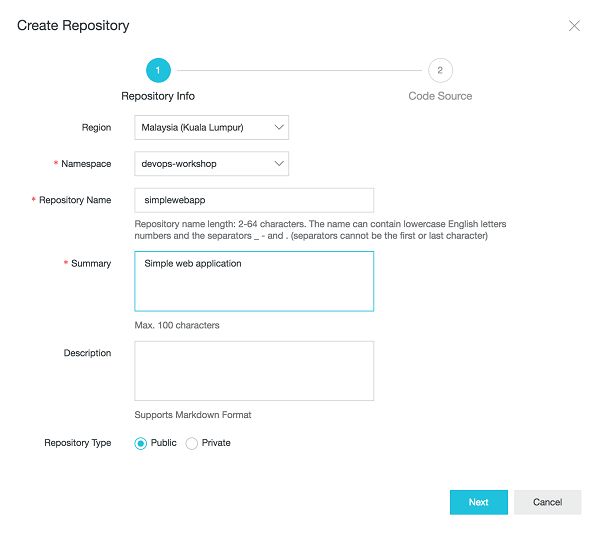
Create a repository according to the following figure. Set the region to Malaysia (Kuala Lumpur) or any other region of your choice.

Set parameters according to the following figure and click Next. Select the namespace you created earlier.
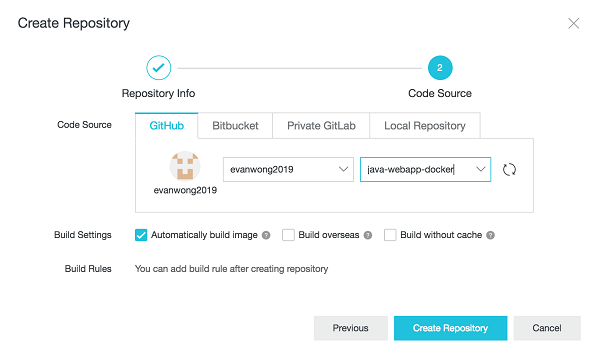
Select GitHub, input your account user name and project. Click Create Repository.
The following figure shows that the repository has been created.

Click Manage to open the repository.
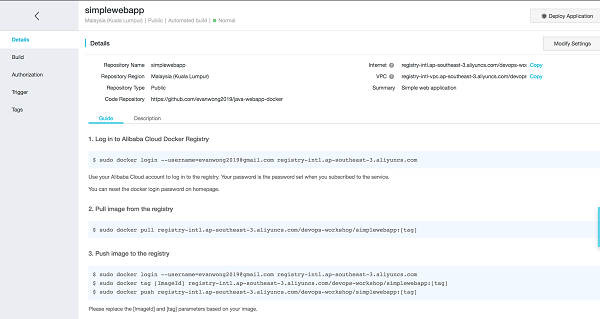
Detailed commands for pushing images to this repository are displayed.
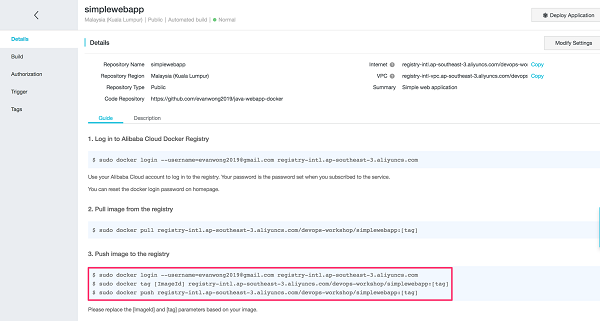
Copy the first command shown in the following figure to the ECS terminal and enter the repository logon password.

On the root directory, change to the directory of the source codes that have cloned locally.
$cd java-webapp-dockerOpen the dockerfile and review the file. Below is the dockerfile, which simply means:
# setup working directory
FROM maven AS build
RUN mkdir /app
WORKDIR /app

# maven build
COPY src /app/src
COPY pom.xml /app
RUN mvn -f /app/pom.xml clean package

# deploy to tomcat server
FROM tomcat
COPY --from=build app/target/simplewebapp.war /usr/local/tomcat/webapps
EXPOSE 8080
CMD ["catalina.sh", "run"]
Run the following command to obtain the ID of simplewebapp image:
docker images
Copy the second command shown in the following figure to the ECS terminal (replace [ImageId] with the actual one and set [tag] to v1).


Copy the third command shown in the following figure to the ECS terminal (set [tag] to v1).

The following figure shows that the image is being uploaded.

The following figure shows that the image has been uploaded.
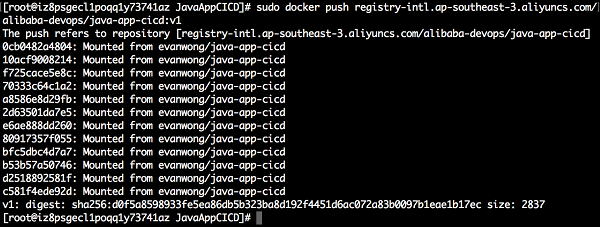
Go to the Alibaba Cloud console and select Tags. The uploaded image is displayed.

Go to the build section, enable the Automatically build image option.

For details about how to download the image in other environments, see the repository guide.
On the next part of the series, you will learn how to deploy this docker image to the Alibaba Cloud Container Service and also to apply the concept of the Kubernetes deployment strategies for the Continuous Deployment workflow.
Continuous Deployment Automation on Alibaba Cloud: CI/CD Automation on Container Service (2)

2,593 posts | 790 followers
FollowNeel_Shah - October 27, 2025
Alibaba Clouder - July 3, 2019
- September 5, 2017
Alibaba Clouder - March 5, 2019
Alibaba Clouder - March 5, 2019
Alibaba Container Service - July 24, 2024

2,593 posts | 790 followers
Follow Container Service for Kubernetes
Alibaba Cloud Container Service for Kubernetes is a fully managed cloud container management service that supports native Kubernetes and integrates with other Alibaba Cloud products.
Learn More Container Registry
A secure image hosting platform providing containerized image lifecycle management
Learn MoreMore Posts by Alibaba Clouder