Drupal is an open-source content management framework that helps developers from around the world build an archetypal digital user experience. It is managed via a dedicated community and provides backend framework for several websites. Drupal effectively runs PHP as well as a database while providing support to a web server to store content and configuration information.
This post describes how you can set up Drupal on an Alibaba Cloud ECS instance with the help of an Apache server.
Before we begin, we need to fulfill certain prerequisites for deployment. You need to have an Alibaba Cloud ECS instance installed with Linux (specifically Ubuntu 14.04). Also, you would need to allocate sudo privileges to a non-root user as a mandatory requirement. Plus, ensure that you have Apache, PHP, and MySQL configured on your instance, too.
Now, let's walk through each step of deploying Drupal on Alibaba Cloud ECS.
Please make sure you have the latest version of the LAMP stack installed before commencing the actual steps.
The first step is to launch the Alibaba Cloud ECS instance installed with Linux. You can follow the steps below to execute this application:
1. Login to your Alibaba Cloud ECS Management Console, where you will be redirected to the main dashboard.
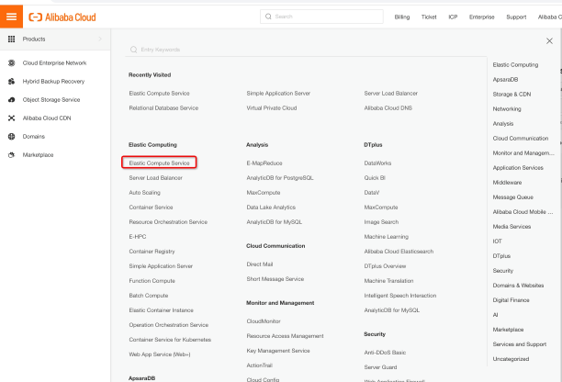
2. Click Elastic Compute Service under the Products & Services section. This will take you to the ECS overview dashboard. Upon reaching that page click Instances on the sidebar to be navigated to the Instances menu.
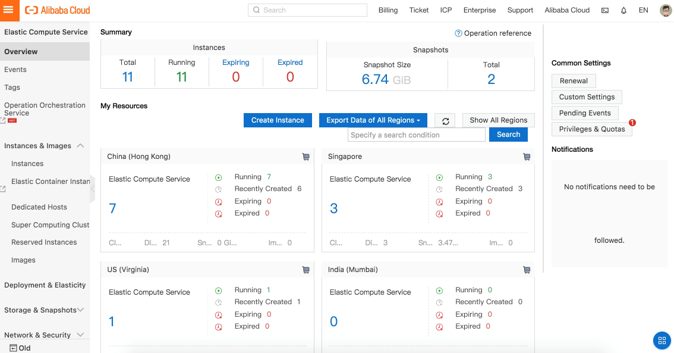
3. Create an instance. Thereafter, you can select a preferred payment mode that suits your requirements. You can choose from two packages: Quick Launch or Custom Launch. Make the appropriate selection for your data center region and Zone to launch your ECS instance. If you are unsure of your Zone, but you specify your data center region, then the instance will be placed in the default zone.

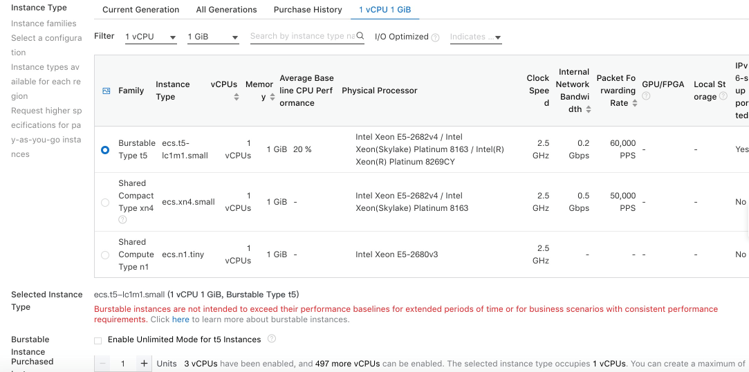
4. You will now have to select Generation under the Choose Instance Type section. Every generation type offers unique configuration and computing power. Select a Network Type from the options of Classic Network or VPC based on your requirements. Then, select a Network Billing type.

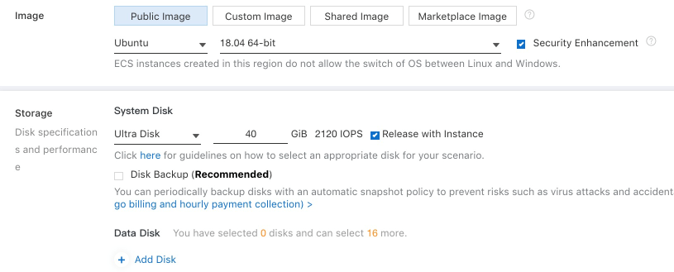
5. This will take you to the next page where you will have to opt for Ubuntu or any other Linux server by clicking one of the server thumbnails provided. Also, under the thumbnail, select a version for the server from the drop-down menu and pick the desired storage type from the various options.
6. You will next come to an option to set up your server's security by setting a password. However, you may choose to complete this task later on your console.

7. Review the details of your purchase configuration, and make changes if needed. Click Activate to confirm and launch your server.
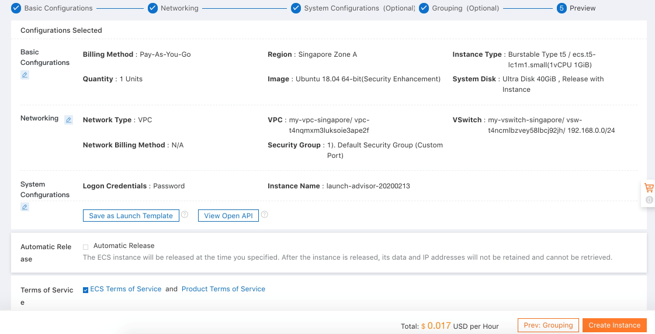
8. You will see your instances in the Instances section.
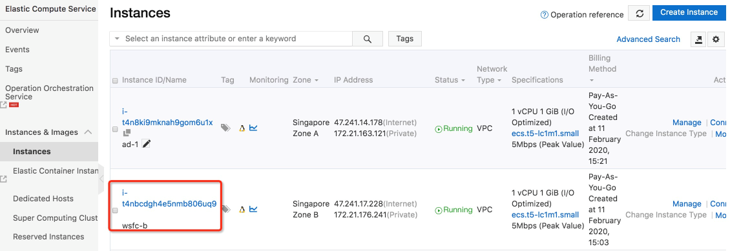
Since you now know how to launch the Alibaba Cloud ECS instance, let's explore the quick and easy deployment process of Drupal on Alibaba Cloud ECS.
Drupal is deployed with the help of a relational database that primarily assists in the management and storage of data provided by users. This post details the use of MySQL for the launch of Drupal. For this, we can use ApsaraDB for RDS as our database. Alibaba Cloud ApsaraDB for RDS is an on-demand database service that allows quick and easy deployment of instances. It also provides elastic scaling of resources based on your requirements. Alibaba Cloud ApsaraDB for RDS has three types of relational databases: MySQL, SQL Server, and PostgreSQL. This database provides time saving resources, scalability, security, and reliability to give your application the edge it needs.
1. After successful configuration of a MySQL user, create a database dedicated for Drupal.
The dedicated user and database is imperative to ensure application security.
Login to MySQL:
root@drupal:~#mysql -u root -p The command will prompt for a MySQL root user password that is the same as the one you set during the installation process of the software. Upon successful authentication, the system will drop a MySQL prompt.
2. Create a dedicated database to be used for the Drupal installation:
mysql>CREATE DATABASE drupal;3. Create a user for your Drupal software to be able to connect with the configured database through password identification:
mysql>CREATE USER drupaluser@localhost identified by 'password';4. You will now need to enter an ensemble of permissions required for the proper functioning of Drupal:
mysql>GRANT SELECT,INSERT,UPDATE,DELETE,CREATE,DROP,INDEX,ALTER,CREATE TEMPORARY TABLES,LOCK TABLES ON drupal.* TO drupaluser@localhost;5. Flush the privilege information to disk to instantly implement these changes:
mysql>FLUSH PRIVILEGES;6. Now, use the Exit command on the ongoing MySQL session:
mysql>exit;1. Update the local package cache. Type the following command to install them:
root@drupal:~# apt-get update
root@drupal:~# apt-get install php5-gd php5-curl libssh2-php
2. Enter the following command, and open the configuration file for Apache PHP:
mysql> root@drupal:~#vim/etc/php5/apache2/php.iniNow also as part of this step, enter the directive, expose_php. Set it to the Off mode:
expose_php = OffAnd also follow the same instructions to turn off the allow_url_fopen directive, as well:
allow_url_fopen = OffOnce you have completed the step, you can save and close the file.
3. Launch the rewrite functionality as your next move that allows your Drupal-based website to modify URLs to easily remember. Usually, the rewrite modules (mod_rewrite) for an Apache server are installed by default. However, you will need to enable them. All you would need to do is type the following command to enable those settings:
mysql>root@drupal:~# a2enmod rewrite4. Once you have enabled the rewrite modules, you will need to open the default virtualhost file:
root@drupal:~# vim /etc/apache2/sites-enabled/000-default.confNow, add a directory that points to your web root within the VirtualHost block. Thereafter, direct the AllowOverride command to All. In this step you also need to add the ServerName command and point it to your domain name. Ensure that the ServerAdmin field carries a valid email ID:
     < VirtualHost *:80>
    . . .
    ServerName   www.website_name.com
    ServerAdmin  xxxxxxxx@xxxxx.com
    DocumentRoot /var/www/html
 < Directory /var/www/html>
       AllowOverride All
    < /Directory>
    . . .
  </VirtualHost>
Save and close the file.
Restart the web server to execute the necessary changes to your Apache server and PHP:
root@drupal:~# service apache2 restartNow, add a directory that points to your web root within the VirtualHost block. Thereafter, direct the AllowOverride command to All. In this step you also need to add the ServerName command and point it to your domain name. Ensure that the ServerAdmin field carries a valid email ID:
1. This step will require you to switch to your home directory and download the project file using wget:
root@drupal:~# wget
http://ftp.drupal.org/files/projects/drupal-7.32.tar.gz
2. Use the following command to extract the application directory:
root@drupal:~# tar xzvf drupal*3. We will now use the newly extracted directory structure hereinafter:
root@drupal:~# cd drupal*
root@drupal:~/drupal-7.32# rsync -avz . /var/www/html
4. Create a new directory by entering the following command:
root@drupal:/var/www/html# mkdir /var /sites/default/files 5. Copy the default settings file to the filename to be used for active configuration by Drupal:
root@drupal:/var/www/html# cp /var/www/html/sites/default/default.settings.php /var/www/html/sites/default/settings.php 6. You will notice that this active settings file needs further authorization to proceed with the installation:
root@drupal:/var/www/html# chmod 664
/var/www/html/sites/default/settings.php
7. On the web user, provide a group ownership for your files. For example: group ownership in Ubuntu is www-data:
root@drupal:/var/www/html# chown -R :www-data /var/www/html/* http://server_domain_or_IP
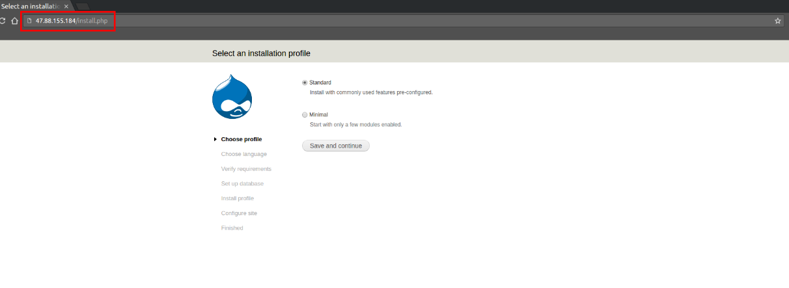
This will take you to the initial Drupal installation procedure webpage.
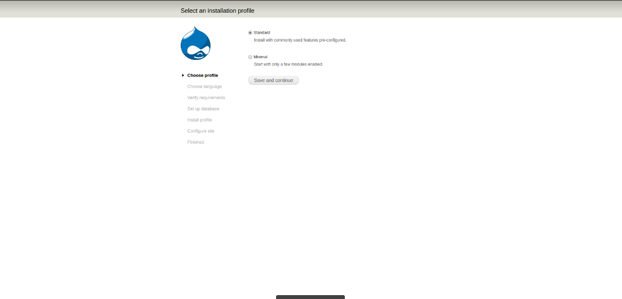
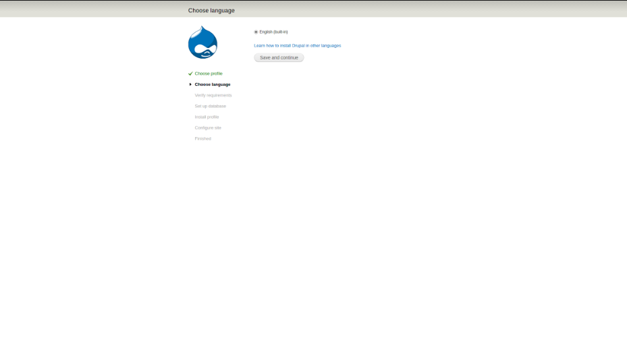
Select Standard installation, unless you have different criterion for this field. Click Save and continue. Click through the next few continue buttons, which will take you to the database configuration page. Use the information previously entered to configure the user and database.
As an example, let's use a database called, drupal; username as, drupaluser; and password set as password. You should use a different password than the one used during the profile creation. Click Save and continue once you have entered the details of your database correctly.
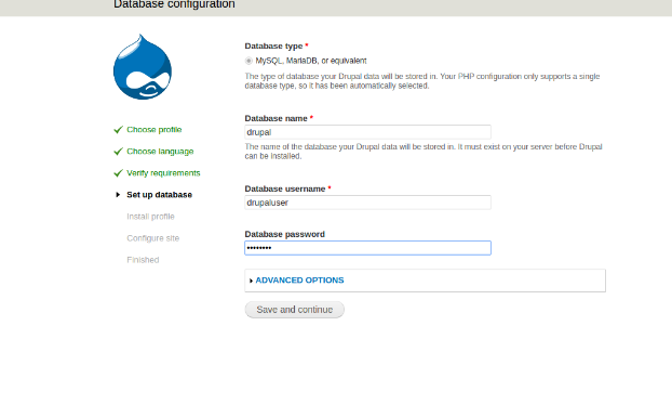
You may be redirected to the same database configuration page when you click Save and continue. Under such circumstances, refresh the page to notice that your database and profile are suitably configured.
The information box at the top of the page prompts you to change authorization permissions in the settings file. However, before you go on to do that, set the basic information section of your website by populating the blank fields with appropriate information.
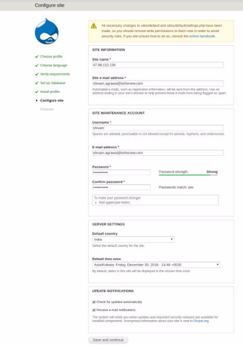
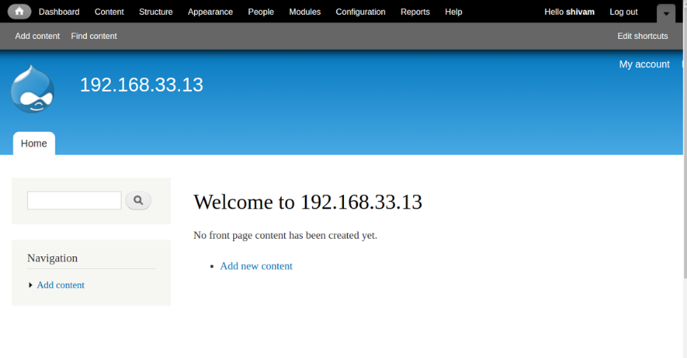
Click Save and continue to complete the installation. Enter your domain name to visit your brand-new Drupal website.
Some related Alibaba Cloud products are Alibaba Cloud WAF and CloudMonitor. We can add certain more layers to increase the reliability and security of our website in production environment. We can also take backup by taking snapshots of our running database to eliminate database failure.
Alibaba Cloud WAF can be used to provide protection against web-based attacks, including SQL injections, XSS, Malicious BOT, command execution vulnerabilities, and other common web attacks. WAF filters out large number of malicious access attempts and alleviates the performance impact of HTTP/HTTPS flood attacks on servers.
Alibaba Cloud CloudMonitor can be used to provide in-depth insights into your cloud deployments. CloudMonitor provides advanced analytics on critical metrics such as CPU utilization, latency and also lets you customize metrics specific to business requirements.

2,593 posts | 793 followers
FollowAlibaba Clouder - May 31, 2019
Alibaba Clouder - May 31, 2019
Alibaba Clouder - June 3, 2019
Alibaba Cloud Community - December 4, 2023
Alibaba Clouder - July 12, 2018
Alibaba Clouder - June 2, 2020

2,593 posts | 793 followers
Follow ECS(Elastic Compute Service)
Elastic and secure virtual cloud servers to cater all your cloud hosting needs.
Learn MoreLearn More
 WAF(Web Application Firewall)
A cloud firewall service utilizing big data capabilities to protect against web-based attacks
Learn MoreMore Posts by Alibaba Clouder