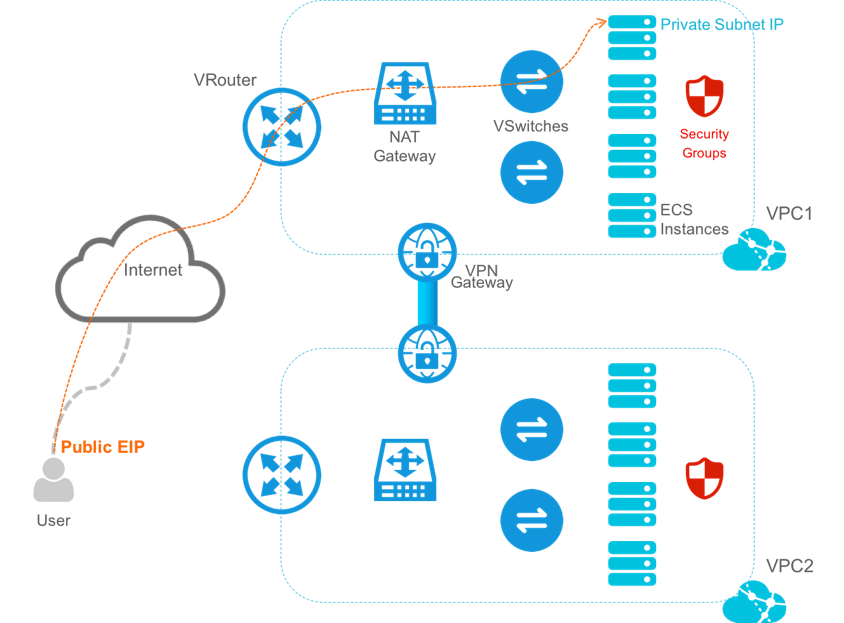
In this tutorial, we'll show you how to get started with Alibaba Cloud's Virtual Private Cloud (VPC). As the first part of this tutorial, we'll show you how you can set up and configure a VPC with an Alibaba Cloud Elastic Compute Service (ECS) instance that is accessible through an Alibaba Cloud Elastic IP (EIP) address. We'll show you have to configure a NAT Gateway onto your VPC. As well as that, we'll also show you how to connect up two VPCs with an Alibaba Cloud VPN Gateway and with Alibaba Cloud's Express Connect service. Finally, we'll show you how to build an Alibaba Cloud Server Load Balancer to guarantee continued access to your applications in the cloud. Consider the infographic below for a bit of reference:
Before you can begin this tutorial, you'll need to have the following:
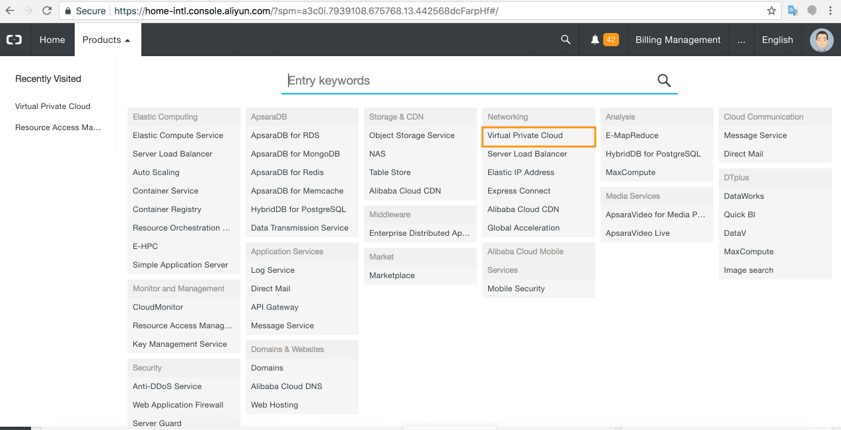
Log in to your Alibaba Cloud account and select Virtual Private Cloud (VPC) on the Products page.
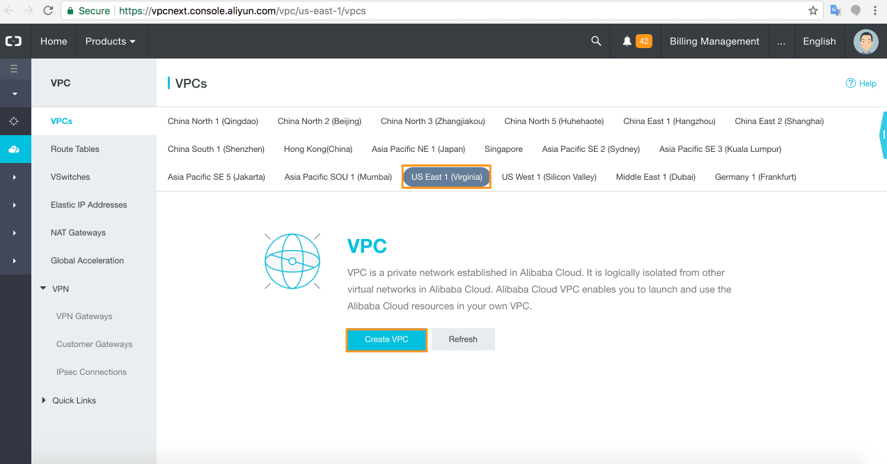
Create a VPC in the required region.
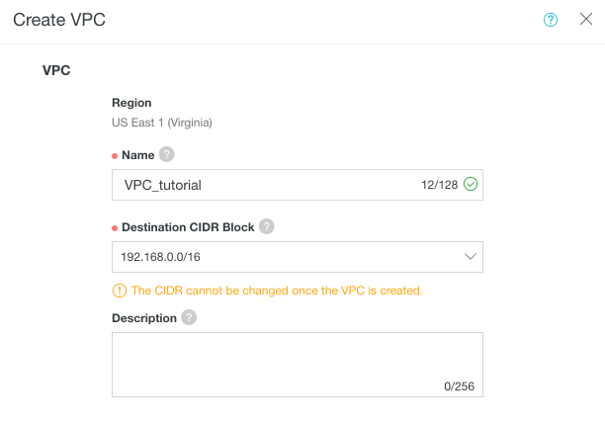
Configuration options will appear for the VPC and the VSwitch, which ships with the VPC. What you'll need to do first is to give your VPC a name and set the destination CIDR block. Remember, you cannot change the CIDR block configuration once you have set it. Here, we have set the CIDR block to 192.168.0.0/16 as an example. This CIDR block allows us 65,534 possible host IP addresses in our VPC.
Now let's configure the VPC's VSwitch. Every Alibaba Cloud VPC comes with one VSwitch. You'll need to provide the VSwitch a name and configure the CIDR block for the VSwitch. Again, once you have set the CIDR block for the VSwitch it cannot be changed. Here, we have given the VSwitch a smaller range of the available VPC private IP addresses with 192.168.0.0/24, which allows us 254 possible hosts. This VSwitch will manage a subsection of our VPC infrastructure. When you're done, click OK.
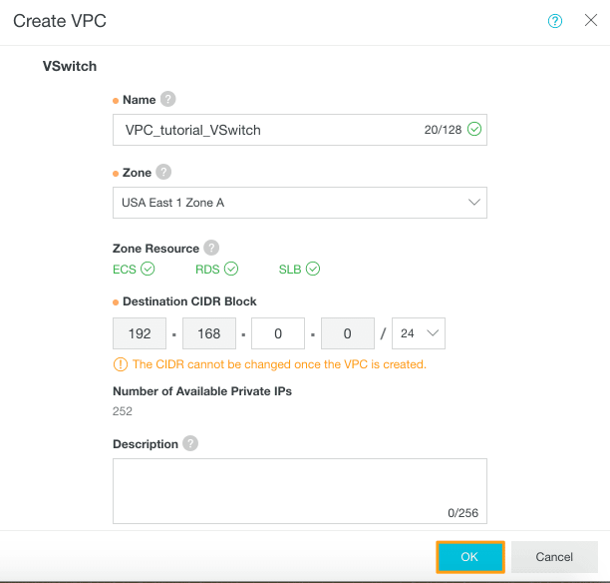
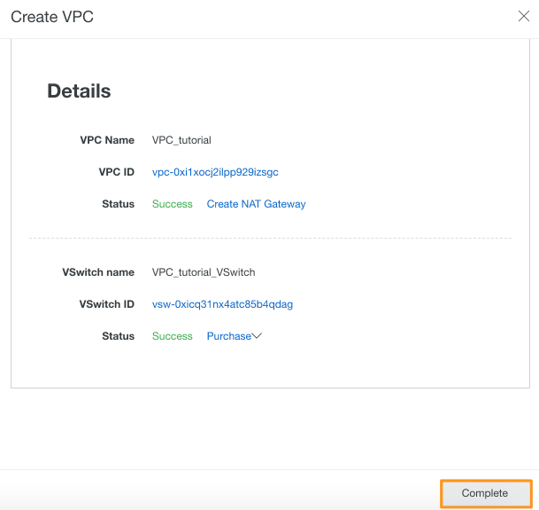
Once the VPC and VSwitch are configured, check the details. Note that the VPC and VSwitch are given unique ID numbers. Click Complete to create the VPC.
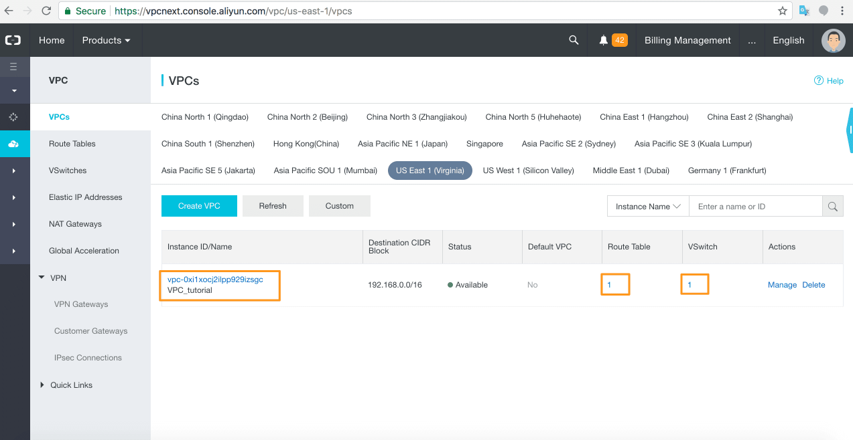
You will now see your VPC in the list for the region. Note that the Route Table that comes with every VPC and the VSwitch, which we just configured.
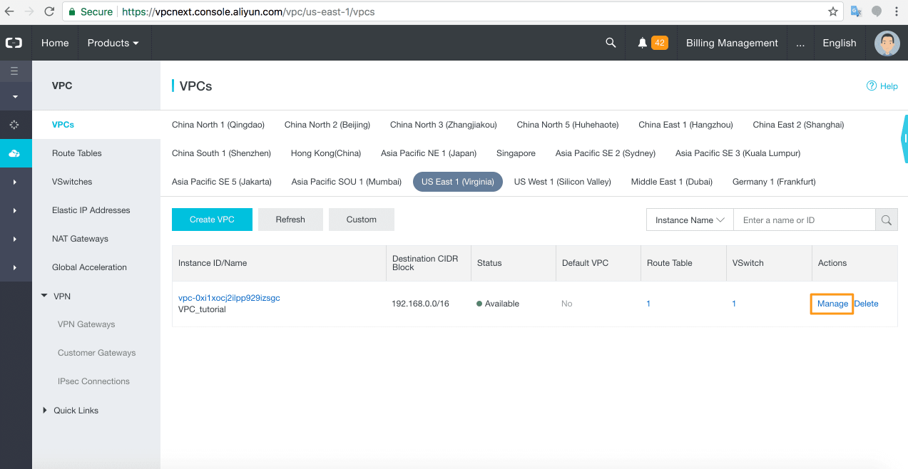
Click Manage to view the VPC details.
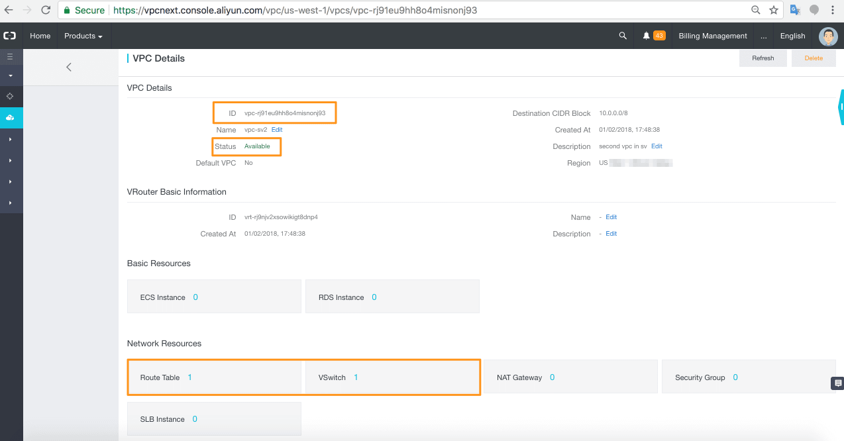
On the VPC details page, you will be able to see the full configuration details for the VPC.
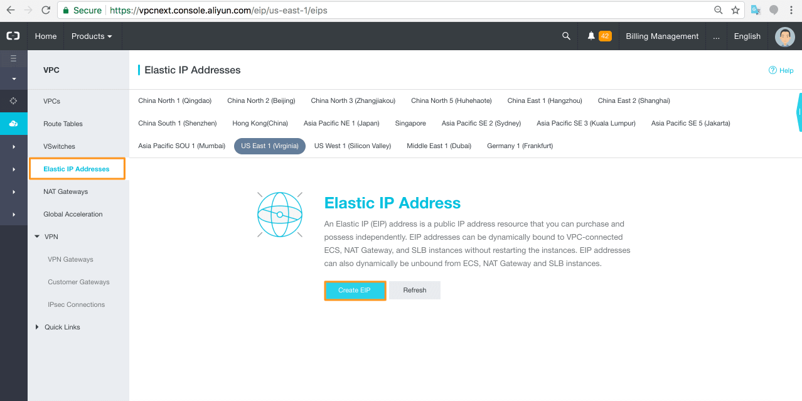
Now, let's add an ECS instance to the VPC. We have created ECS instances in previous tutorials so, this time, let's first create the Elastic IP addresses we need for accessing each ECS instance. Go to Elastic IP Addresses and, in the region you choose earlier, click Create EIP.
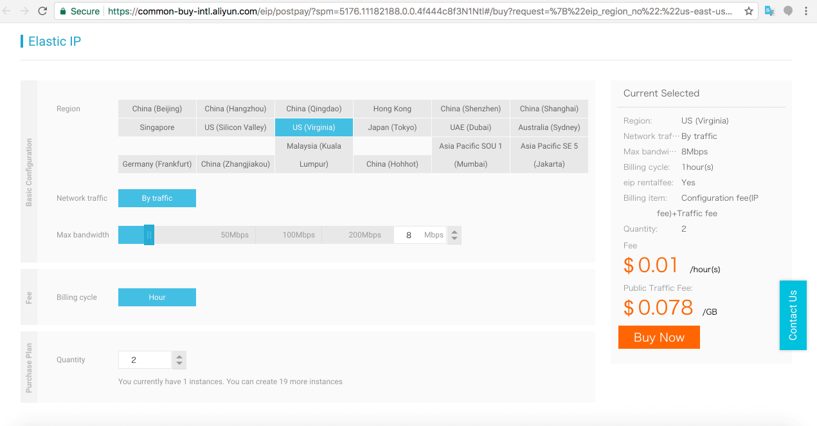
The Elastic IP purchase screen comes up. Check the details. Here, we chose the minimum configuration details and requested two EIPs.
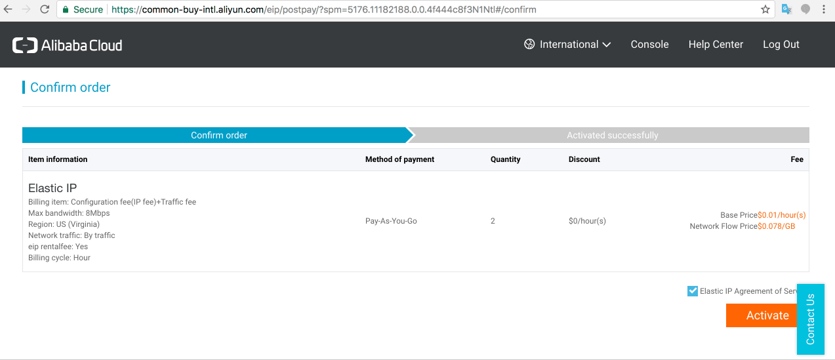
Last, you'll have to agree to terms and click Activate.
Your Elastic IP addresses are listed by region on the Elastic IP Addresses page. Now we can bind the addresses to your ECS instances. Click Bind under the Actions option.
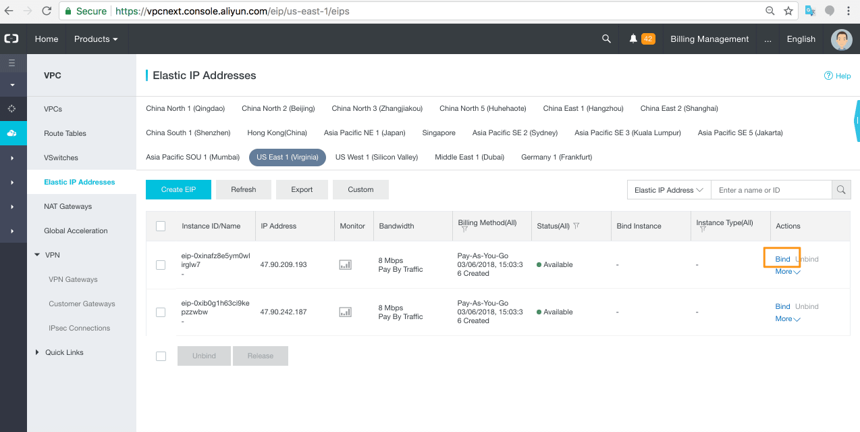
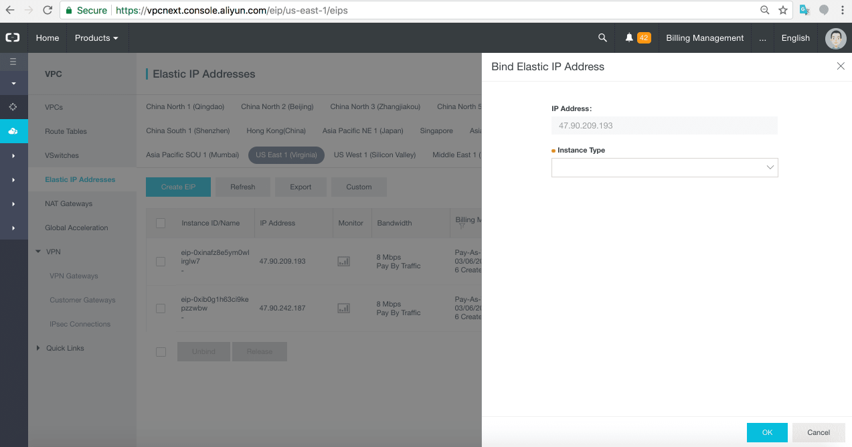
After the Bind configuration box will appear, the IP Address box shows the public Elastic IP Address details that you have just bought. It needs to be bound to an ECS instance.
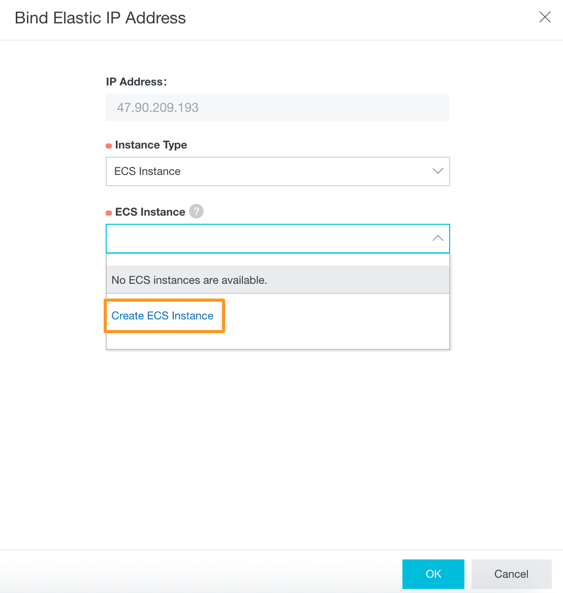
When you click the drop down, you will see that there are no ECS instances available. Click Create ECS Instance.
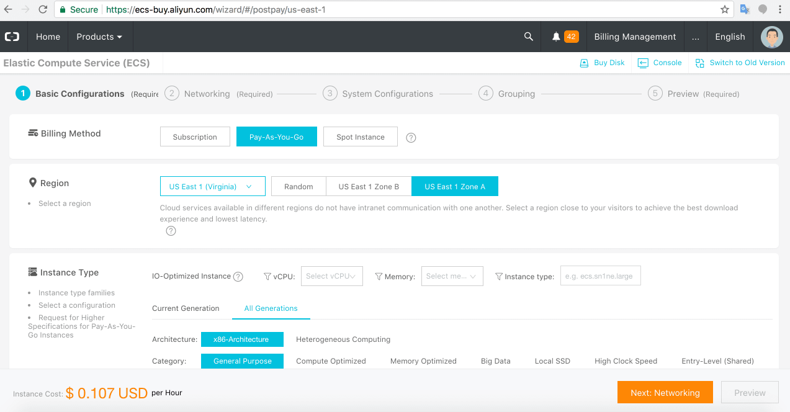
You are taken to the Alibaba Cloud Elastic Compute Service (ECS) page where you can configure and create an ECS instance. For the tutorial's purposes, we have chosen the pay-as-you-go basic configuration in Zone A of our region. After you're done with that, click Next.
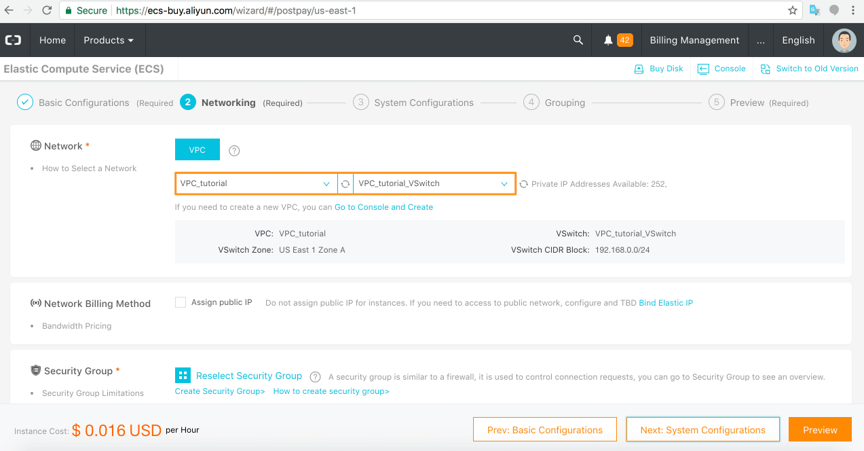
Step 2 details the network configuration. Pick the VPC and VSwitch we have just created. We will leave the Security Group details for now. Click Next.
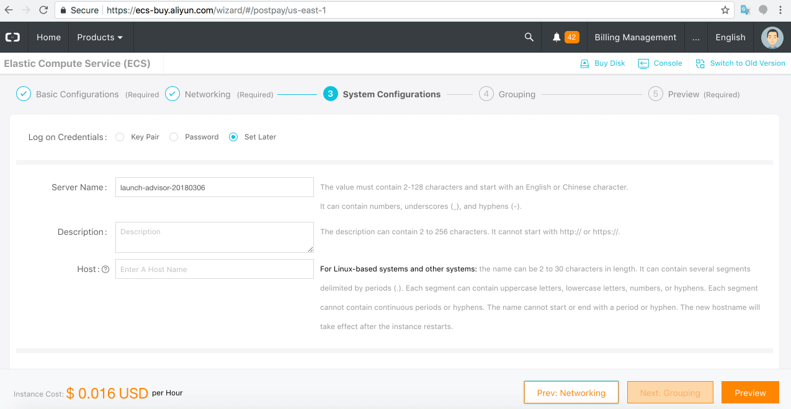
Step 3 is System Configurations where you can give your server instance a name and set the logon credentials. We will leave these for now. Click Next: Grouping to go to the next step.
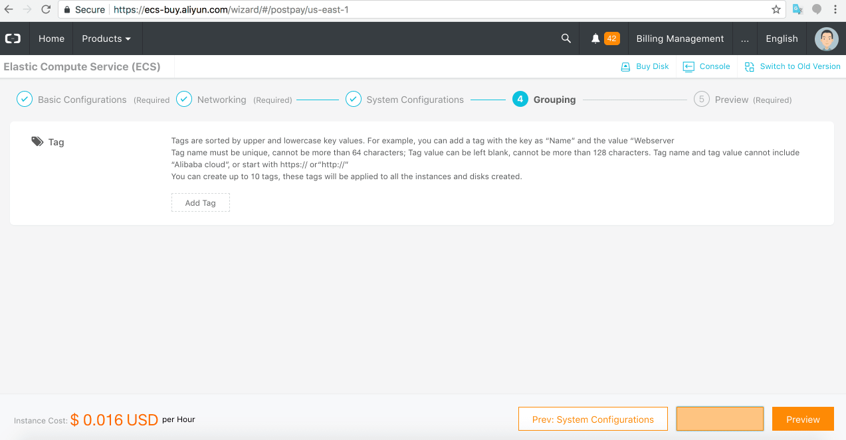
Step 4 is Grouping by tags for organizing your ECS instances. Let's also skip this for now and go to Preview.
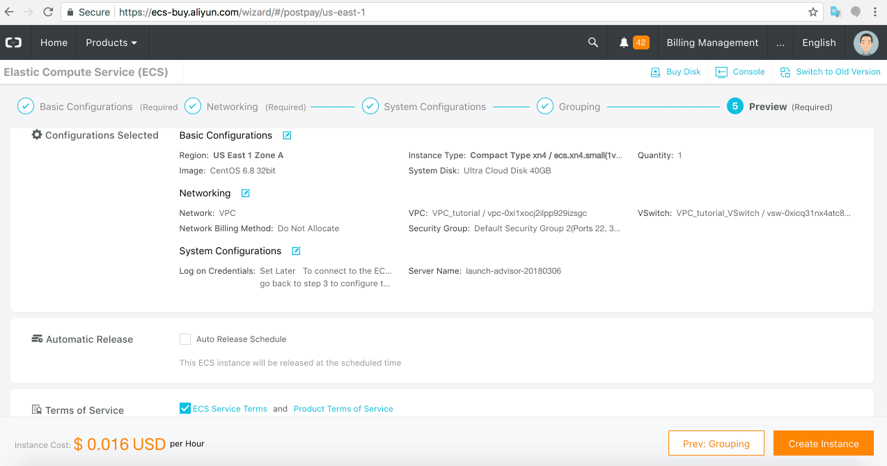
Check that all the details are correct and click Create Instance.
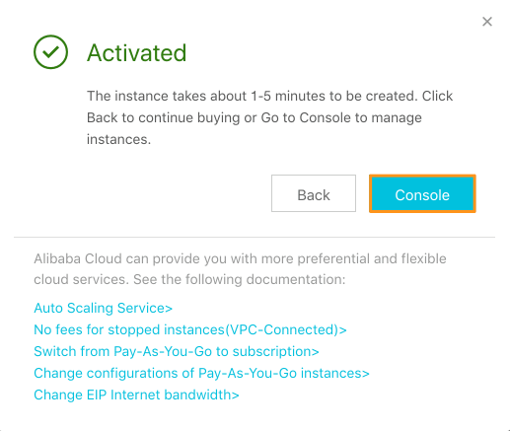
You will eventually see a success box. Wait for a moment or two before going back to the page where you are going to bind an ECS instance to an EIP.
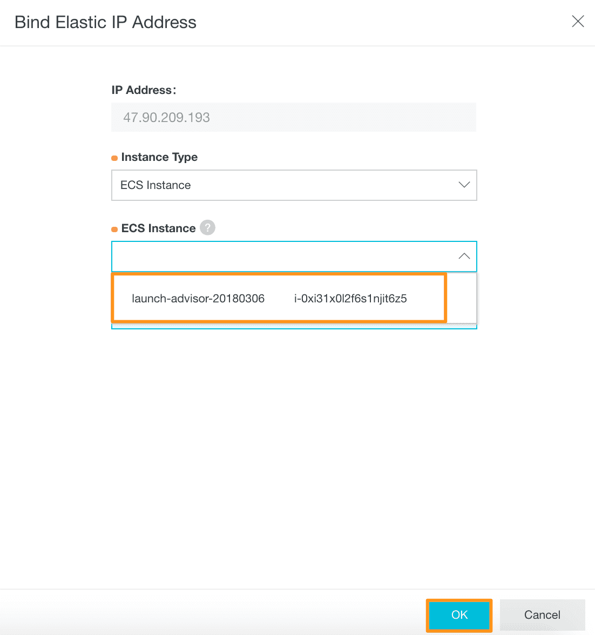
The instance you just created, with the server name and ID, is now available for binding to your EIP in the drop down. Click OK.
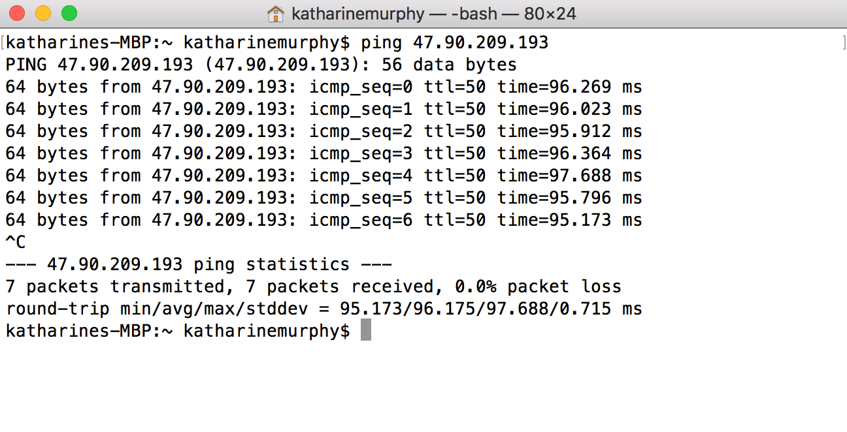
You can check that your ECS instance is available through the public EIP by pinging it on the terminal. All ECS instances have ICMP open by default.
Let's delete one of the Elastic IP Addresses we created, the one we are not going to use right now. Go to the Elastic IP Addresses page and select the EIP you want to delete. Click Release.
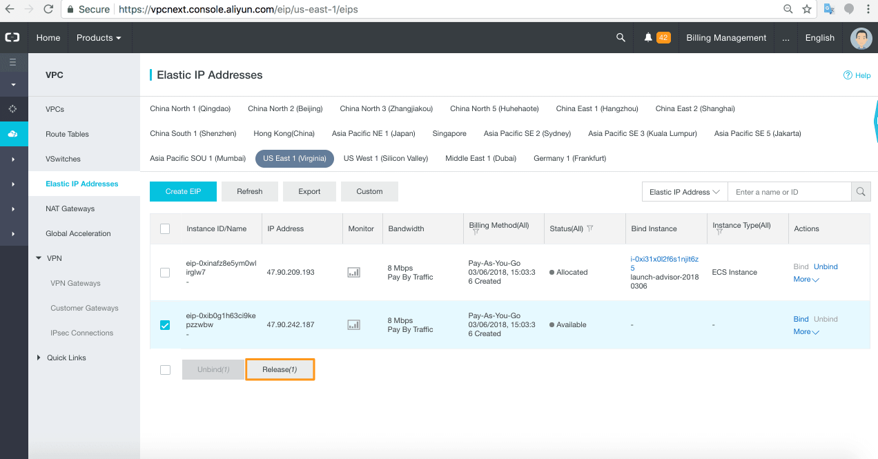
The EIP is gone.
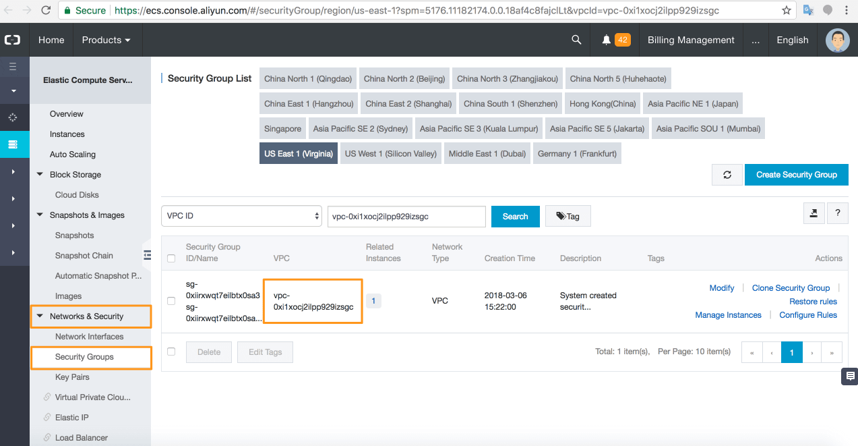
Control access to your ECS instances by creating Security Groups and Key Pairs for your VPC and its ECS instances. Do this through the Networks and Security options in the Elastic Compute Service left-side navigation pane.
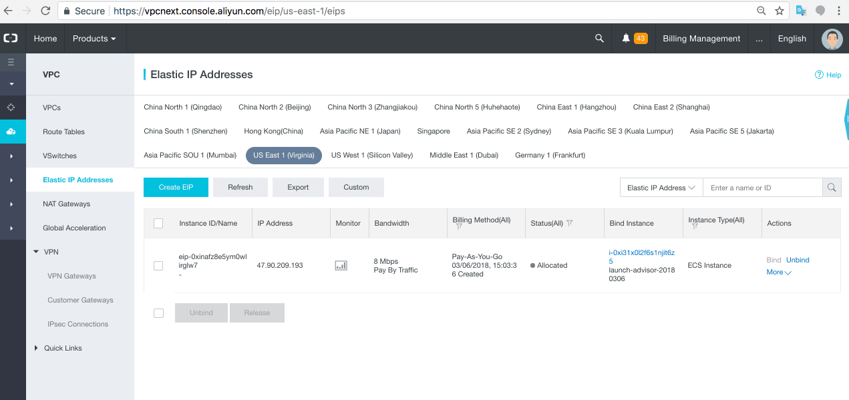
If you're not using an ECS instance, it's good practice to put it in a non-running status. There are other ways to get to ECS instance details. We'll go there through the Elastic IP Addresses console in the VPC console left-side navigation pane.
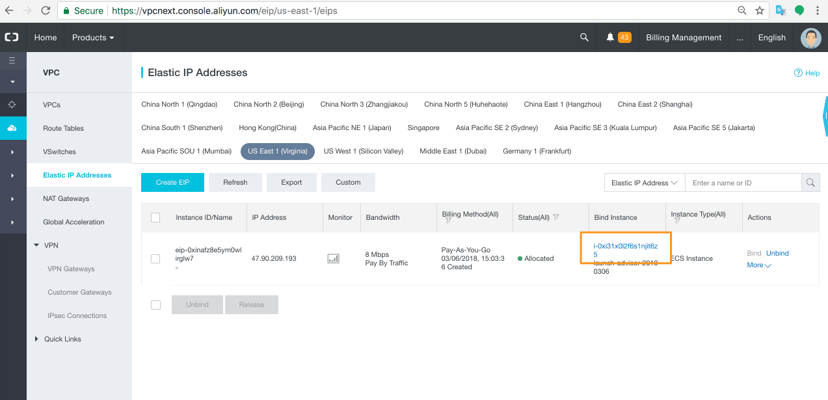
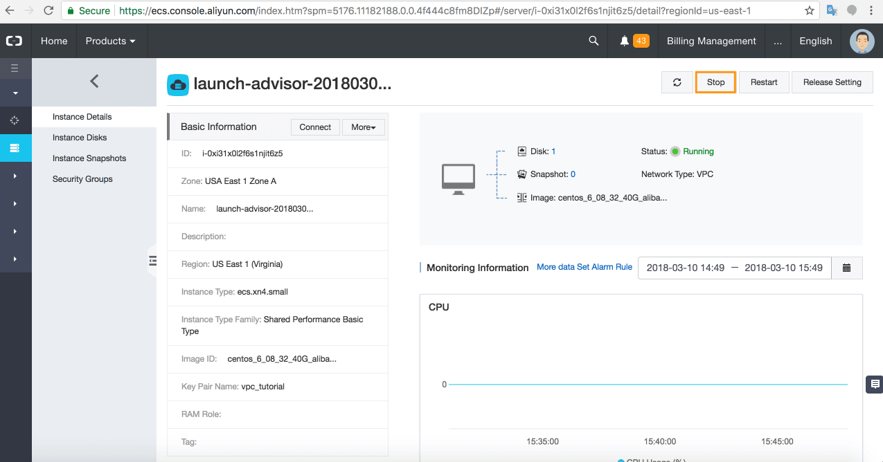
Click the Bind Instance ECS link and click Stop to stop the instance.
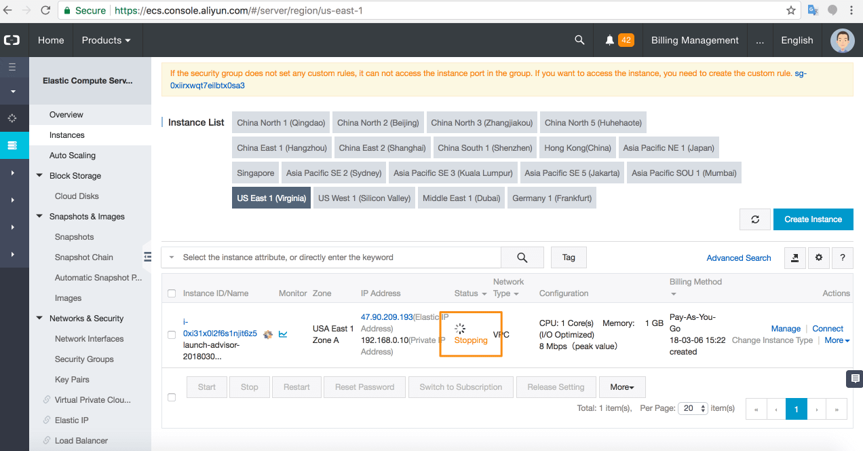
If you go back to the Elastic Compute Service list, you will see the instance in the process of stopping. If your ECS instance is a pay-as-you-go, you will not be charged for it when it is stopped.
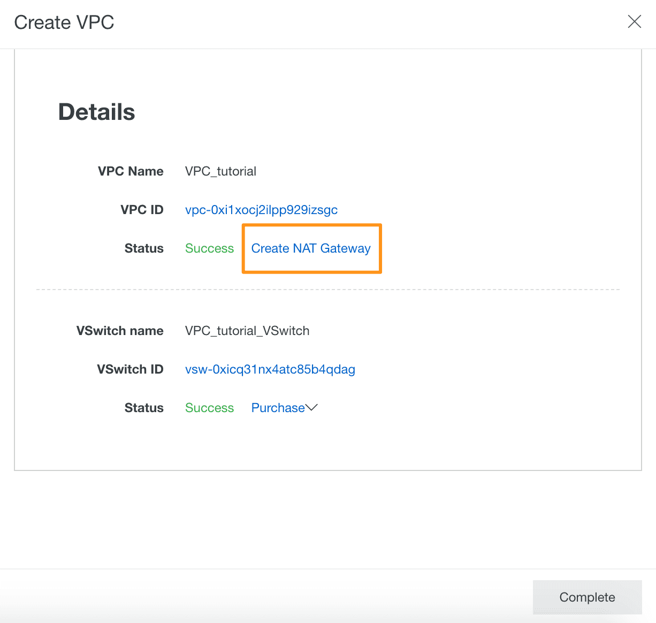
As you are creating and configuring a new VPC, you will see the option to Create NAT Gateway for the VPC.
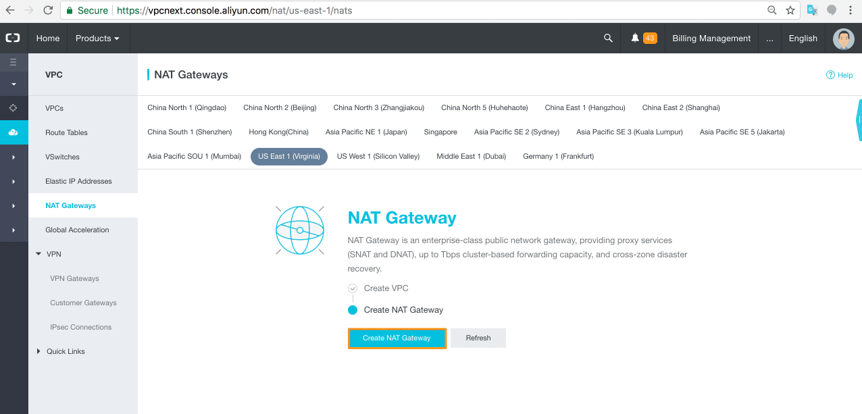
You can also create a NAT Gateway from the VPC console.
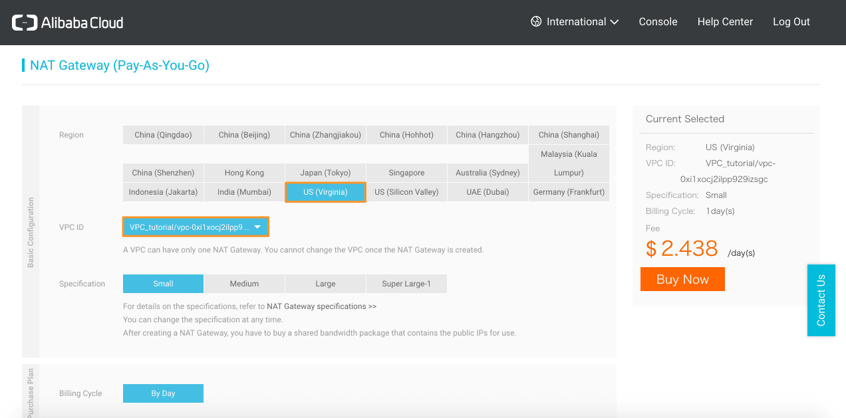
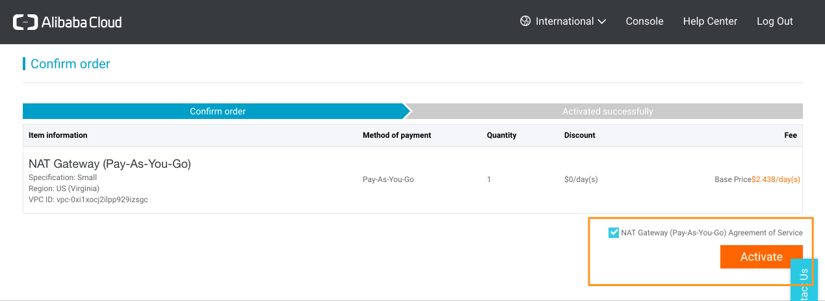
Pick the correct region and VPC ID to create a new NAT Gateway. Check the details and click Buy Now.
Agree to terms and click Activate.
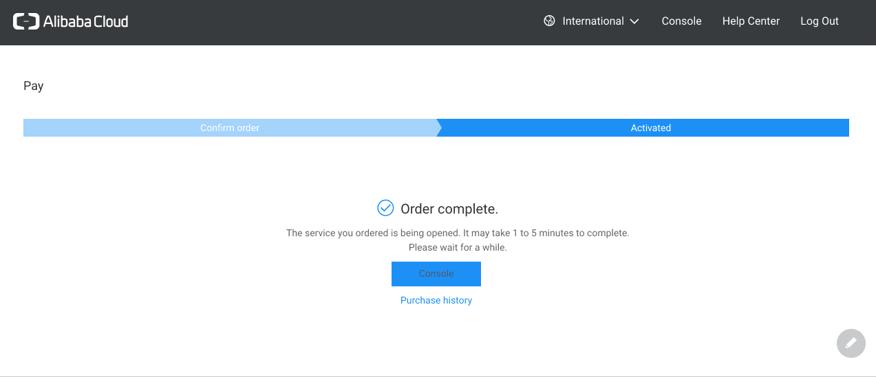
You will see the Order complete screen.
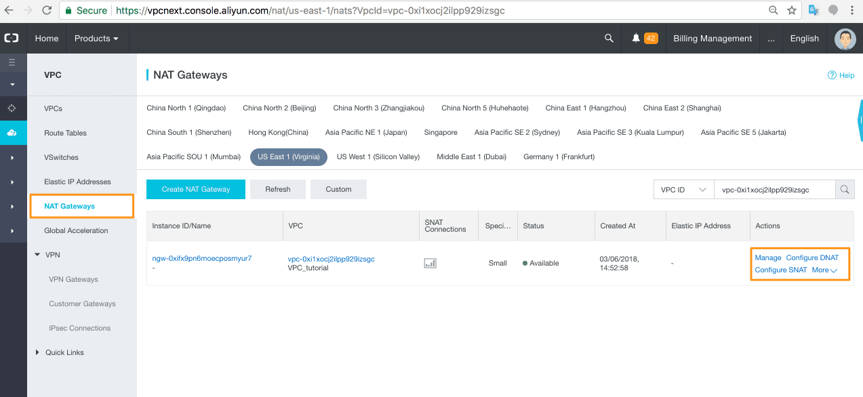
After a few moments, your NAT Gateway will be ready. Go to the NAT Gateway console from the VPC left-side navigation pane. Here you will see the details of the NAT Gateway you just created.
The Actions options allow you to configure DNAT and SNAT entries.
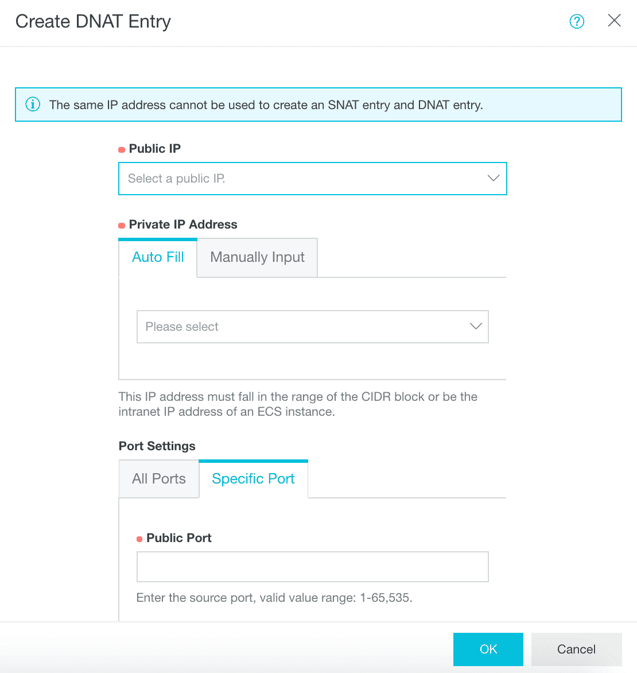
In the Create DNAT Entry, you can map inbound traffic on a public IP (for example, a public EIP address bound to an ECS instance) to a private IP (for example, an IP address that is within your VPC's CIDR range).
You can also supply port details for accessing specific services and applications.
IP addresses cannot be shared by DNAT and SNAT entries.
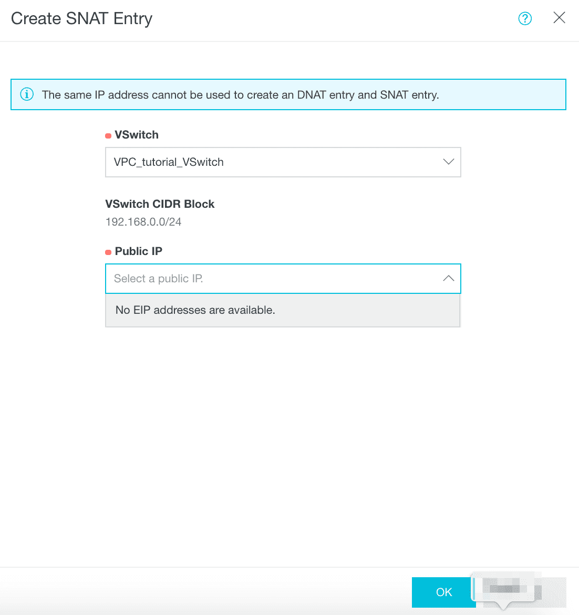
Then, create an SNAT Entry for outbound private to public IP mapping. Alibaba Cloud will auto-fill the VPC, VSwitch, and available IP addresses and IDs where possible for your convenience.
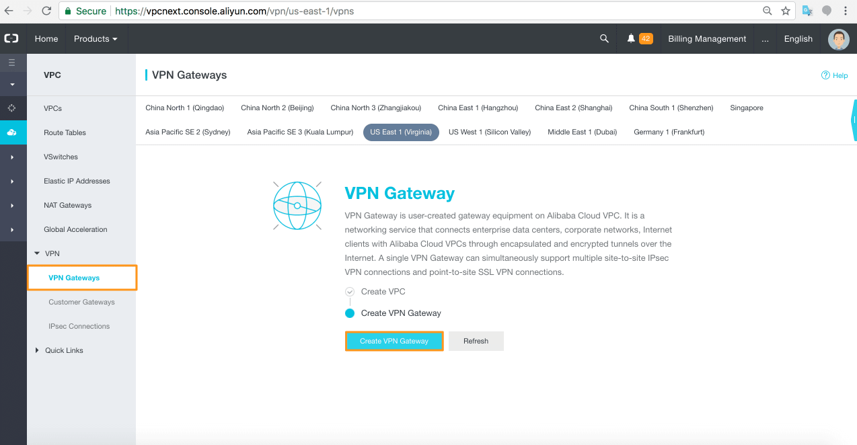
On the left-side navigation menu of the VPC, click VPN Gateway and Create VPN Gateway.
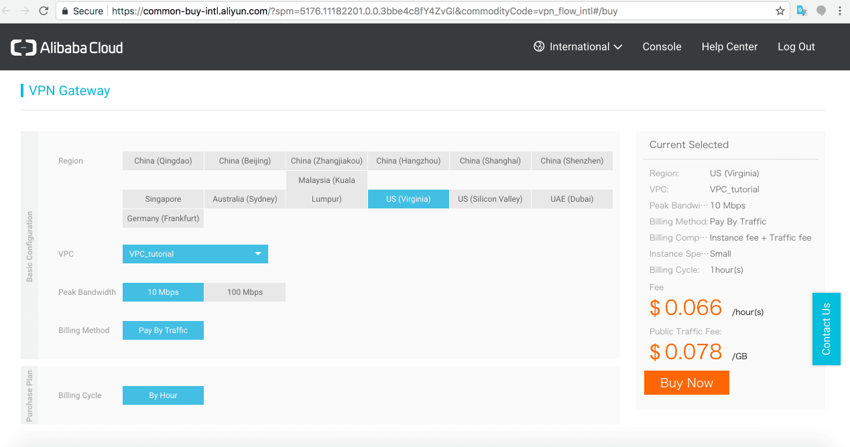
Check the details and click Buy Now.
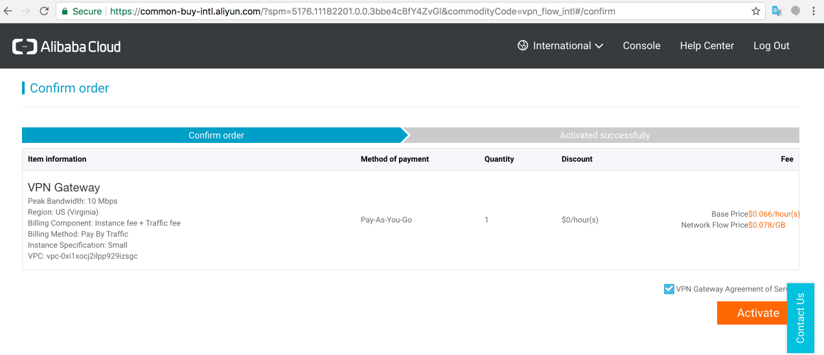
You'll need to click that you agree to terms and click Activate.
Go back to the VPN Gateway console and you will see the system preparing the VPN Gateway for your VPC.
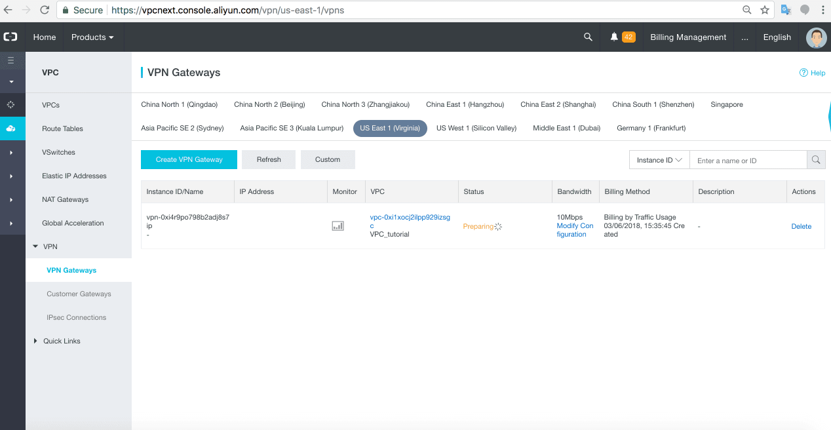
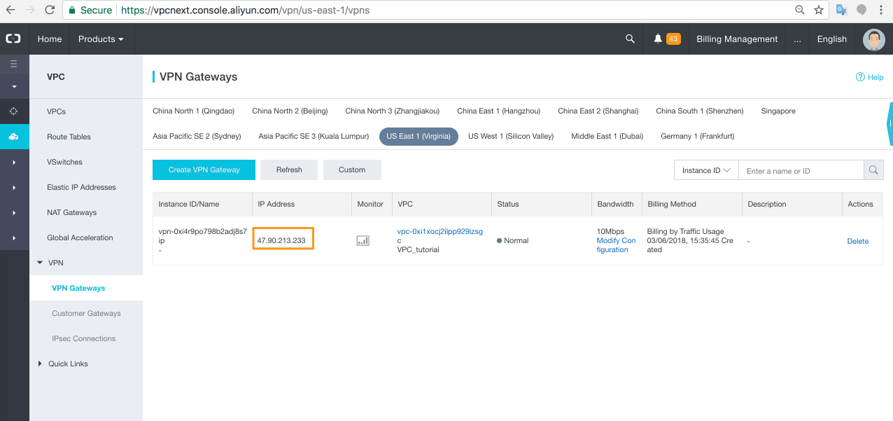
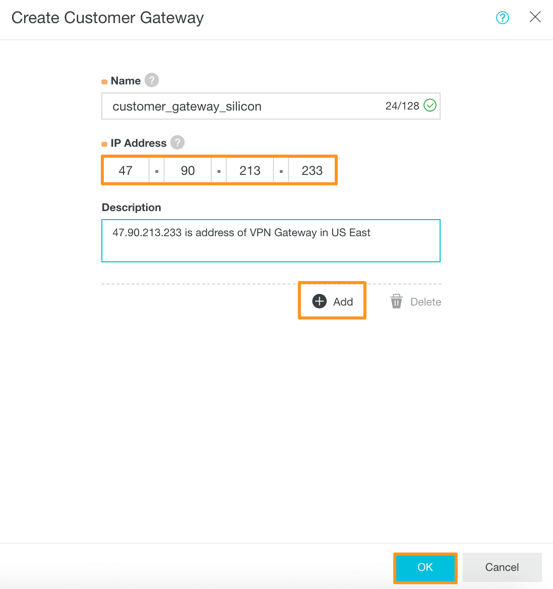
Once the VPN Gateway is created, make a note of the IP Address. For our US East VPC, the IP Address is 47.90.213.233.
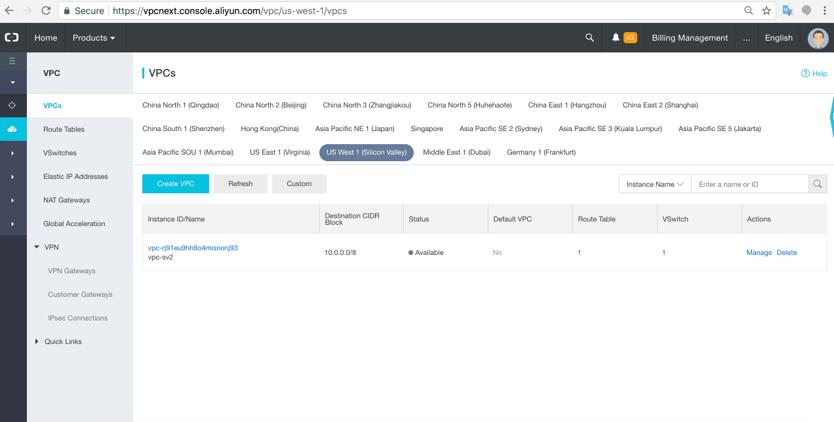
Follow the steps again to create a new VPC in a different region.
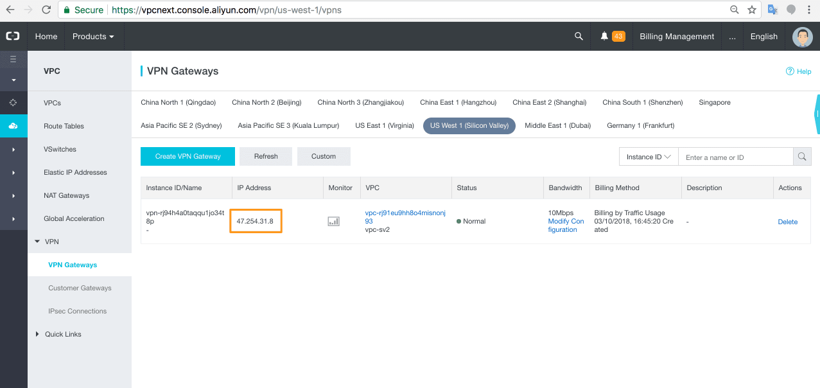
Configure a VPN Gateway for this VPC and make a note of the IP. Our US West VPC's VPN Gateway IP is 47.254.31.8. The IPs for the VPN Gateways are public IPs and are pingable.
Now we can connect up our VPCs by creating Customer Gateways in each region that connect to the VPN Gateway in the other region. Click Customer Gateways and Create Customer Gateway.
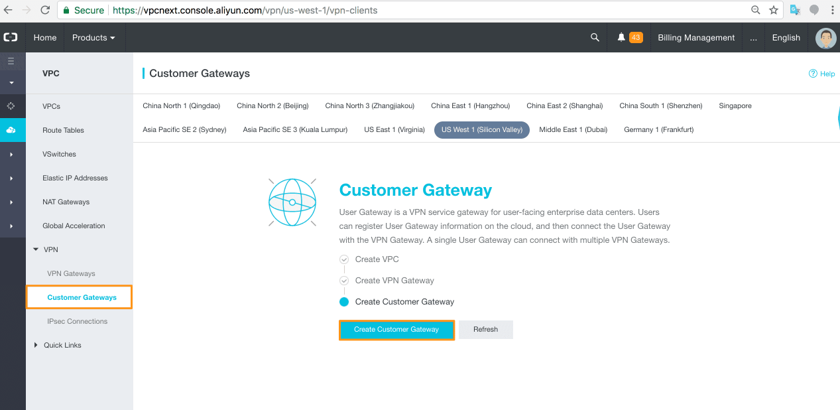
Configure the Customer Gateway to connect to the VPN Gateway IP in the other region. You can connect to more VPN Gateways by clicking Add. Click OK.
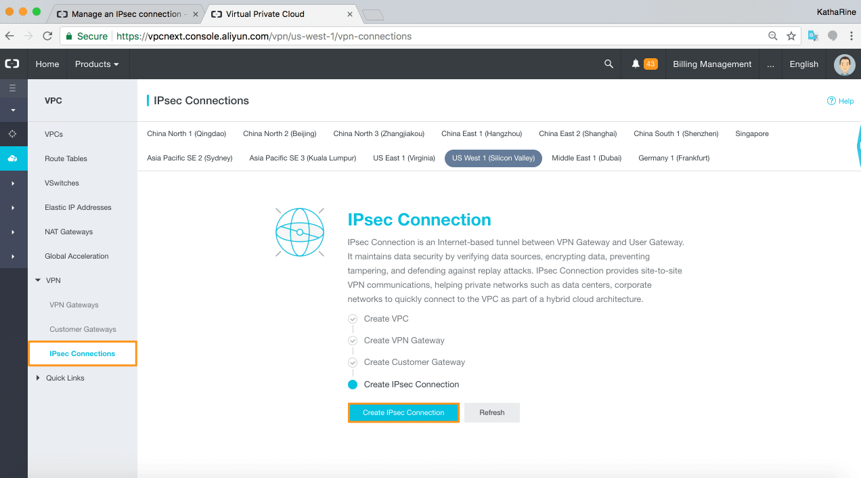
Create a Customer Gateway in the other region in the same way. Your VPCs are now connected up through the VPN Gateways we just built out. Now we have to configure an IPsec Connection, which will create a VPN tunnel that allows network traffic between the two VPCs. Go to IPsec Connections and click Create IPsec Connection.
Scroll down and make a note of all the configuration details in the advanced tab at the bottom.
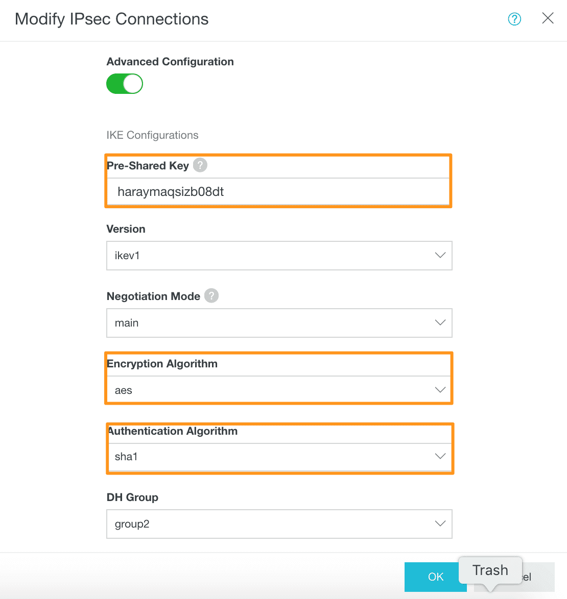
There are a lot of these, so make sure you've noted all of them. We're particularly interested in any shared keys and the authentication algorithms used. When you're ready, click OK.
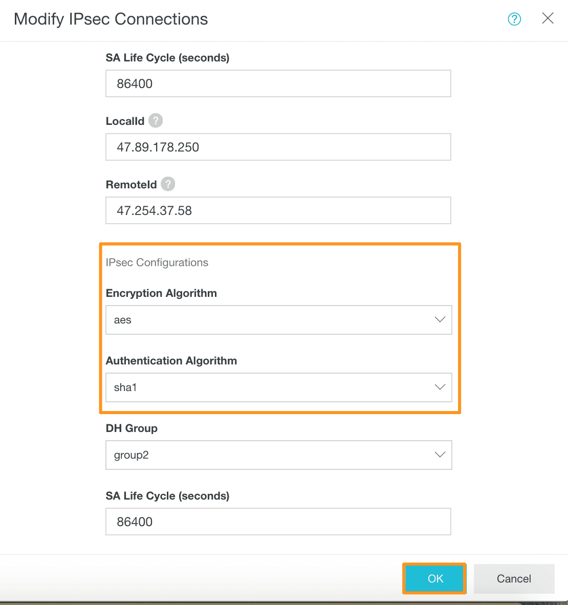
Now repeat all the steps for creating an IPsec connection in the other region VPC. Make sure all the advanced settings are the same and click OK when you are ready. Now, the IPsec Connection should be created.
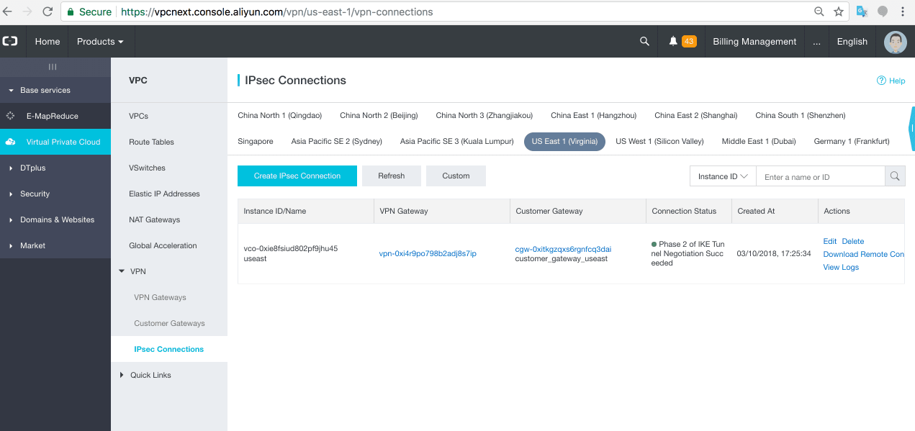
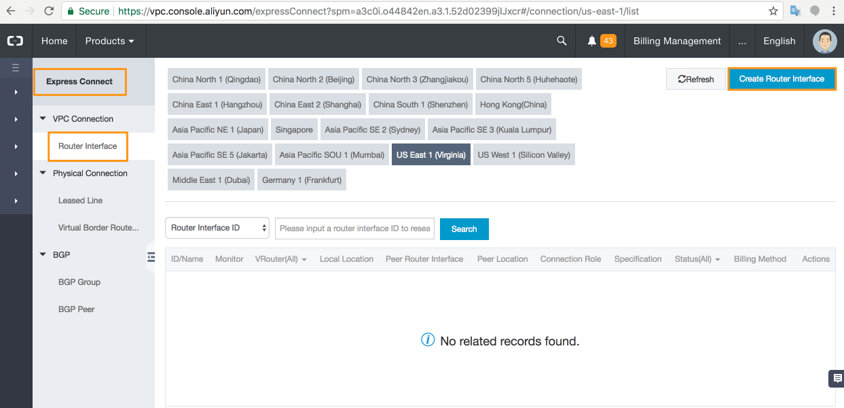
Alibaba Cloud Express Connect provides another way for connecting VPCs. To use this product for this purpose, log on on to the Express Connect console. Go to the Router Interface option under VPC Connection and click Create Router Interface.
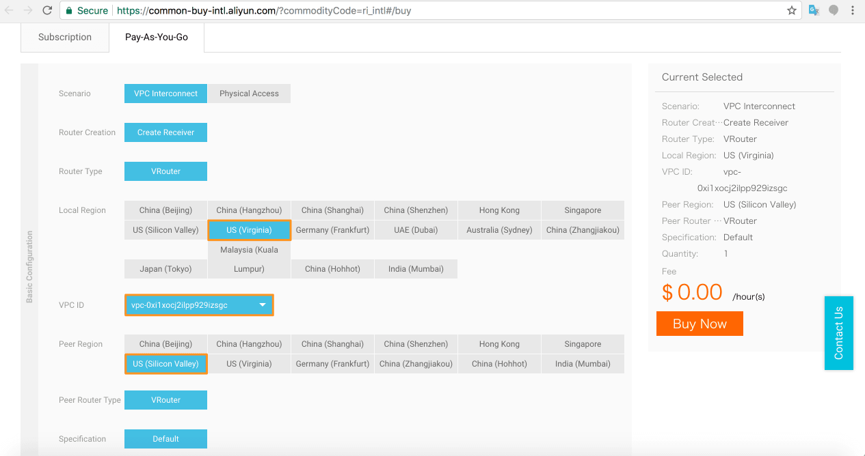
Select the relevant configuration details. We have chosen the most basic options for the Router Interface. Pay-as-you-go option only allows a receiver interface to be built. Click Buy Now.
At this point, you'll need to agree to the terms of service and click Activate.
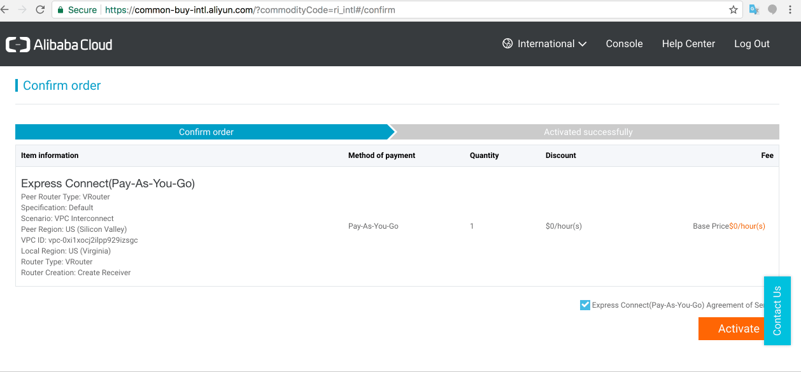
Wait for the order to complete and then go back to the Express Connect console. You will see the new Express Connect Router Interface in the region list. To learn more, check out our Express Connect tutorial.
To summarize, in this tutorial we first built a Alibaba Cloud Virtual Private Cloud network architecture on which we configured a VSwitch, a NAT Gateway, a couple of public EIP addresses, and one ECS instance running on it. Next, we built a similar VPC in another region, which we connected up to the first. We showed you how to connect your separate VPCs via the Alibaba Cloud VPN Gateway service and we mentioned that you can do exactly the same thing with the Alibaba Cloud Express Connect service, too. Make sure you keep your eyes out for more Alibaba Cloud whitepapers, blogs, tutorials, and videos for more helpful tips and information.
Setting up an Intranet Connection between VPCs with Express Connect
Deploying Windows Server Failover Clustering (WSFC) on Alibaba Cloud

2,593 posts | 793 followers
FollowSabith - July 27, 2018
Alibaba Clouder - December 18, 2020
Alibaba Clouder - April 7, 2021
Alibaba Clouder - February 21, 2020
Alibaba Clouder - November 20, 2018
Alibaba Clouder - June 18, 2020

2,593 posts | 793 followers
Follow Elastic IP Address (EIP)
An independent public IP resource that decouples ECS and public IP resources, allowing you to flexibly manage public IP resources.
Learn More VPN Gateway
VPN Gateway is an Internet-based service that establishes a connection between a VPC and your on-premise data center.
Learn More ECS(Elastic Compute Service)
Elastic and secure virtual cloud servers to cater all your cloud hosting needs.
Learn MoreMore Posts by Alibaba Clouder