A container is a new kind of OS-specific virtual machine that contains only the files which differ from the base operating system. Because of this, a container is much smaller than a virtual machine and starts up very quickly. The most well-known container management environment is called Docker. The Alibaba Cloud Container Service fully supports Docker-compatible containers. You can build your own, or use any of the freely available ones, or take an existing one and modify it.
In this tutorial, you can get started with the container service on Alibaba Cloud. The tutorial covers the following topics, which we'll refer to as stages 1 to 5:
• Stage 1 - Activate the VPC and container services in your Alibaba Cloud account
• Stage 2 - Create a Virtual Private Cloud (VPC) and a VSwitch
• Stage 3 - Create an Elastic Compute Service (ECS) server instance and attach it to your VPC
• Stage 4 - Create a cluster within your VPC and add the ECS instance to it
• Stage 5 - Create containers from existing Docker images, on the nodes in your cluster
You need to complete each stage in the order covered above in order to use the container service. This tutorial assumes that you have not yet completed any of them. To continue, you'll need an Alibaba Cloud account and a valid payment method set up. If you don't already have one, head to www.alibabacloud.com. Payment methods can be credit card or PayPal.
Although the procedures here may seem complex, they only need to be performed once. When everything is done you can deploy a new container in just a couple of minutes.
There are two ways to run containerized programs on Alibaba Cloud. You could simply create a single server (that is to say, an ECS instance) and install Docker on it. You can then quickly and easily download containers and run them.
However, this approach doesn't scale well. You are limited by the capacity of that single ECS server.
The Alibaba Cloud container service is a solution for running containers that is fully managed and totally scalable. You use it by creating a "cluster" of one or more ECS instances, onto which you then install your containers. It takes a little more work to set up, but the results are more robust. And this tutorial will walk you through the entire process step by step.
A Virtual Private Cloud (VPC) is a network in the cloud. A virtual datacenter, if you like, complete with servers and switches. In order to use the container service, you need a VPC, so we'll start by creating one. Don't worry - it's not as difficult as it sounds.
Then we'll activate the container service too.
To start, sign into your Alibaba Cloud account and head to the console.
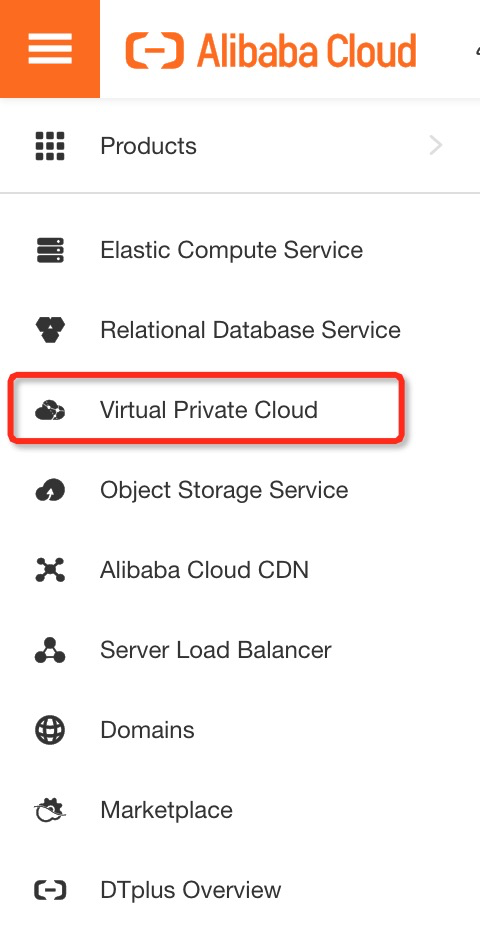
In the Elastic Computing section, click on Virtual Private Cloud. You'll be asked to activate the VPC service, so click the Activate button.
Review the Service Terms and, if you're happy with them, click on Activate Now.
If all goes well, the VPC service will be activated on your account.
You'll find yourself back at the console, where you can see all of your VPCs in the chosen region. There may be none, or there may be a system default one, but ignore these for now.

Return to the console home page.
Now we can activate the container service. From the console's home page, click on Container Service.
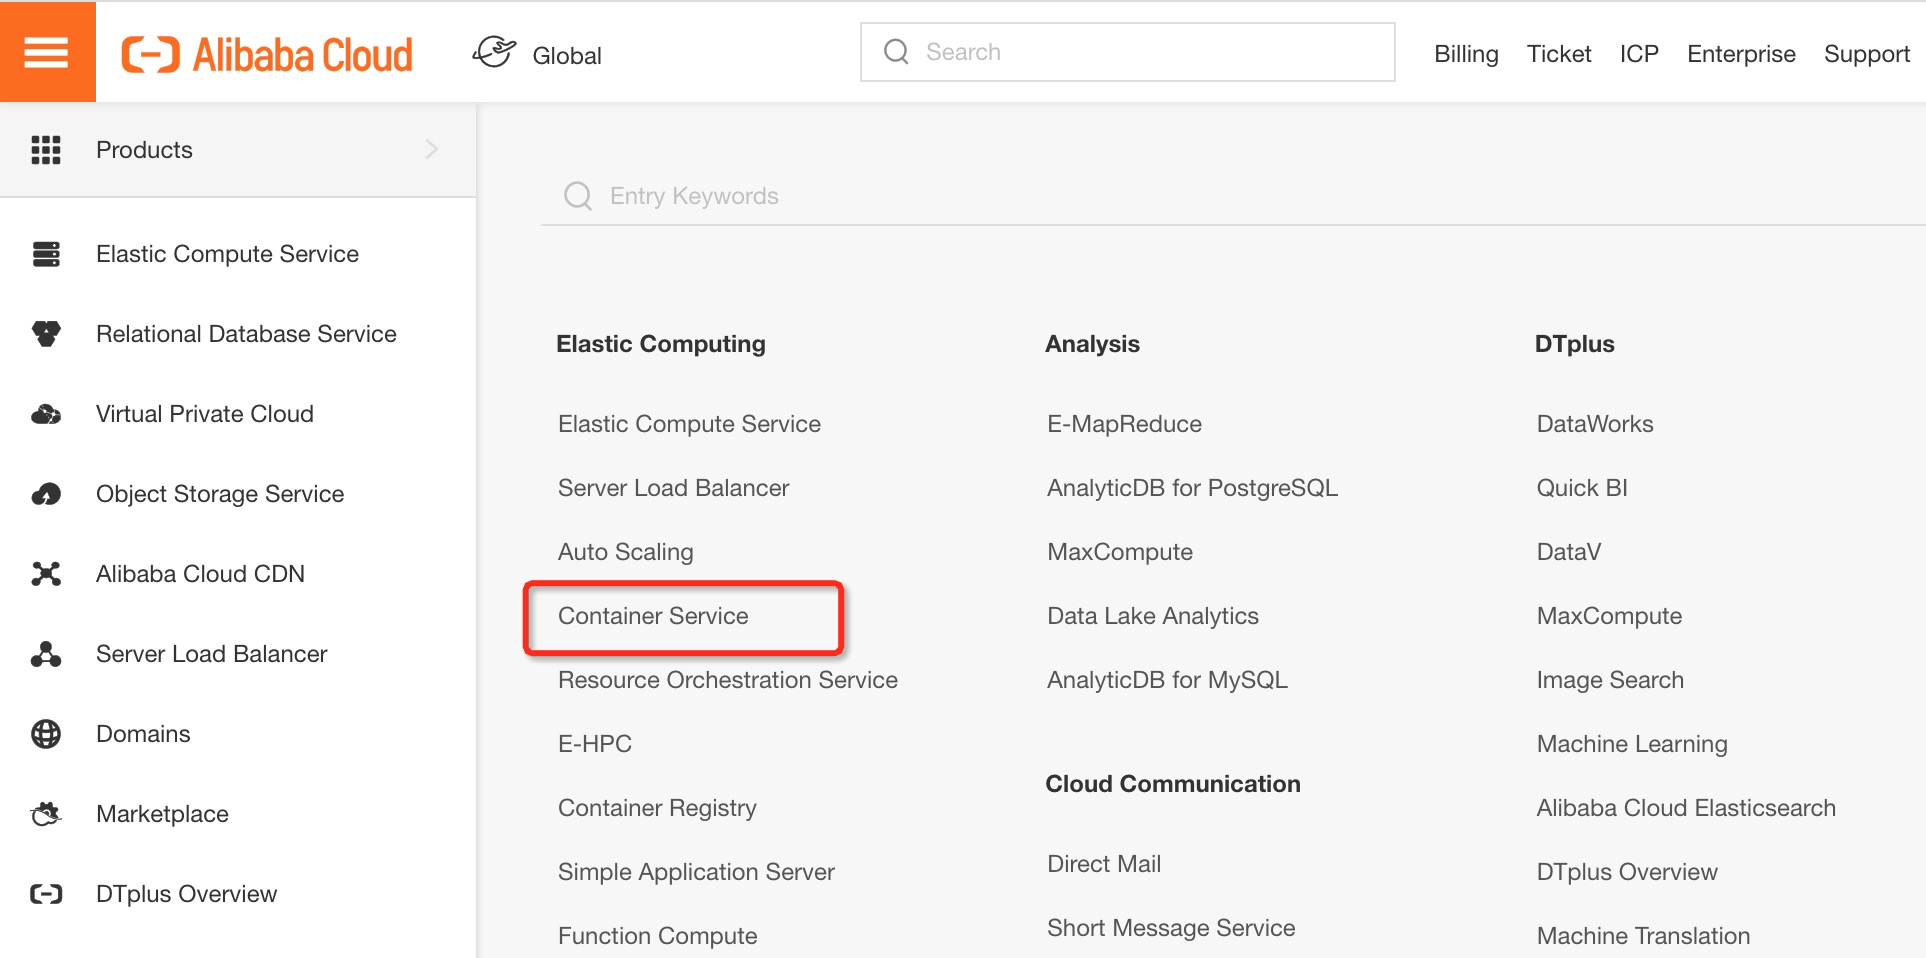
You'll be asked to accept the service terms. Read them, then click to accept them.
After a few moments, the service will be activated.
That's stage 1 complete. The VPC and container services are activated.
Having activated the service, we can now create a VPC. Log into your Alibaba Cloud account if you're not already there, and go to the console. Choose Virtual Private Cloud.

Select the VPC tab on the left hand side of the screen and you'll see something that looks like this.

The top of the screen shows the list of regions in which you can create your VPC. If this is just for test and evaluation purposes, and won't be used for production, then it doesn't matter which region you choose for now. But be aware that your choice of region is important so you'll need to give this some additional consideration before making a final decision.
Whichever region and zone you choose at this point, it's very important that you make a note of it. Because you'll need to choose the same region and zone during the other stages of this tutorial.
In this document, we are using the Hong Kong region, zone B.
From the list at the top of the screen, and bearing in mind the above, choose a region. Then click the Create VPC button on the right hand side.
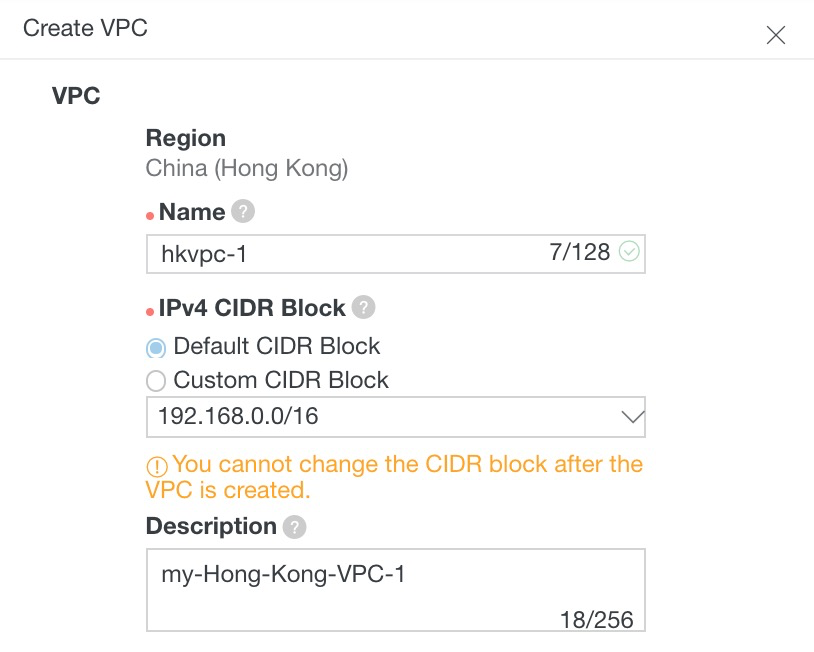
Give your VPC a name and a description.
The CIDR option lets you specify which internal non-routable IP address range you want to use for your virtual cloud-based network. You can choose from 3 ranges.
The 192.168.0.0/16 range gives you around 65,000 possible addresses from 192.168.0.0 to 192.168.255.255.
The 172.16.0.0/12 range gives you around a million addresses from 172.16.0.0 to 172.31.255.255.
The 10.0.0.0/8 range gives you around 16 million addresses from 10.0.0.0 to 10.255.255.255.
Assuming that you don't anticipate requiring any more than 65,000 IP addresses in this VPC, your choice of range doesn't matter. We'll use the 192.168 range for this tutorial.
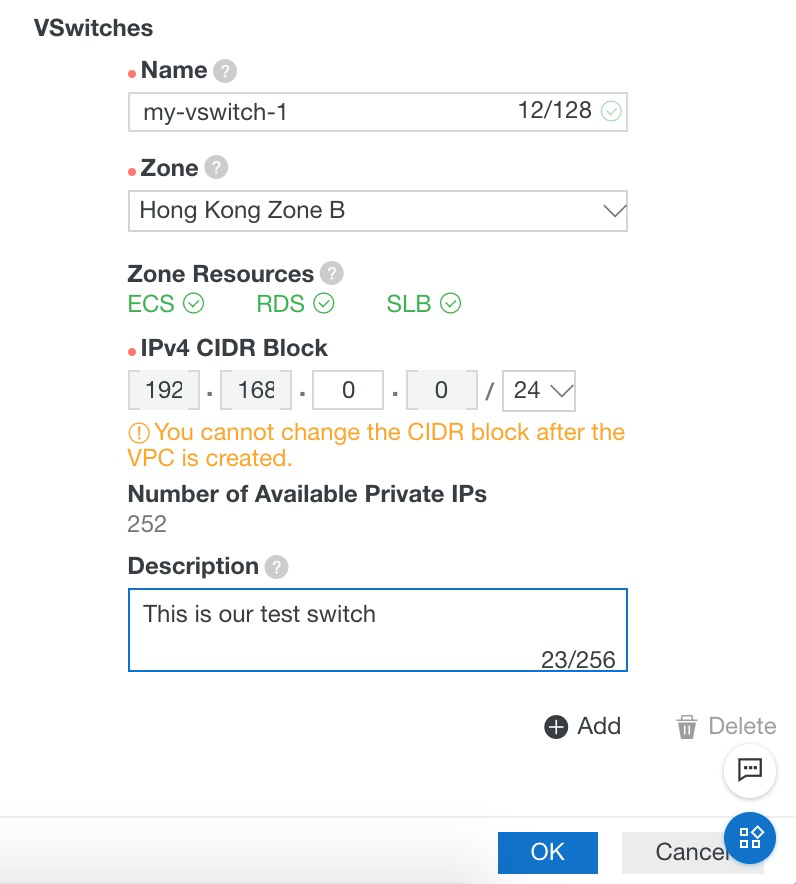
Our virtual network (VPC) needs at least one virtual switch (a VSwitch). So, Alibaba Cloud now asks us to create one.
Give your VSwitch a name, and choose a zone. Remember that we're using Hong Kong zone B for everything in this tutorial. You can use a different region and zone if you like, but make sure that you use the same ones throughout.
You'll be asked to allocate an IP address to your switch, in the range you chose earlier. For this example, we'll use 192.168.10.0/24, which allows it to control up to 252 virtual devices.
If all is well, you'll see a message saying that it was created successfully.
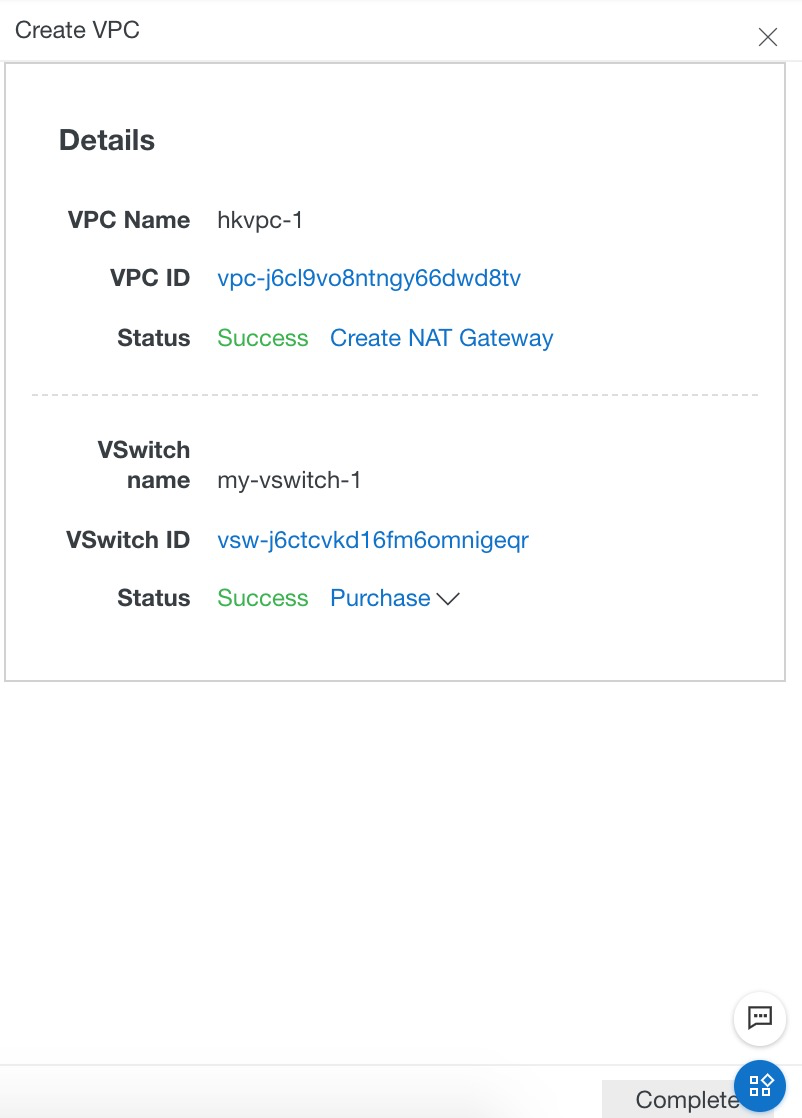
Click on the Complete button within the message box and you should now see your VPC listed.

That's Stage 2 complete. You now have a VPC. Next, we'll create a virtual server (an ECS instance) and add it to our virtual private cloud.
Now we need to create an Elastic Compute Service instance, i.e. a virtual server, within our virtual private cloud.
Return to your main console screen. Click the Elastic Compute Service option on the left hand side, then click Create Instance.
Remember to choose the same region and zone as you have been using for all of this tutorial (Hong Kong zone B in our case).
Choose an instance size. For this example, a small instance (1 vCPU core and 1GB of RAM) is just fine.

You now need to choose a network type. You will probably find that the only type available to you is VPC. Depending on your region and account type, you may also see a legacy "Classic" option listed. This was deprecated by Alibaba Cloud in 2016 as it's no longer considered best practice. So, ensure that VPC is selected if you have a choice.
Then choose your VPC and VSwitch. If their names don't appear in the drop-down lists under Network Type, it means that you have selected the wrong region and zone so go back and correct your choice.
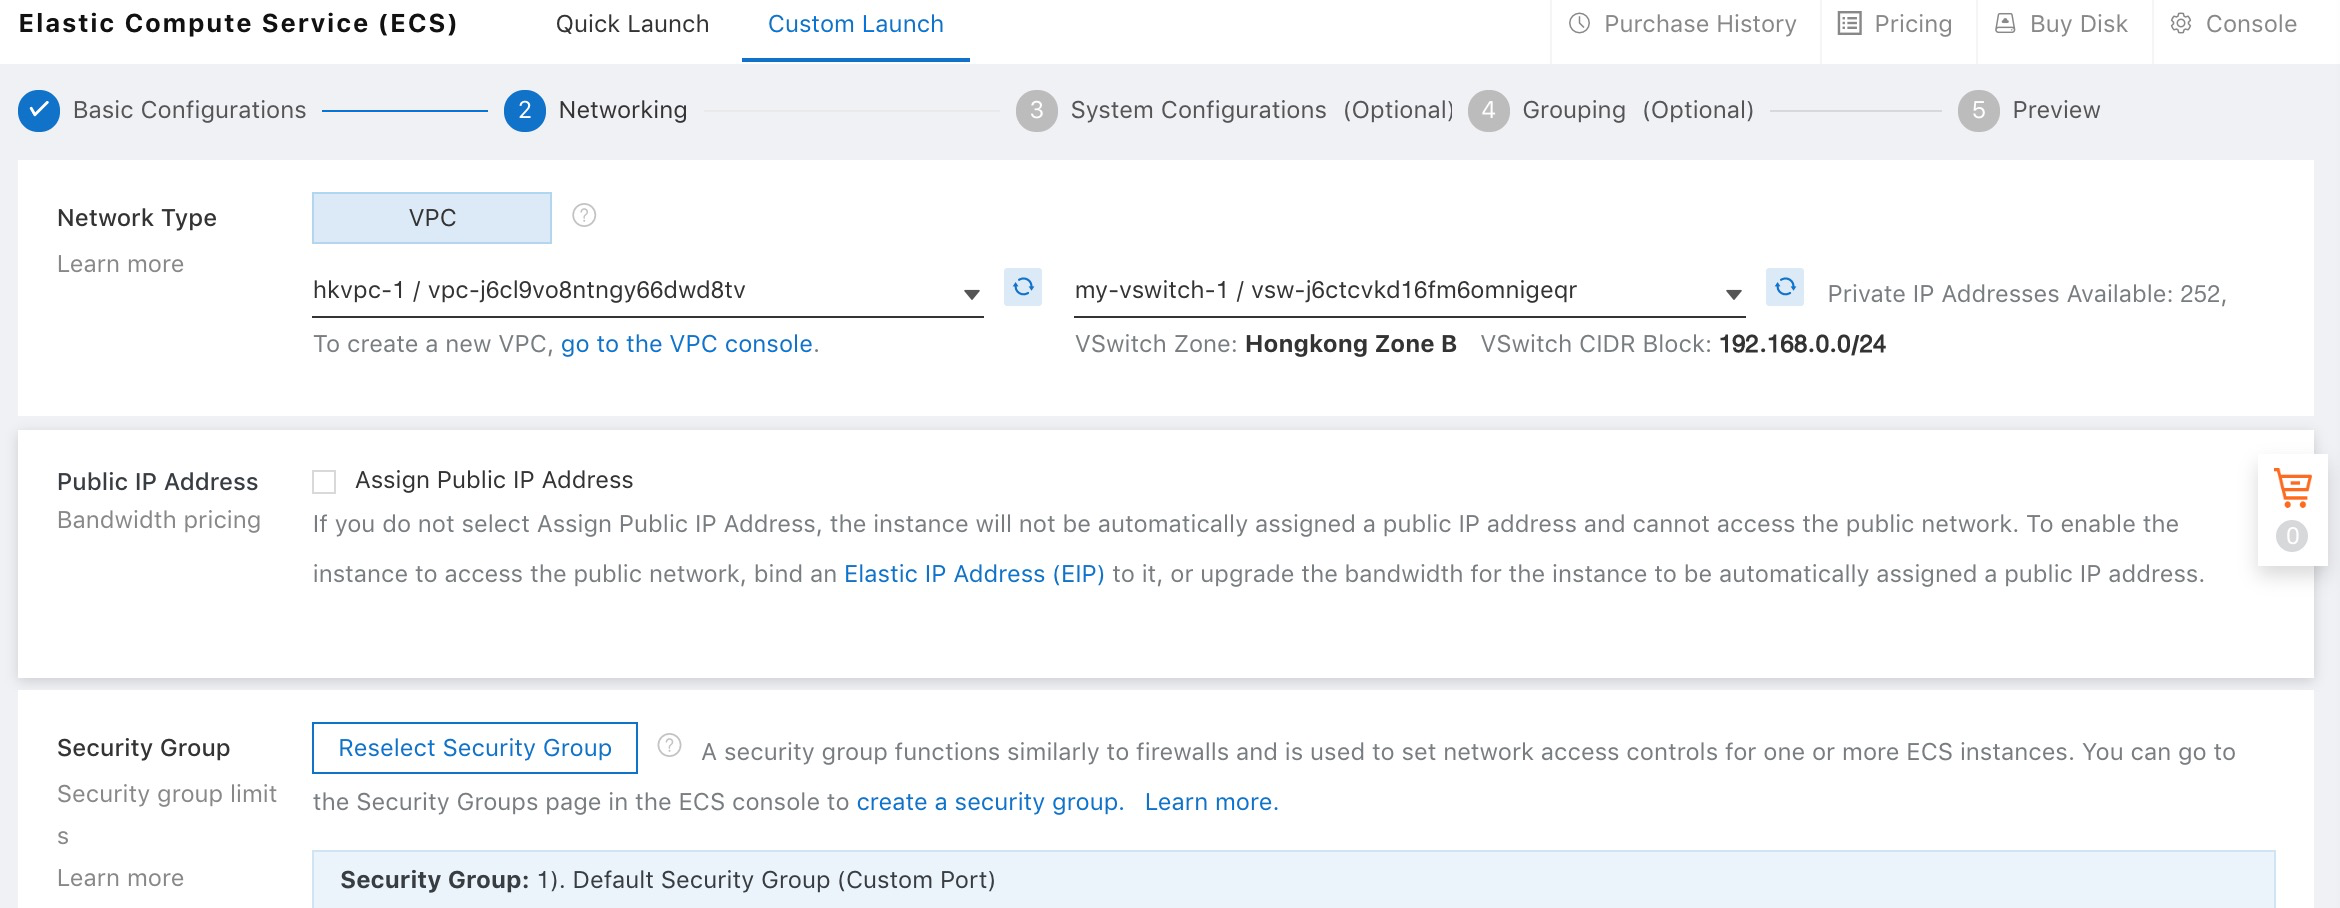
On the same screen, you'll also be asked to choose a security group. A security group is a collection of firewall rules that allows you to control access to your ECS instance. For now, just choose the Default Security Group 2 (customized port) option.
Tick the boxes to enable access to ports 80 and 443. We'll be creating a web server container later and it will need these ports open.
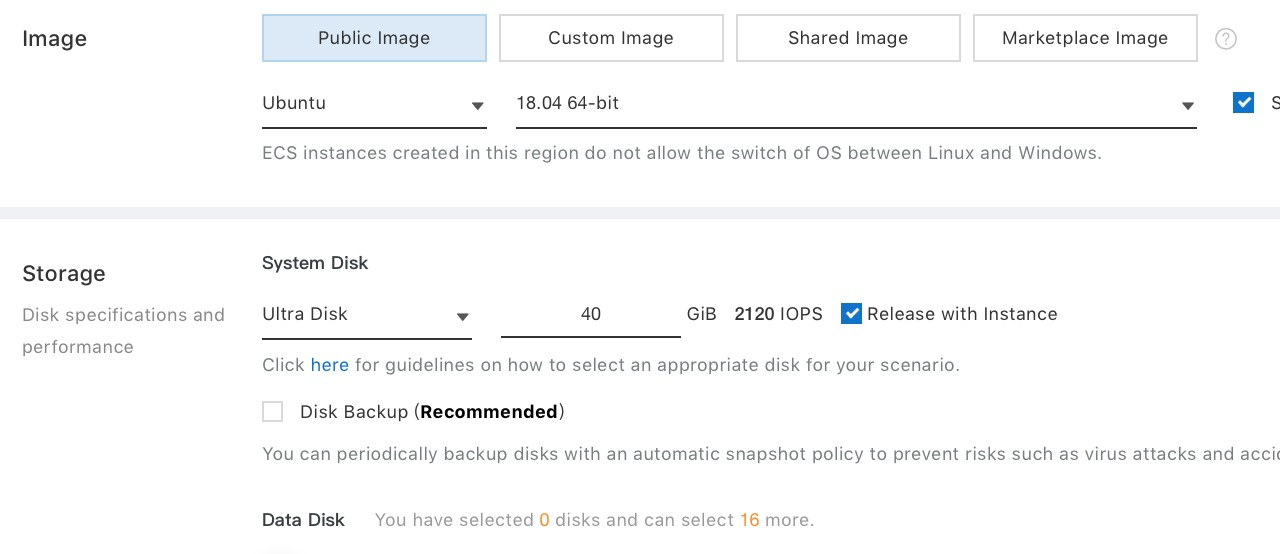
Now scroll down the screen in order to choose your server's operating system and disk size.
For this tutorial we'll use Ubuntu, and a 40GB drive.
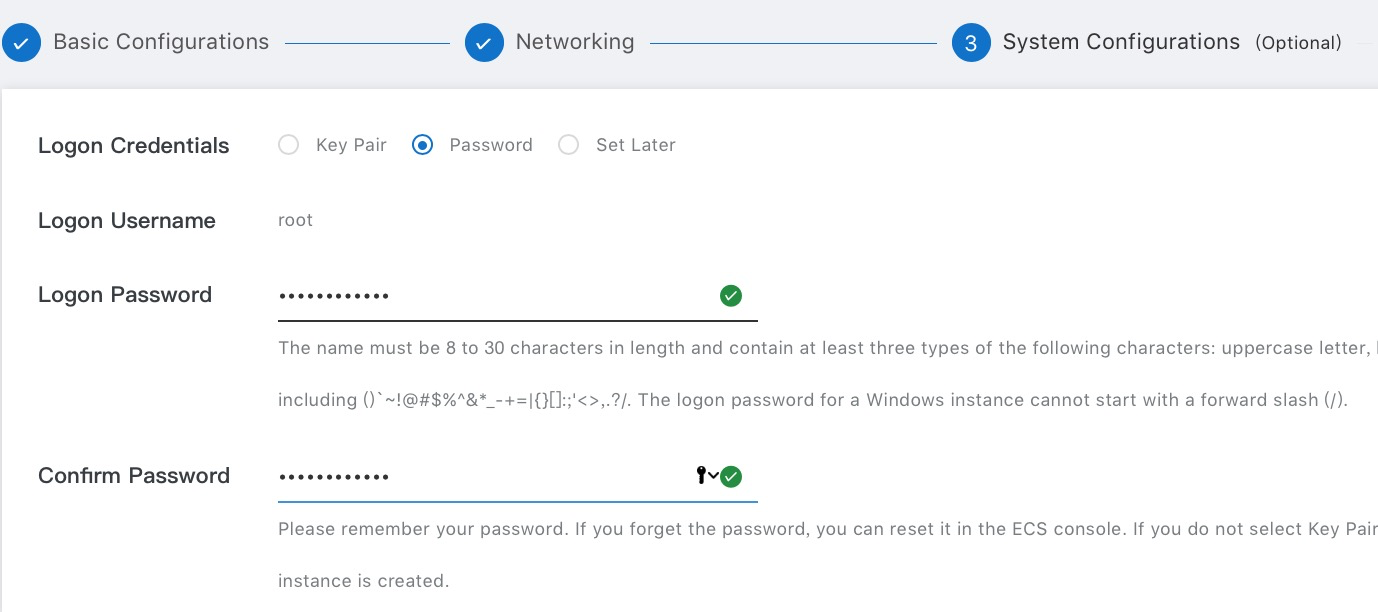
Scroll down the screen again and choose a security setting. This is the method of securing your server. You can opt for a key pair, which is the most secure option, but for the sake of simplicity we will choose Password for now.
Scroll down the screen again to choose the duration of your ECS instance and to assign it a name. For this tutorial, we'll choose a duration of 1 month and disable the auto-renew feature. This keeps costs to a minimum.

Now click the Buy Now button and check that all is correct.
If you have a new Alibaba Cloud account you will have received $300 of free credit, $50 of which can be used to purchase ECS instances and related services. So, you may find, as here, that your instance will cost nothing at all.
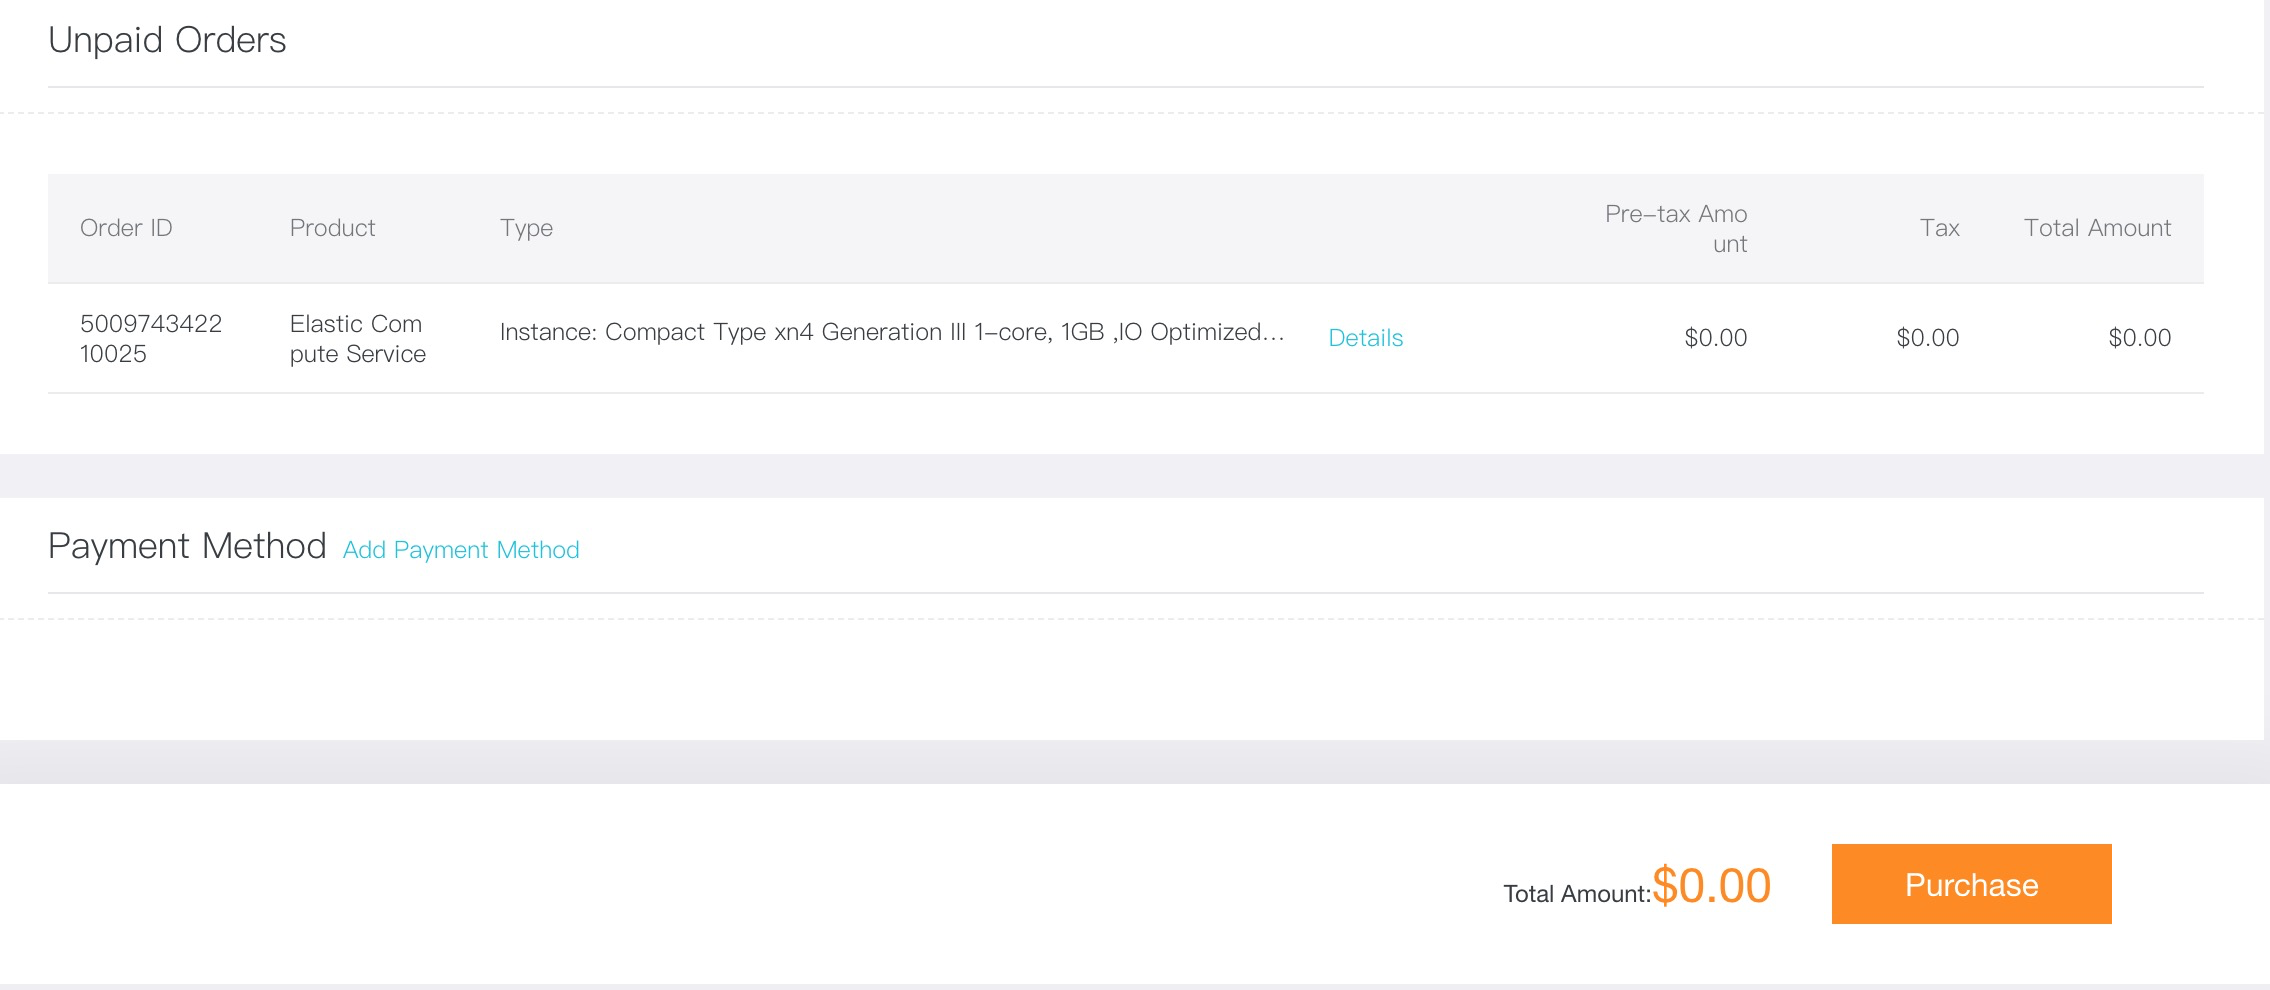
To finish this stage, click on Place Order, and then click on the Create Instance button on the screen that follows.
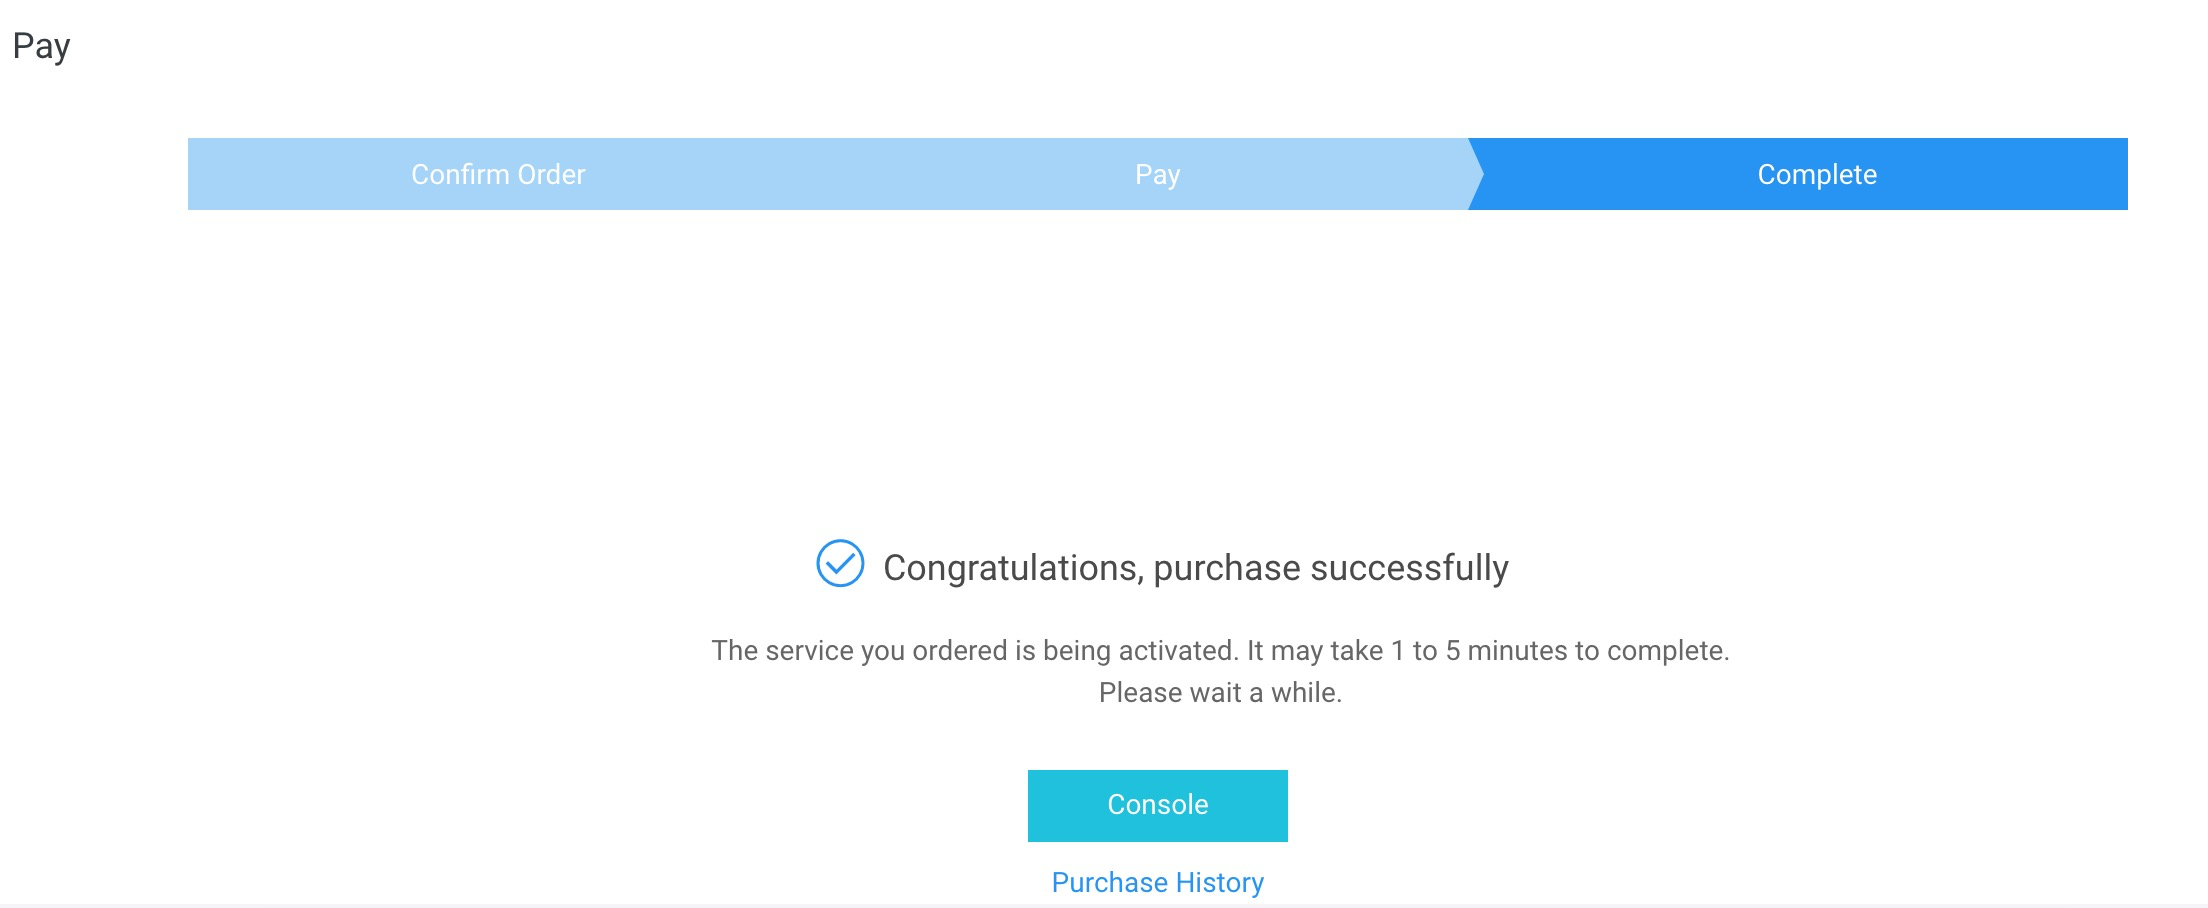
That's it for this stage. You now have an ECS instance.
If you need more ECS instances, or servers, in your VPC in the future then you can go through the steps in stage 3 again. But for now, one is sufficient.
Note that, although these are conventional virtual servers and you have chosen a root password with which to connect to them, the Alibaba Cloud container service takes care of deploying containers on the servers in your VPC. So, you won't need to log into a server in order to deploy a container.
We now have a VPC which contains an ECS instance and a VSwitch. Before we can use the container service there's one more stage, that is to create a cluster. In this fourth stage, we'll do that. Then we will be able to quickly deploy containers on our new infrastructure that we have built.
From the main console screen, click on Container Service.
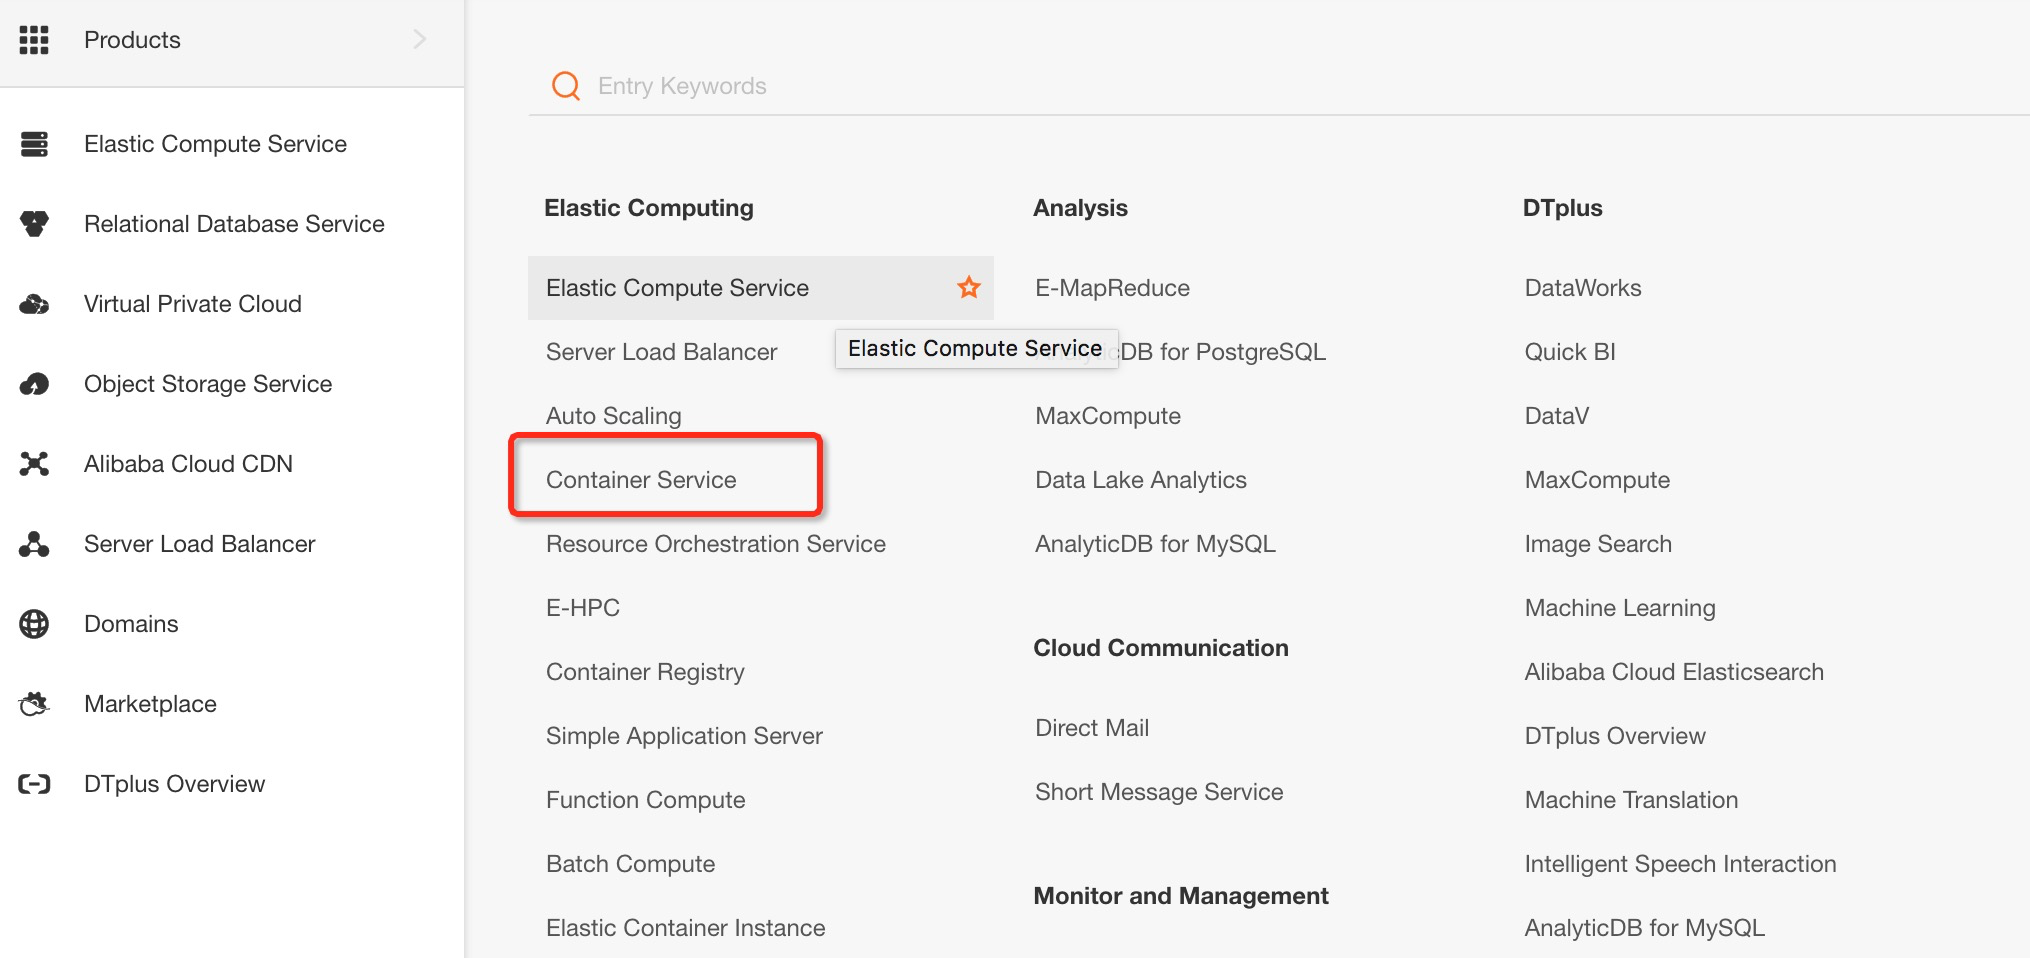
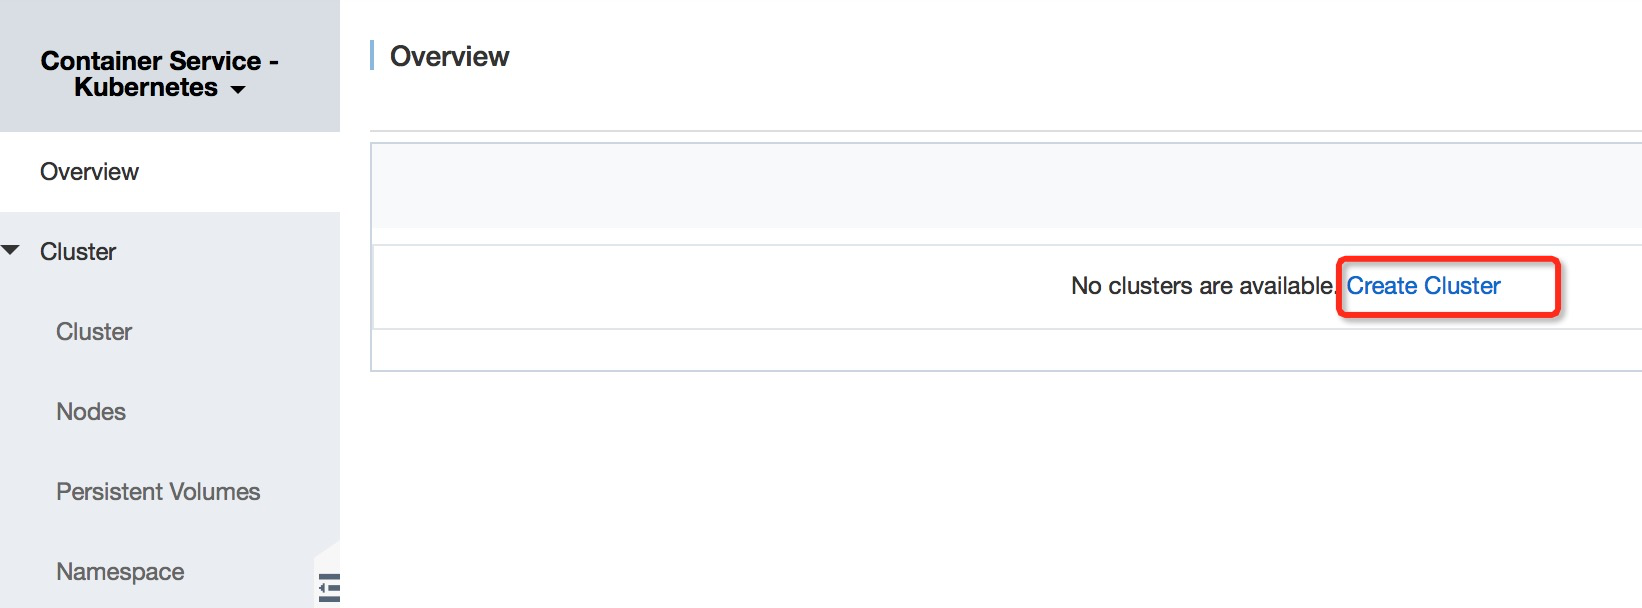
We activated the service earlier in stage 1, but we didn't do anything else. Now we will rectify that.
As you can see from the screen, you need a cluster in order to create containers and we don't currently have one. So, click on the Create Cluster button.
As before, ensure that you select the correct region and zone for your cluster. That is to say, the same region and zone as you have used in the previous stages of this tutorial. In our case, we've been using Hong Kong zone B.
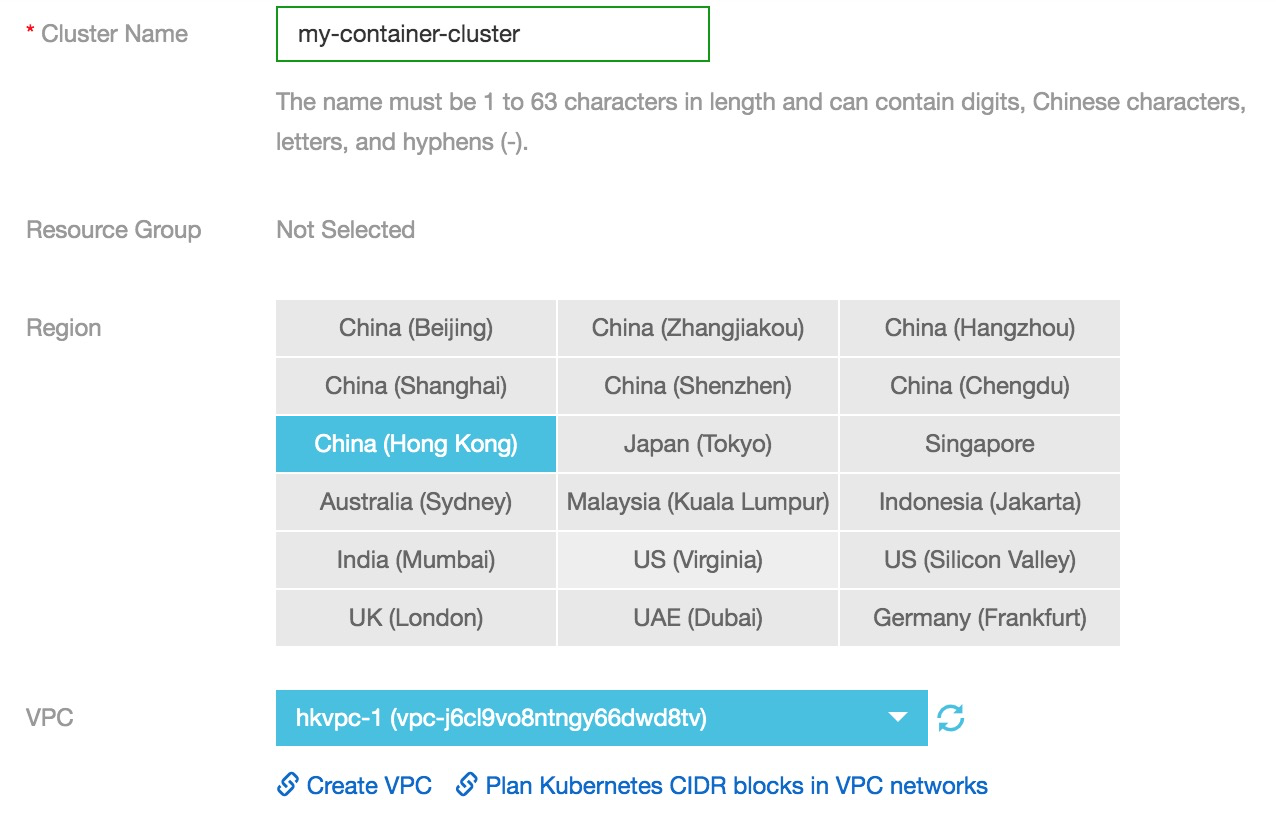
Also ensure that the network type is set to VPC. You probably won't see any other options for this. But if you do see a "Classic" option for the network type, be aware that this was deprecated in 2016 so don't choose it.
Underneath the network type setting, select the VPC and VSwitch that you created earlier. If they're not listed, you have chosen the wrong zone or region.
Scroll down to the work instance section and click on the Add Existing Instance link. This will allow us to add the ECS instance we created earlier into our new cluster.

The left hand pane shows your existing instances. Click on the one you created earlier and then click the right arrow to add it to the right hand pane, which shows the list of instances in your cluster.
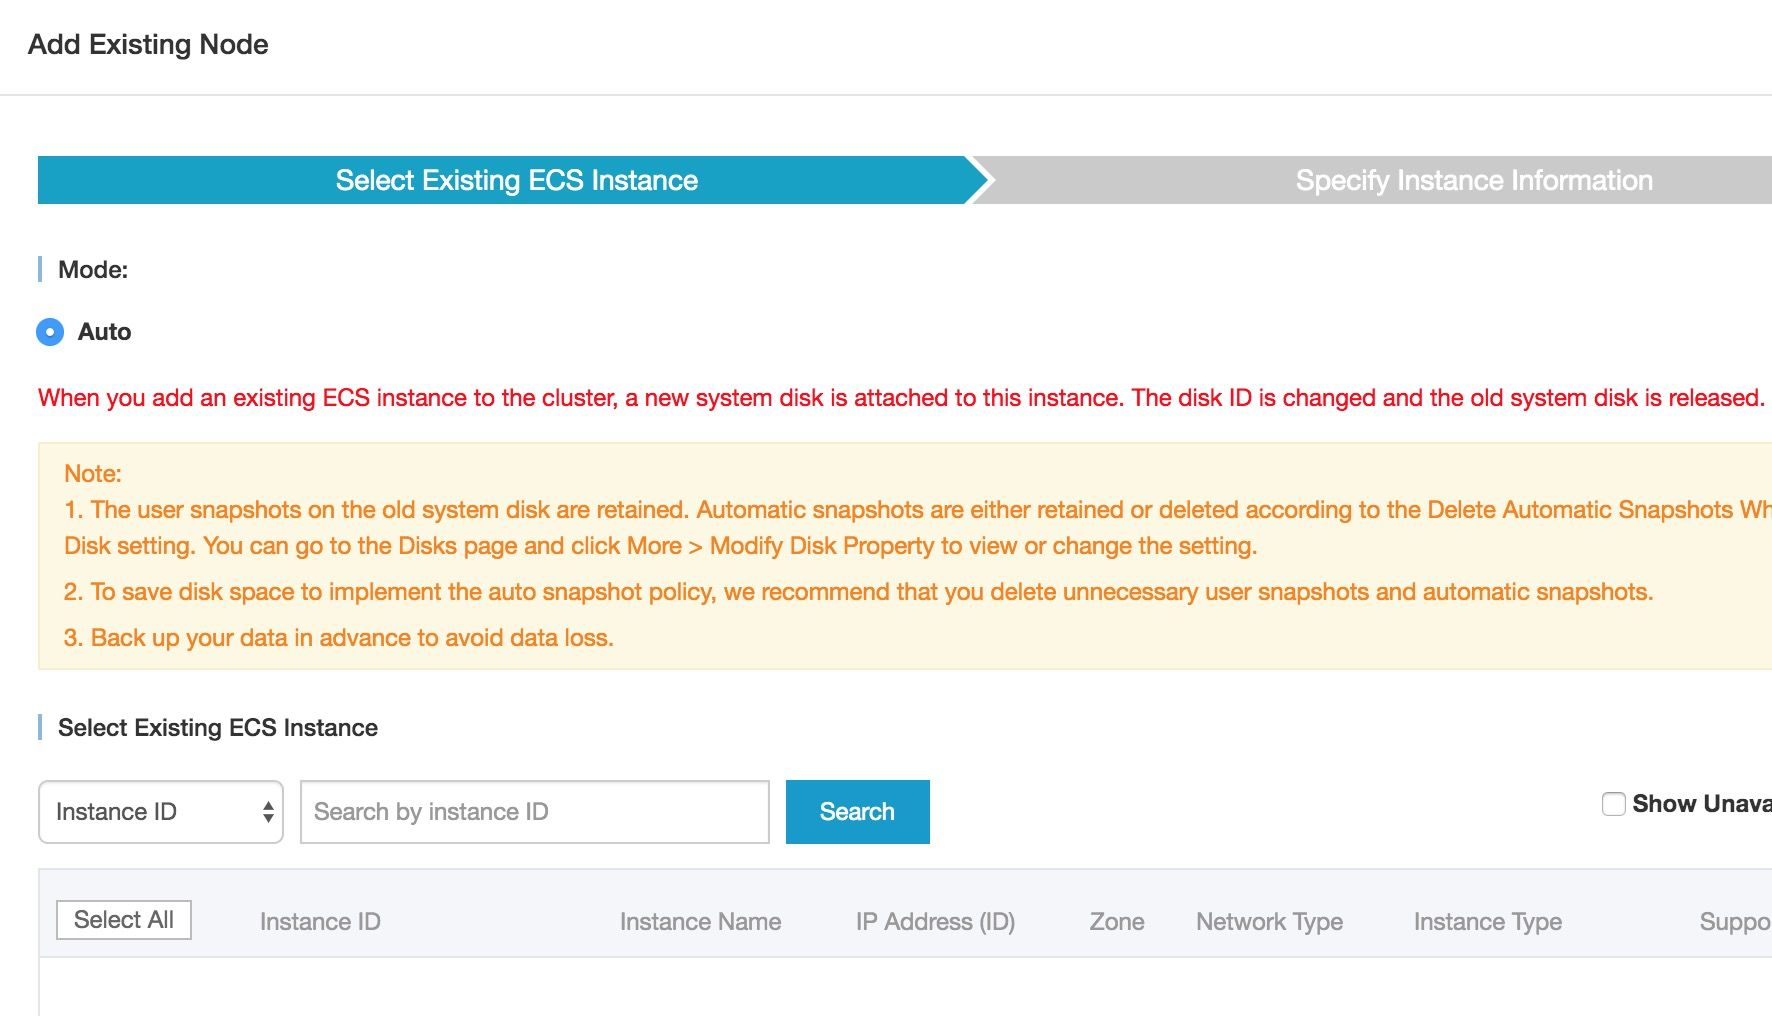
Click on Next Step, and choose a password when asked.
You'll see a reminder that port 22 needs to be enabled in the security group. We'll deal with that later.
For now, you probably don't need Server Load Balancer so untick this option. It's not necessary for a single ECS instance, and will incur additional charges.
Scroll down to the security group and you should see, as mentioned above, that port 22 is indeed open (access is allowed). There's nothing that we need to change here.
Return to the top of the screen and click on Create Cluster, then click the OK button on the screen that appears.
Our cluster will now be created. It takes a few minutes and it's OK to log out of the control panel or close your browser while this is happening behind the scenes.
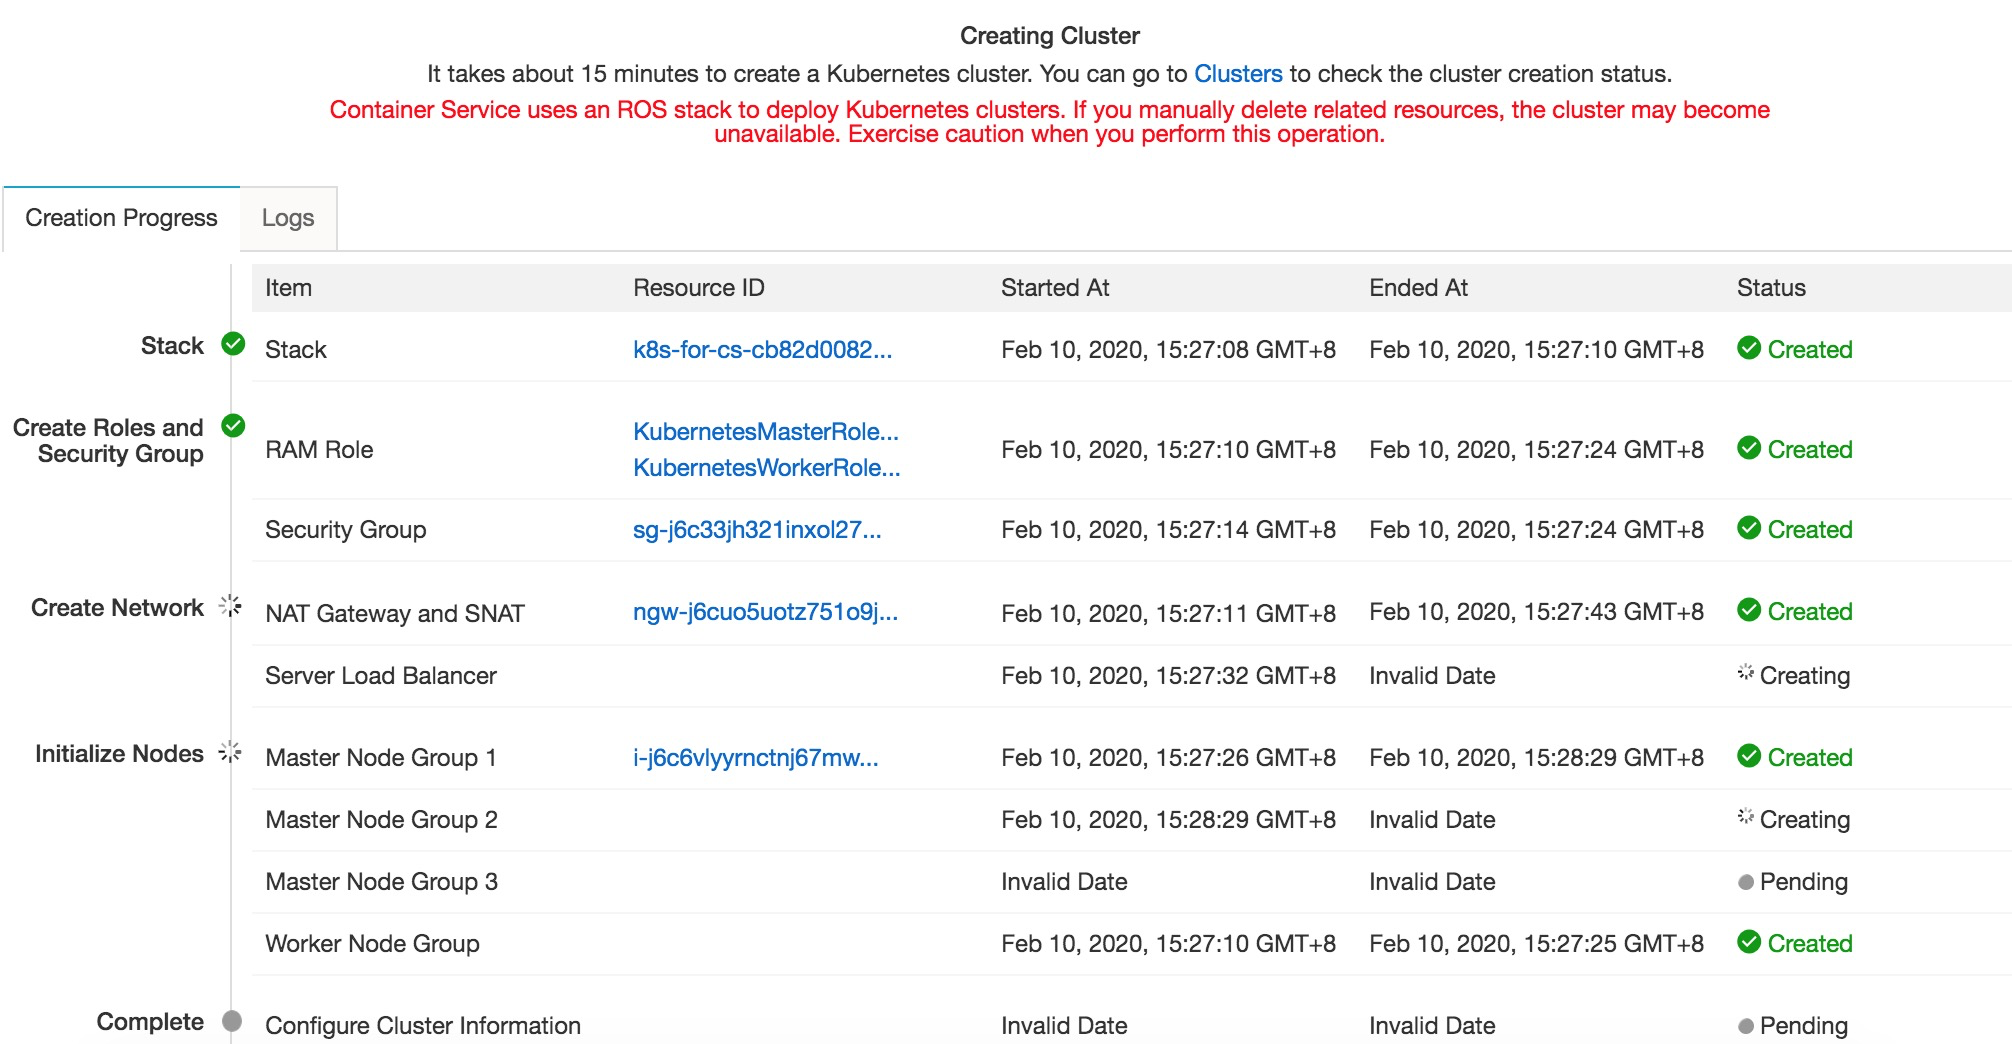
You may be asked to activate the Resource Access Management (RAM) service at this point.
If so, check the Service Terms and click the Activate Now button. You'll find yourself at the RAM overview panel.
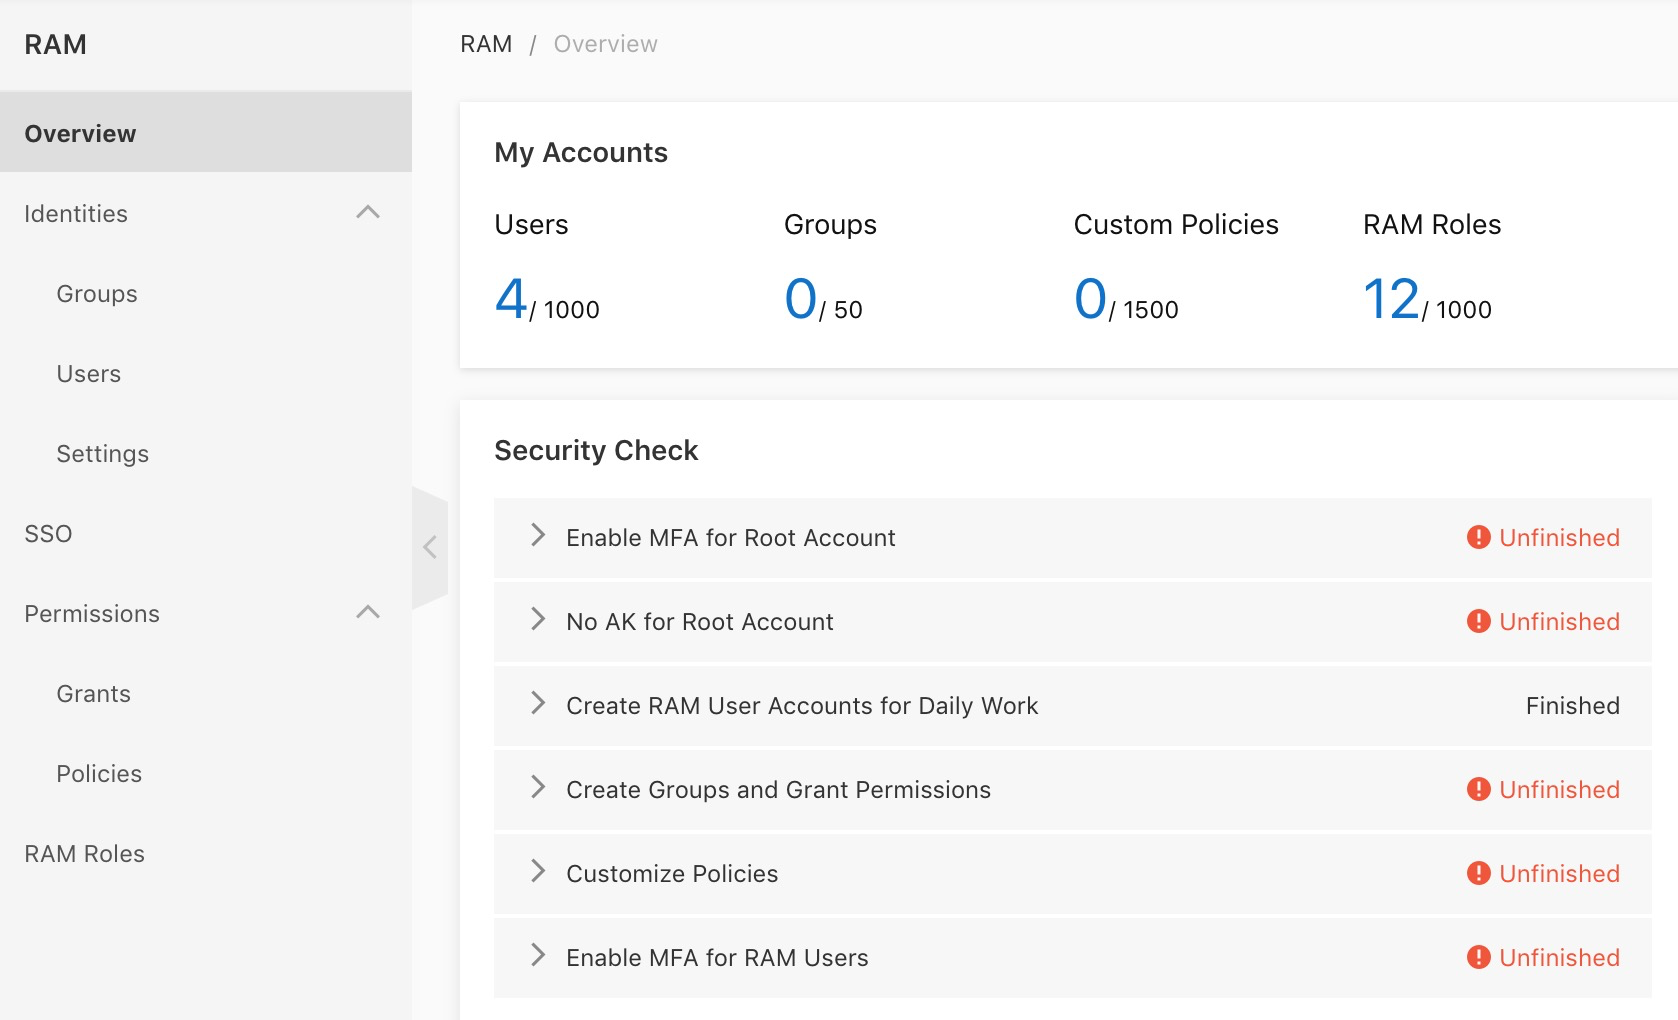
There's nothing you need to do here, so go back to the console home page and click on Container Service.
The screen will probably look like this, showing that your cluster contains 1 node (1 ECS instance) and that it's initializing. The node is where we'll create containers.
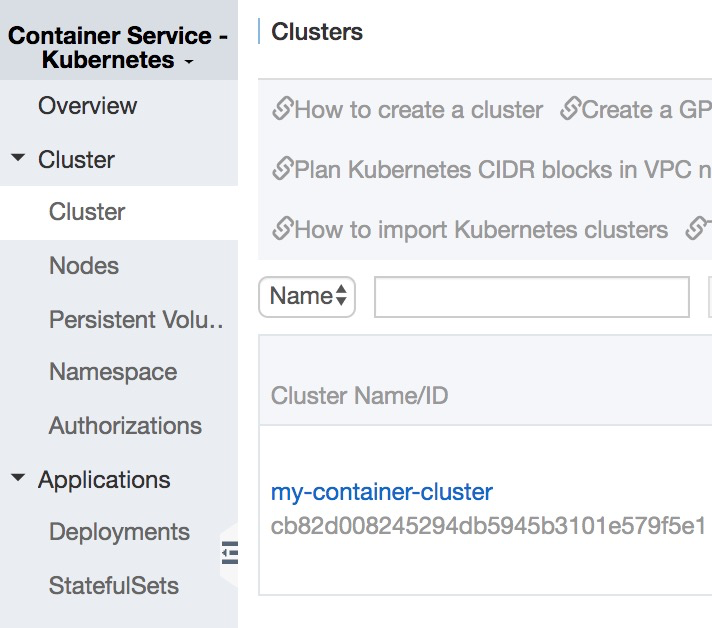
After a few minutes, go to the console home page again, select Container Service, and the screen shown above will have changed to the following. Your cluster is now up and running.
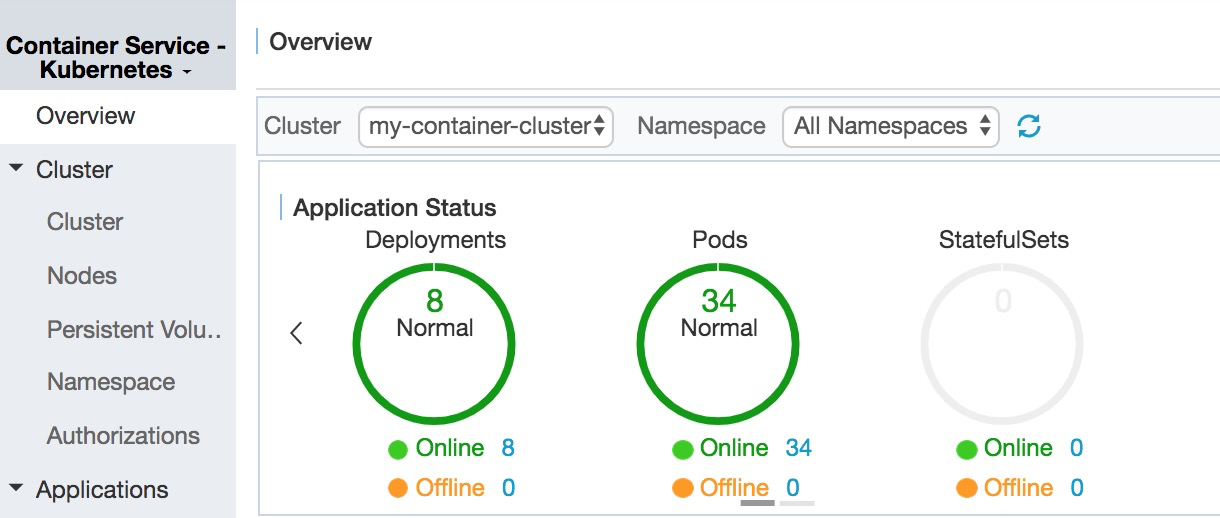
Here you can see information about the various components and services of your cluster. If you're curious you can click on any of the blue links and drill down to see further information, but it's not essential.
Your cluster, and thus stage 4 of this tutorial, is now complete. We can finally move to stage 5 and start creating containers. Having done all the previous configuration work, you'll find that actually creating and accessing containers is surprisingly quick and easy.
From the main Alibaba Cloud console screen, under Elastic Computing, select Container Service. Then from the menu on the left hand side, select Images and Templates. From there, select Docker Images.
The standard test for a container system is to deploy the Docker hello-world container so that's what we'll do first.
Click on the Official tab at the top of the screen.
Look down the list of available Docker images until you find hello-world. You will probably have to scroll down to the bottom of the screen and click the arrow in order to move onto page 2 or 3.
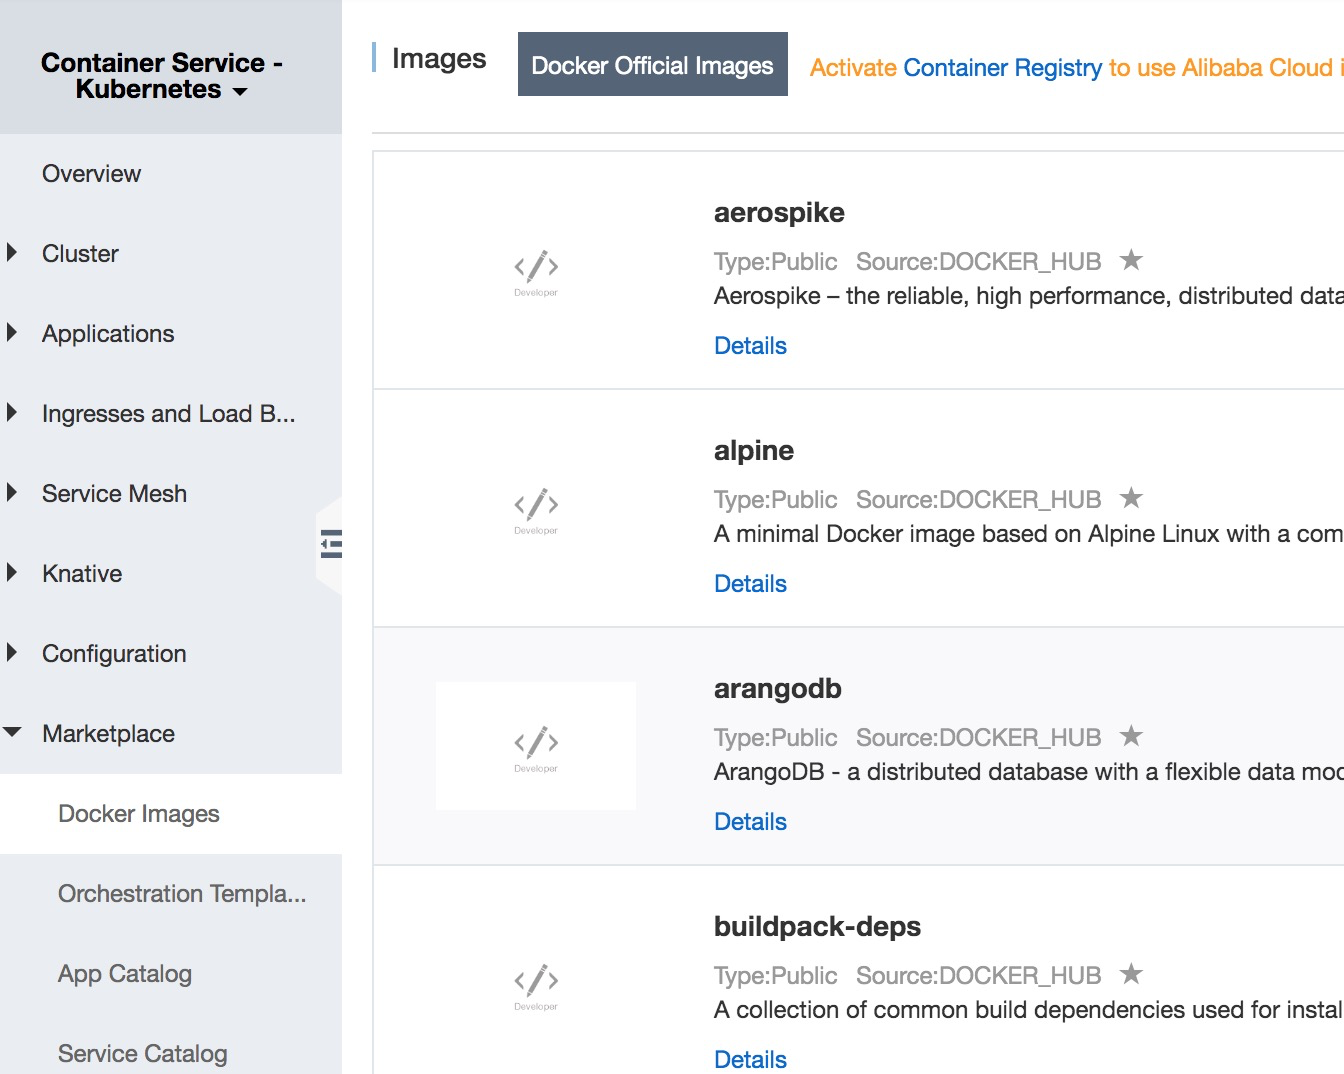
When you find the hello-world image, click on its Create Application button and you'll see the following.
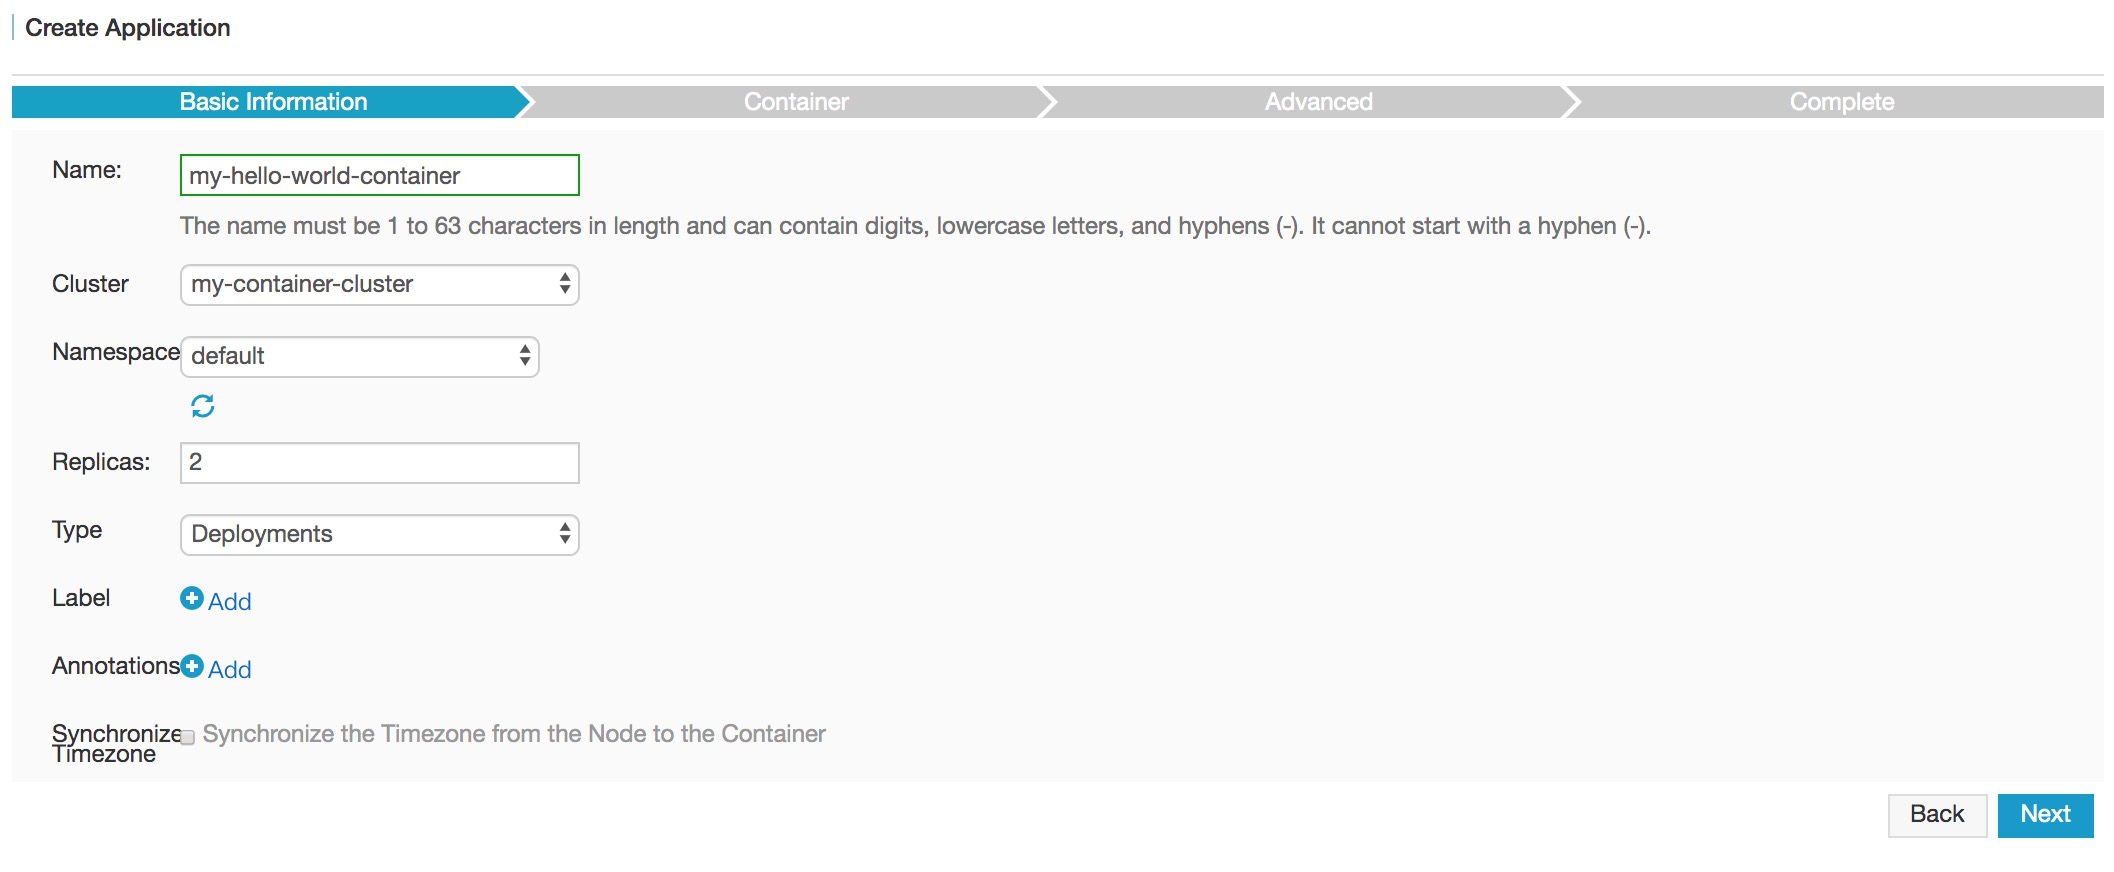
This is where you create the instance of the container. Choose a name for your container. Leave the version setting as it is, and leave the update setting at Standard Release. Add a description if you wish.
Tick the "pull Docker image" box so that you definitely end up with the latest version rather than anything that may be cached in your cluster.
The next screen, called Configuration, will appear.
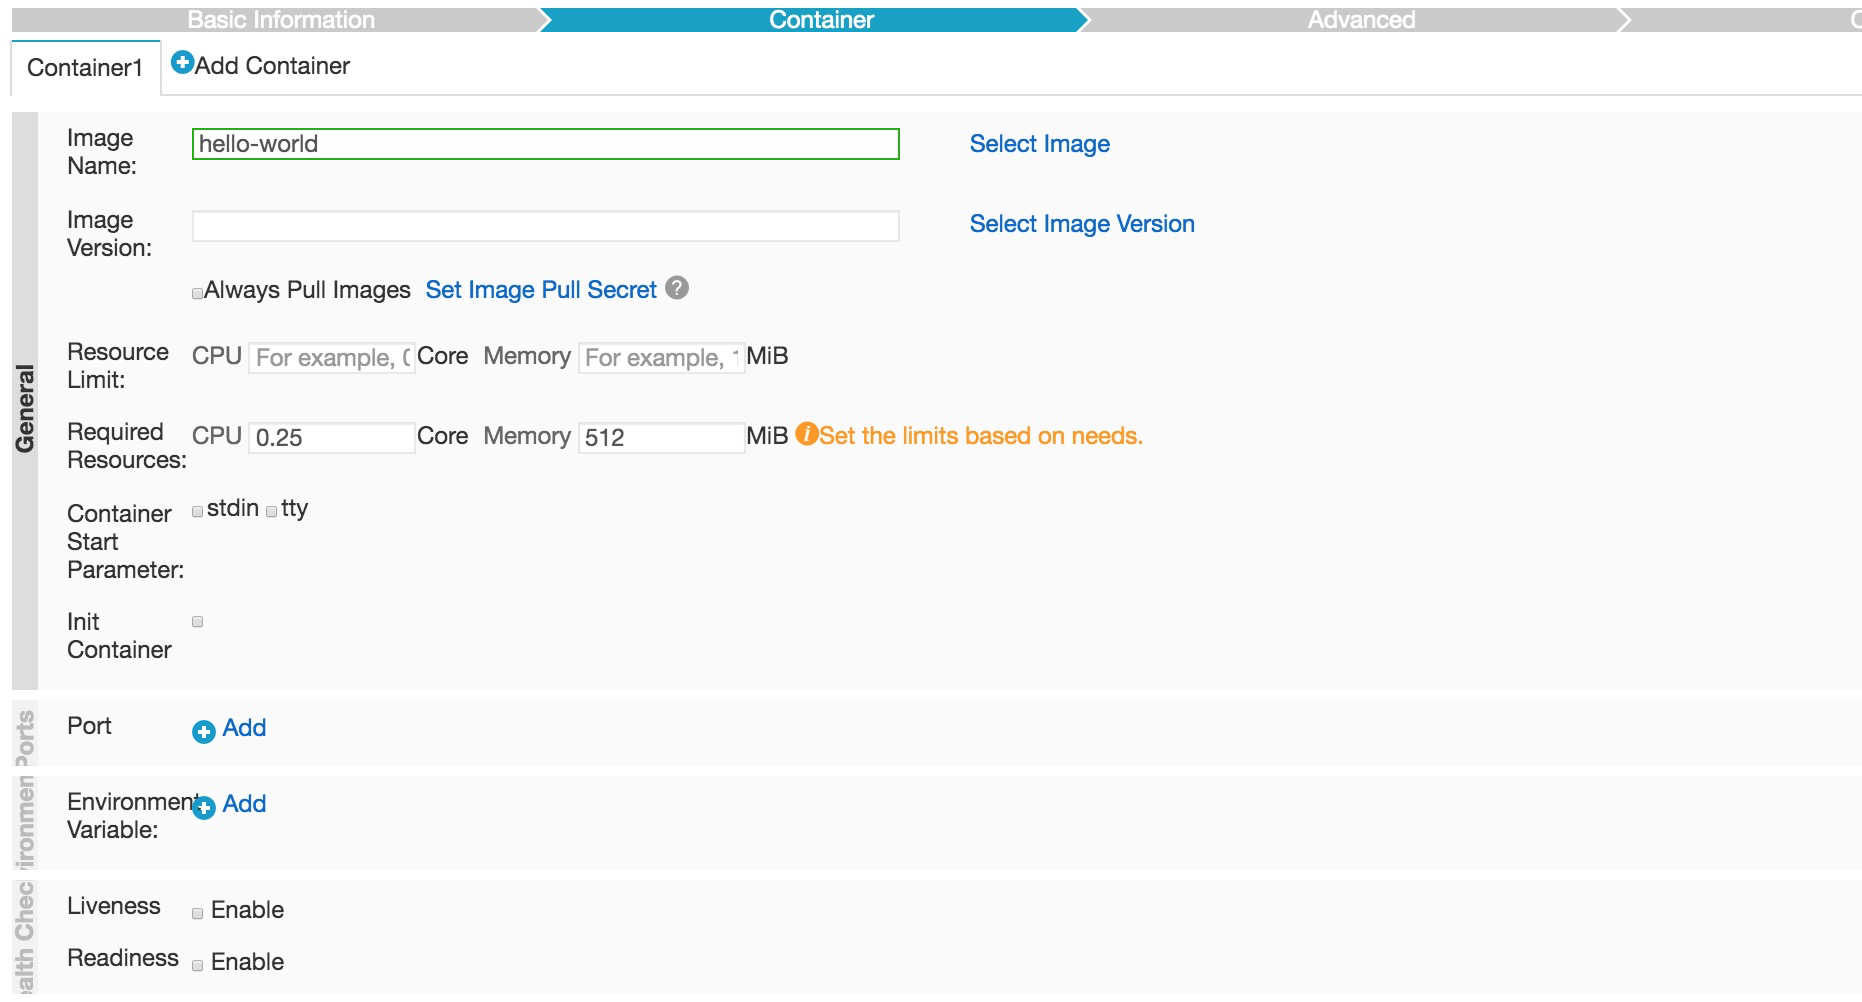
You can ignore all of the settings on this screen and leave them at their default. Just click on the orange Create button. Your container will now load and run.
If you're familiar with the hello-world Docker container then you should recognize its output. Let's see if it worked.
Return to the main console. Under Container Service, click on Applications. Then click on the name of your container.

Then click on the Logs tab.
And there it is. You can see the output generated by the hello-world Docker container.
Congratulations. You have now deployed a Docker container using the Alibaba Cloud container service.
Finally let's do something a little more ambitious. Let's deploy a Docker container that includes a full Nginx web server. Our single ECS instance is more than capable of hosting more than one container so there's no need to repeat any of the steps from stages 1 to 4 above. We just deploy the new container in the same way that we deployed the hello-world one.
From the main Alibaba Cloud console, under Container Service, click on Applications. At the top of the screen, click on the Create Application button.
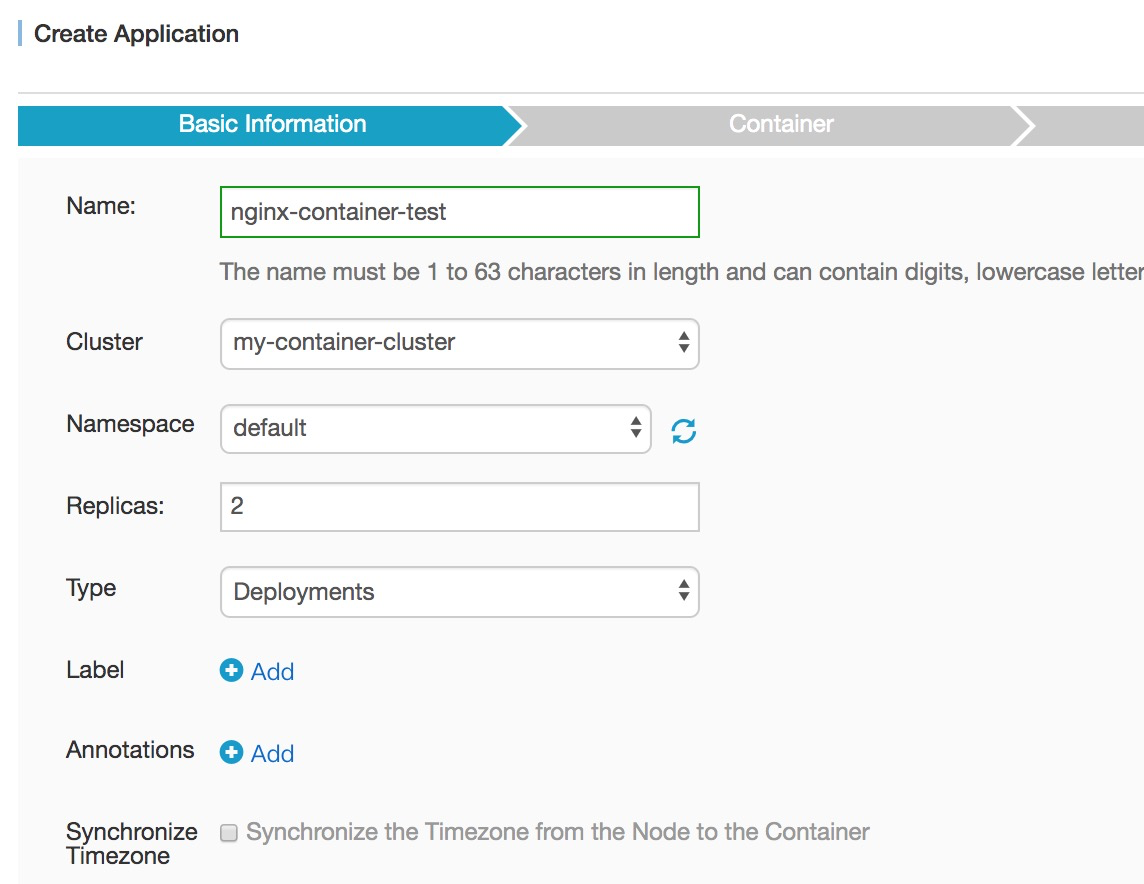
Give this application a name, add a description if you wish, and tick the Pull Docker Image box. Then click on Create with Image.
You'll see the screen below.
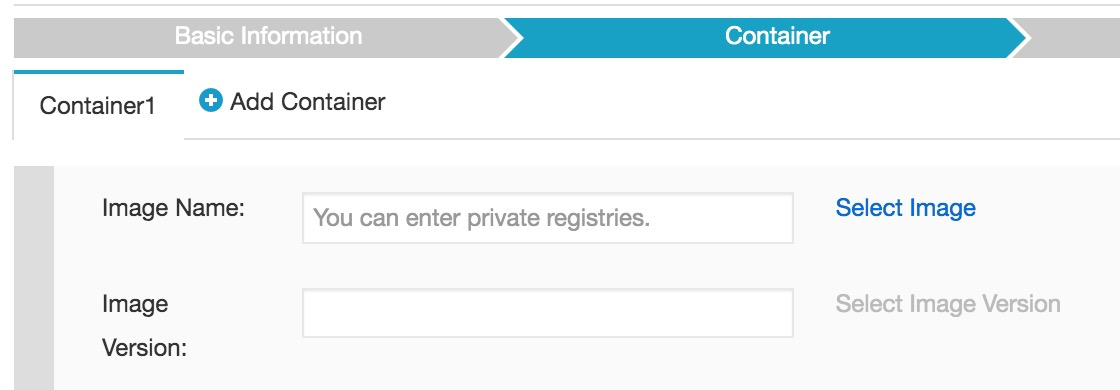
Click on the Select Image link.
From the Popular tab, choose Nginx (it's near the top of the list) and press OK.

In the Network section of the page, under Web Routing, click the blue "plus" symbol.

In the Container Port field, type 80.
In the Domain field, enter Nginx.
Now click Create on the right hand side of the screen.
You should now see a link to your application list (which you can also reach via the console of course).
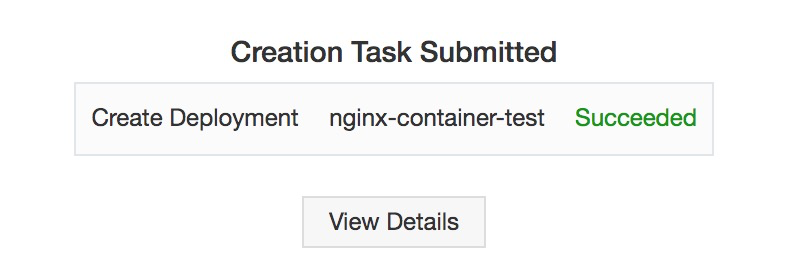
Under Applications you should see your new container listed alongside the other hello-world one.
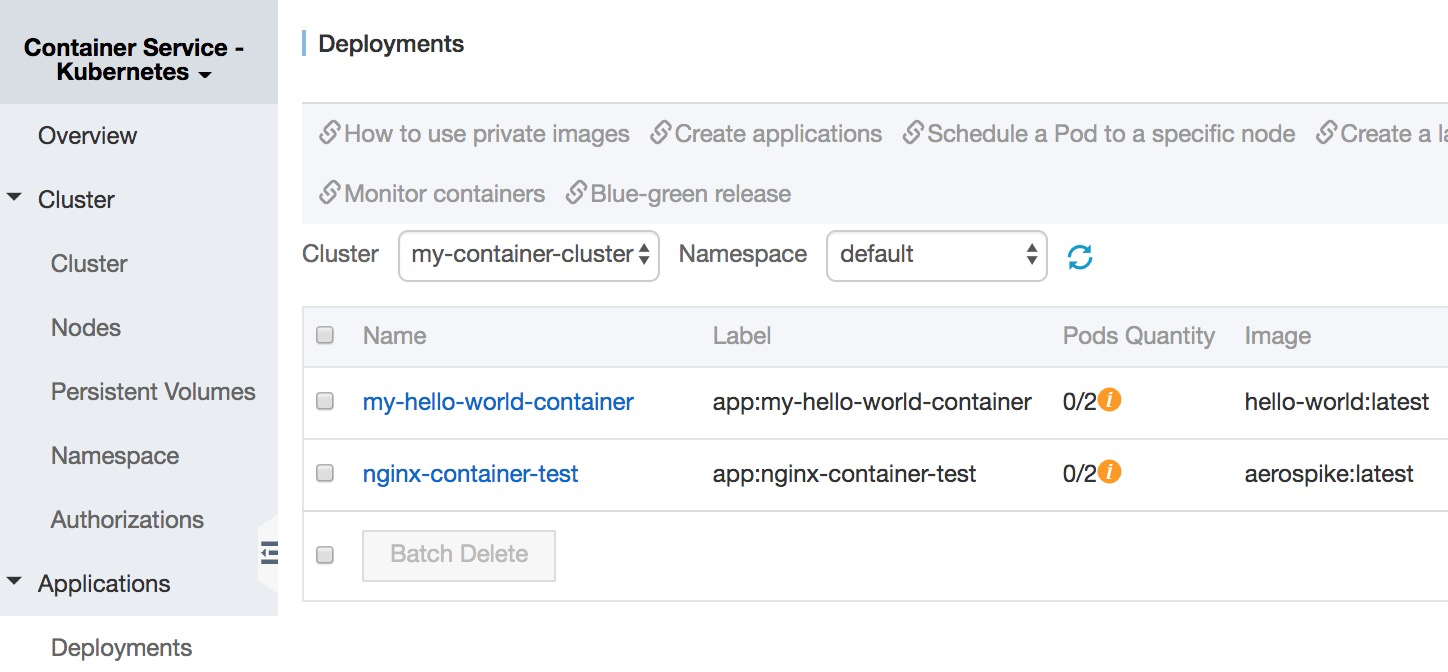
Click on the name of the container (Nginx-container-test in the example here) and you will see the container name with five tabs above it. Click on the Services tab.
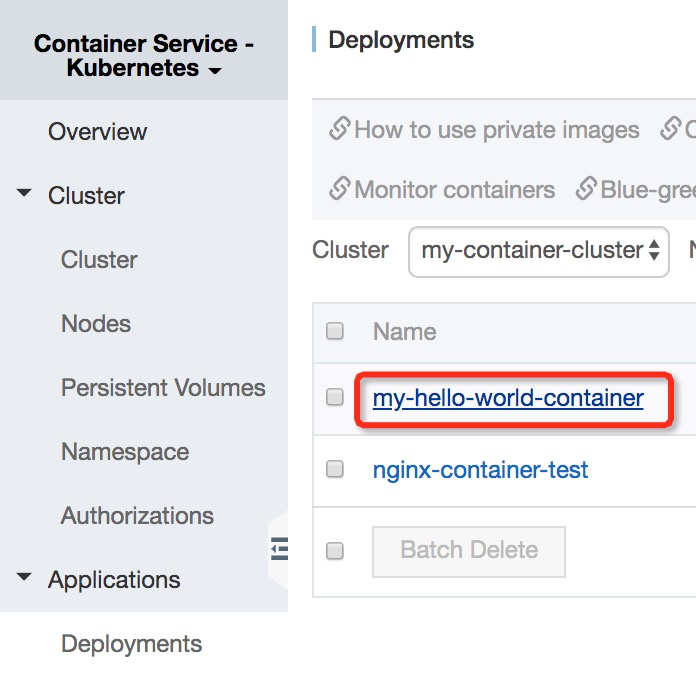
In the Services tab, click on the name of the container. You'll now see various items of information about your Nginx web server container, including its access endpoint.
That access endpoint is the URL of your Nginx web server container that you just created. If you click it, you'll see the Nginx home page.

We now have a working web server running as a container in our new cluster, that took just a couple of minutes to create.
Using the Alibaba Cloud container system involves a degree of preparation work, but this only needs to be done once. It's fully described in stages 1 to 4 of this tutorial.
Once you've done that work you can create new containers very easily and quickly. In the last few pages we've set up two containers in very little time.
Before you use the container service in a production environment there are other things that you will need to consider. You'll probably want to set up your own domain names for addressing your containers, rather than using the default endpoint names. And you should definitely consider how best to set up your security groups and arrange the architecture of your VPC.
Your new Nginx server is now publicly available via its listed endpoint from anywhere in the world.
As a further exercise, why not use what you've learned in this tutorial to deploy some more containers in your cluster?
Setting up a Jenkins-Based Continuous Delivery Pipeline with Docker

2,593 posts | 793 followers
FollowAlibaba Container Service - May 30, 2019
Alibaba Developer - June 23, 2020
Alibaba Developer - February 26, 2020
Alibaba Developer - February 26, 2020
Alibaba Developer - April 3, 2020
Alibaba Developer - June 23, 2020

2,593 posts | 793 followers
FollowLearn More
 Container Service for Kubernetes
Alibaba Cloud Container Service for Kubernetes is a fully managed cloud container management service that supports native Kubernetes and integrates with other Alibaba Cloud products.
Learn More ECS(Elastic Compute Service)
Elastic and secure virtual cloud servers to cater all your cloud hosting needs.
Learn MoreMore Posts by Alibaba Clouder