This document will show you how to use Alibaba Cloud Web Hosting in order to set up a new website, complete with a domain name. If you follow the steps here you will have a new website up and running, accessible worldwide using the name of your choice, and hosted on the Alibaba Cloud platform.
This document assumes that you already have a working Alibaba Cloud Account and that you know how to access the Alibaba Cloud console. If you don't, then you need to create an account before you go any further. It is free to set up.
You will also need to set up a valid payment method (a credit card preferably, although PayPal is also accepted for some services). Later you will need an FTP program such as FileZilla, so it is a good idea to install one of those now if you don't have one.
There are two main ways to host a website. In essence they are the same, but there are some important differences. Understanding those differences will help you choose the right type of service to use on Alibaba Cloud, so let's run through them right now.
When you create a website, you are creating or acquiring HTML document files, web pages, databases, programs scripts, images and so on, and storing them on a server in the cloud. For complete control, you can create your very own server using Alibaba Cloud. It is not a physical metal box, but what's known as a Virtual Server. This means that you share a physical metal box with a number of other customers, but your virtual server behaves as if it is your own. You can do whatever you like on it. You can host websites and email. You can run WordPress. You can install your own software, and much more besides. And you can tweak every last setting on the websites you host, because the web server belongs to you alone and so your changes won't affect anyone else.
A virtual server like this gives you ultimate control, but you also need technical skills to keep it running securely and effectively. You will need to install security patches regularly, and fix it if things go wrong.
On the other hand, maybe you don't need a complete server, virtual or otherwise. Perhaps all you need is a folder on an existing web server in which you can safely and securely upload some files and images etc. to create a website. You don't need to install an accompanying email server, or to be able to change and tweak every last setting. And you certainly don't have the time or skills to keep a server running in tip-top condition – you're more than happy to leave that to someone else within Alibaba Cloud.
The former option requires that you set up your own server instance using the Elastic Compute Service within Alibaba Cloud. Your server will then be known as an ECS instance.
The remainder of this document describes the other option: hosting your pages on a ready-made web server that someone else looks after. This is known as Web Hosting. It is cheaper, easier and quicker, and you don't have to spend any time on server maintenance, but you don't get quite as much control.
If you want to try creating an ECS instance sometime in the future, you can do it easily on Alibaba Cloud. But we'll leave that for another time and another tutorial. Now you understand the difference, and are happy that Web Hosting is what you need, we can get started.
Log into your Alibaba Cloud account and get to the console. You will see something like this:
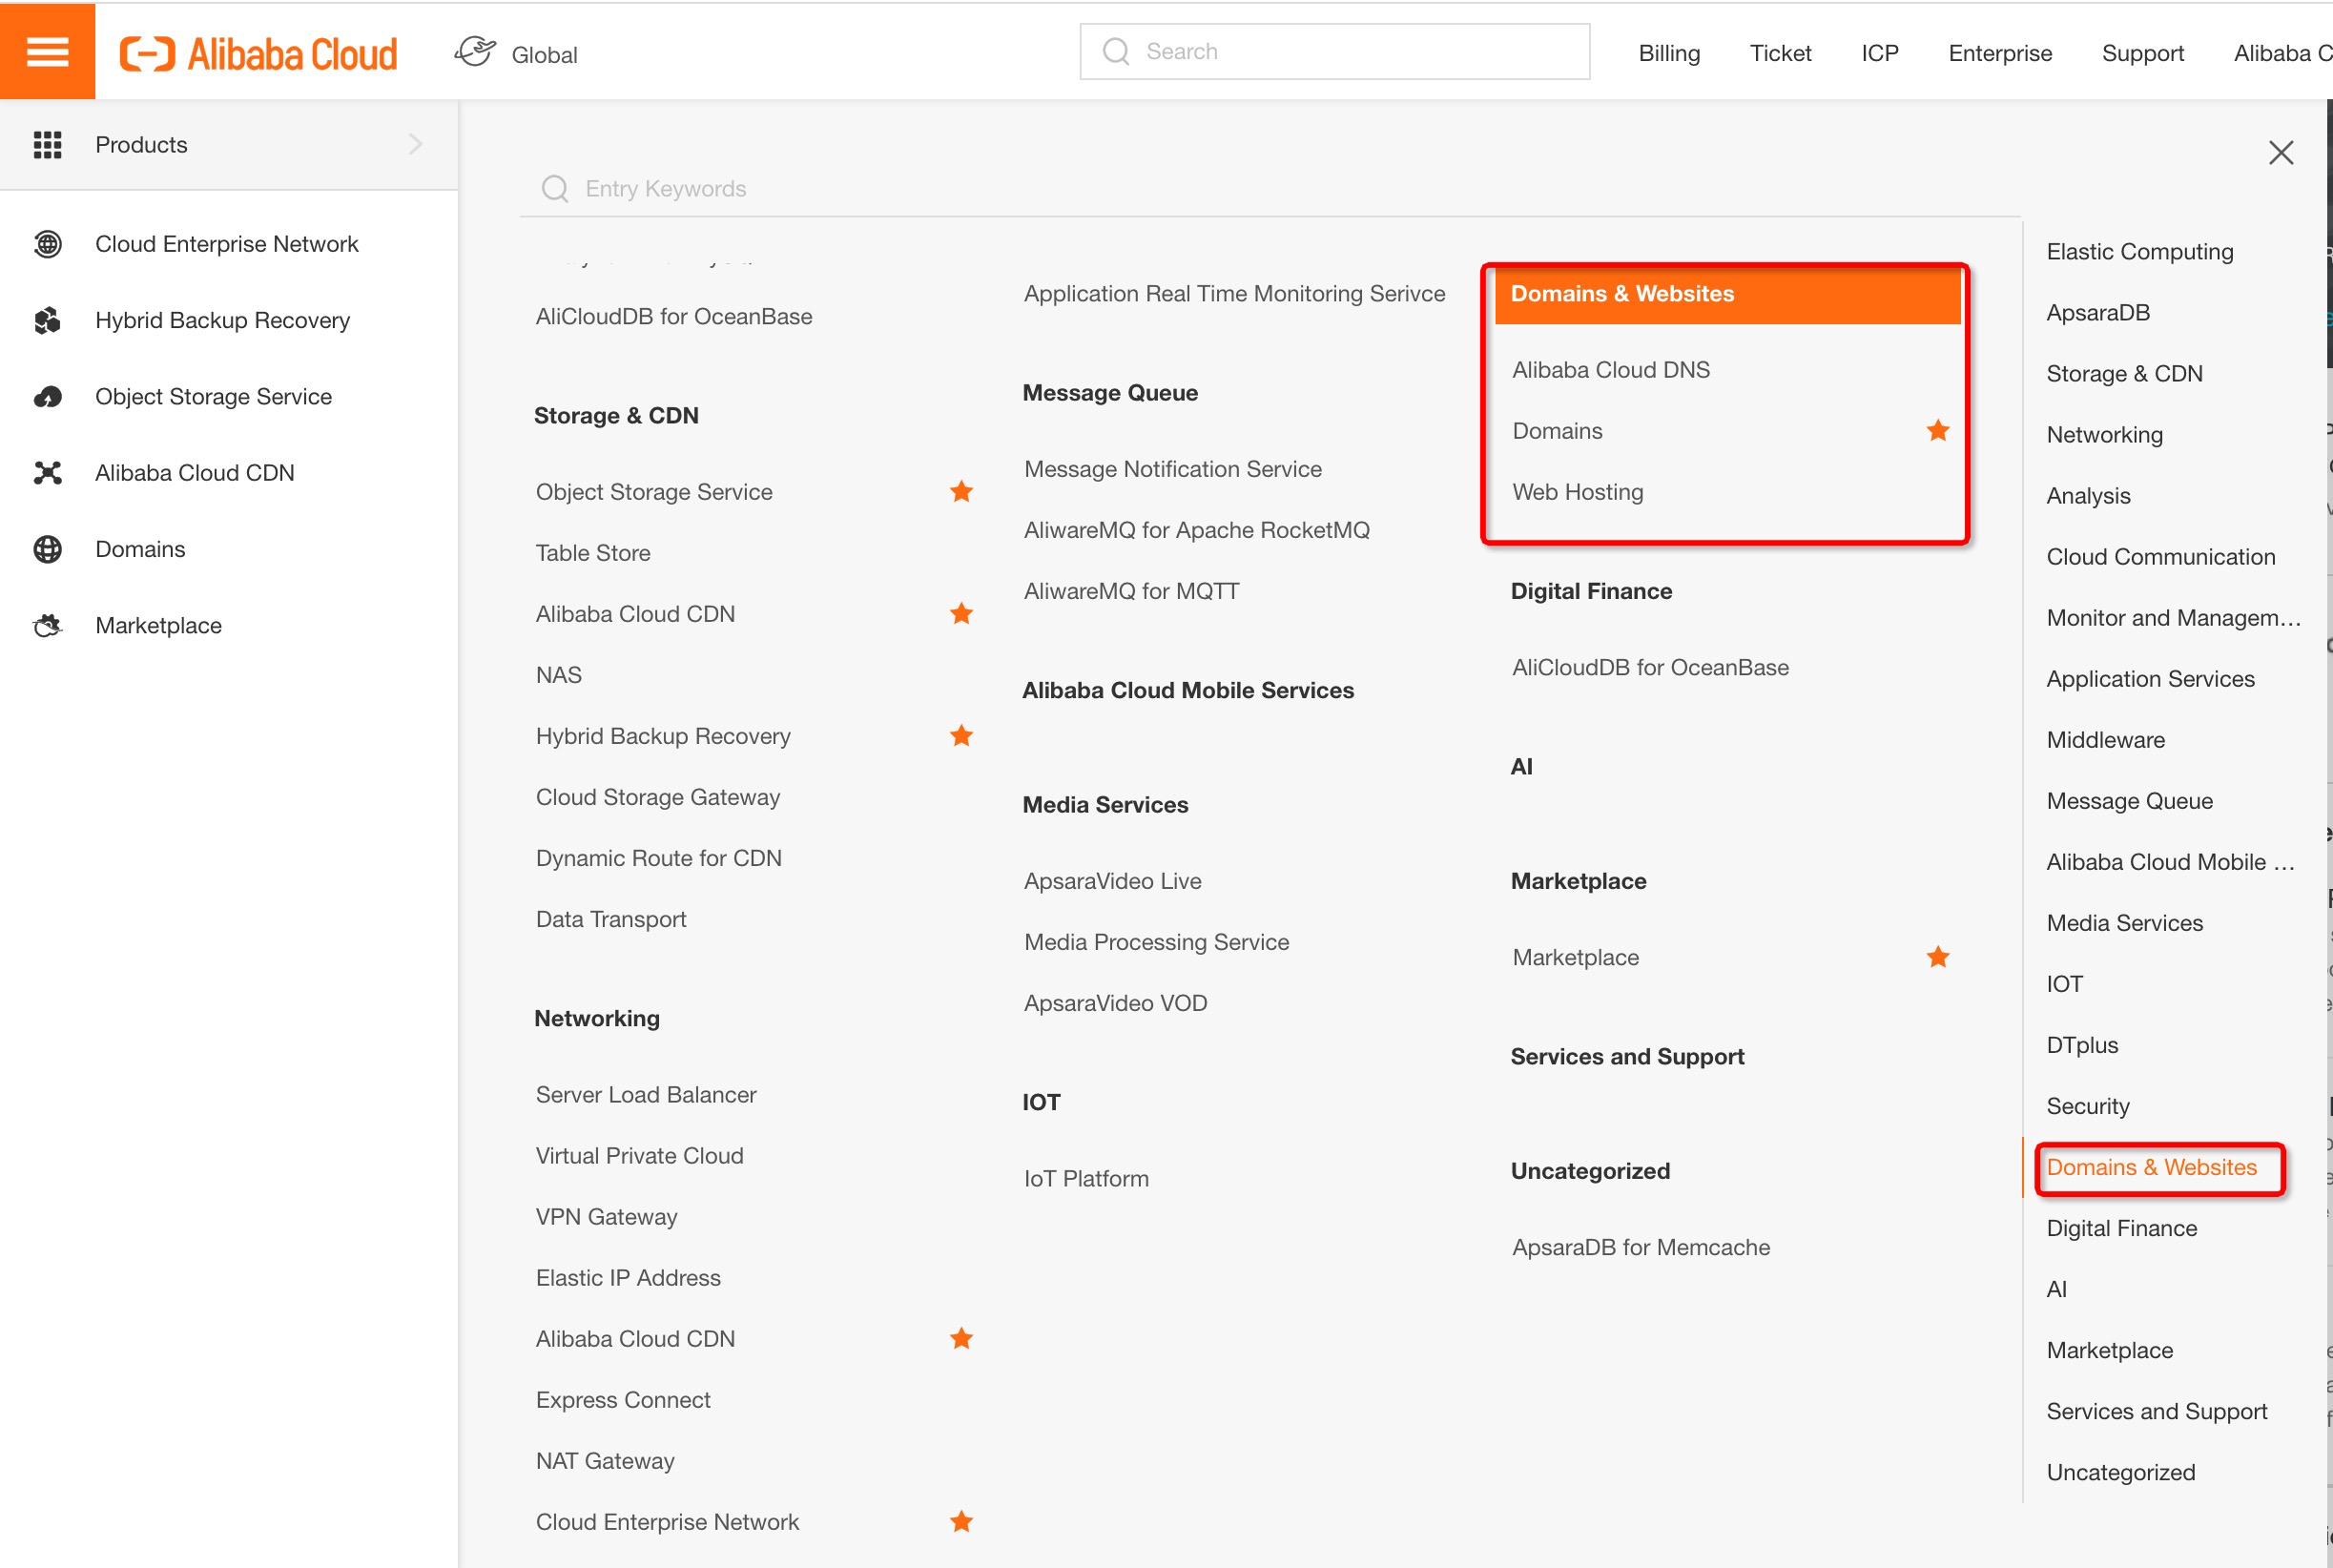
On the left-hand menu, there's a Domains & Websites entry. If you don't see that left-hand menu, click the small icon that consists of 3 horizontal lines, and it will appear.
Click on Domains & Websites and it will expand to cover Domains, Cloud DNS, and Web Hosting.
Click on Web Hosting:

If you've previously bought a different web hosting package it will be listed (as is the case here). If not, there will be no entries.
At the top of the screen is a Buy button. We want to buy a new web hosting package so click it.
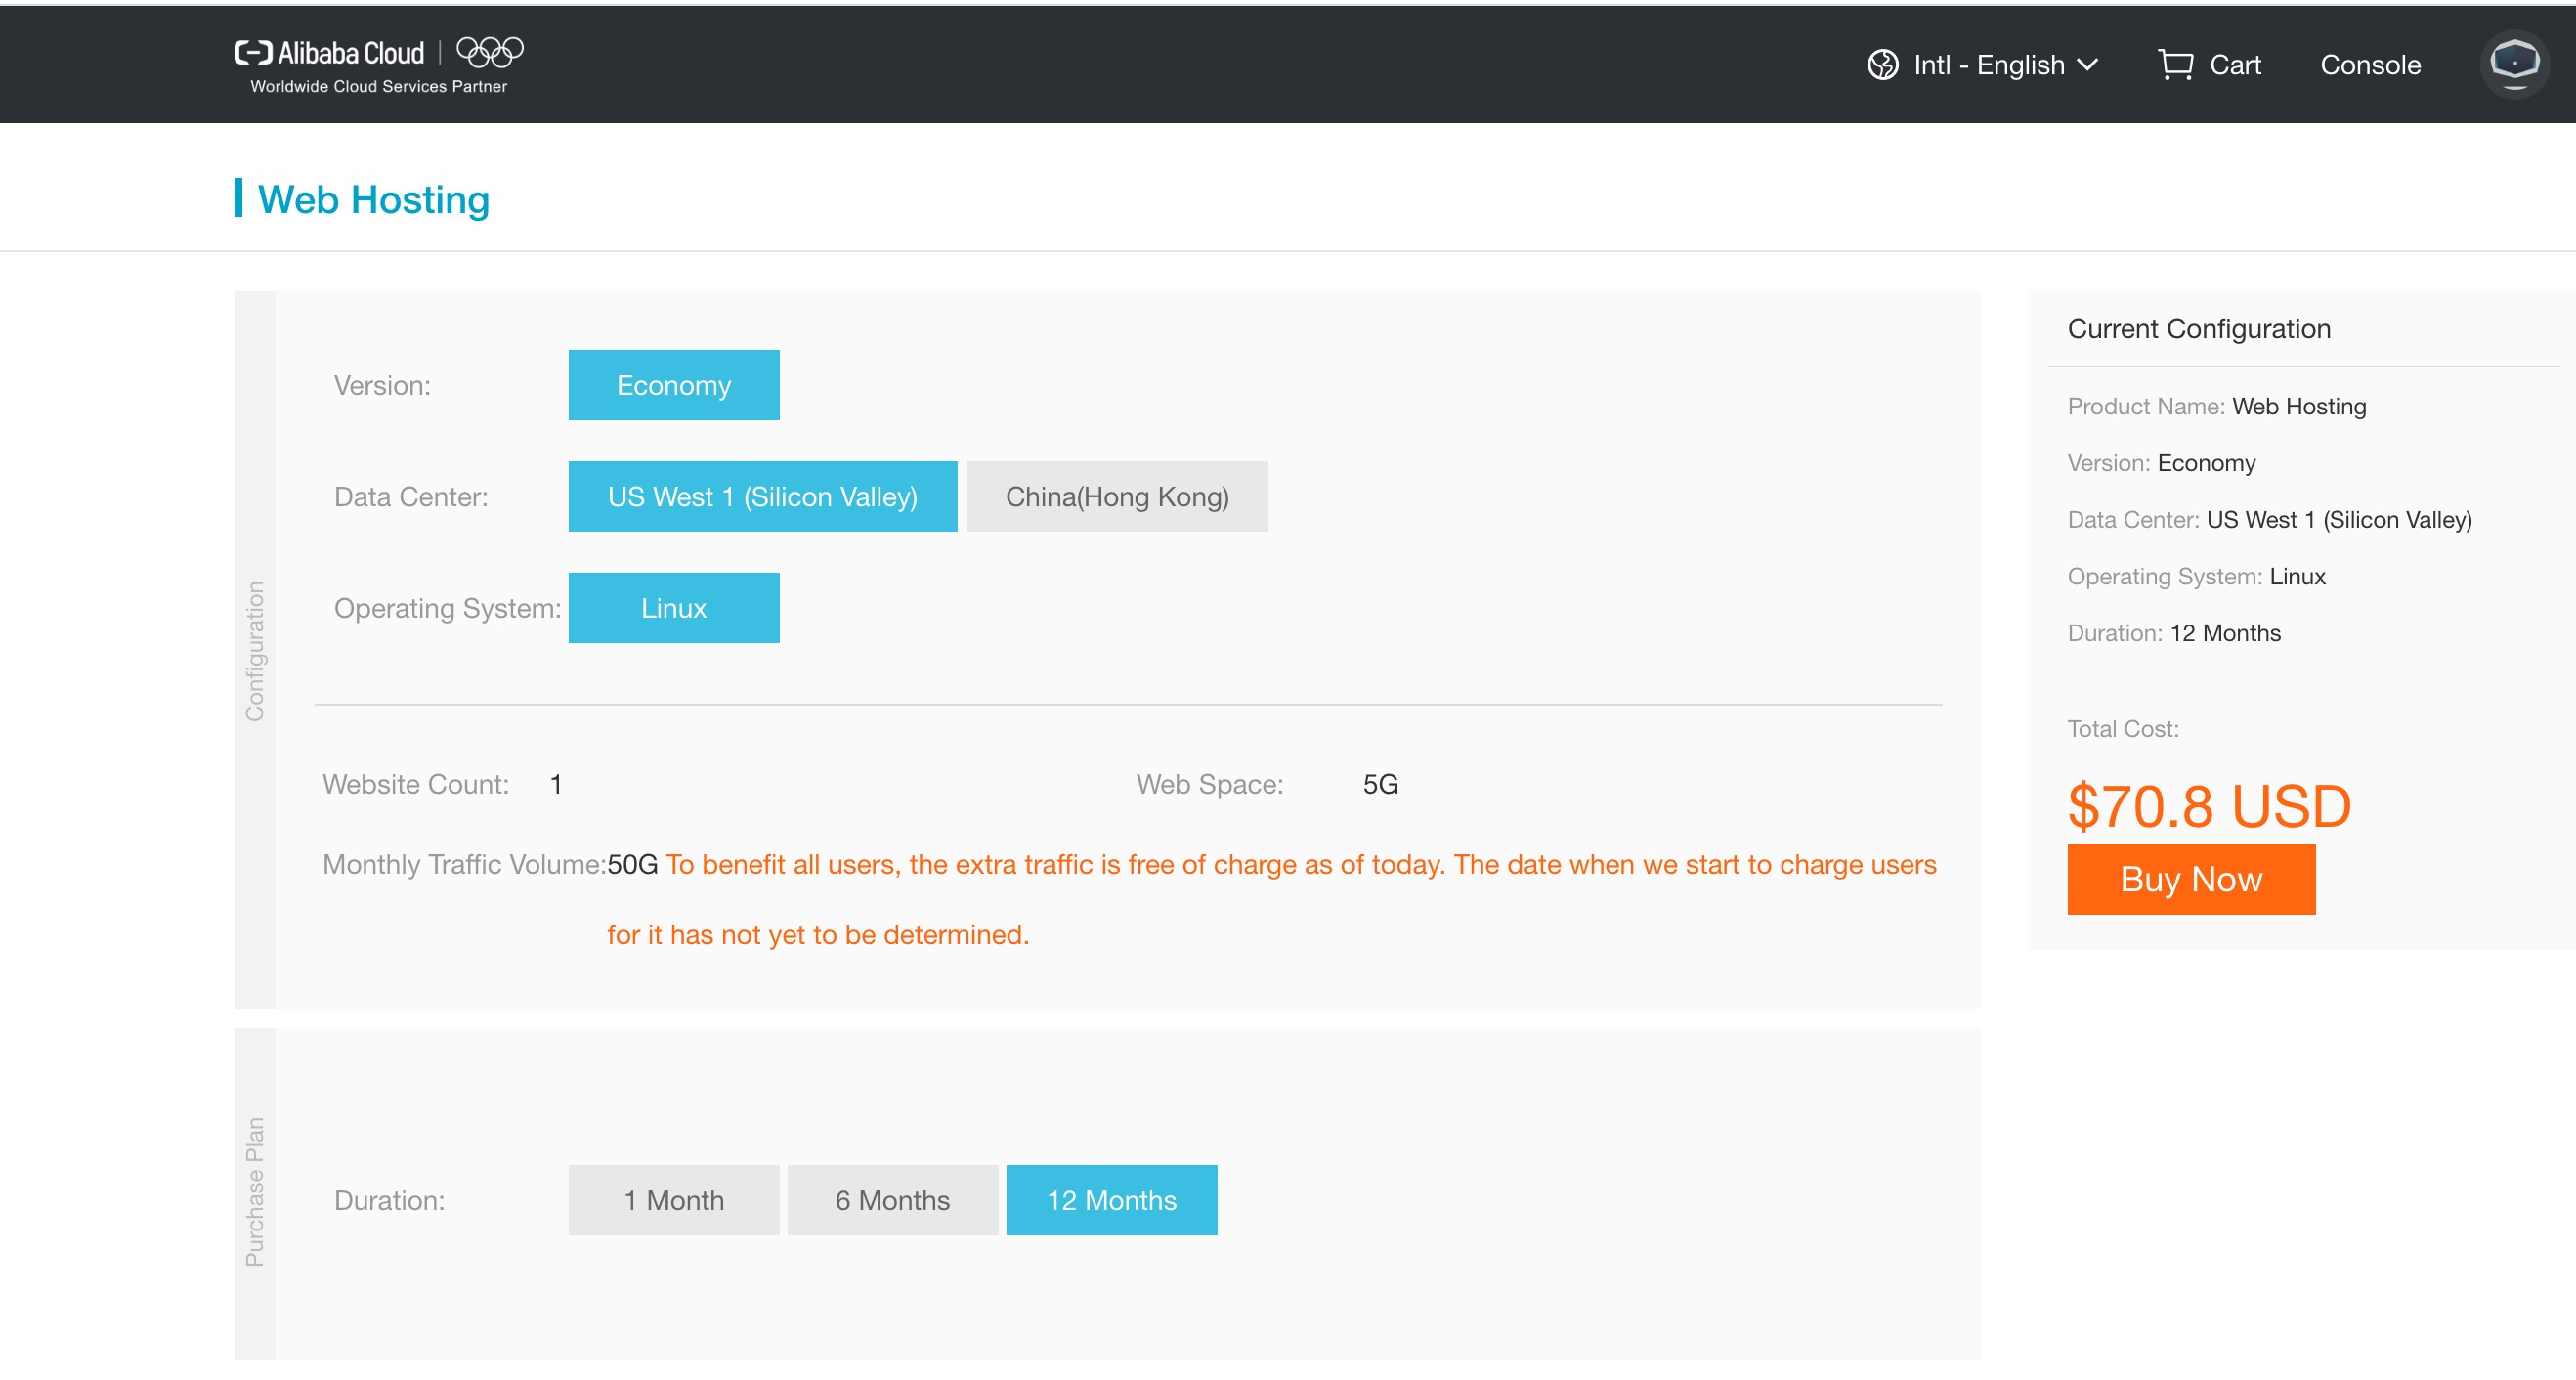
If you want to change any of the presented options, you can, although we recommend that you don't right now. Just hit the Buy Now button to the right of the screen, once you've checked the price. Note that the price covers the hosting package for the entire period (1 year unless you change it), but purchasing the domain name (which we'll do later) will be extra. And you will need both.
Two additional screens will allow you to review the information, place the order, and make the payment.
When you've done that, return to the console, click the Web Hosting button on the left hand side under Domains & Websites again, and your newly-purchased hosting package will be shown.

If the Instance Status is set to Stopped, wait a minute and refresh the page as your new hosting package is still being set up. It will soon show as Running.

Now click on the Manage link next to your listed hosting package.
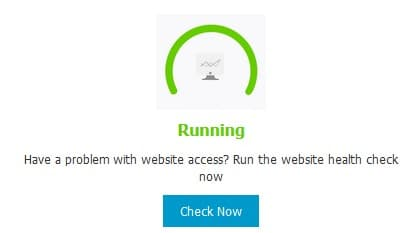
This is your Instance Details screen. It shows that your web hosting is up and running.
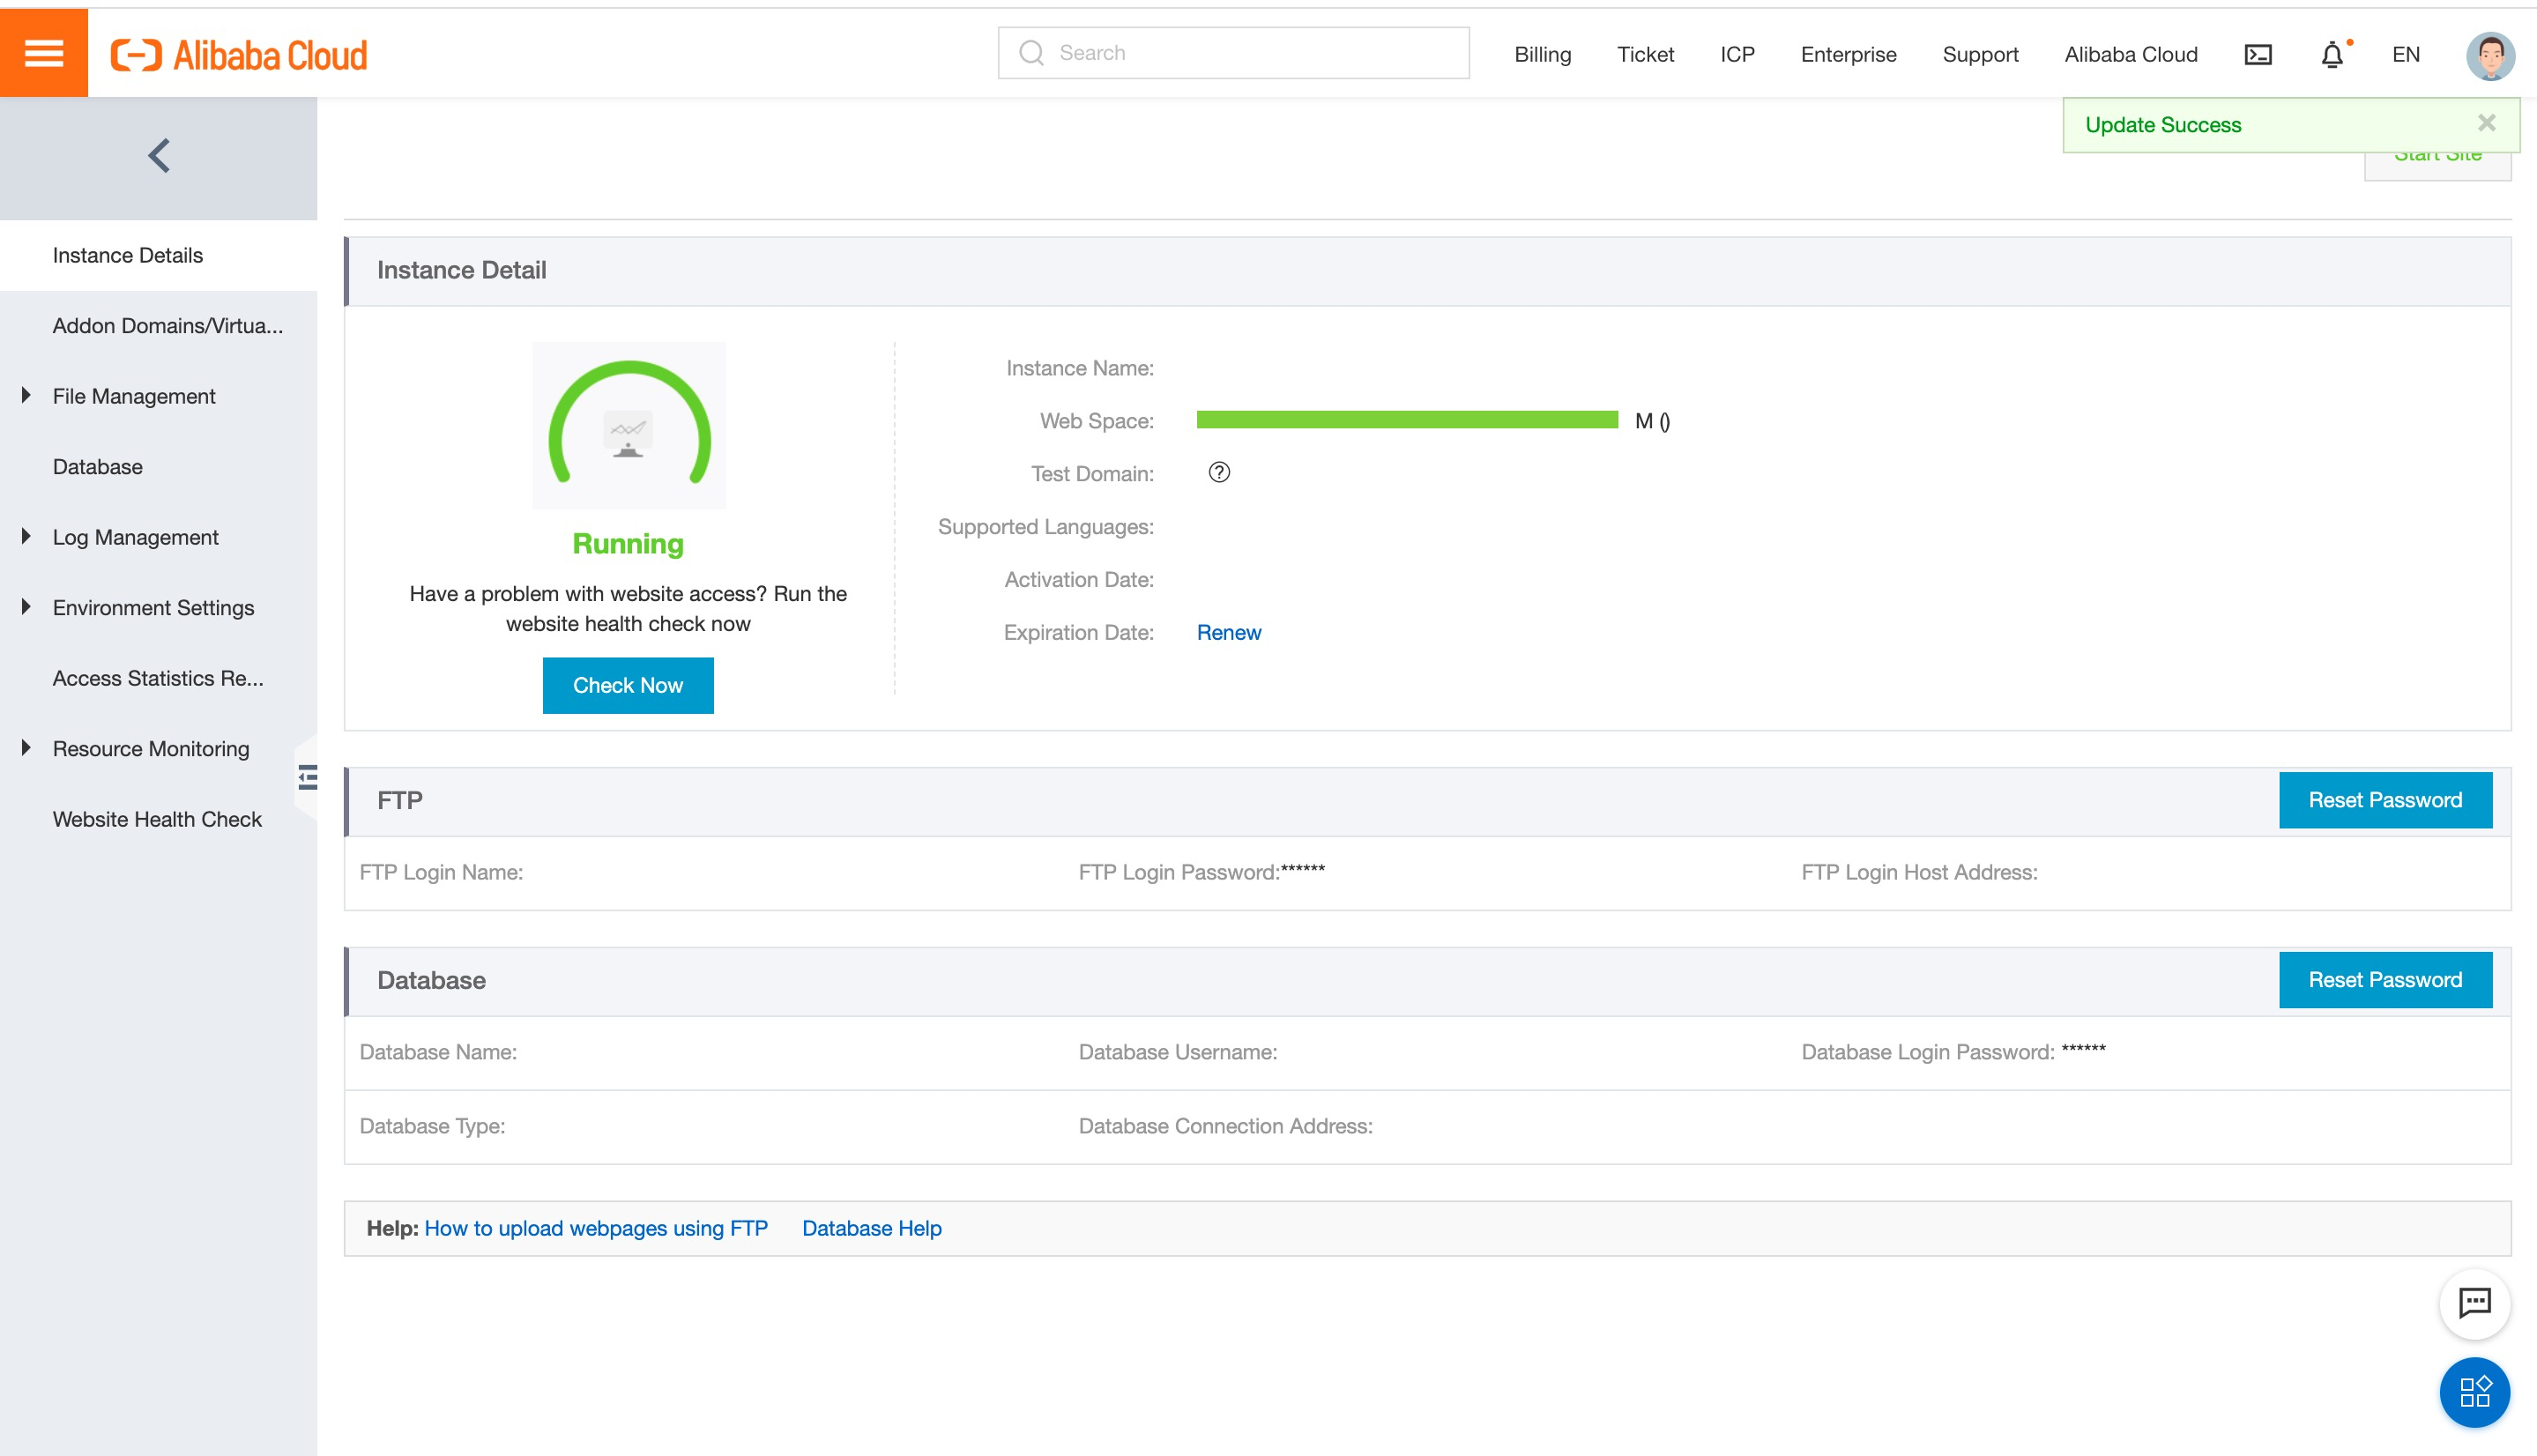
The Check Now button will run a quick health check on your hosting to ensure that everything is set up correctly. You can try it now if you wish, but there will obviously be errors as we haven't yet set anything up.
Our hosting is now all ready to upload some files to our site. If you don't already have an FTP program for your computer in order to do this, you will need to acquire one. FileZilla is very popular and will do just fine, and it is also free.
Whichever FTP program you use, you will need to know 3 pieces of information so that it can connect to your web hosting in order to upload files:
Your site host address is shown on the Instance Details screen under FTP Login Host Address. Make a note of it as you will need it. Perhaps copy and paste it straight into your FTP program's site manager.
Your FTP Username is also shown on the page, as FTP Login Name. Again, make a note of it.
To get your FTP Password, click on the Reset Password button in the FTP section of the status page and you will be asked to choose one. Make it as long and complex as you can. Remember that anyone who knows your FTP login details will be able to amend your website, so the details need to be kept safely. You can change the FTP password at any time without affecting your website.
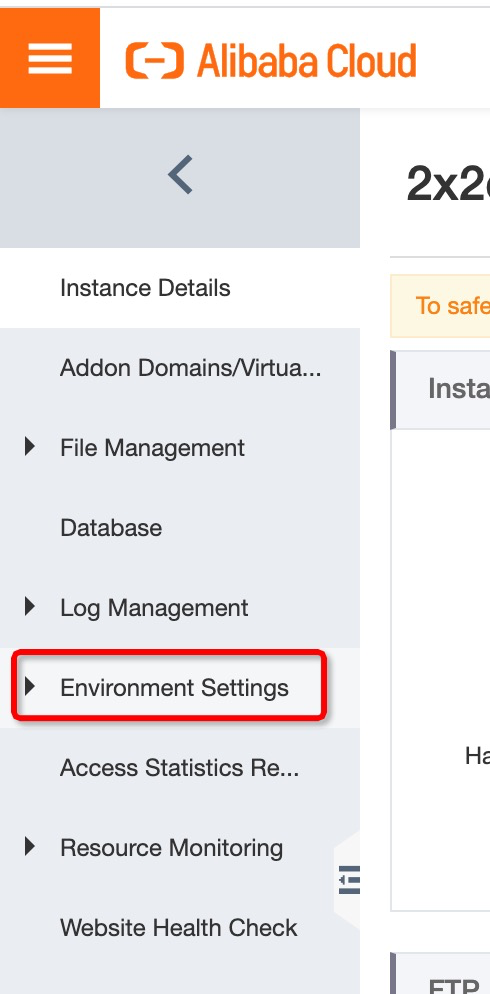
While we are here, you need to set your new website to release mode rather than debug mode. To do this, see the Environment Settings option on the left hand side of the screen, find the Run Mode Settings link, and click it.
If release mode isn't already selected, then select it and click Submit. This ensures that additional warnings and error messages are not displayed. For the simple pages we are creating, we don't need them. And they are a security risk because they divulge information about your site to visitors.
In addition to the Instance Details and Environment Settings screens, there are some others. Feel free to explore them if you wish, but we don't need them for now.
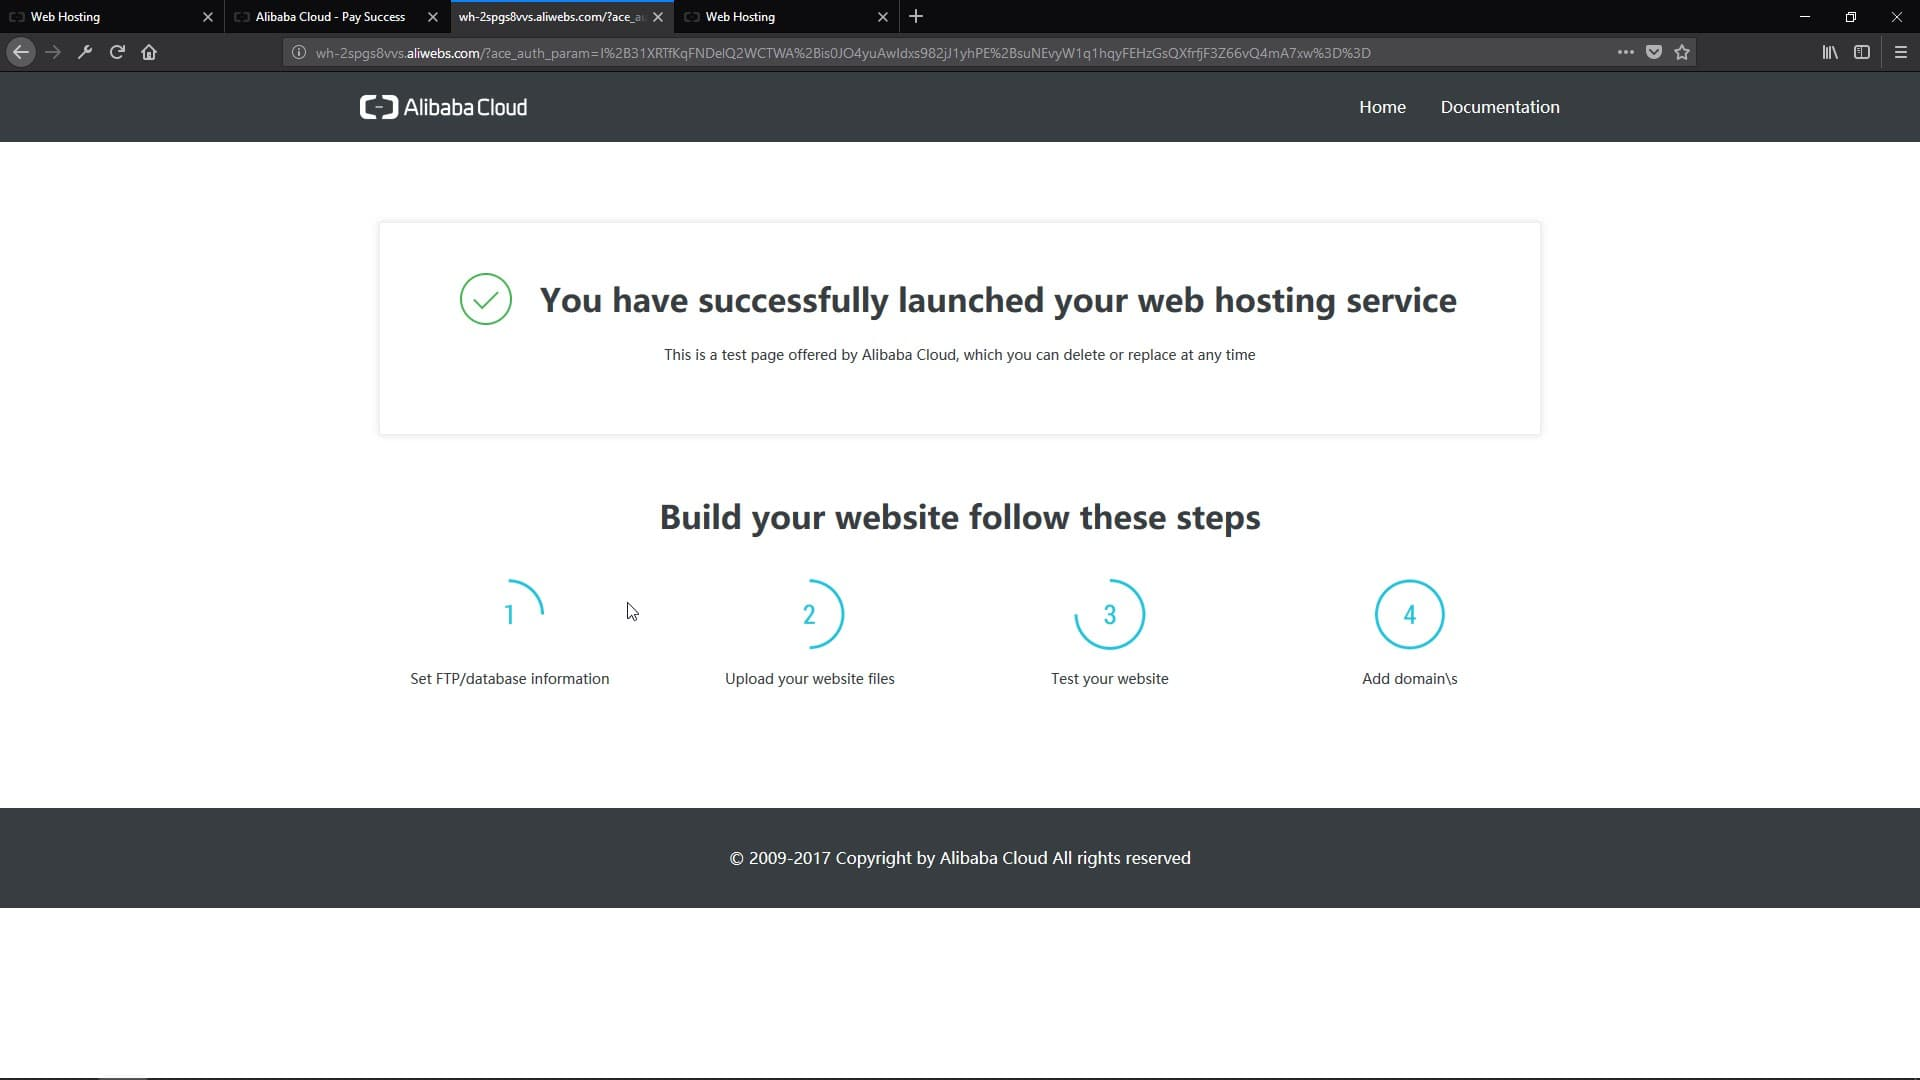
When your web hosting package was set up, a sample home page was created. In a while we'll overwrite that file with our own page. But for now, let's check that the same page is accessible. Because we've not yet registered a domain name, we can access the site via its Test Domain.
The Test Domain is listed on the Instance Details screen. Copy it, then paste it into a web browser. Because this is strictly only for your testing, and not for public use, you will be asked for your Alibaba Cloud login details.
Your site's home page will (for now) look something like this:
Now you can replace the sample home page with one of your own.
Fire up your FTP program and use it to connect to your hosting space. Use the site address, username and password that you noted earlier.
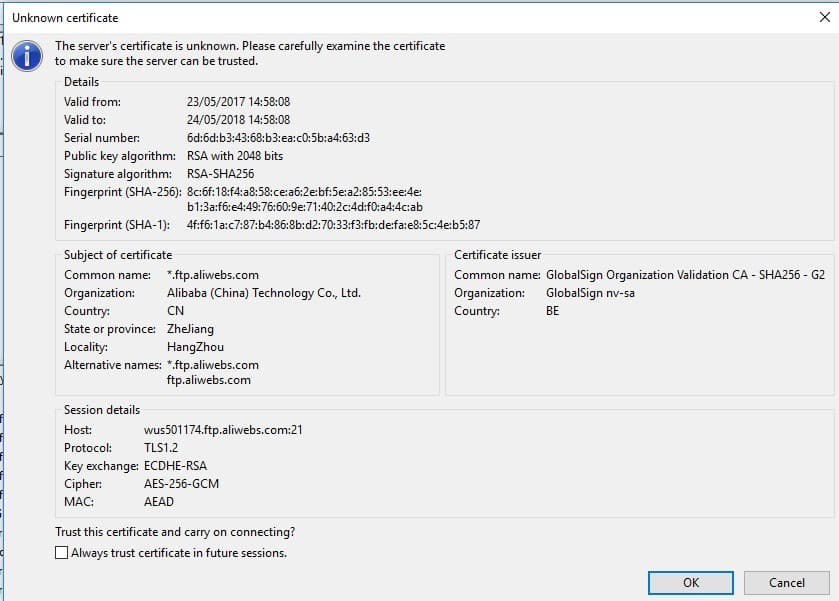
If your computer or FTP program warns you about an insecure certificate, it is safe to accept the warning and continue.
Equally, if you've never used an FTP program on your computer before, you might receive a warning from your PC about the computer's firewall. Again, it is safe to accept that.
Once you're connected you will see that your hosting space contains 2 folders, htdocs and myfolder.
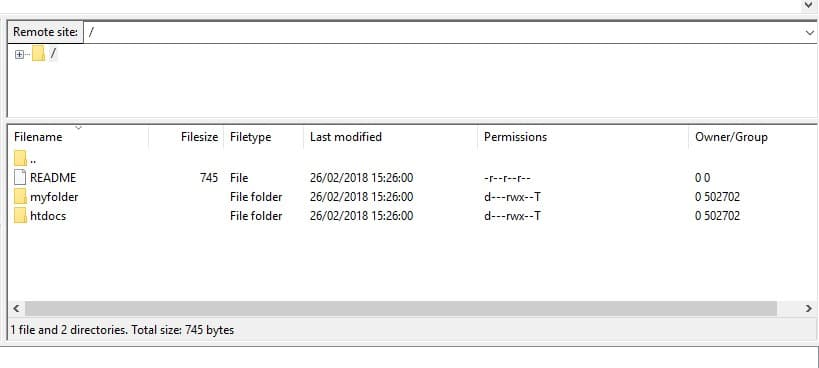
The htdocs folder is where you need to place all your web-accessible files, i.e. pages, scripts, images and so on. You can create additional sub-folders in there too. In technical terms, htdocs is your "web root" folder.
Conversely, anything that you place in myfolder will not be accessible via your website. It won't have a URL. You can use this to store files that you might want to keep online but which need to remain private. But remember of course that they are still accessible to anyone who has your FTP login details, such as someone with whom you share the task of keeping your website updated.
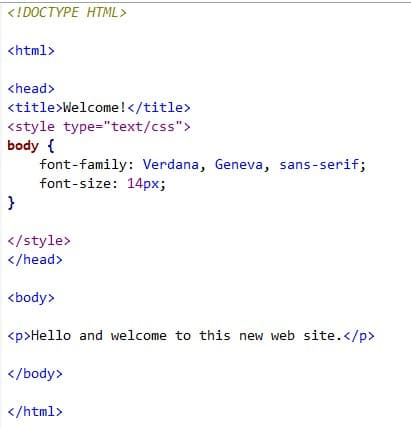
Use a web page design program or HTML editor to create a home page for your new site. In this example, we'll keep it simple. Here's the code.
We'll name the file default.html as that is the name of the file which currently exists and was created by Alibaba Cloud.
Your site's home page is the page that will be shown to users if they don't specify any other particular page when they surf to your URL. The one that Alibaba created for you will be called default.html, so that is what we will call our new file too.
If you prefer, you can name your home page index.html, default.html, zhuye.html or index.php. If more than one of those files exists, the system will look for them in the order listed. So, if both index.html and default.html exist, users will be shown index.html unless they request otherwise by adding the page name to the URL that they type.
Use your FTP program to upload your new default.html file in place of the one that is currently there.
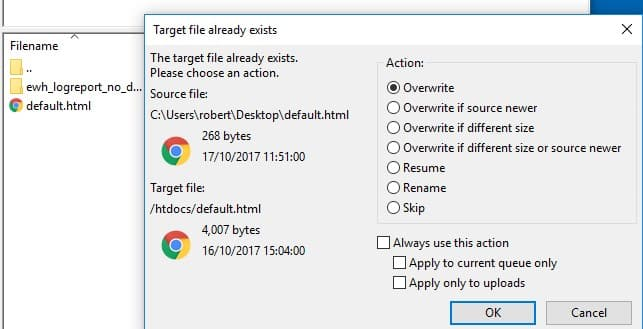
Note that it is best to keep all file names in lower case. Don't call it Default.html or DEFAULT.HTML. Simple default.html will work best, regardless of whether visitors to your site are using Windows, a Mac, Linux, or phone or a tablet.
With the new page in place, test that your site works and that you can see the new home page. We still don't have a domain name so you will need to access the site via the Test Domain.
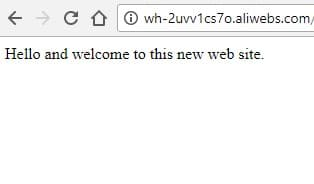
If you still see the old version of the page, you may need to refresh your browser. In most browsers, you do this by pressing F5. Or right-click on the page and choose Refresh.
Great. Our new home page works.
The next step is to choose and register a domain name so that visitors can access your site by way of a friendly name. Without a domain name, no one except you can view your site. Plus, the domain name becomes a unique brand that you can promote and advertise.
If you already have a domain name for yourself or your business and you want to switch that existing name from your current website to the new one you are creating, this can be done. On the Alibaba Cloud console, under Domains & Websites, choose Domains and then select the Domain Transfers-In option.
But for this tutorial we will register and pay for a brand-new domain name and assign it to the new website we just created.
In the Console, under Domains & Websites, choose Domain Names. Then click on the Purchase Domain button and you will see something like this:
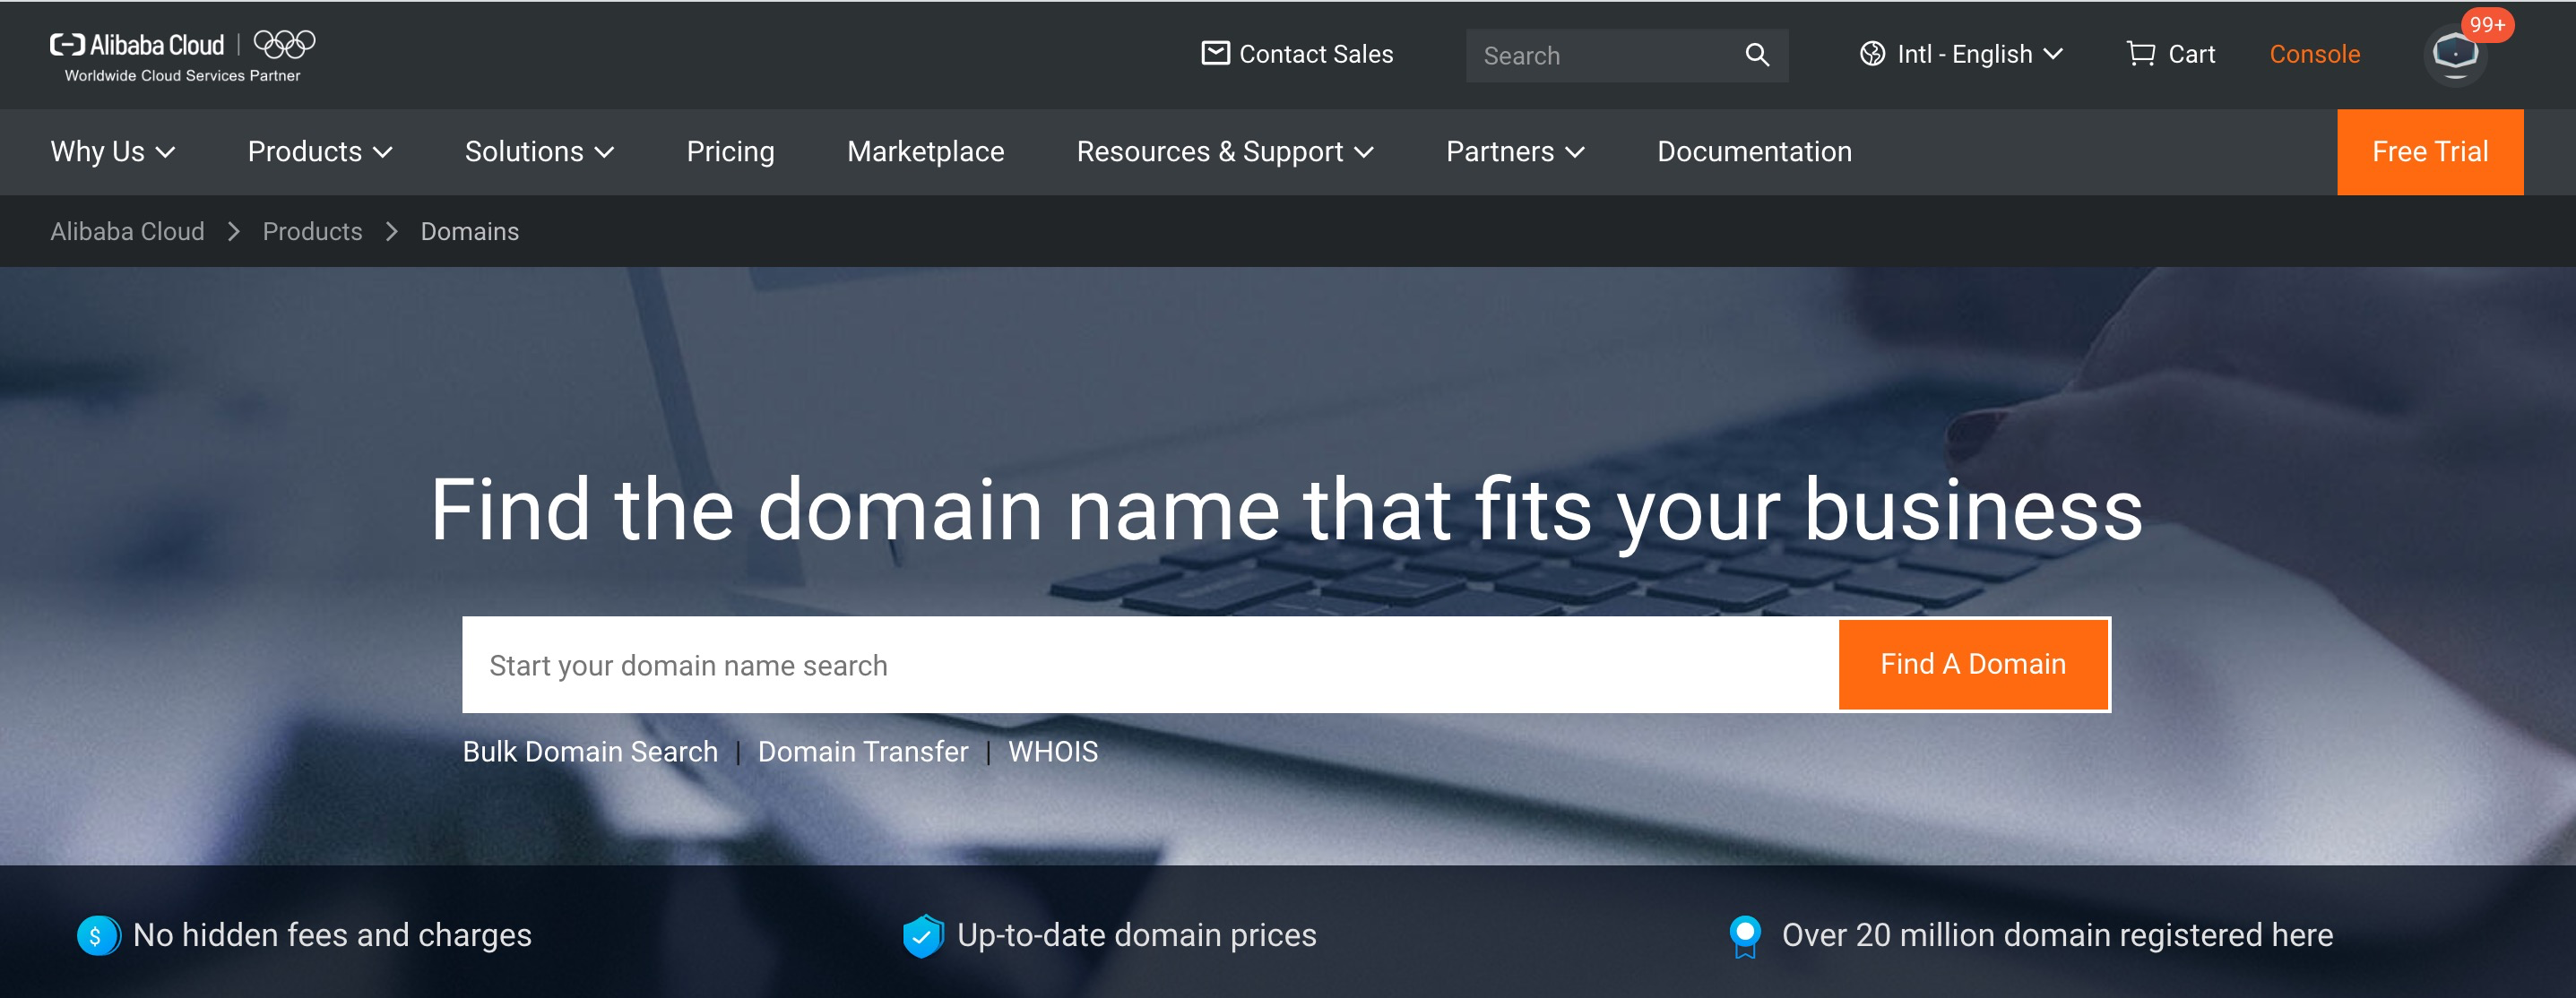
The choice of domain name is up to you. The only condition is that no one else has already registered the particular combination of name and extension that you want (either via Alibaba Cloud or with any other company that offers domain registration services).
For this example, let's try to register my-test-domain-12345.com:
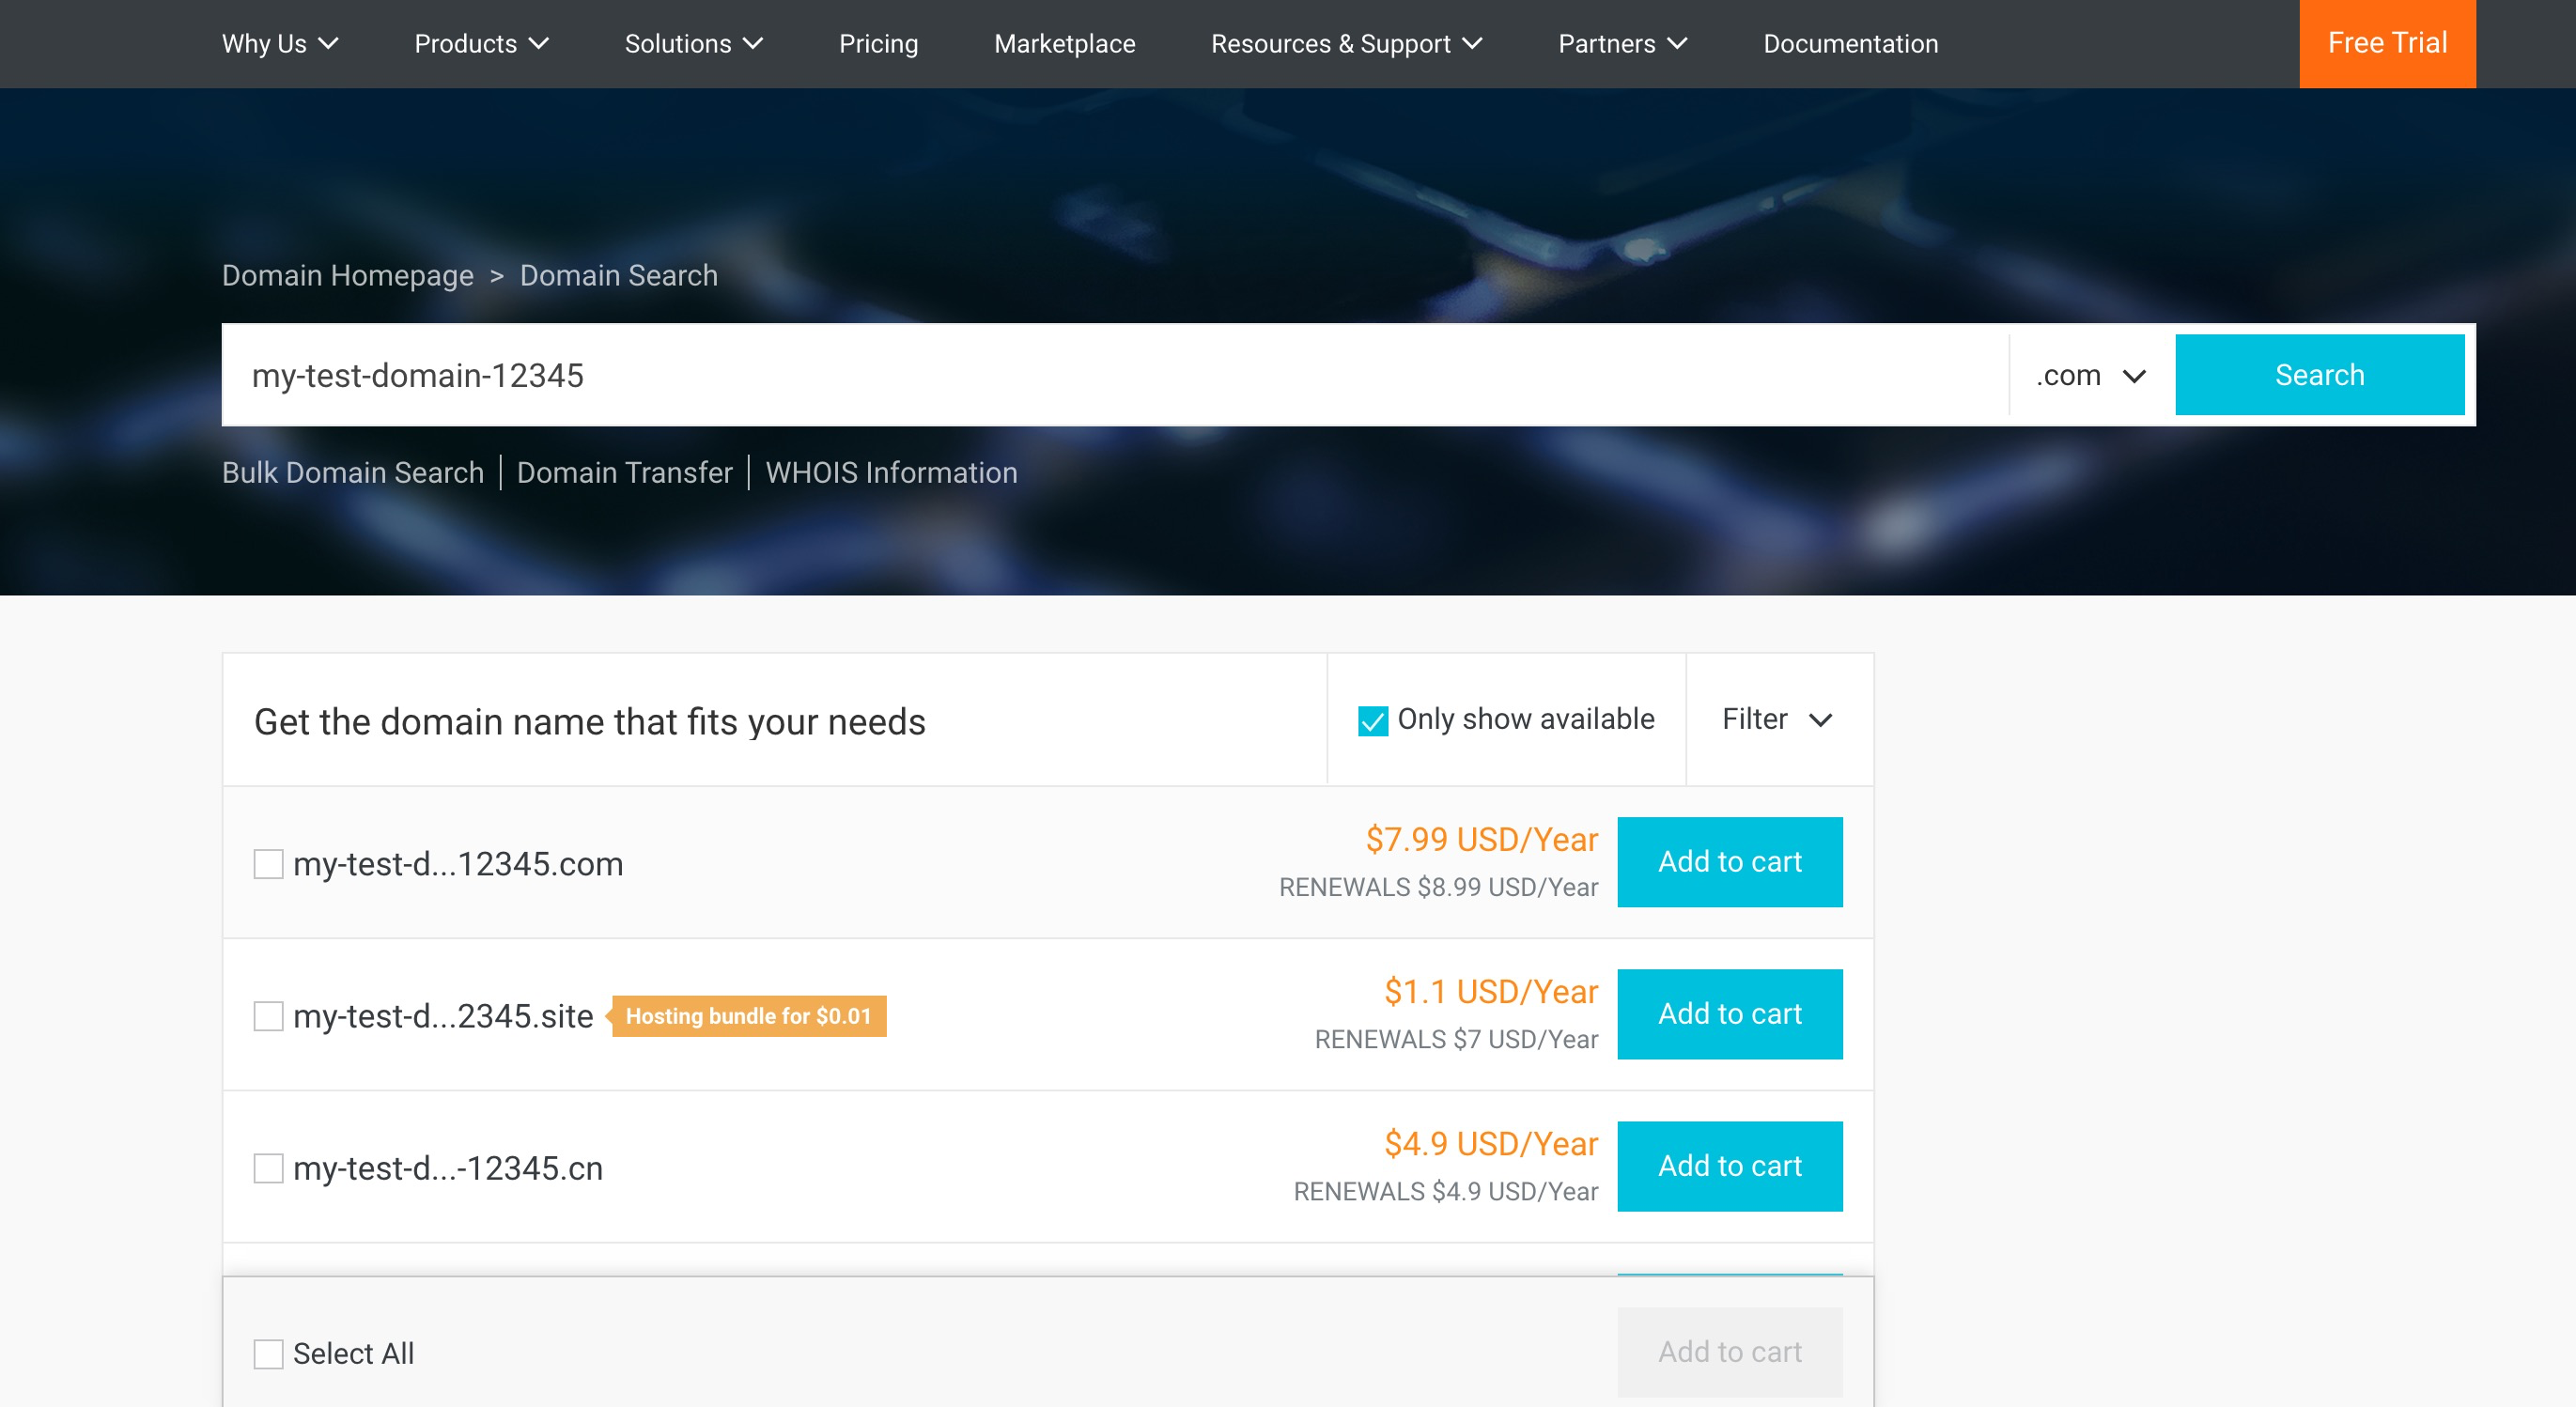
It's available. Great news! We will buy it for our new site.
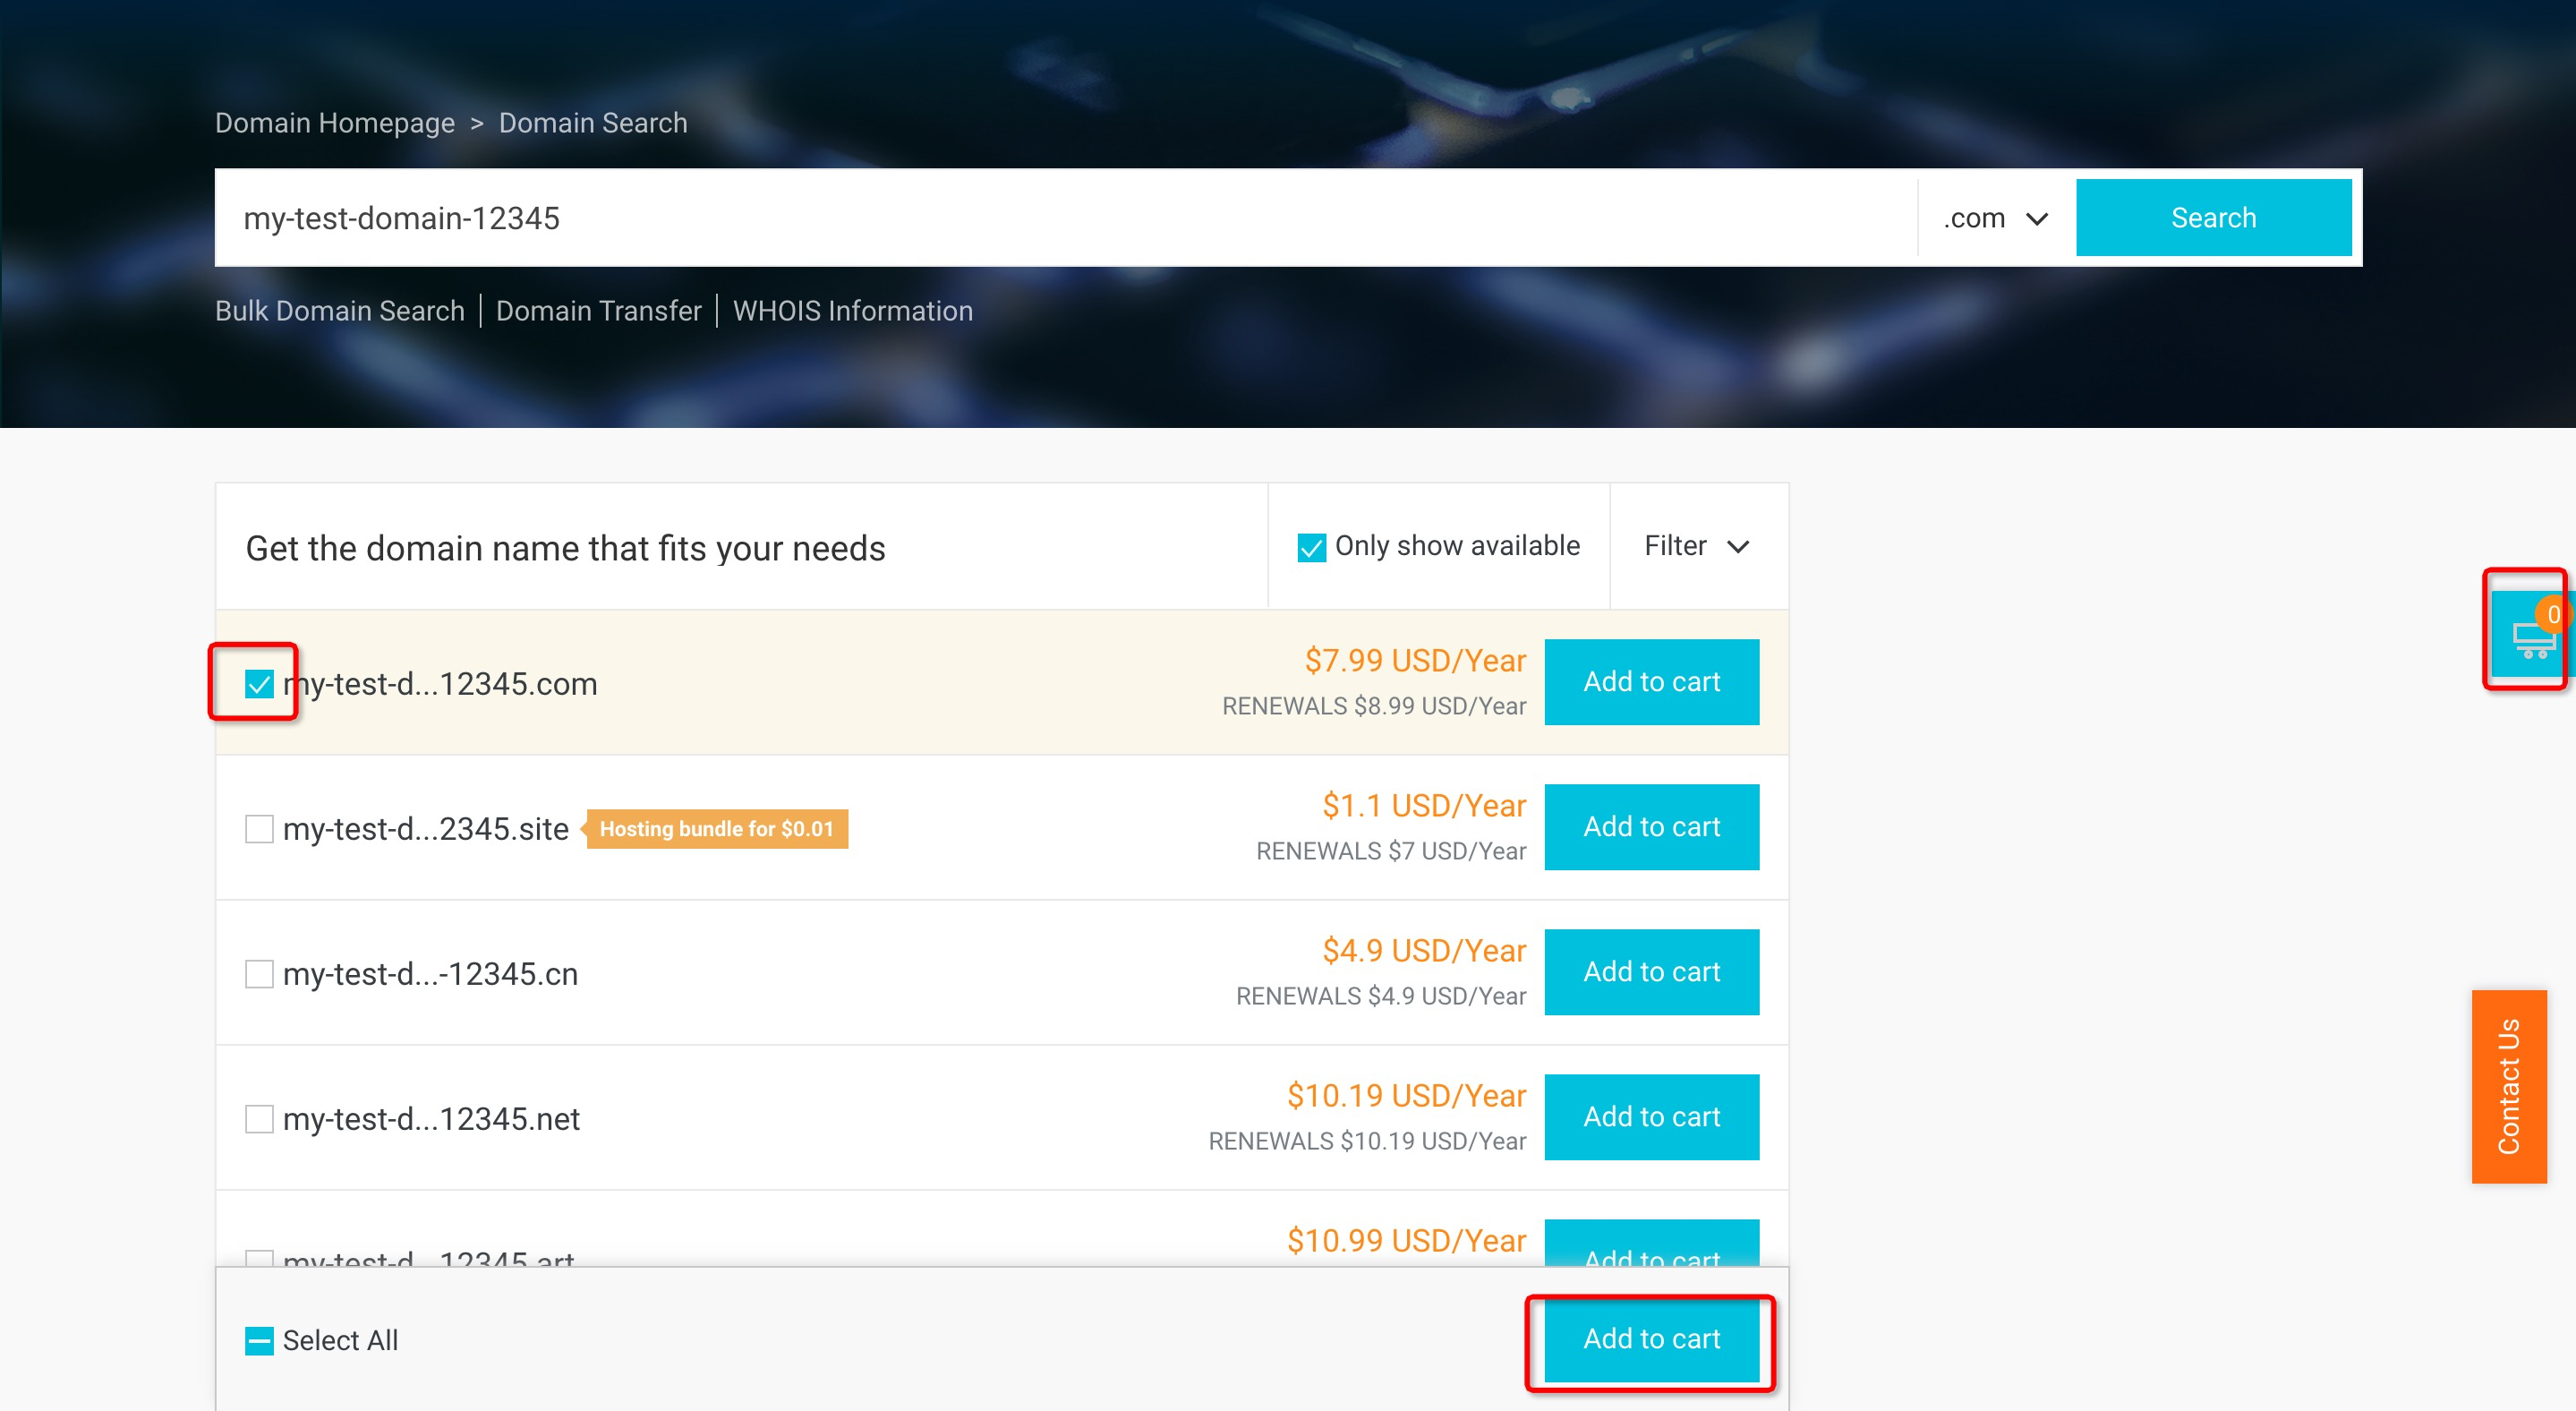
Add it to your cart, check the spelling carefully(!), then click on the small shopping cart icon on the right hand side of the screen in order to continue.
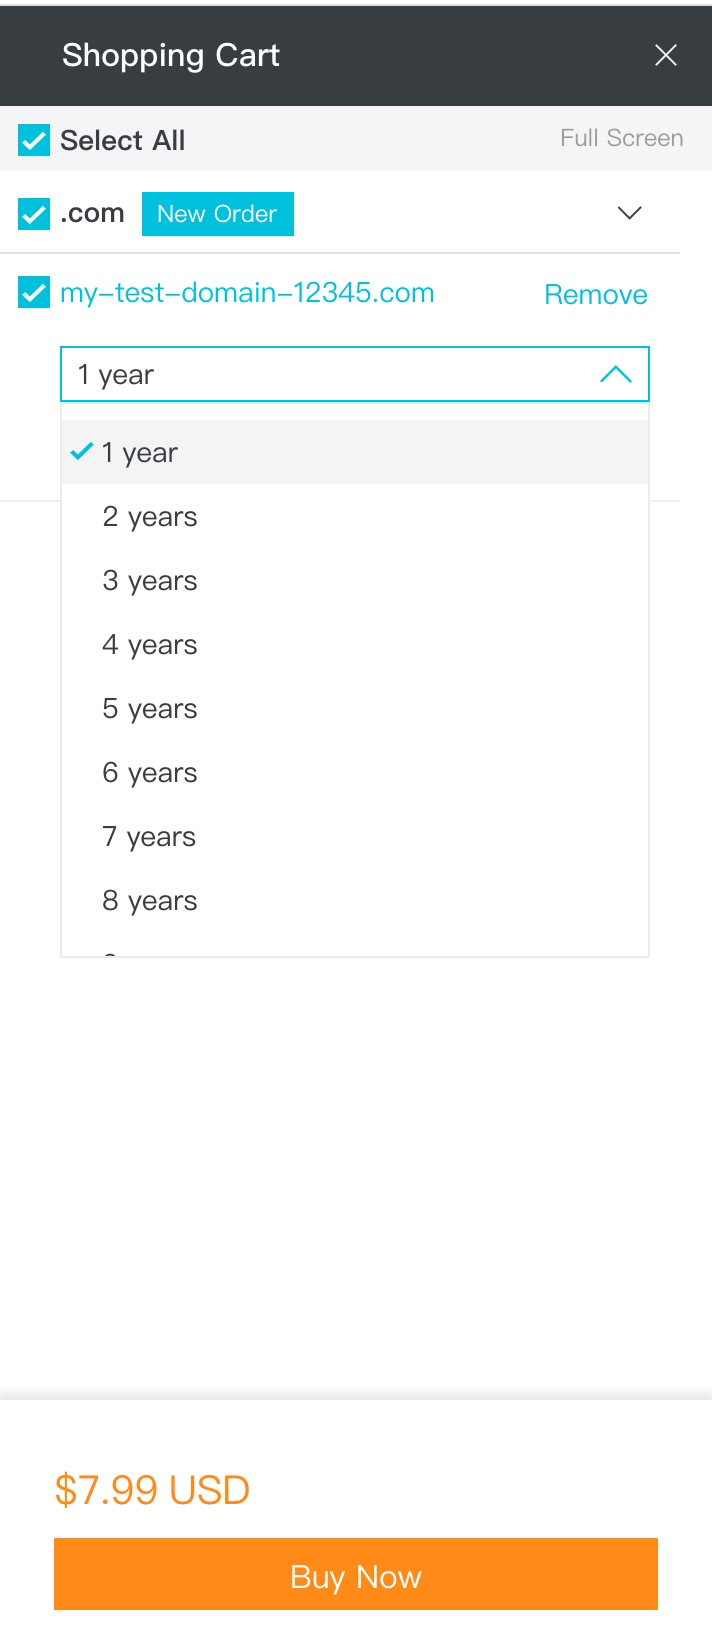
It is very important to understand that you cannot buy a domain name outright. You can only rent it for a certain number of years (normally up to 10 or so). Once that period is up you can renew it, and as the owner you get first refusal. If you don't renew in time, then someone else can register it and use it for their own website. So make sure you always renew your domain names in time, unless you no longer need them (and if you're prepared for someone else's site to be known via a name that used to belong to you).
Click the duration you want, and click Buy Now.
If you have never registered a domain name on Alibaba Cloud before, you will be asked to create a domain registrant profile before the final purchase. If so, simply enter your name and address details when asked. This is a requirement of Chinese law and only needs to be done once.
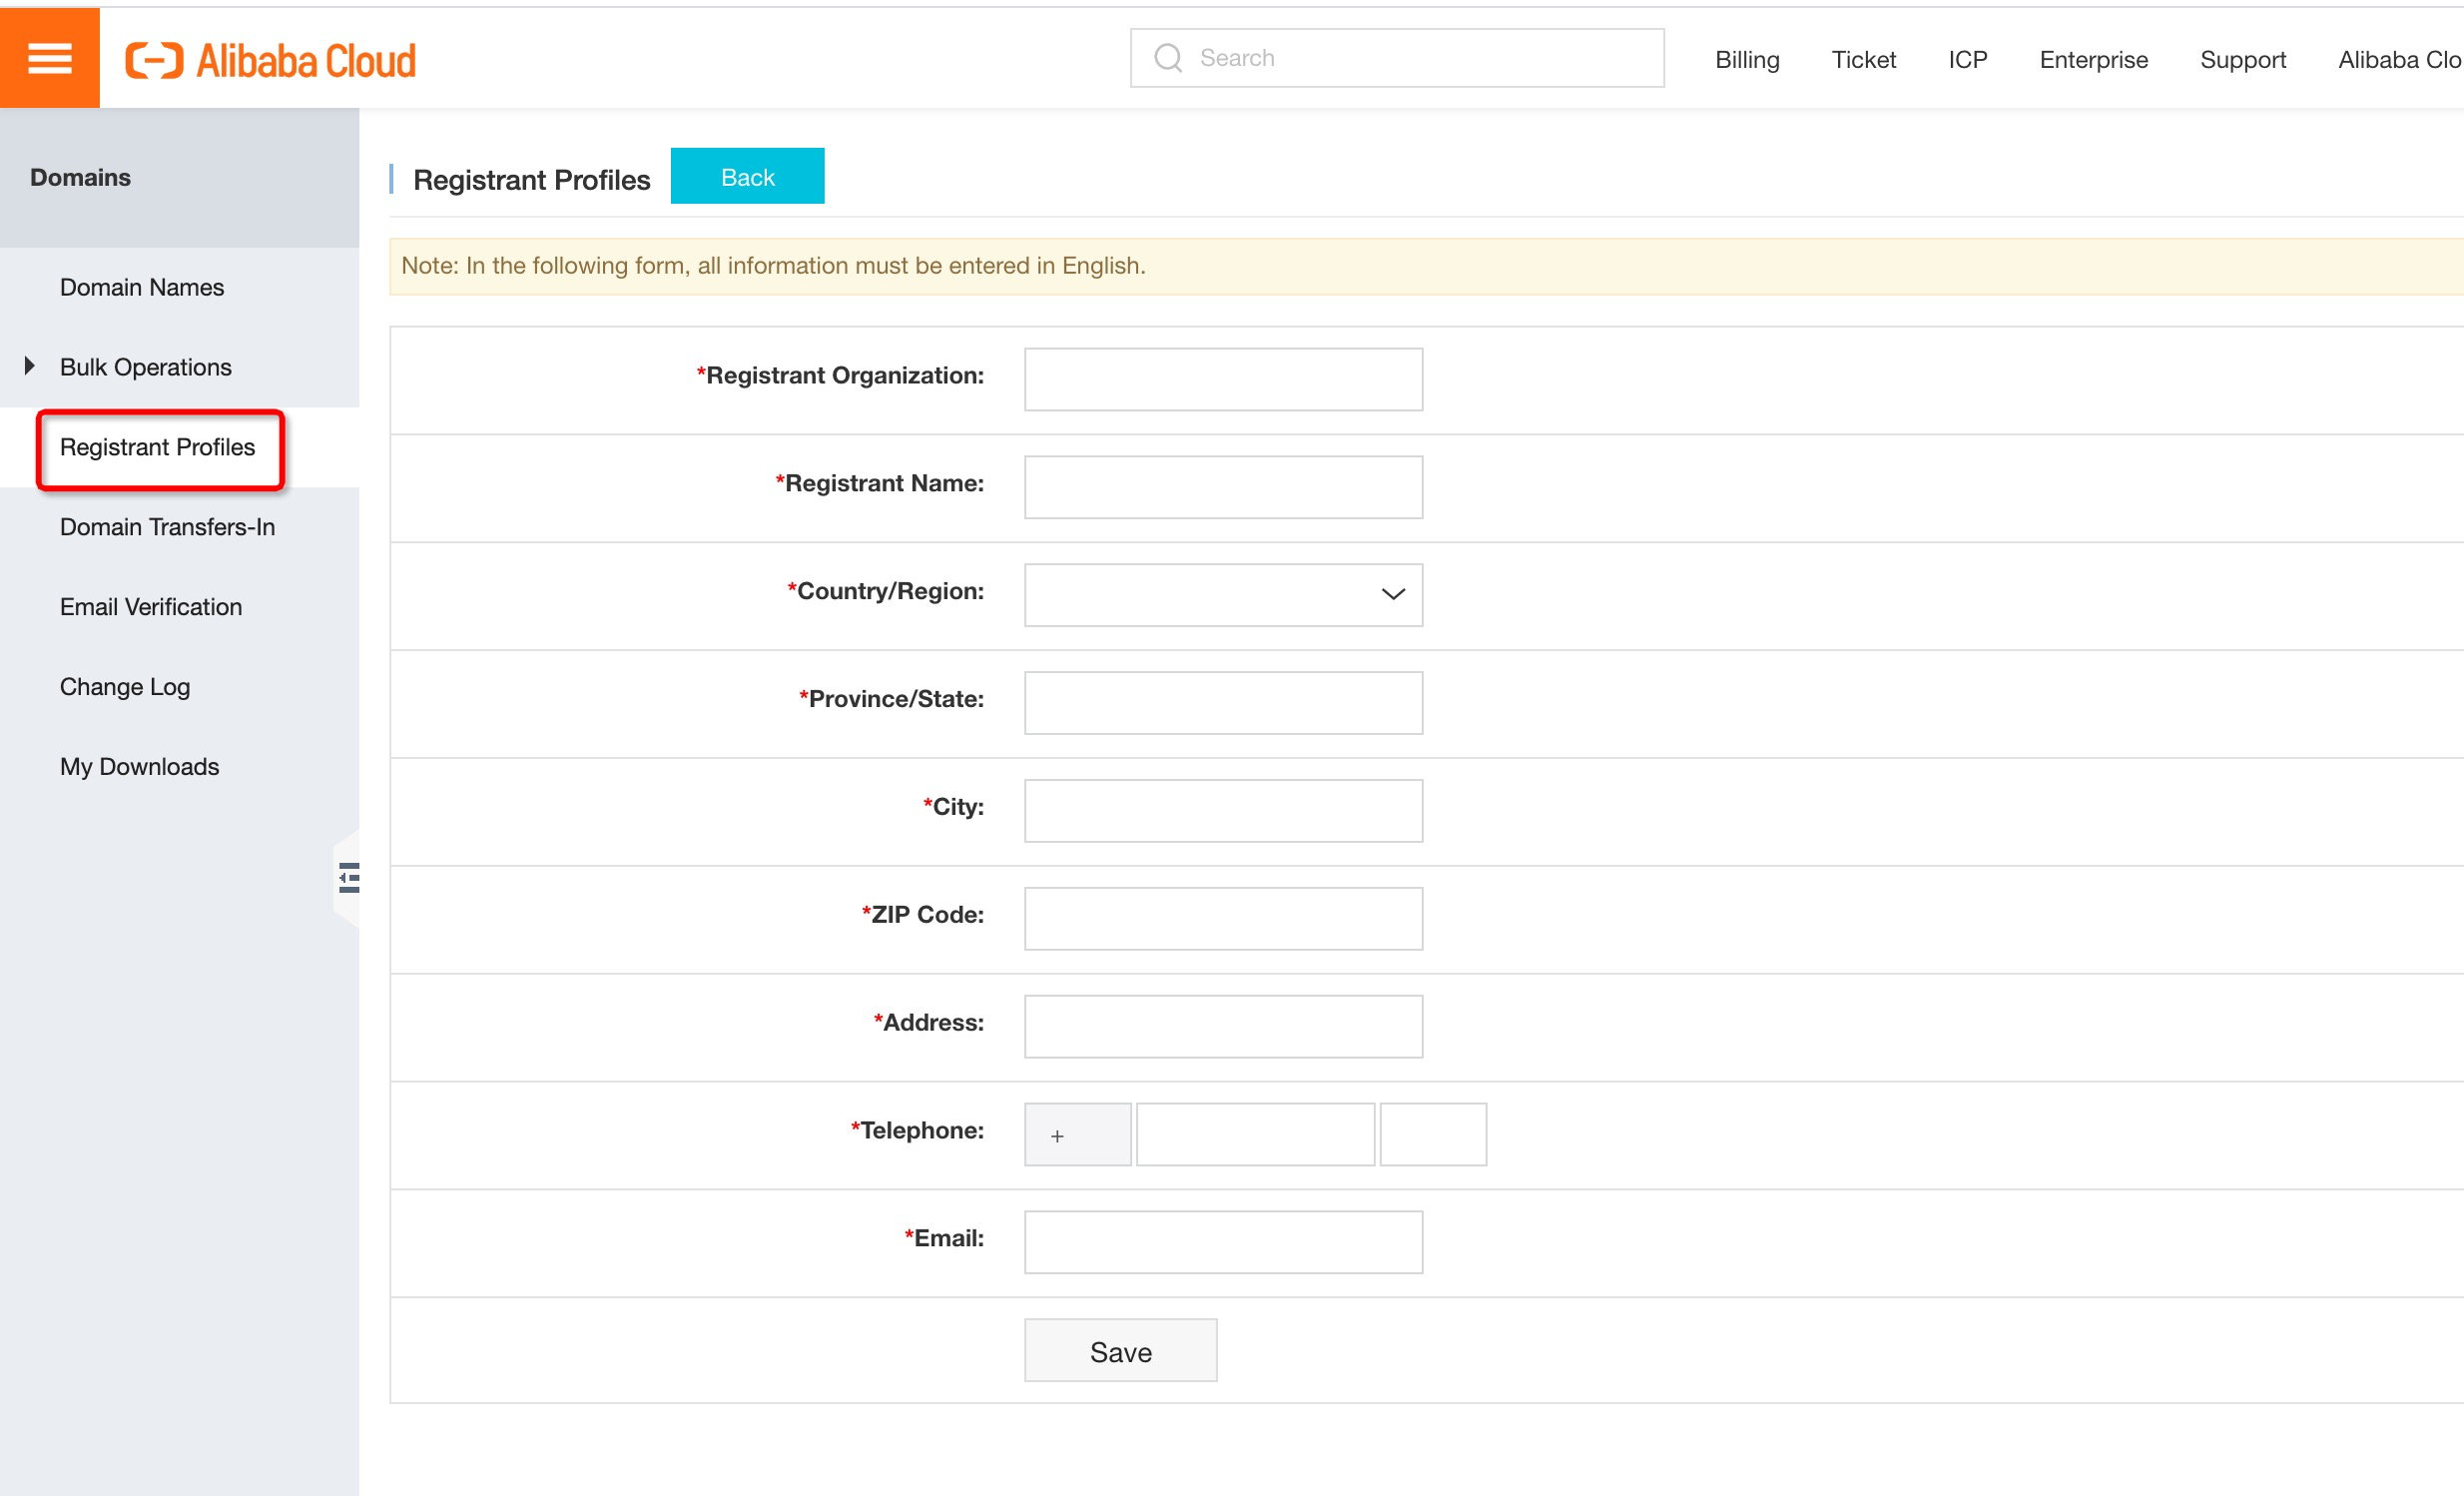
Note this option on the screen. As you can see, your name and email address are recorded as the person who registered this domain. Normally, these details appear on a publicly accessible global database of domain registrants. This can lead to unwanted telemarketing calls and emails from companies trying to sell you related services. To avoid this, ensure that you tick the box to enable Domain Proxy Service. This is free, and means that Alibaba Cloud, rather than you, will appear in the global database against your domain name. This doesn't mean that you lose any control, but it does mean that you won't receive unwanted marketing calls.

Now click Place Order, and then Pay Now on the following screen.
All done! You are now the proud owner of a domain name.
We now have a website and a domain name. The final step is to link the two together so that when someone types your domain name into their browser they see your website, rather than someone else's, or an error message saying that the site wasn't found.
To make the link we need to enter details of our web hosting package and our domain name into a global database called DNS, or the Domain Name System.
There are two steps required.
Firstly, go to the Alibaba Cloud console. Under Domains & Websites, click on Web Hosting, then locate your hosting package from the list and click the Manage link.
At the top of the screen, click the Bind Now link.
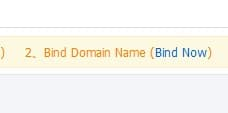
Enter your new domain name, complete with www. at the start, then press Submit. The added www is very important so don't omit it. In this case we'll enter www.my-test-domain-12345.com and then press Submit.

Now to step 2. On the left hand side of the screen, select the Instance Details option to show the details of your web hosting. Select and then right-click the contents of the Test Domain value, and copy it to the clipboard.
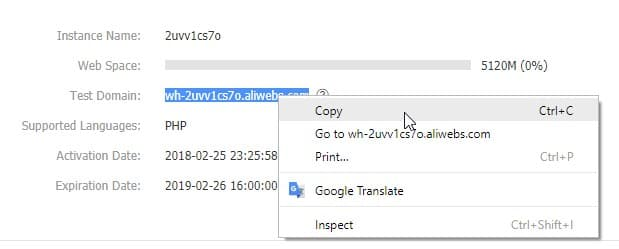
Now, from the console home page, under Domains & Websites, choose Alibaba Cloud DNS. Locate your chosen domain name in the list, and click Configure. Then click Add Record and you will see the following:
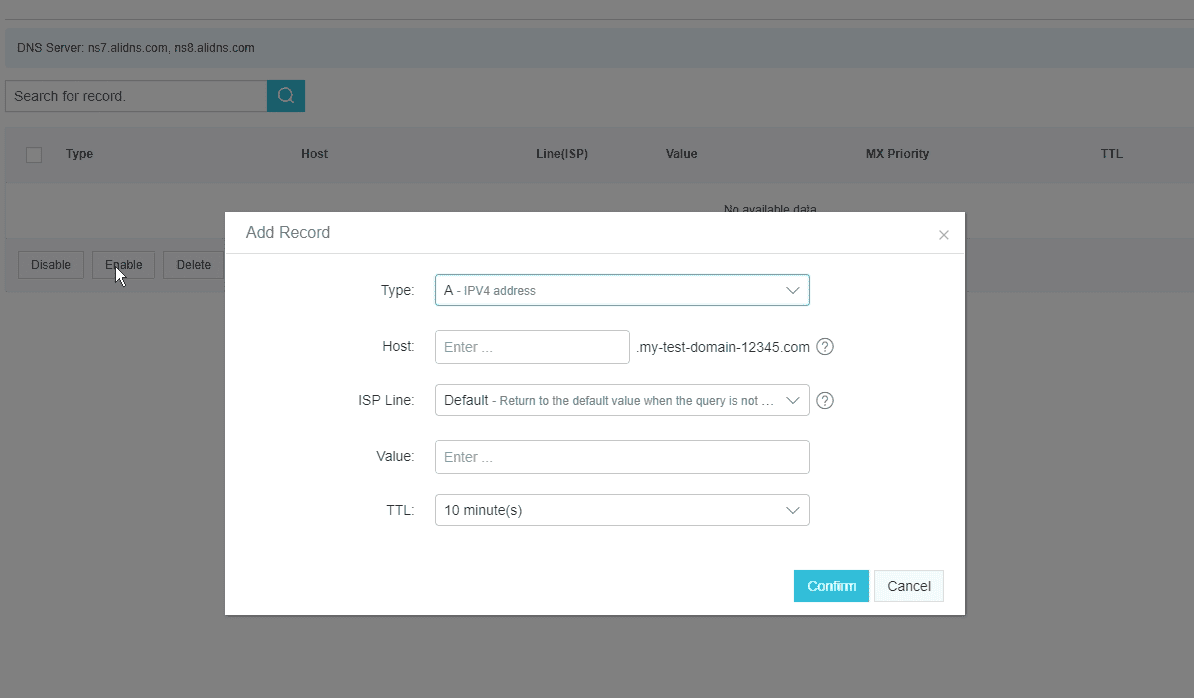
Change the Type box from A to CNAME. Enter www (without a dot) as the host setting. For the ISP Line, leave the entry as Default. In the Value box, paste the test domain entry that you copied previously. And leave the TTL box as it is.
It should look something like this:
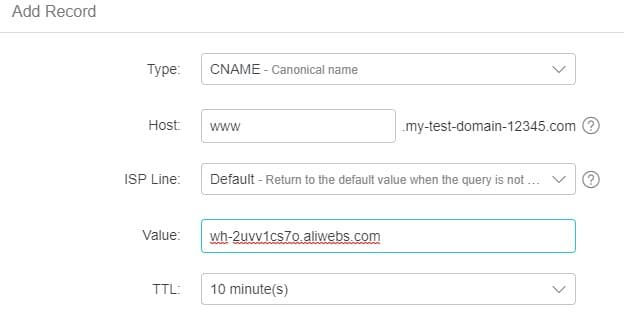
When you're done, press Confirm.
That is it. Your web hosting, sample site and domain name are all set and ready to go. All that remains is to test it. So, close the Alibaba Cloud console, open a browser window, go to your chosen site (www.my-test-domain-12345.com in this case), and admire your work.
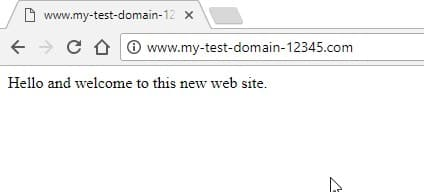
If all is well, you can now create more web pages and then upload them via FTP in the same way as we did earlier.
New DNS entries can sometimes take a while (even a few hours) before all of the worldwide DNS servers update themselves. So if your site isn't accessible via its new name yet, wait for a while and then try again.
If something else doesn't seem to be working correctly, use the built-in health check feature to find out where the problem lies. In the Alibaba Cloud console under Domains & Websites, under Web Hosting, locate your web hosting package and click Manage. Then click on Check Now. Your site and its settings will be checked, and you can then view the results.
That is the end of this tutorial. We hope you enjoy using your new website.

2,593 posts | 793 followers
FollowAlibaba Clouder - February 10, 2020
Alibaba Clouder - August 31, 2018
Alibaba Clouder - August 14, 2019
Alibaba Cloud Community - November 3, 2022
Alibaba Cloud Community - December 29, 2021
Alibaba Clouder - December 16, 2020

2,593 posts | 793 followers
Follow Web Hosting Solution
Explore Web Hosting solutions that can power your personal website or empower your online business.
Learn More Web Hosting
Explore how our Web Hosting solutions help small and medium sized companies power their websites and online businesses.
Learn More Web App Service
Web App Service allows you to deploy, scale, adjust, and monitor applications in an easy, efficient, secure, and flexible manner.
Learn More ICP Support Solution
Learn how to obtain an ICP Filing or ICP Commercial License to host your website in Mainland China.
Learn MoreMore Posts by Alibaba Clouder