If your enterprise uses Active Directory (AD) to manage user accounts but has not connected an office network directly to your AD domain, you can still enable single sign-on (SSO) for cloud computers. Create convenience accounts in EDS Enterprise that mirror your AD users by username, configure Active Directory Federation Services (AD FS) as the identity provider (IdP), and let AD FS authenticate users when they log in to their cloud computers.
If your office network is already connected to an AD domain, configure SSO using AD users instead. See Implement SSO for Elastic Desktop Service for AD users by using AD FS.
How it works
In this setup, EDS Enterprise acts as the service provider (SP) and AD FS acts as the identity provider (IdP). The two systems exchange Security Assertion Markup Language (SAML) metadata files to establish a trust relationship. When a user logs in:
The Alibaba Cloud Workspace client sends the user to the AD FS login page.
AD FS authenticates the user against your Active Directory and issues a SAML assertion.
AD FS maps the user's AD username (via User Principal Name, or UPN) to a SAML Name ID, which EDS Enterprise uses to identify the corresponding convenience account.
The user lands on their assigned cloud computer without entering credentials again.
The username of each convenience account must match the AD SamAccountName, case-insensitively, for the mapping to work.
Prerequisites
Before you begin, make sure you have:
An AD FS server deployed and accessible
Admin access to the EDS Enterprise console at
https://eds.console.alibabacloud.com/Admin access to the AD FS server (Server Manager)
An office network created in EDS Enterprise (SSO is configured per office network)
AD usernames that conform to EDS Enterprise convenience account naming conventions: 3–25 characters, starting with a letter or digit, containing only lowercase letters, digits, hyphens (
-), underscores (_), or periods (.), and not consisting solely of digits
Step 1: Create convenience accounts
Convenience accounts must have usernames that match your AD usernames. Create them manually for a small number of users, or in bulk via CSV for large teams.
Option 1: Create accounts manually
Log in to the EDS Enterprise console.
In the left navigation pane, choose Users > Users & Organizations.
On the User tab, click Create User, then click the Manual Entry tab.
Configure the parameters and click Create User.
| Parameter | Required | Description |
|---|---|---|
| User type | Yes | User-activated: the user activates the account via email or SMS. Administrator-activated: the admin sets the initial password. |
| Username | Yes | Must match the AD SamAccountName, case-insensitively. Format: 3–25 characters, starts with a letter or digit, lowercase letters/digits/hyphens/underscores/periods only, not all digits. |
| Display name | No | Used for identification in the console; not visible to end users. |
| Contact info (email address) | Yes | Receives assignment notifications, login info, and password reset links. |
| Parent organization | No | Assign the account to an organization now or later. |
| Password | Yes (Administrator-activated only) | At least 10 characters, including at least three of: uppercase letters, lowercase letters, digits, special characters (no spaces). |
| Password validity | No | Permanently valid by default. Set to 30–365 days to require periodic resets. |
| Lock on | Required if Administrator-activated | When locked, the user cannot log in to Alibaba Cloud Workspace terminals. |
| Grant admin permission | No | Grants local administrator permissions on the cloud computer. Default: Yes. Changes take effect after a cloud computer restart. |
| Remarks | No | Supplementary notes about the account. |
Enter usernames that exactly match AD usernames. Usernames are not case-sensitive during matching, but use lowercase to avoid confusion.
Option 2: Import accounts from a CSV file
Use this option when you have many AD users to onboard.
Prepare the CSV file on the AD domain server:
Verify that your AD usernames meet the EDS Enterprise naming requirements. AD usernames that contain characters outside the allowed set (for example, spaces or special characters) cannot be imported and must be handled separately.
Export AD users to CSV using PowerShell:
Get-ADUser -filter * | export-csv <file-path> -Encoding utf8For example, to save the file as
C:\Users\test.csv:Get-ADUser -filter * | export-csv C:\Users\test.csv -Encoding utf8Open the exported CSV in spreadsheet software. The exported file uses the
SamAccountNamecolumn as the username and theUserPrincipalNamecolumn as the email address. If an AD user's actual email differs from theUserPrincipalNamevalue, update that field. Reformat columns to match the EDS Enterprise import template:Account type Column 1 Column 2 Column 3 Column 4 User-activated Username Email address Phone (optional) — Administrator-activated Username Email (optional) Phone (optional) Password
Import the CSV file in the console:
Log in to the EDS Enterprise console.
In the left navigation pane, choose Users > Users & Organizations.
On the User tab, click Create User, then click the Batch Entry tab.
Configure the parameters:
Parameter Required Description User type Yes User-activated or Administrator-activated. Password validity No Permanently valid by default; set to 30–365 days to require periodic resets. Lock on No Required if Administrator-activated. Prevents login when locked. Grant admin permission No Default: Yes. Changes take effect after a restart. Upload file Yes Click Download to get the import template. Fill in user information, then click Upload Local File to submit. To assign users to organizations, enter the organization ID in the OrgIdcolumn. To find an organization ID, hover over the organizational structure in the console.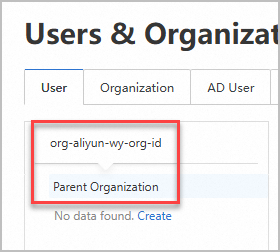
Click Close. The system imports the data automatically. If the import fails, click View Account to identify format errors.
After creation, the accounts appear on the User tab with a Normal status. Notifications are not sent at account creation — users receive emails when cloud computers are assigned to them.
Step 2: Configure AD FS as the IdP in EDS Enterprise
Download the AD FS IdP metadata file to your local device. The file is available at:
https://<AD FS server>/FederationMetadata/2007-06/FederationMetadata.xmlReplace
<AD FS server>with the domain name or IP address of your AD FS server.Log in to the EDS Enterprise console.
In the left navigation pane, choose Networks & Storage > Office Networks.
Select the region in the upper-left corner of the top navigation bar.
Click the office network ID for which you want to enable SSO.
On the office network details page, click Show in the upper-right corner of the Other Information section, then turn on SSO.
Click Upload File next to IdP Metadata and upload the metadata file you downloaded in step 1.
Step 3: Configure EDS Enterprise as the relying party in AD FS
Download the SP metadata file
Log in to the EDS Enterprise console.
In the left navigation pane, choose Networks & Storage > Office Networks.
Click the office network ID for which SSO is enabled.
In the left-side navigation pane of the office network details page, click the Other tab.
Click Download Application Metadata File next to Application Metadata. The file is saved to your local Downloads folder.
Add EDS Enterprise as a relying party trust in AD FS
Log in to the AD FS server and open Server Manager.
Choose Tools > AD FS Management.
In the left navigation pane of the AD FS window, choose Trust Relationships > Relying Party Trusts.
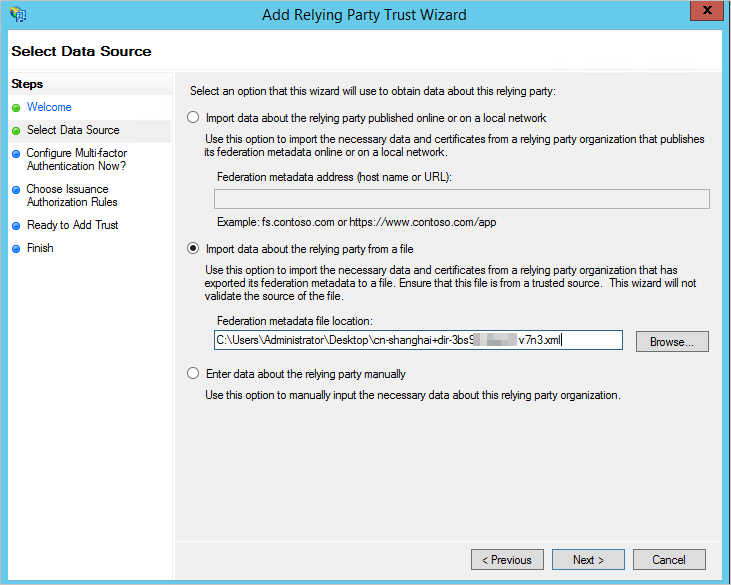
In the Actions pane on the right, click Add Relying Party Trust.
Follow the wizard. In the Select Data Source step, select Import data about the relying party from a file and import the SP metadata file you downloaded from EDS Enterprise. Keep the default settings in the remaining steps.
Configure the claim issuance policy
Configure the claim rule that maps AD user attributes to SAML assertions.
In the Relying Party Trusts list, right-click the trust you just added and select Edit Claim Issuance Policy.
In the dialog box, click Add Rule.
Configure the claim rule:
In the Choose Rule Type step, select Transform an Incoming Claim from the Claim rule template list.
In the Configure Claim Rule step, set Incoming claim type to UPN and Outgoing claim type to Name ID.
This mapping passes the user's UPN as the SAML Name ID. EDS Enterprise matches this value against the username of the corresponding convenience account.
Step 4: Verify SSO
The following steps use Alibaba Cloud Workspace Windows client V7.2.2 as an example.
Open the Alibaba Cloud Workspace Windows client, select Enterprise Edition, accept the privacy policy, enter the organization ID or office network ID from your login credentials, and click the arrow icon.
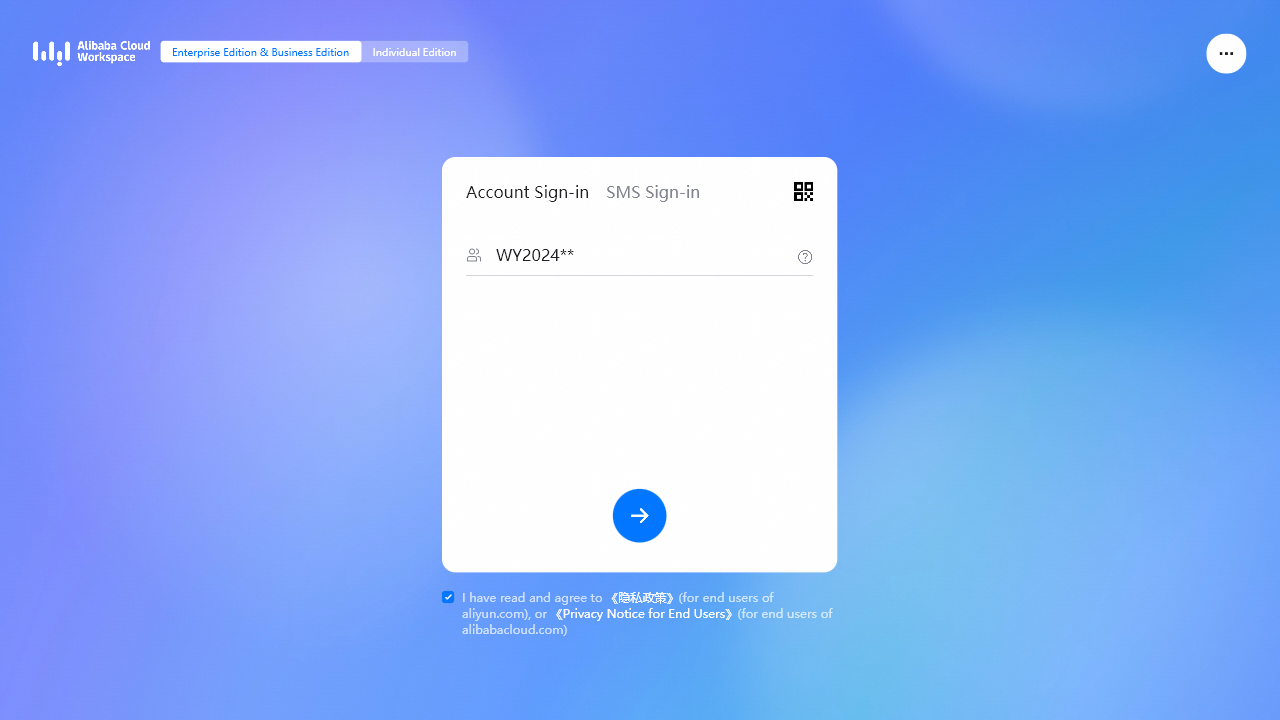
On the AD FS login page, enter the username of a convenience account you created in Step 1. AD FS authenticates the user against Active Directory.
After authentication succeeds, the client displays the user's assigned cloud computers. Hover over a cloud computer card and click Start, then Connect Cloud Computer to connect.
What's next
Assign cloud computers or cloud computer pools to the convenience accounts. Users receive an email notification with login instructions after assignment.
To manage convenience accounts at scale, use the Users & Organizations page to update account details, reset passwords, or lock accounts.