In the current cybersecurity environment, protecting origin servers from malicious attacks is crucial. In most cases, abnormal User-Agent (UA) headers are used to perform various attacks, such as web crawling, vulnerability scanning, and Distributed Denial of Service (DDoS) attacks. For ease of understanding, this type of attack is referred to as UA attacks. This topic describes how to use the custom rule module of Web Application Firewall (WAF) 3.0 to defend against UA attacks.
Network architecture
In the following network architecture, WAF blocks abnormal traffic to ensure that only normal traffic reaches the Elastic Compute Service (ECS) instance.

Quick deployment
To help you experience how WAF defends against malicious UA attacks, Alibaba Cloud provides quick deployment of a network architecture.
During quick deployment, you are charged for your ECS and Classic Load Balancer (CLB) instances. For more information, see Pay-as-you-go of ECS and Pay-as-you-go of CLB.
We recommend that you promptly release or unsubscribe from the resources that are automatically created and no longer required. This helps avoid additional fees.
During quick upgrade, the system automatically creates the following resources: a virtual private cloud (VPC), a vSwitch, a security group that allows access on ports 22, 80, and 443, a pay-as-you-go ECS instance that supports public access, and a CLB instance that uses port 80 for listening. You can click quick deployment to go to the debugging page. On the page that appears, click Initiate Debugging. Then, click Plan & Apply. After the deployment is complete, deploy your web service to your ECS instance and enable WAF protection for your Layer 7 CLB instance. |
|
UA attacks
Attackers can forge or tamper with UA headers in HTTP requests to hide their real identities and bypass security protection measures. Abnormal UA headers can be used in the following attacks:
Malicious crawling: Website content is massively scraped, which consumes a large amount of bandwidth and resources.
Vulnerability scanning: Websites are automatically scanned to find vulnerabilities that can be exploited.
HTTP flood attacks: A large number of requests are sent to overwhelm servers, which prevents the servers from responding as expected.
Spoofing and bypassing: UA headers are forged to bypass specific security and access control policies.
Prerequisites
A WAF 3.0 instance is purchased. For more information, see Purchase a WAF 3.0 subscription instance and Activate a pay-as-you-go WAF 3.0 instance.
Web services are added to WAF 3.0 as protected objects. For more information, see Configure protected objects and protected object groups.
Procedure
Step 1: Collect and analyze UA data
Before you configure protection rules, you must get familiar with the UA headers that are used for normal access. This helps distinguish between normal and abnormal traffic. In this example, log collection is enabled for a Layer 7 CLB instance, and you can view and analyze the collected logs in Simple Log Service. For more information, see Enable the data collection feature.
Log on to the Simple Log Service console. Select your project and logstore to go to the log query and analysis page.
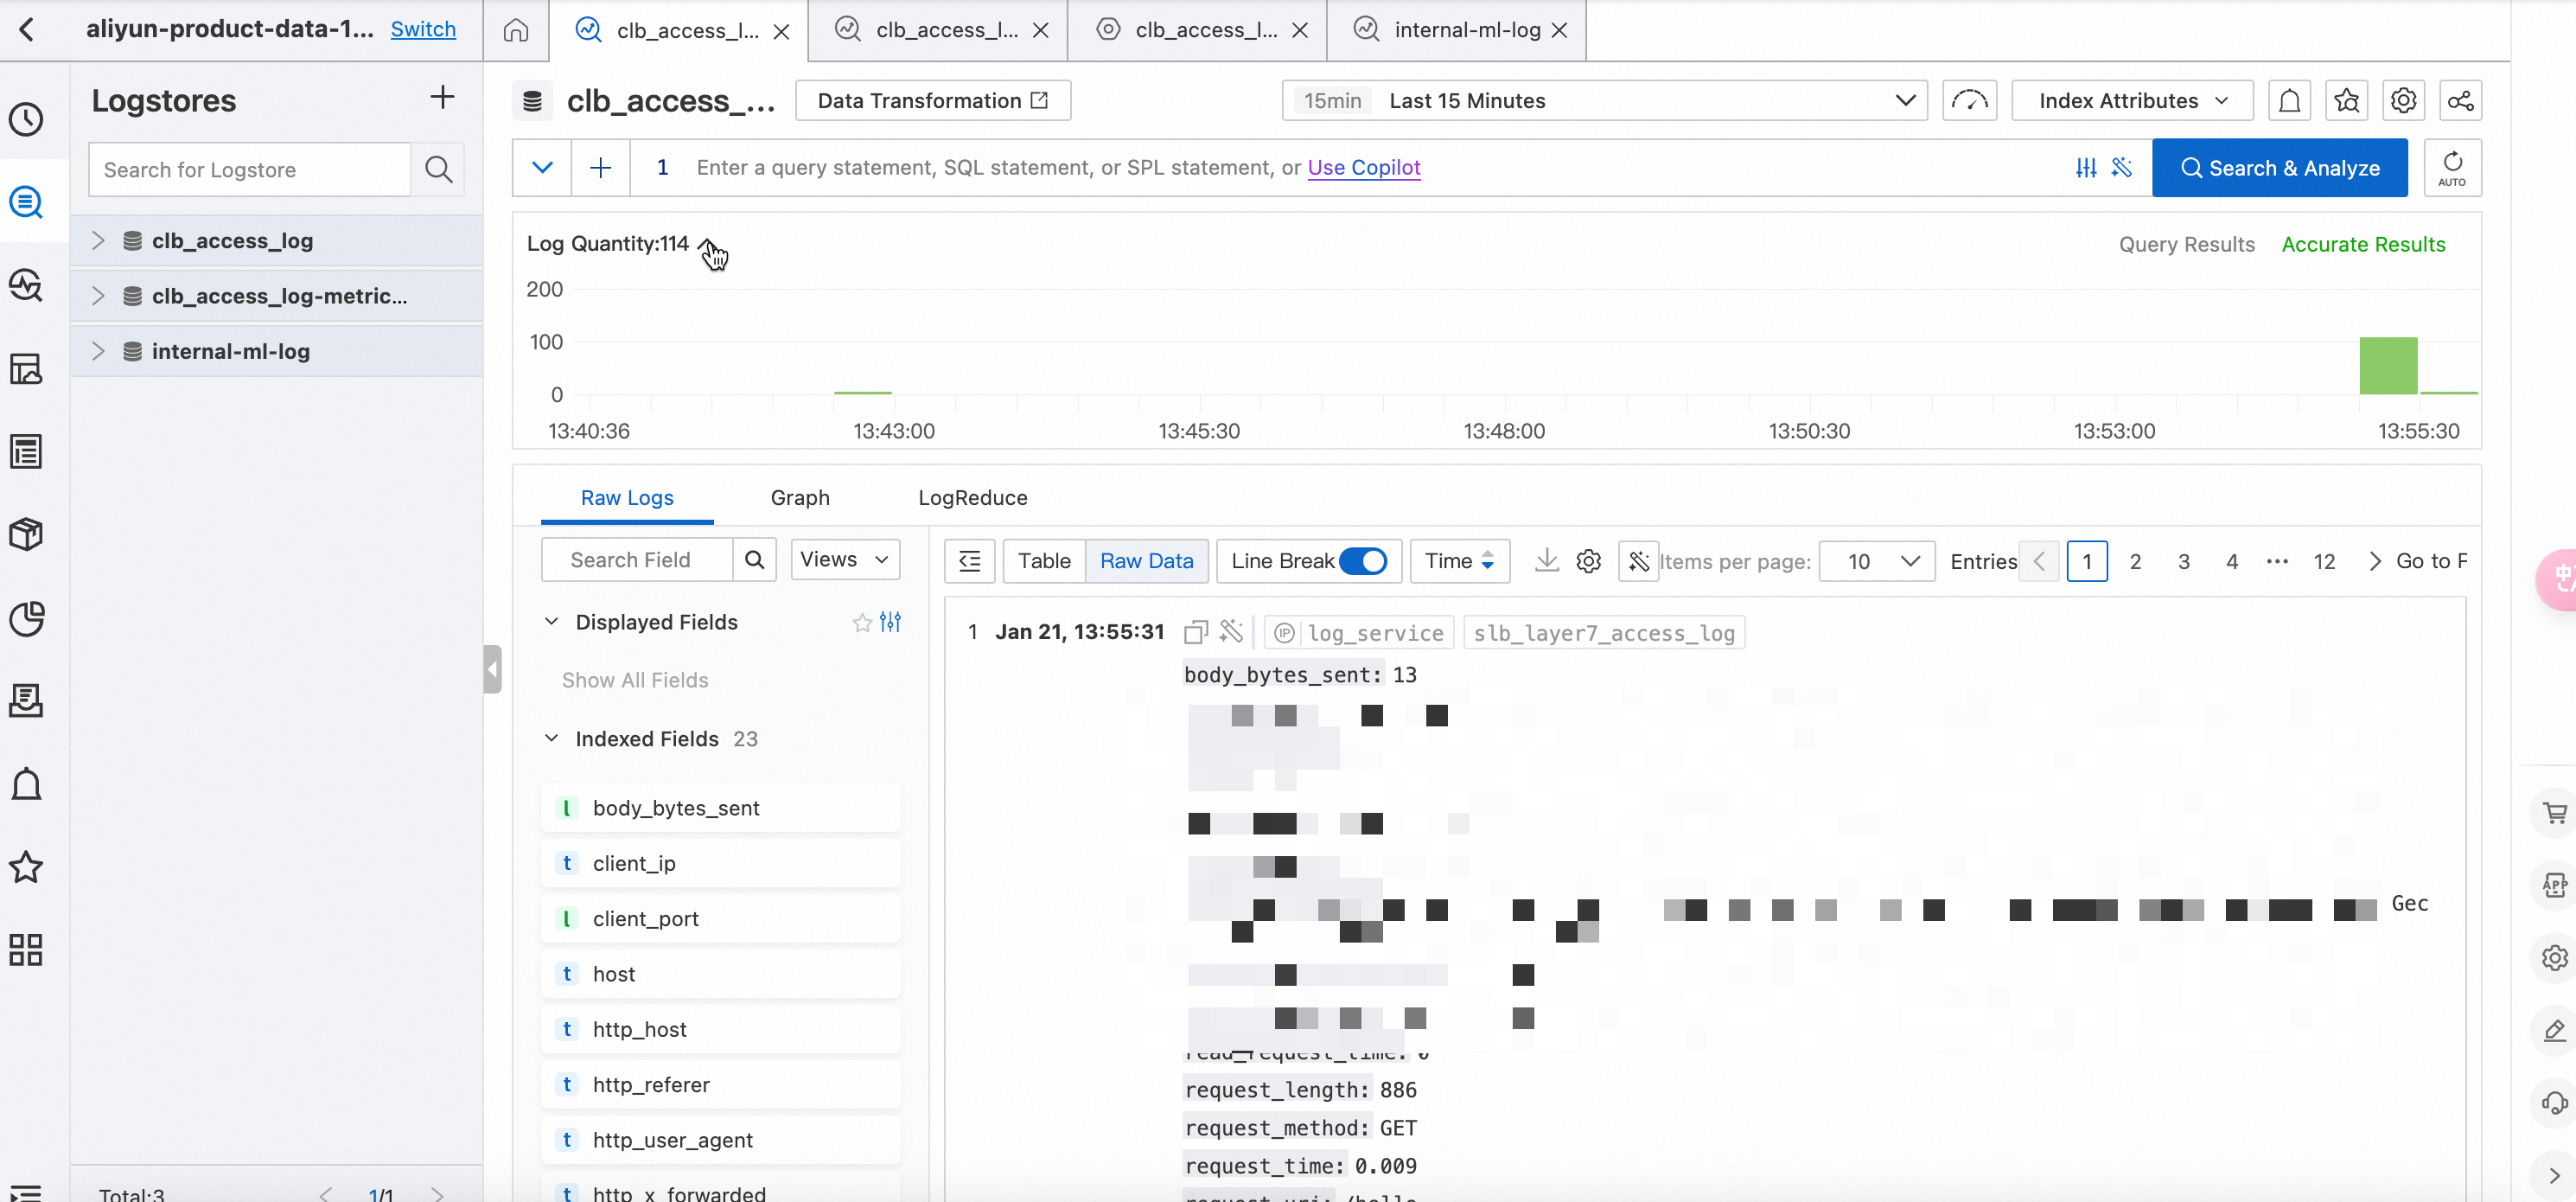
View log fields. After log collection is enabled for your CLB instance, Simple Log Service collects information about the request packets of the instance. For more information about fields in the collected logs, see Log fields. The http_user_agent field specifies the UA header in a request. You can click the http_user_agent field and select the UA value that has the largest number. Then, the console displays all logs that contain the UA value within the specified time range.

The preceding figure shows that the requests whose UA value is Apache-HttpClient/4.5.13 (Java/1.8.0_381) account for 99% of all requests within the previous 15 minutes. The total number of requests whose UA value is Apache-HttpClient/4.5.13 (Java/1.8.0_381). is 4,368.
Step 2: Create a protection rule of the custom rule module
If a domain name or an API is maliciously accessed by attackers and logs contain a large number of forged UA headers, such as UA headers that use null values or random strings, you must identify abnormal requests based on your business scenarios.
In this example, the data collected in Step 1 shows that the number of requests with the same UA value surges. This indicates potential abnormal traffic. In this case, you can create a protection rule of the custom rule module to allow WAF to block the abnormal traffic.
Log on to the WAF 3.0 console. In the top navigation bar, select the resource group and region of the WAF instance. You can select Chinese Mainland or Outside Chinese Mainland.
In the left-side navigation pane, choose .
In the Custom Rule section of the Core Web Protection page, click Create Template.
NoteIf this is your first time to create a protection template of the custom rule module, you can also click Configure Now in the Custom Rule card in the upper part of the Core Web Protection page.
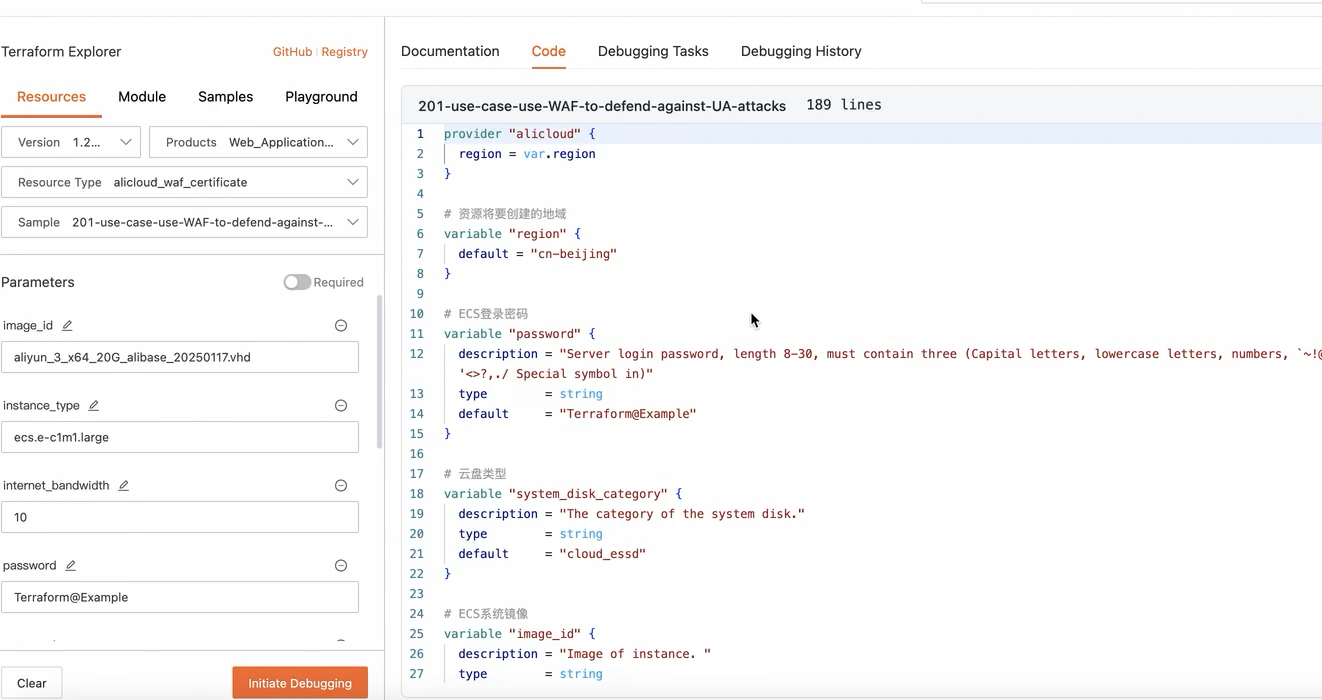
In the Create Template - Custom Rule panel, click Create Rule to create a protection rule for the current protection template.
Rule Name: For this example, set the rule name to Abnormal_UA_Interception.
Match Condition: For this example, select User-Agent for the Match Field parameter and Include for the Logical Operator parameter, and enter Apache-HttpClient/4.5.13 (Java/1.8.0_381) for the Match Content parameter.
Configure the actual parameters as needed.
Rule Action: For this example, select Block.
Click OK. A protection rule named Abnormal_UA_Interception is created. We recommend recording the rule ID. You can use the rule ID to view the protection performance of the rule. In this example, the rule ID is 20766535.

In the Create Template panel, select the required Protected Objects or Protected Object Groups in the Available Objects section and add them to the Selected section.
Click OK. The Added. message appears, which indicates that the protection template is created.
Verification
After the protection rule takes effect, you can verify the protection performance of the rule by using the following methods: view request information in logs and view rule details in security reports.
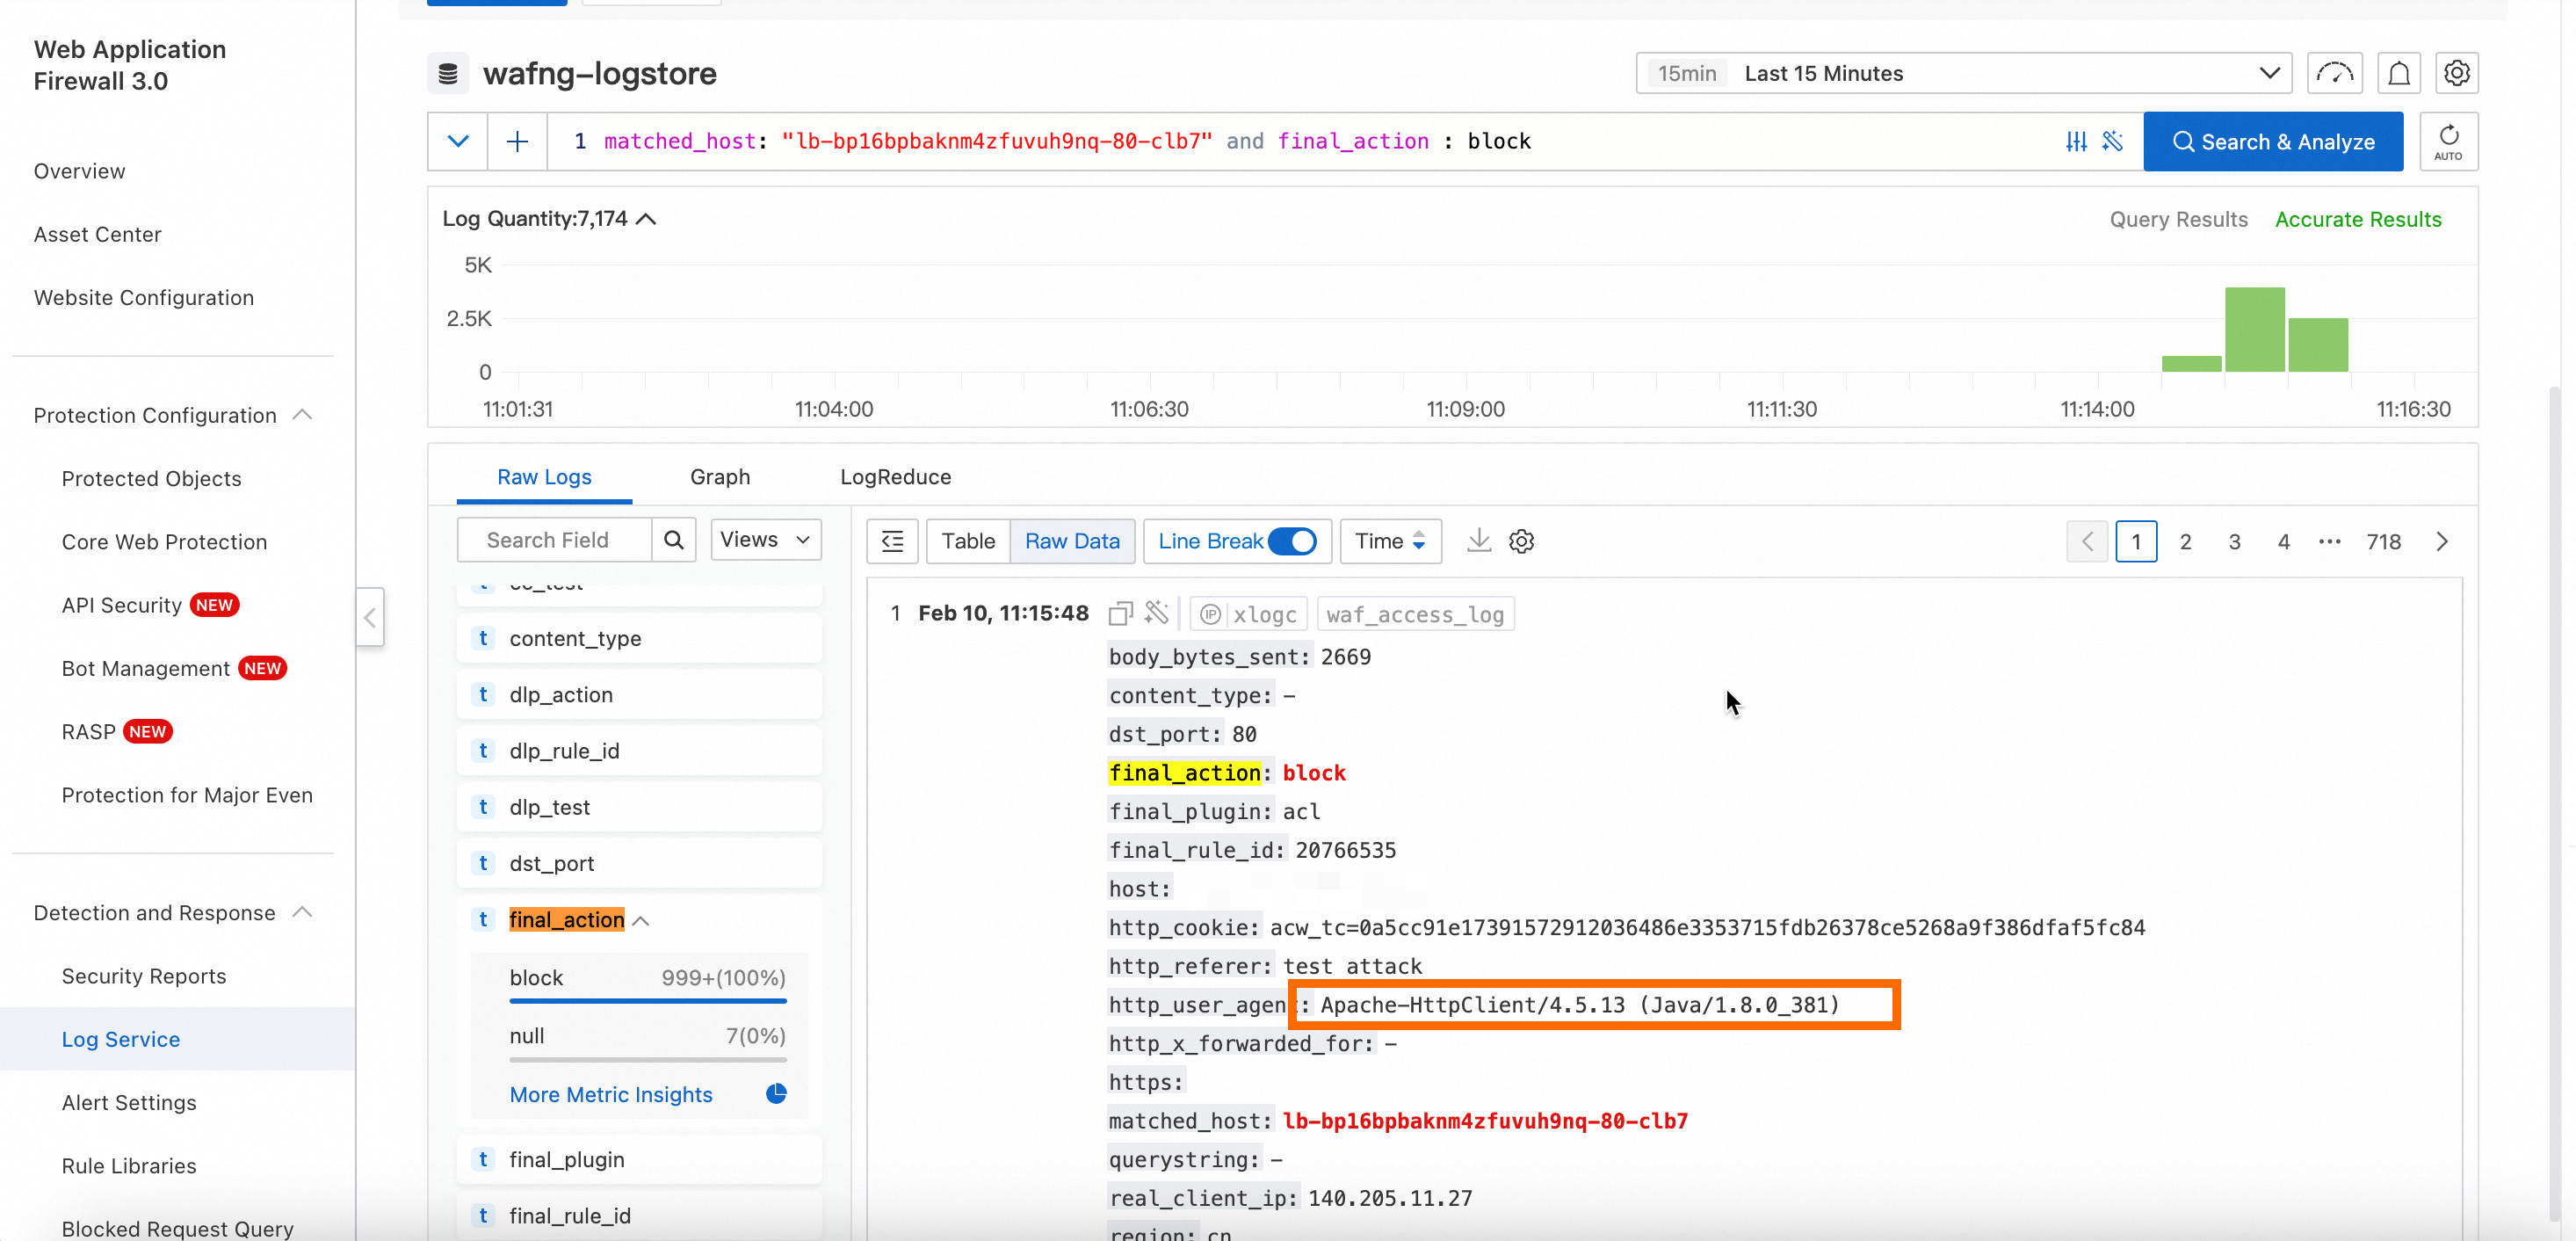
View WAF logs
You can view blocked requests that use abnormal UA headers in WAF logs. In the logs, if the value of the final_action field is block, a request is blocked. For more information, see Log fields.
You can view WAF logs only if the Simple Log Service for WAF feature is enabled for your protected objects.
Log on to the WAF 3.0 console. In the top navigation bar, select the resource group and region of the WAF instance. You can select Chinese Mainland or Outside Chinese Mainland for the region.
In the left-side navigation pane, choose Detection and Response > Log Service.
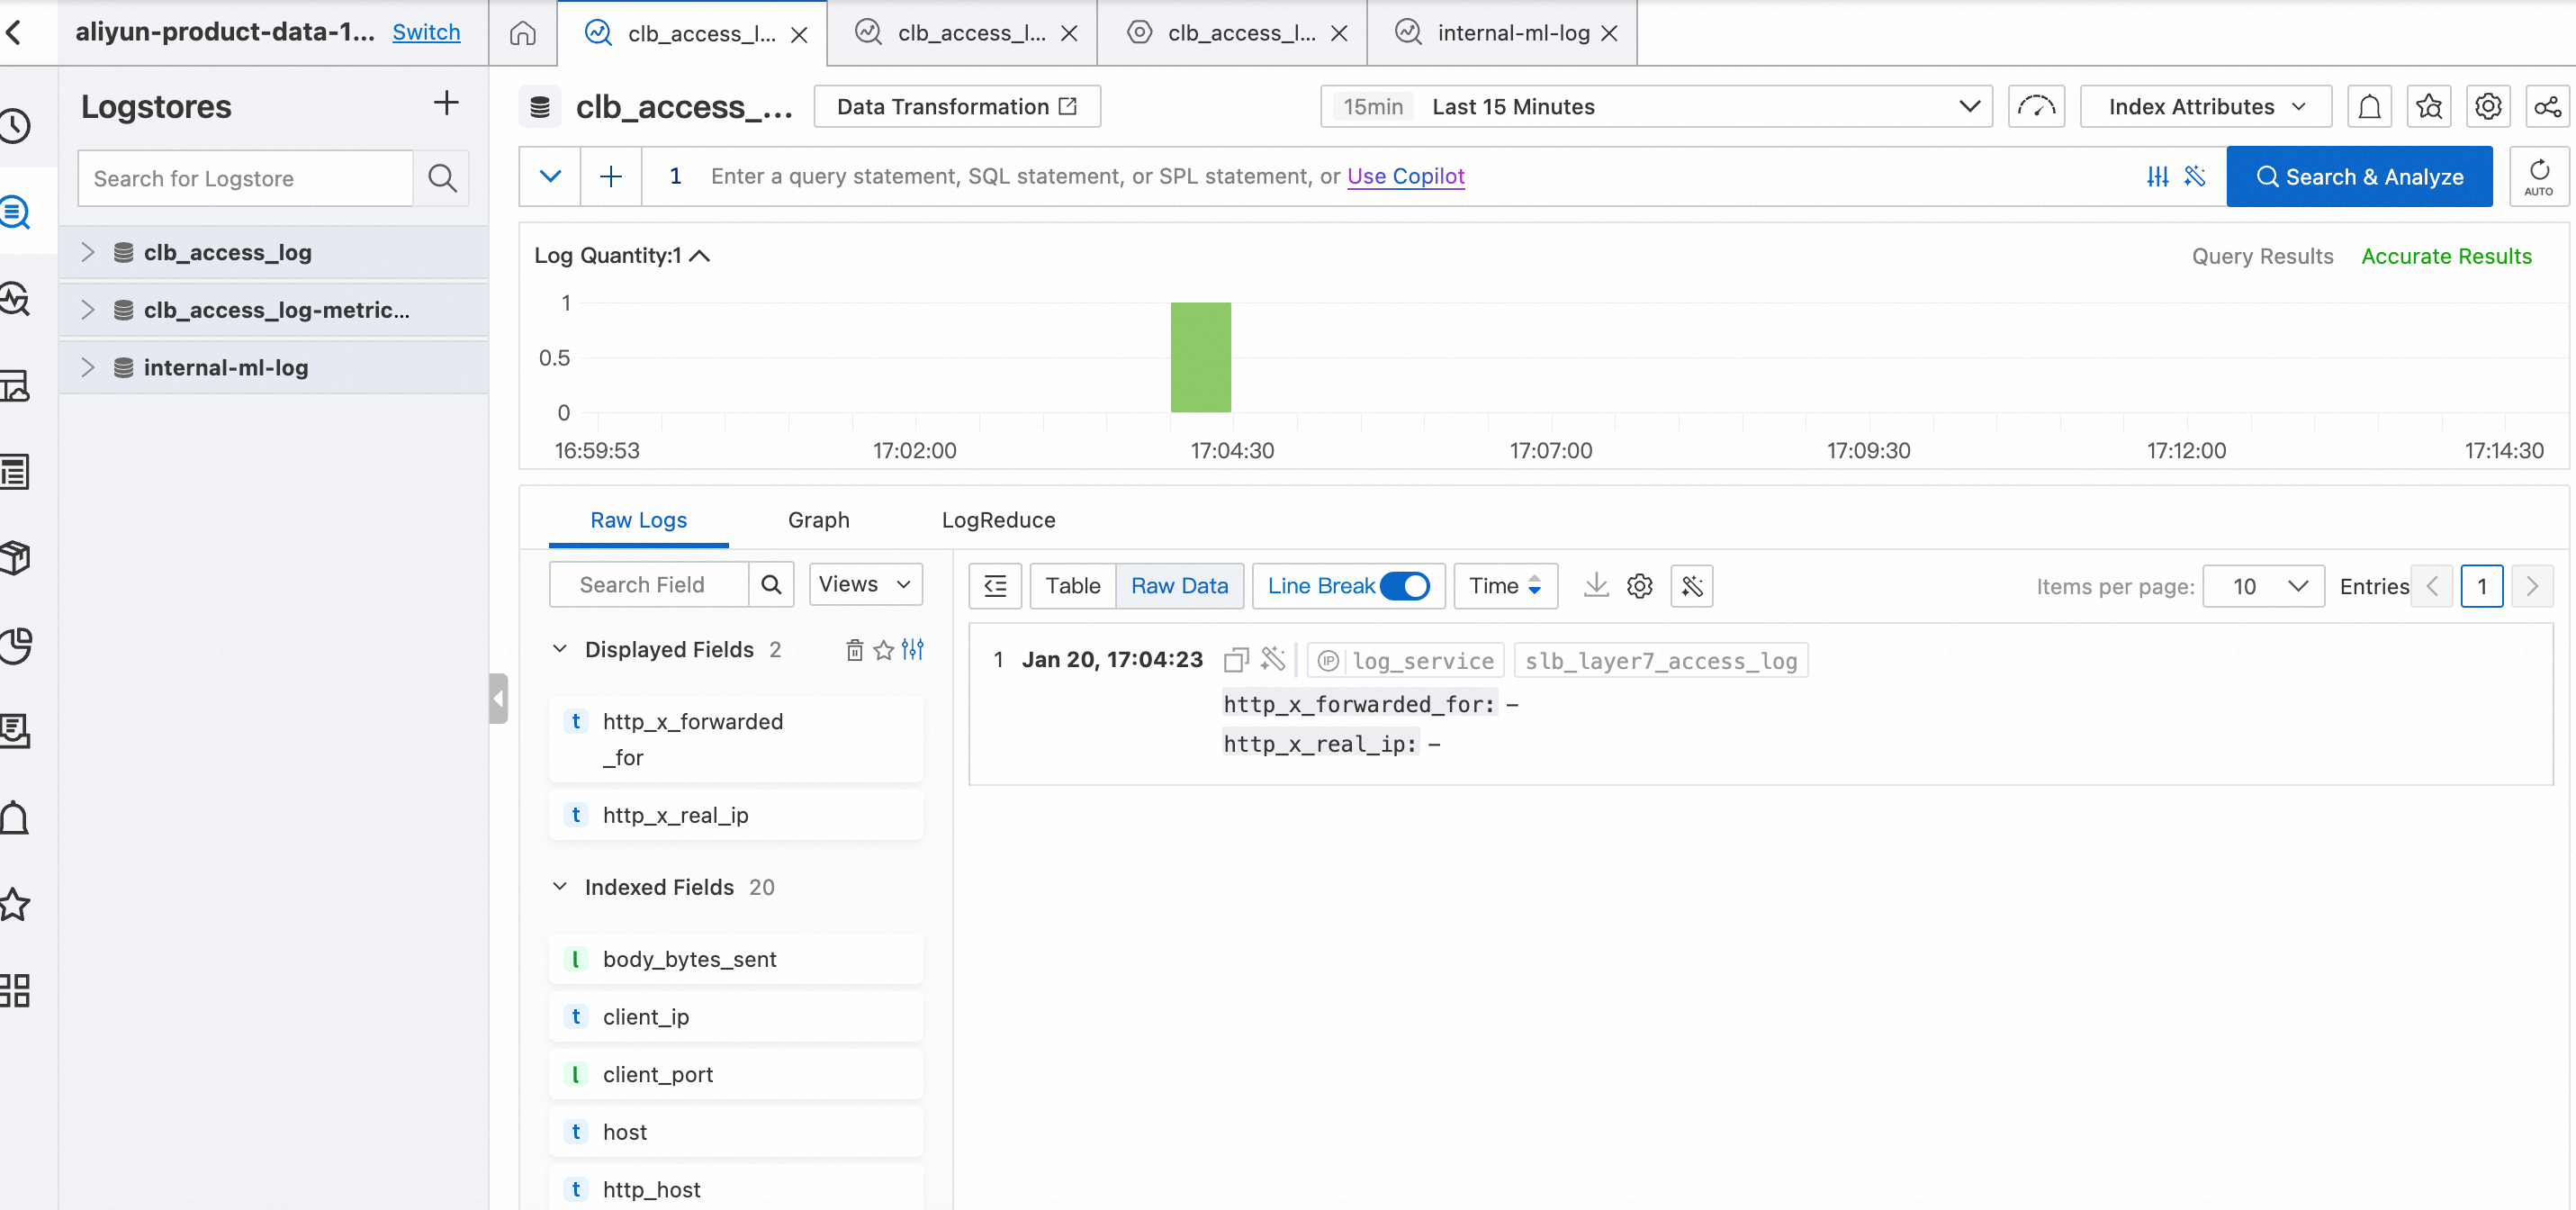
In the upper part of the Log Service page, select the protected object generated for your CLB instance. The following figure shows that abnormal UA traffic is blocked by WAF and recorded in WAF logs.
View WAF security reports
You can view the protection performance of the protection rule in WAF security reports.
Log on to the Web Application Firewall 3.0 console
In the navigation pane on the left, choose . On the Security Reports page, use the search bar at the top to filter by the custom rule protection module and the protected object generated for your CLB instance.
In the Top 5 Hits section, you can view the number of hits for the Abnormal_UA_Interception rule that you created in Step 2.
View service logs
After the protection rule takes effect, the server logs of the CLB instance no longer include requests that use abnormal UA headers. The following figure shows the logs of the CLB instance within the previous 15 minutes. Requests that use abnormal UA headers are blocked by WAF. The requests are not forwarded to the CLB instance.