Authentication endpoints — registration, logon, and SMS verification — are frequent targets for credential attacks. WAF's account security feature monitors these endpoints and detects dictionary attacks, brute-force attacks, spam user registration, weak password sniffing, and SMS flood attacks. This topic describes how to add a monitored endpoint and view account security reports.
Prerequisites
Before you begin, ensure that you have:
You have purchased a WAF instance of the Pro edition or higher.
A WAF instance of the Pro edition or higher
Your website added to WAF (see Tutorial)
How account security works
Account security requires you to identify the endpoints where user credentials are submitted — not the login page itself, but the URI that receives the username and password. WAF monitors traffic to those endpoints and reports security events when it detects suspicious patterns.
Each WAF instance supports up to three monitored endpoints. After you add an endpoint, WAF dispatches detection tasks automatically and reports events within a few hours if the traffic meets the account security rule.
Add an endpoint
Log on to the WAF console.
In the top navigation bar, select the resource group and the region where your WAF instance is deployed. Valid regions: Chinese Mainland and Outside Chinese Mainland.
In the left-side navigation pane, choose Scenario-specific Protection > Account Security.
On the Account Security page, click Add Endpoint.
If this is the first time you open the Account Security page, skip this step — the endpoint form opens automatically. Each WAF instance supports a maximum of three endpoints. When the limit is reached, Add Endpoint is dimmed.
Configure the following parameters and click Save. Configuration examples
POST logon — URI:
/login.do, request body:username=Jammy&pwd=123456. Set Account Parameter Name tousernameand Password Parameter Name topwd.GET logon — URI:
/login.do?username=Jammy&pwd=123456. Set Request Method to GET. Keep all other parameters the same as the POST logon example.Registration (no password) — Configure Account Parameter Name only. Leave Password Parameter Name blank.
SMS verification — URI: `/sendsms.do?mobile=1381111**`. Set Endpoint to be Detected to `/sendsms.do` and Account Parameter Name to `mobile`. Leave Password Parameter Name** blank.
Parameter Description Endpoint to be Detected Select the domain name, then enter the URI where user credentials are submitted. Enter the URI that receives the username and password — not the login page URI. For example, use /login.dorather than/login.html. If you enabled the asset discovery feature and added the domain to WAF, all URIs for that domain appear in the drop-down list. See Asset Discovery.Request Method Select the HTTP method for the endpoint: POST, GET, PUT, or DELETE. Account Parameter Name Enter the name of the username parameter. Password Parameter Name Enter the name of the password parameter. Leave blank if the endpoint does not require a password (for example, a registration or SMS verification endpoint). Protective Action Select the action WAF takes when it detects an account security event: Report (log only) or Block (deny the request).
After saving, WAF starts monitoring the endpoint automatically. Security events are reported within a few hours if the traffic matches the account security rule.
All requests to your website pass through the account security check. To exempt specific requests from this check, configure a whitelist. See Configure a whitelist for Data Security.
View account security reports
There are two ways to access account security reports:
On the Account Security page, find the endpoint and click View Report in the Actions column.
In the left-side navigation pane, choose Security Operations > Security Report.
The following steps describe how to view reports from the Security Report page.
Log on to the WAF console.
In the top navigation bar, select the resource group and the region where your WAF instance is deployed.
In the left-side navigation pane, choose Security Operations > Security Report.
On the Web Security tab, click Account Security, then select the domain name, URI, and time range. Available time ranges: Yesterday, Today, 7 Days, and 30 Days.
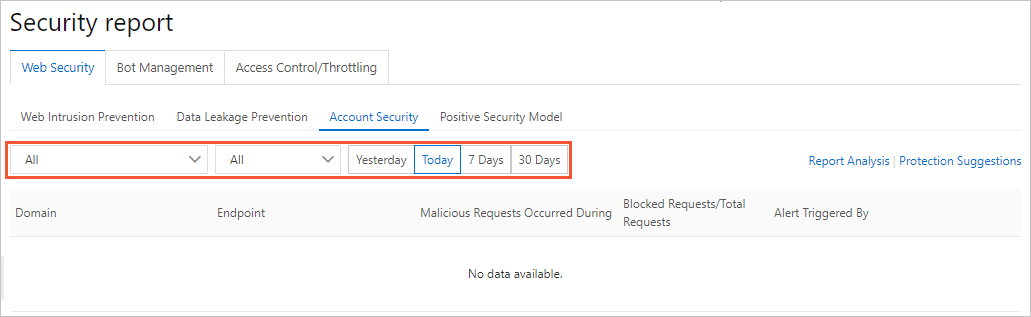
The report includes the following fields.
| Field | Description |
|---|---|
| Endpoint | The URI where account security events are detected. |
| Domain | The domain name the URI belongs to. |
| Malicious Requests Occurred During | The time range in which account security events were detected. |
| Blocked Requests | The number of requests blocked by WAF protection rules during the reported period. Rules include the Protection Rules Engine, custom protection policy (ACL), HTTP flood protection, and region blacklist. The proportion of blocked requests indicates the endpoint's account security status. |
| Total Requests | The total number of requests sent to the endpoint during the reported period. |
| Alert Triggered By | The reason the alert fired. Possible reasons: a request matches the behavior model of dictionary or brute-force attacks; the traffic baseline for the endpoint is abnormal; a large number of requests match rules in the threat intelligence library; weak passwords are detected in a large number of requests, indicating potential dictionary or brute-force attacks. |
What's next
The account security feature detects credential risks but does not automatically remediate them. For guidance on responding to detected threats and hardening your authentication endpoints, see Account security best practices.