When the RegEx Protection Engine in WAF blocks legitimate requests to your website, you can create a custom rule group to exclude the specific protection rule causing the false positive—without disabling your overall protection.
Prerequisites
Before you begin, ensure that you have:
A WAF instance purchased with the subscription billing method
If the instance is deployed in the Chinese Mainland: Business edition or higher
If the instance is deployed outside the Chinese Mainland: Enterprise edition or higher
Your website added to WAF. For more information, see Tutorials
How it works
The custom rule group approach lets you selectively remove one problematic rule without touching your base protection configuration:
Identify the rule ID that is triggering false positives.
Copy the active rule group to create a custom version.
Remove the problematic rule from the custom rule group.
Apply the custom rule group to only the affected domain name.
Resolve false positives caused by the RegEx Protection Engine
Step 1: Find the rule ID
Log on to the WAF console.
In the top navigation bar, select the resource group and the region of your WAF instance. The region can be Chinese Mainland or Outside Chinese Mainland.
In the left-side navigation pane, choose Security Operations > Security Report.
On the Web Security tab, click Web Intrusion Prevention, select the affected domain name, and then select Regular Protection in the lower part of the page to view attack records.
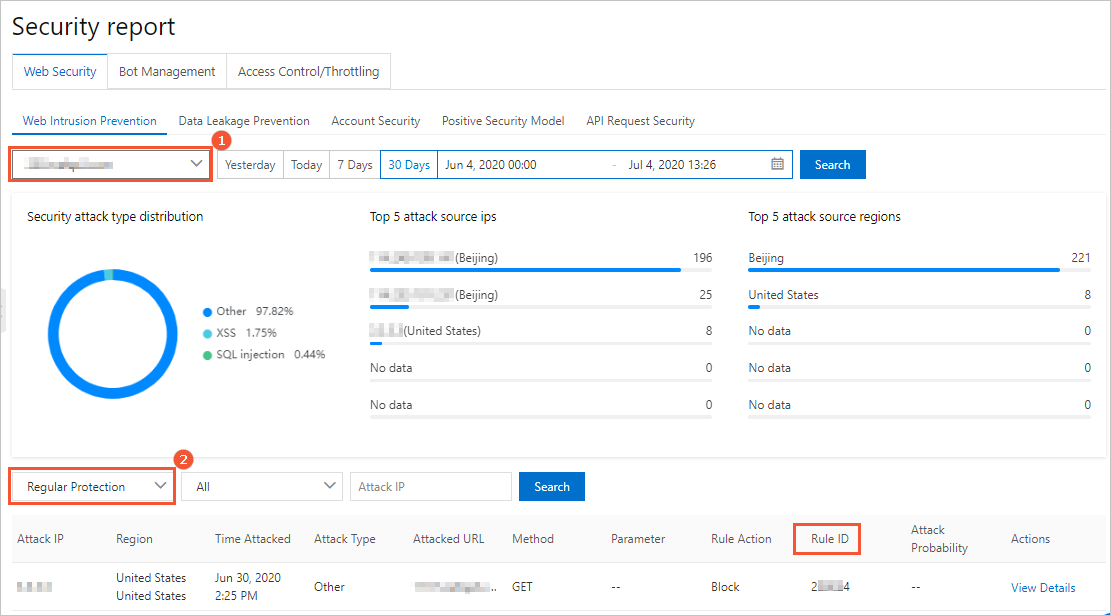
In the attack record list, locate the false positive record and note the rule ID. To find the record faster, search by the attack IP address.
Step 2: Create a custom rule group
In the left-side navigation pane, choose System Management > Protection Rule Group.
On the Web Application Protection tab, find the rule group that applies to the affected domain name. Search by domain name in the Website column.
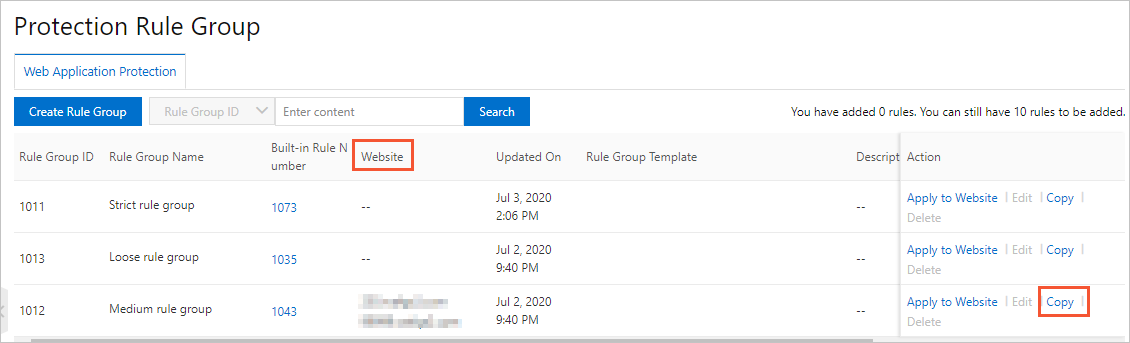
In the Action column, click Copy.
On the Copy Rule Group page, enter a descriptive name in the Rule Group Name field (for example,
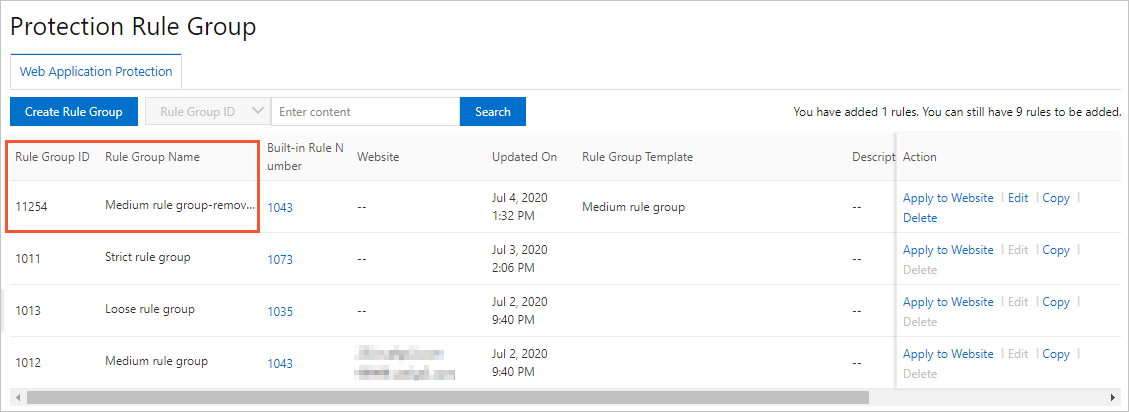
medium rule group-remove false positive rule), turn on Automatic Update, and click Save. The new rule group appears in the rule group list.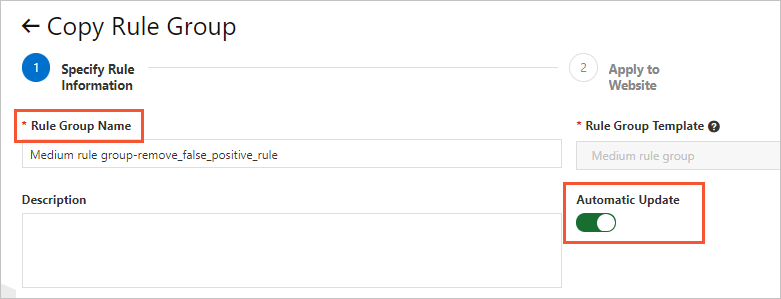
Step 3: Remove the false positive rule
In the rule group list, find the custom rule group you just created. In the Action column, click Edit.
On the Edit Rule Group page, search for the rule using the rule ID you recorded earlier. Select the rule and click Remove Selected Rules.
ImportantBefore removing a rule, verify that you have selected the exact rule that is blocking normal requests.
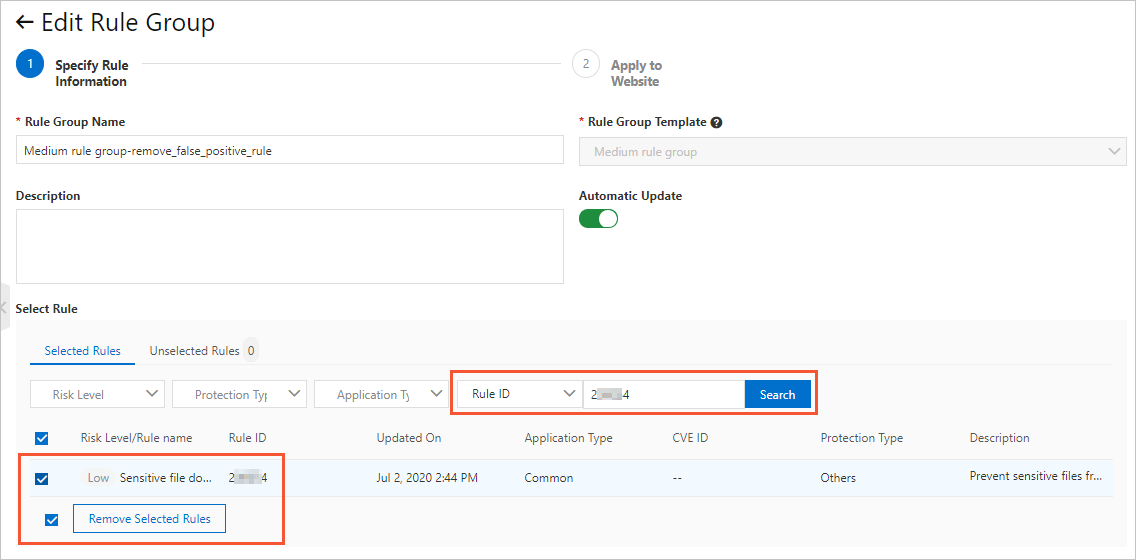
Click Save.
Step 4: Apply the custom rule group to your website
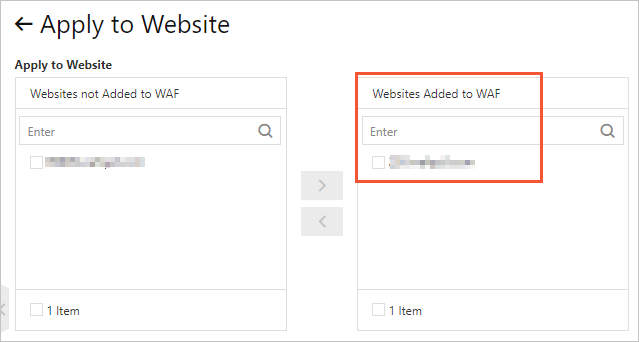
In the rule group list, find the custom rule group. In the Action column, click Apply to Website.
On the Apply to Website page, add the affected domain name to the Websites Added to WAF section and click Save.
Verify the result
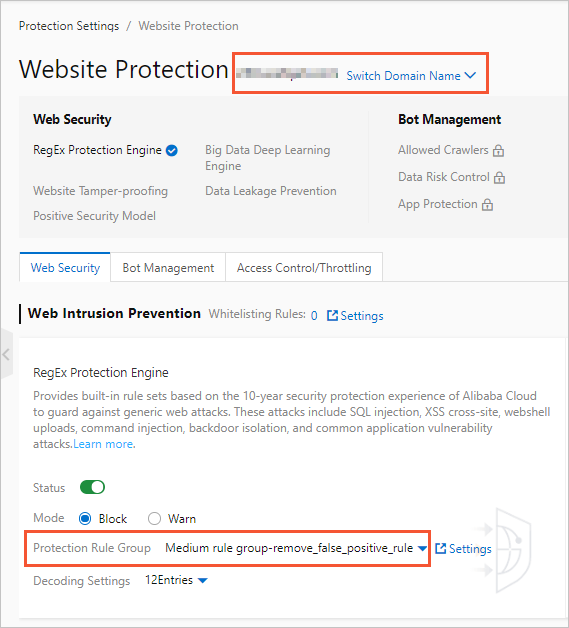
After applying the custom rule group, go to the Website Protection page and check the RegEx Protection Engine settings. The Protection Rule Group field should now show the custom rule group you applied.
Send the same request that was previously blocked. WAF should now allow it through.
If requests are still blocked, double-check that you identified the correct rule ID and that the exact rule was removed from the custom rule group. For more information about RegEx Protection Engine settings, see Configure the protection rules engine feature.