Video translation technology uses artificial intelligence (AI) and machine learning algorithms to efficiently and accurately convert video content from a source language to one or more target languages. ApsaraVideo VOD Workflow 2.0 integrates caption-level and voice-level translation from Intelligent Media Services (IMS). This feature is available as a workflow node to automate and streamline video translation. This topic describes how to use the video translation feature in a workflow.
This feature is available in the following regions:
China (Shanghai), China (Beijing), China (Shenzhen), Asia-Pacific Southeast 1 (Singapore), and Americas (US West).
Voice-level translation: China (Shanghai), China (Beijing), China (Shenzhen), Singapore, and US (West).
Prerequisites
To use the video translation node in a workflow, you must activate ApsaraVideo VOD and Intelligent Media Services.
Advantages
End-to-end multilingual translation
Supports translation services for over 40 languages.
Supports more than 10 Chinese dialects to meet diverse voice requirements.
A single translation task supports output in more than 40 different target languages.
Original voice cloning and emotional synchronization
High-fidelity voice cloning replicates who is speaking.
Fine-grained emotional synchronization conveys the current emotion.
Seamless integration with multiple formats
Supports various mainstream video formats, such as MP4, WebM, MOV, and M3U8, to ensure seamless content integration.
Supports multiple audio formats, such as MP3 and WAV.
You can create custom configurations to meet specific requirements in different scenarios.
Features
ApsaraVideo VOD workflows support the video translation services provided by IMS. These services include caption-level translation and voice-level (narration) translation. The main features include the following:
Feature | Description | Highlights |
Caption-level translation |
| Provides efficient and accurate text translation. This is suitable for scenarios that require you to quickly add multilingual support. |
Voice-level (narration) translation | In addition to caption-level translation, this feature also supports:
| Adds a voice dimension to text translation. This maintains the authenticity and emotional delivery of the original voice and improves the viewer experience. |
Voice translation correction/secondary editing |
| Flexibly adjust the translation output to meet custom needs. This lets you fine-tune the results for the best effect. |
Instructions
Step 1: Configure a video translation workflow in the console
Currently, you can create workflows only in the ApsaraVideo VOD console.
Log on to the ApsaraVideo VOD console.
In the navigation pane on the left, choose Configuration Management > Media Processing > Workflows to open the Workflows page.
Click Add Workflow and enter a name for the workflow.
On the workflow editing page, click the + icon to the right of the Start node to add a video translation node.

In the panel that appears on the right, configure the parameters as prompted:
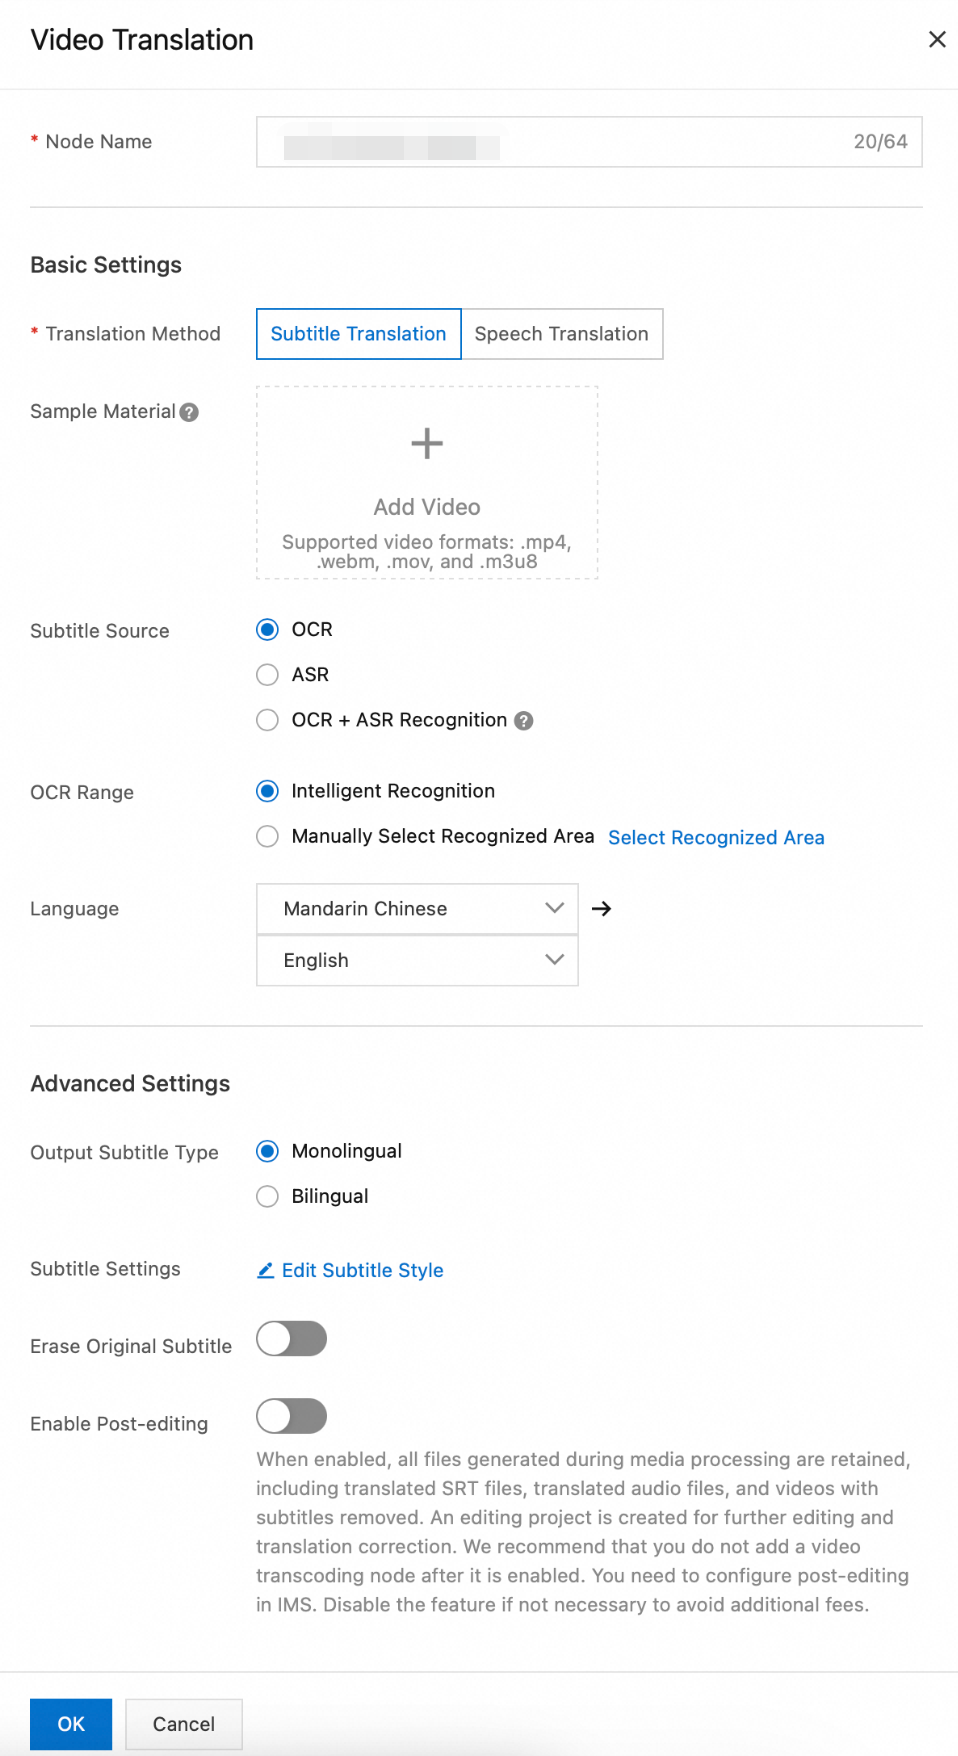
Node Name: Enter a custom name for the video translation node.
Translation Method: Select Caption-level translation or Voice-level translation.
Sample Material: A sample video for configuring captions. This video is not processed by the workflow task. MP4, WebM, MOV, and M3U8 formats are supported.
Caption Source: The caption source can be optical character recognition (OCR), automatic speech recognition (ASR), or OCR+ASR.
OCR: If you do not have a subtitle file but your video contains visible text, use OCR to extract caption text from the video frames. To improve efficiency and accuracy, you can also specify an OCR recognition area.
ASR: If your video file does not have captions, use ASR to extract captions from the audio track.
OCR+ASR: This method combines OCR and ASR to extract captions. This method prioritizes OCR and uses ASR as a fallback if OCR fails.
Translation Languages: Select multiple target languages at once. After you submit the translation task, the system generates video files for each target language.
Output Target Caption Type: Select single-language or bilingual captions.
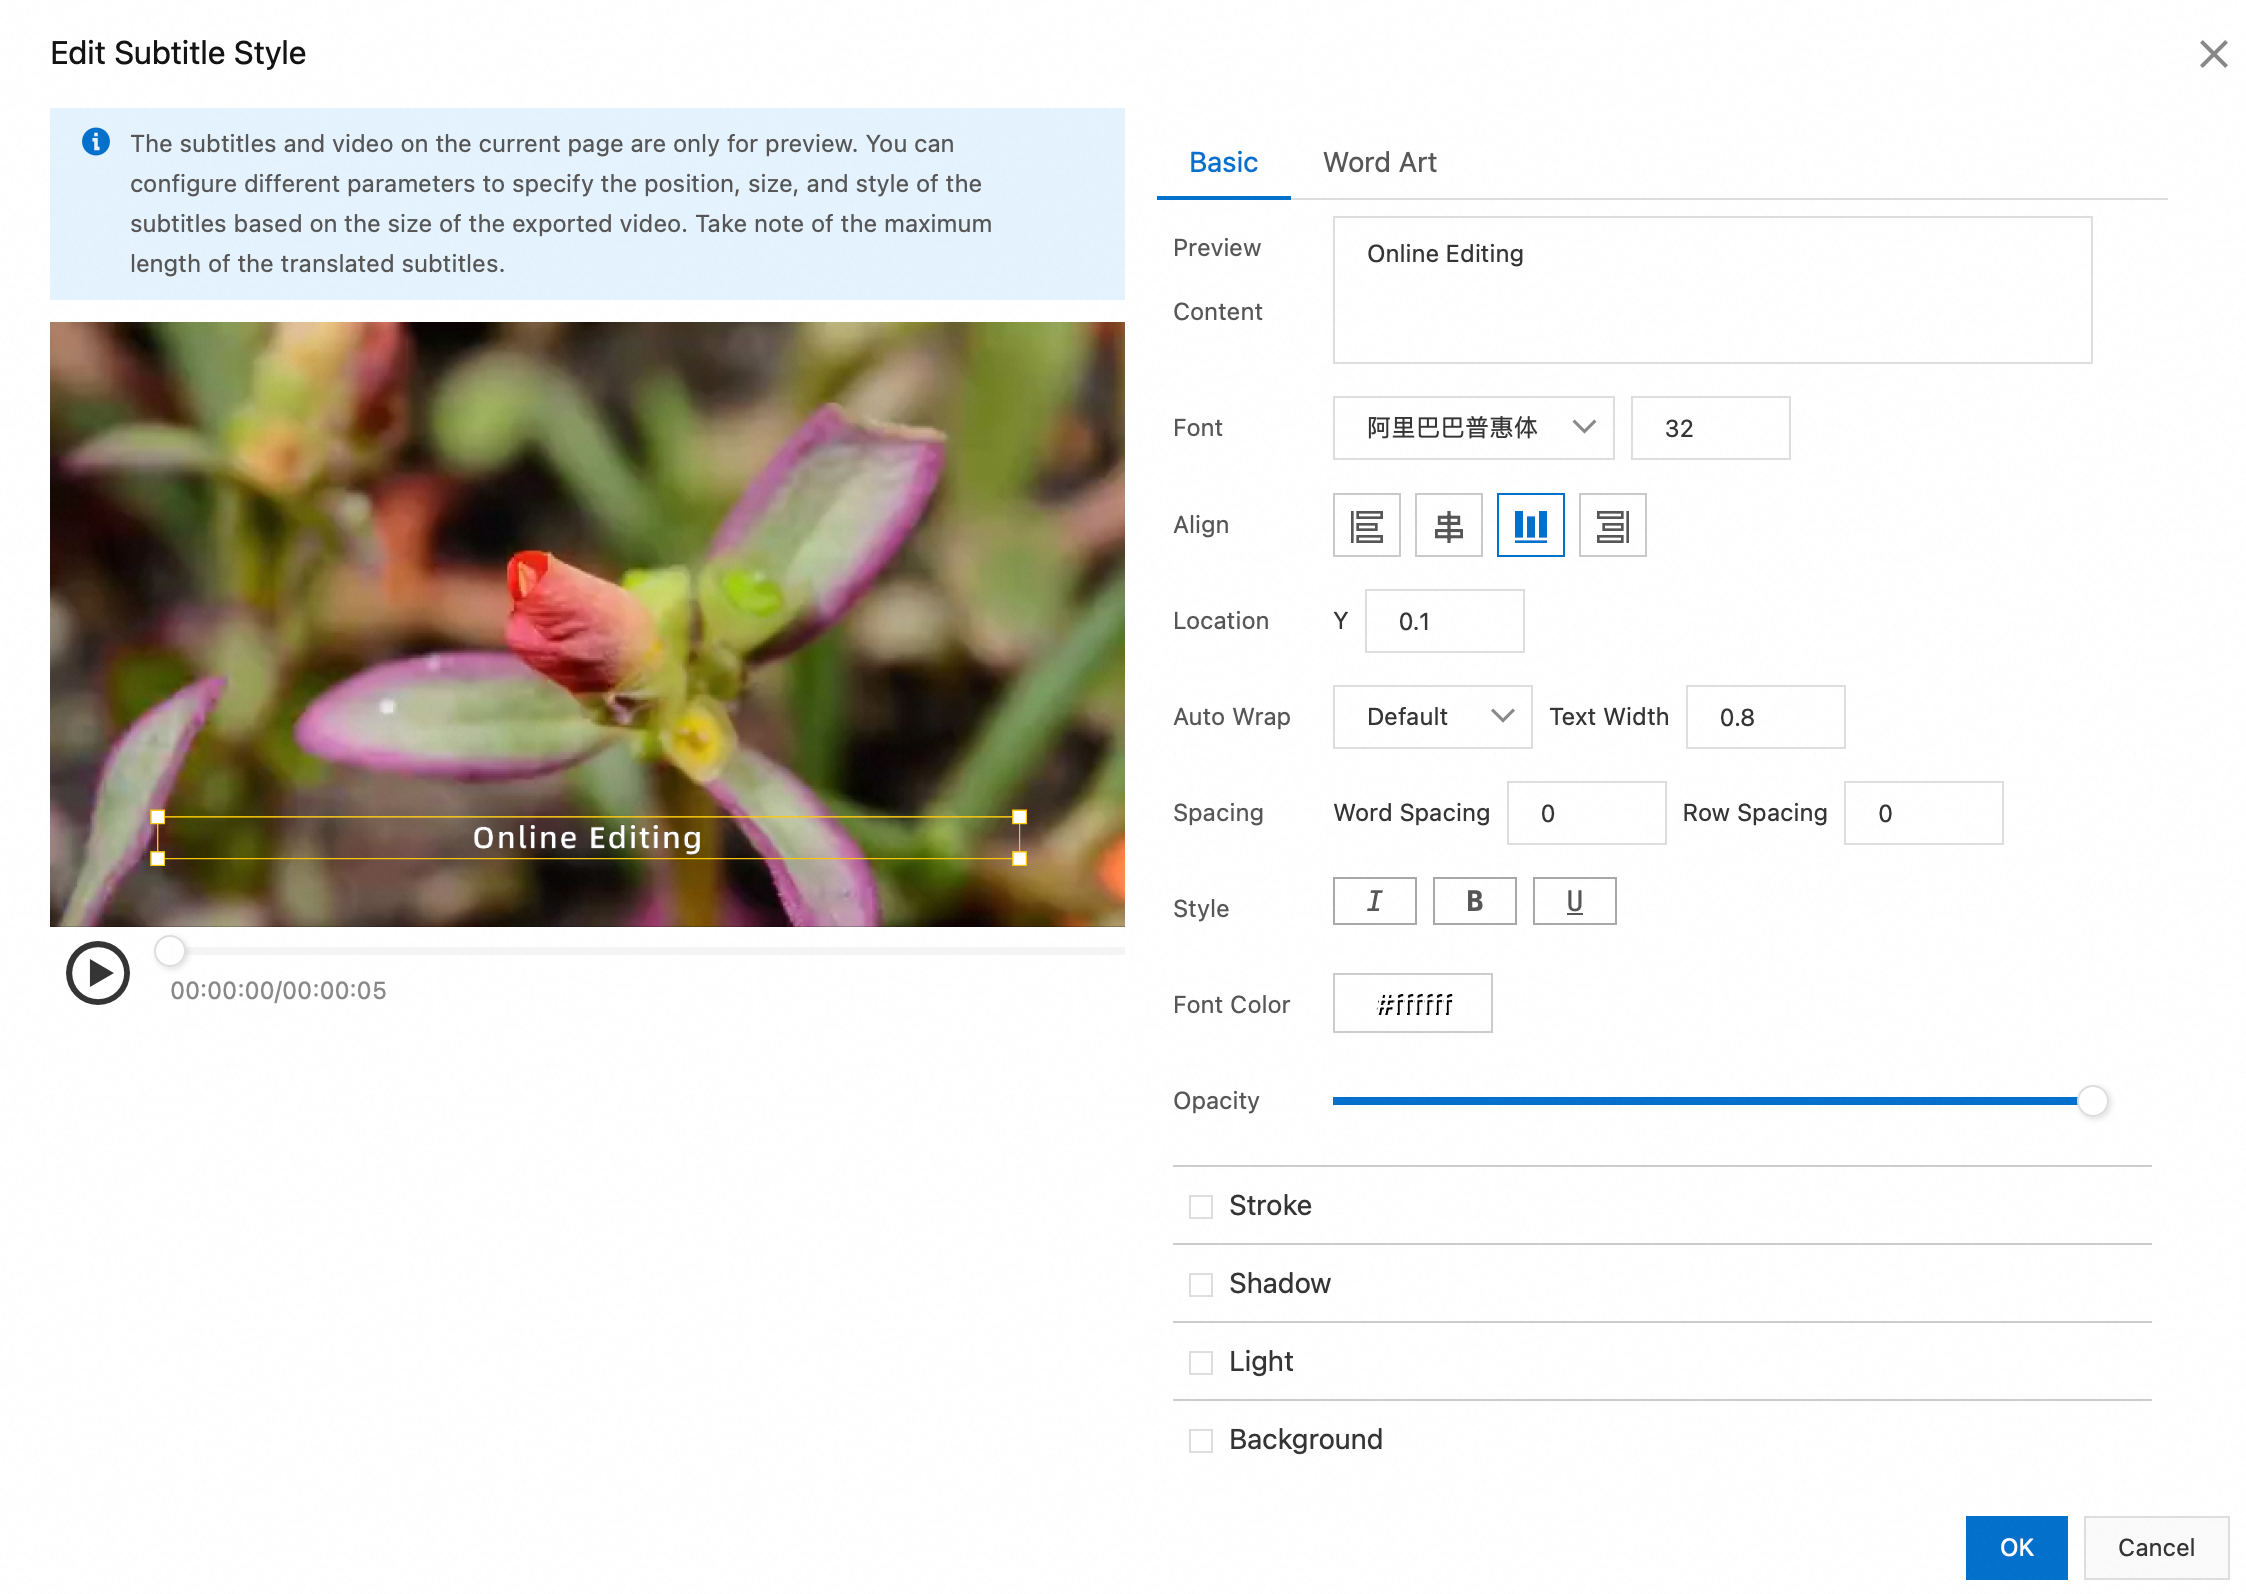
Caption Settings: If you select caption composition, configure the basic and fancy caption styles in the Edit Caption Style dialog box.
Basic Settings: Set the font, alignment, position, auto wrap, pitch, style, font color, and opacity of the captions. You can also enter text in the preview content field to preview the effect.
Fancy Caption Settings: This feature provides various built-in fancy caption effects that you can use as needed.
Remove Original Captions: If you enable this feature, the original video captions are removed. The recognition area can be identified intelligently or selected manually.
Enable Secondary Editing: If you enable this feature, all intermediate files are retained, including target language captions, translated audio, and the video with original captions removed. An online editing project is also generated for further editing or correction. After you enable this feature, do not add any new transcoding nodes. You must configure secondary editing in IMS. To avoid incurring extra costs, disable this feature if you do not require it.
After you complete the configuration, click OK. Submit the workflow template to generate a workflow ID. Record this ID to specify the workflow for future uploads.

Step 2: Trigger the workflow
Use the workflow that you created to process videos. You can trigger a task during or after a video upload.
Start a workflow process in the console
Start during video upload
Log on to the ApsaraVideo VOD console.
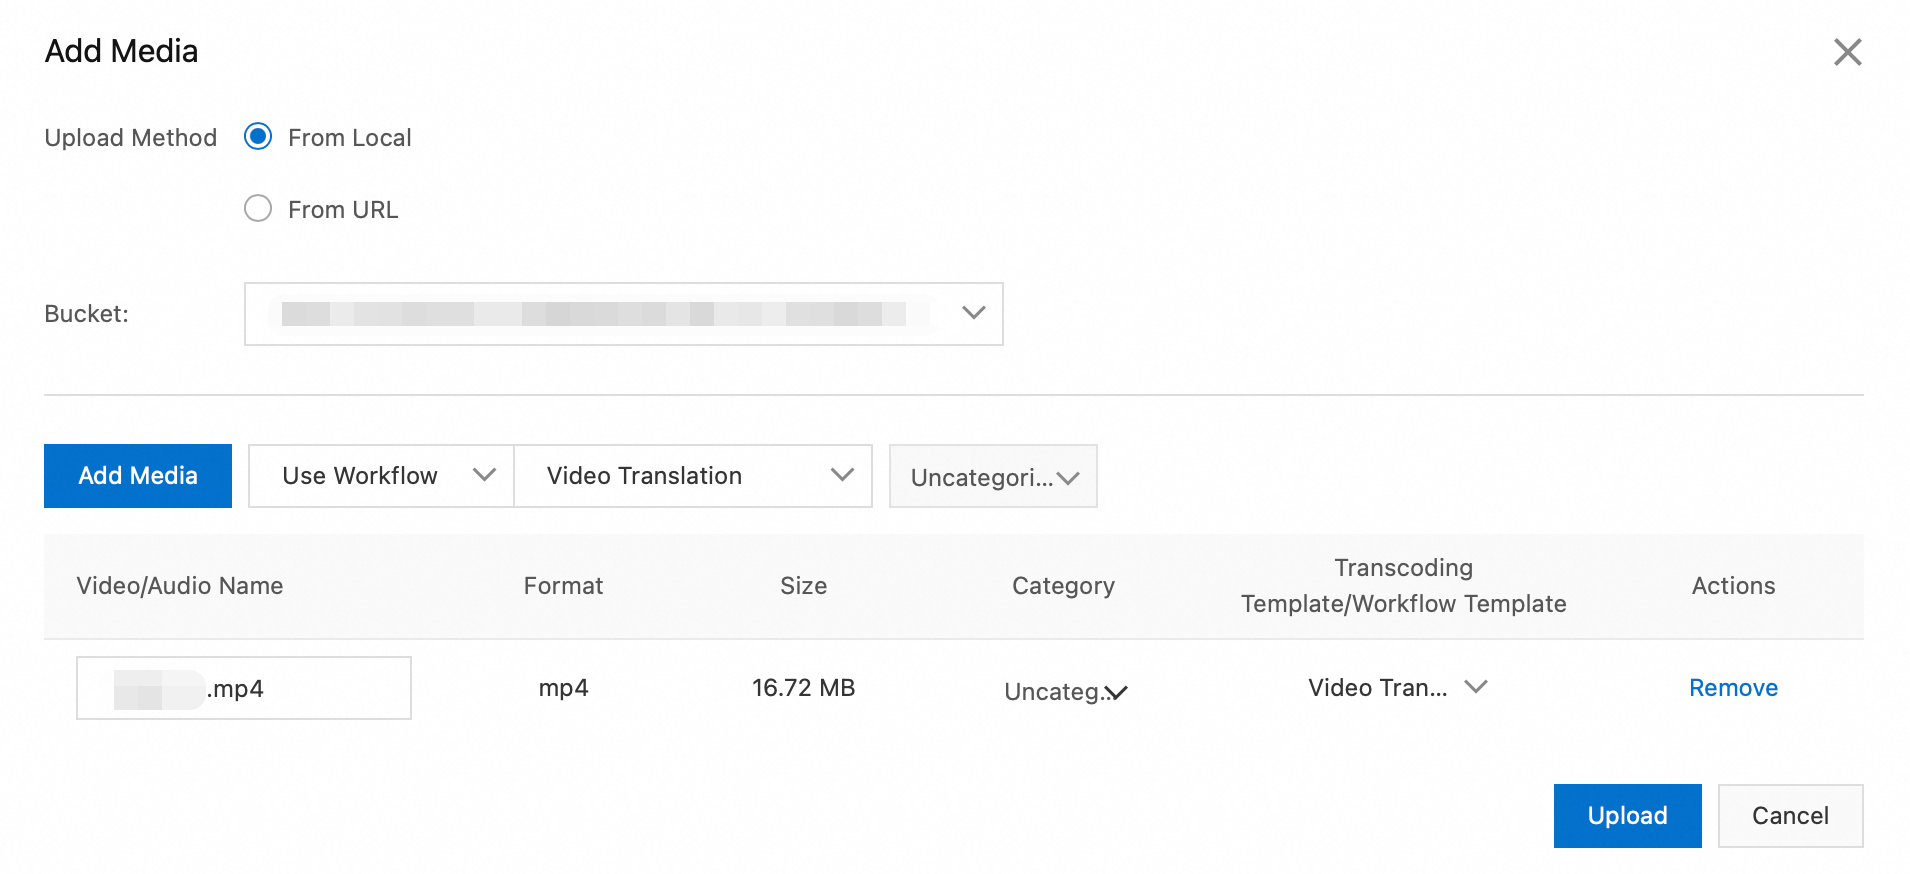
In the navigation pane on the left, choose Media Files > Audio/Video, and then click Upload Media.
On the Upload Media page, click Add Media. Configure parameters such as the upload method and storage address. Then, select Use Workflow and specify the workflow that you created in the previous step.
Start after video upload
Log on to the ApsaraVideo VOD console.
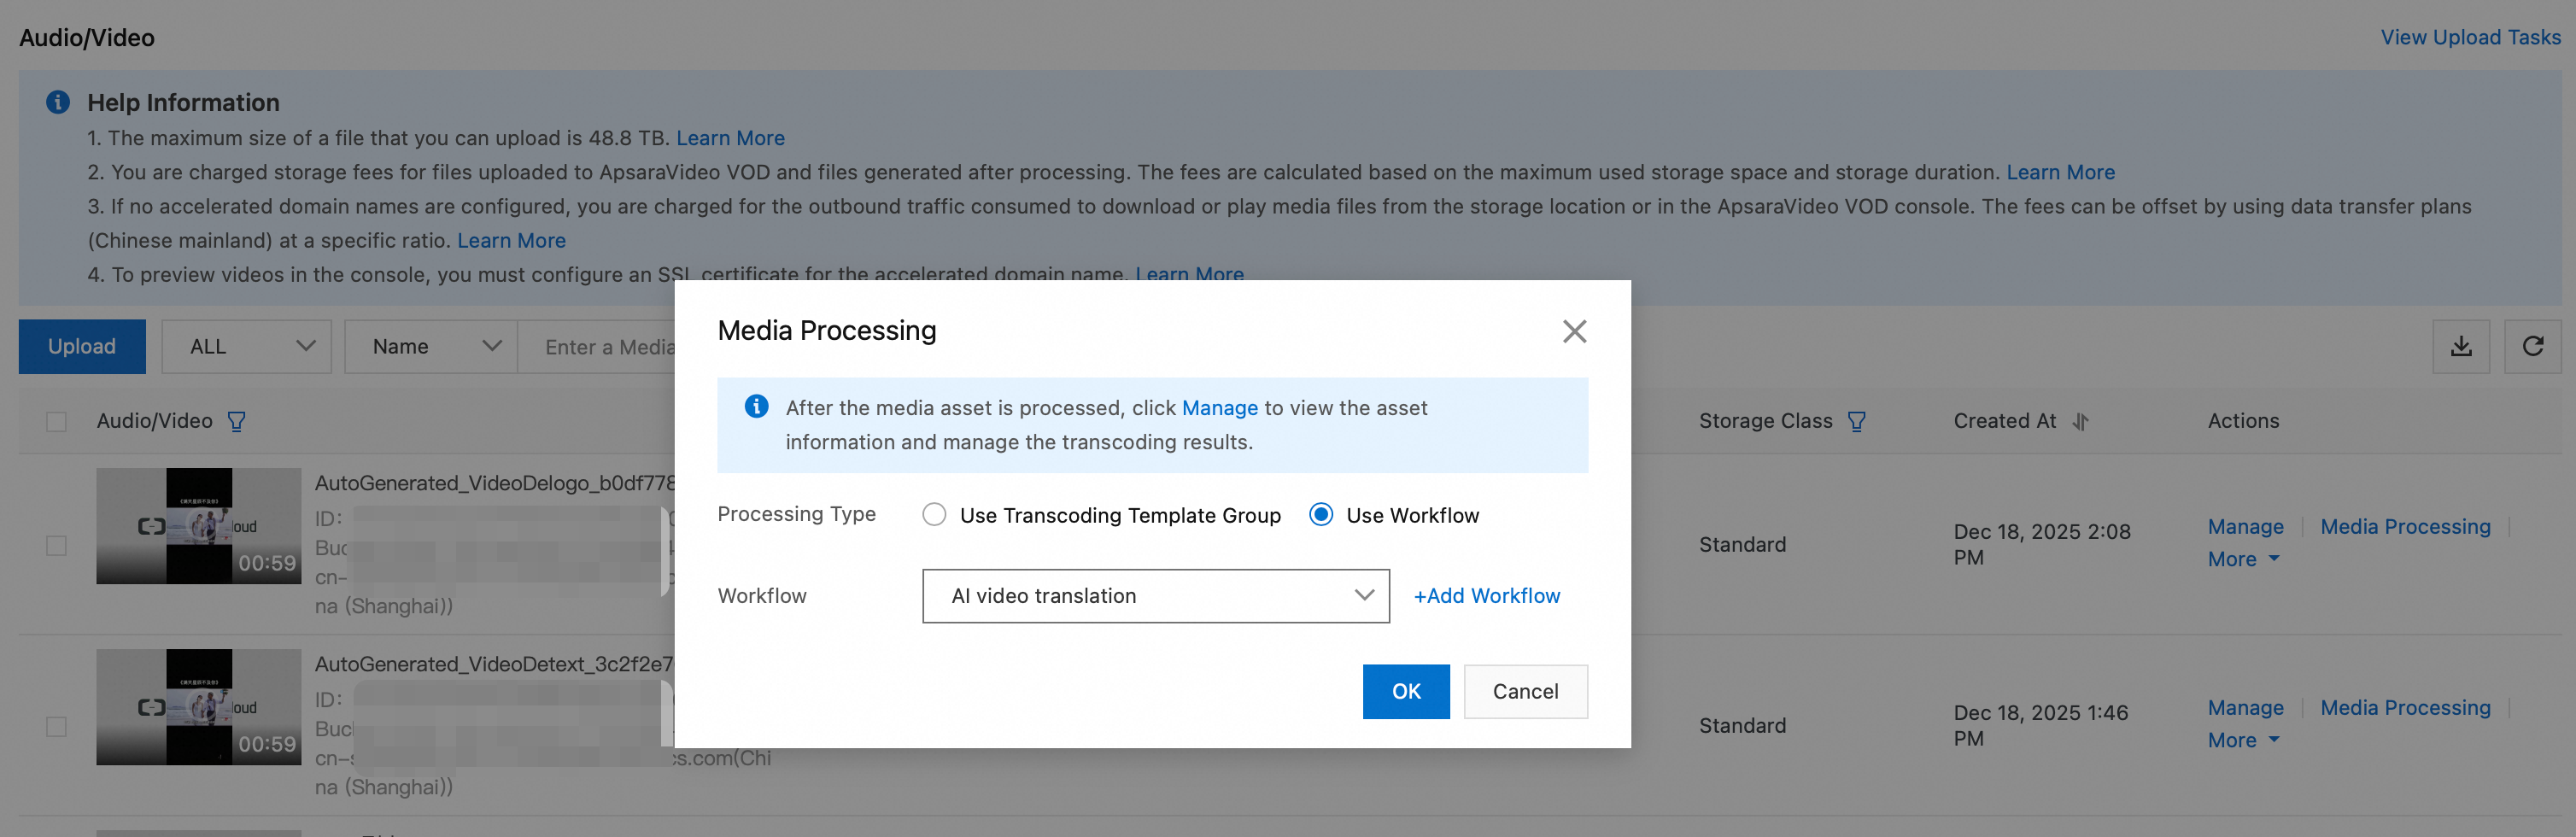
In the navigation pane on the left, choose Media Files > Audio/Video to open the Audio/Video list page.
In the Operation column for the target audio or video, click Processing. Then, select Process with Workflow and specify the workflow that you created in the previous step.
Start a workflow process using OpenAPI
Start during video upload
The CreateUploadVideo operation is used only to obtain an upload URL and credentials and to create basic media asset information. You must implement the upload logic separately. For a complete example of how to upload a file by calling an API, see Upload media files using the ApsaraVideo VOD API.
When you call the CreateUploadVideo or UploadMediaByURL operation to upload an audio or video file, set the
WorkflowIdparameter to the ID of the workflow that you created. After the file is uploaded, ApsaraVideo VOD automatically processes the file based on the specified workflow.
Start after video upload
Call the SubmitWorkflowJob operation and set the WorkflowId parameter to the ID of the workflow that you created. This immediately starts the workflow for the audio or video file.
Step 3: Query results
Query using the ApsaraVideo VOD console
Log on to the ApsaraVideo VOD console.
In the navigation pane on the left, choose Media Files > Audio/Video.
On the Audio/Video list page, find the translated video that was generated by the workflow. You can filter the results by criteria such as source video name and creation time.
Query using the Intelligent Media Services console
Log on to the Intelligent Media Services console.
In the navigation pane on the left, choose Intelligent Production > Video Translation.
On the task list page, find the translation task that was generated by the workflow. You can filter the results by criteria such as media asset ID and creation time.
When the task status is Complete, click View Details to view the following information:
Source video information for the translated video.
Storage address of the translated video.
Details such as translation method, translation language, status, and output results.
Query using workflow task callbacks
Configure HTTP or MNS callbacks.
When a workflow task is complete, the system triggers a WorkflowTaskComplete event and sends the complete results through the configured HTTP or MNS callback. The key fields are described as follows:
Status: The overall status of the task (SucceedorFailed).ActivityResults: A JSON string that contains the execution details of each node, such asVideoTranslation. TheResultfield contains key information from the translation output, such asMediaIdandJobId.TaskInput: The information about the input media, such as theMediaID and filename.
Parse the
ActivityResultsfield in the callback message body to fetch theMediaIdof the translated video for subsequent playback or distribution.
Query using OpenAPI
Call the following API operations to query task results:
GetSmartHandleJob: Pass the
JobIdof the translation task (which you can obtain fromActivityResults.Result.JobIdin the workflow task) to retrieve the detailed status and output results of the translation job.ListSmartJobs: Lists all smart jobs, including translation jobs, for batch retrieval.
Step 4: Speech translation - post-editing (Optional)
The video translation node in ApsaraVideo VOD workflows supports post-editing. If you are not satisfied with the speech-level translation results, you can enable the Enable Secondary Editing option before you submit the task. This section describes two methods for correcting speech-level translations.
You must enable the Enable Secondary Editing option when you configure the video translation node.
Make corrections using online editing (web SDK)
Prerequisites
For more information, see the online editing operation guide.
Procedure
Log on to the Intelligent Media Services console.
In the navigation pane on the left, choose Intelligent Production > Video Translation to go to the video translation task list page.
In the Actions column of the target task, click Translation Correction/Editing to open the corresponding online editing project.
Make corrections using OpenAPI
You can also use OpenAPI to correct speech-level translation results. For more information, see Speech Translation - Manual Correction.