By default, Jetty transmits data over HTTP, which exposes your services to risks such as eavesdropping and session hijacking. Installing an SSL certificate enables HTTPS, encrypts traffic between clients and the server, and verifies the server's identity.
This guide uses Linux and jetty-distribution-9.4.51.v20230217 as the example environment. Steps may differ depending on your operating system or Jetty version.
Prerequisites
Before you begin, make sure that you have:
An SSL certificate issued by a trusted certificate authority. If the certificate is expiring or has expired, renew it first.
A certificate that covers all domain names you want to secure. To add or change domain names, purchase a commercial certificate or update the bound domains.
To cover multi-level subdomains, the Bound Domains field must contain the exact domain (for example,
a.b.example.com) or a matching wildcard (for example,*.b.example.com).Domain type Coverage Exact-match ( example.com)Only the specified domain Wildcard ( *.example.com)First-level subdomains only ( www.example.com,a.example.com). Does not cover the root domainexample.comor multi-level subdomains such asa.b.example.com.A
rootaccount or an account withsudoprivileges on the server.Domain name resolution: The domain's DNS record is configured and resolves to the server's public IP address.
A DNS record that resolves your domain to the server's public IP address.
Overview
The installation involves five steps:
| Step | Task |
|---|---|
| 1 | Download the JKS certificate from the Alibaba Cloud console |
| 2 | Open port 443 in the security group and server firewall |
| 3 | Configure the Jetty SSL module with the certificate |
| 4 | Restart Jetty |
| 5 | Verify that HTTPS is working |
Step 1: Download the SSL certificate
Go to the SSL Certificate Management page. In the Actions column of the target certificate, click Download Certificate.
On the Download tab, select JKS as the Server Type and download the certificate package.
Java KeyStore (JKS) is the proprietary keystore format for Java environments.
Extract the package. It contains two files:
A
.jksfile — the certificate file that includes the complete certificate chain.A
jks-password.txtfile — the keystore password.
Step 2: Open port 443
HTTPS traffic uses port 443. Open it in both your cloud security group and the server's firewall.
Open port 443 in the security group
If your server runs on Alibaba Cloud Elastic Compute Service (ECS), add an inbound rule to the security group:
Go to the Elastic Compute Service (ECS) instances page and click the target instance name.
In the Security Group Details section, add a rule with the following settings, then save. For detailed instructions, see Add a security group rule.
Field Value Action Allow Protocol Custom TCP Destination (Current Instance) HTTPS (443) Source 0.0.0.0/0 (anywhere)
For other cloud platforms, refer to their documentation.
Check whether port 443 is already open
Run the following command to verify that port 443 is reachable. Replace <your_server_public_ip> with your server's public IP address.
RHEL/CentOS
command -v nc > /dev/null 2>&1 || sudo yum install -y nc
# Replace <your_server_public_ip> with the public IP address of your server.
sudo ss -tlnp | grep -q ':443 ' || sudo nc -l 443 & sleep 1; nc -w 3 -vz <your_server_public_ip> 443
If the output is Ncat: Connected to <your_server_public_ip>:443, port 443 is open. Otherwise, proceed to open it in the firewall.
Debian/Ubuntu
command -v nc > /dev/null 2>&1 || sudo apt-get install -y netcat
# Replace <your_server_public_ip> with the public IP address of your server.
sudo ss -tlnp | grep -q ':443 ' || sudo nc -l -p 443 & sleep 1; nc -w 3 -vz <your_server_public_ip> 443
If the output is Connection to <your_server_public_ip> port [tcp/https] succeeded! or [<your_server_public_ip>] 443 (https) open, port 443 is open.
Open port 443 in the firewall
First, identify the active firewall service:
if command -v systemctl >/dev/null 2>&1 && systemctl is-active --quiet firewalld; then
    echo "firewalld"
elif command -v ufw >/dev/null 2>&1 && sudo ufw status | grep -qw active; then
    echo "ufw"
elif command -v nft >/dev/null 2>&1 && sudo nft list ruleset 2>/dev/null | grep -q 'table'; then
    echo "nftables"
elif command -v systemctl >/dev/null 2>&1 && systemctl is-active --quiet iptables; then
    echo "iptables"
elif command -v iptables >/dev/null 2>&1 && sudo iptables -L 2>/dev/null | grep -qE 'REJECT|DROP|ACCEPT'; then
    echo "iptables"
else
    echo "none"
fi
If the output is none, no firewall is active and no further action is needed. Otherwise, run the command for your firewall:
firewalld
sudo firewall-cmd --permanent --add-port=443/tcp && sudo firewall-cmd --reloadufw
sudo ufw allow 443/tcpnftables
sudo nft add table inet filter 2>/dev/null
sudo nft add chain inet filter input '{ type filter hook input priority 0; }' 2>/dev/null
sudo nft add rule inet filter input tcp dport 443 counter accept 2>/dev/null
iptables
sudo iptables -A INPUT -p tcp --dport 443 -j ACCEPTTo persist iptables rules across reboots:
RHEL/CentOS
sudo yum install -y iptables-services
sudo service iptables save
Debian/Ubuntu
sudo apt-get install -y iptables-persistent
sudo iptables-save | sudo tee /etc/iptables/rules.v4 >/dev/null
Step 3: Install the SSL certificate on Jetty
Set up the directory structure
Jetty separates the installation directory ($JETTY_HOME) from the working directory ($JETTY_BASE). Keep them separate to simplify future upgrades.
# Example: Jetty is installed in /usr/local/jetty; the application runs from /var/www/my-app.
export JETTY_HOME=/usr/local/jetty
export JETTY_BASE=/var/www/my-app

# Create directories for certificate files and web application resources.
mkdir -p $JETTY_BASE/cert
mkdir -p $JETTY_BASE/webapps

cd $JETTY_BASE
Upload the certificate files
Upload the .jks file and jks-password.txt to the $JETTY_BASE/cert/ directory using a file transfer tool such as PuTTY, Xshell, or WinSCP. If your server is on Alibaba Cloud ECS, see Upload or download files.
Enable the SSL module
In the $JETTY_BASE directory, run the following command to initialize the ssl module. This generates ssl.ini and https.ini in $JETTY_BASE/start.d/.
java -jar $JETTY_HOME/start.jar --add-to-start=sslConfigure the certificate path and password
Open $JETTY_BASE/start.d/ssl.ini for editing:
vim $JETTY_BASE/start.d/ssl.iniFind and update the following parameters. Make sure none of them are commented out with #.
jetty.ssl.keyStorePath=cert/your_domain.jks
jetty.ssl.keyStorePassword=<password from jks-password.txt>
jetty.ssl.keyManagerPassword=<password from jks-password.txt>| Parameter | Description | Example |
|---|---|---|
jetty.ssl.keyStorePath | Relative path from $JETTY_BASE to the .jks file | cert/your_domain.jks |
jetty.ssl.keyStorePassword | Password from jks-password.txt | — |
jetty.ssl.keyManagerPassword | Same value as keyStorePassword for Alibaba Cloud JKS certificates | — |
The older parameter namesjetty.ssl.keystore.path,jetty.ssl.keystore.password, andjetty.ssl.keymanager.passwordare deprecated. Use the camelCase names shown above.
Step 4: Restart Jetty
From the $JETTY_BASE directory, start the Jetty server with sudo. Port 443 is a privileged port and requires root permissions.
# Change to the Jetty working directory.
cd $JETTY_BASE

# Start the service.
sudo java -jar $JETTY_HOME/start.jar
Step 5: Verify the installation
Open a browser and navigate to
https://yourdomain. Replaceyourdomainwith your actual domain.A lock icon in the address bar confirms the certificate is installed correctly. If you see an access error or no lock icon, clear your browser cache or retry in incognito mode.

Starting from Chrome 117, the ![]() lock icon was replaced with
lock icon was replaced with ![]() . Click this icon to view certificate details.
. Click this icon to view certificate details.
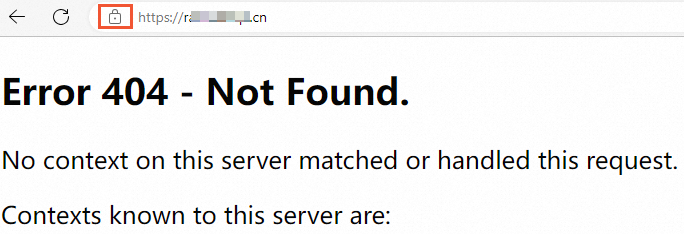
An Error 404 response means Jetty started successfully but has no web application deployed. This is expected on a fresh installation.
Going live
When moving to production, apply these practices to improve security and stability:
Run as a non-root user: Create a dedicated, low-privilege system account for the application. Never run Jetty as root.
A recommended approach is to terminate SSL at the gateway layer — deploy the certificate on a Server Load Balancer (SLB) or a reverse proxy such as Nginx. The gateway handles HTTPS and forwards decrypted HTTP traffic to Jetty.
Externalize credentials: Never hard-code passwords or sensitive values in configuration files. Use environment variables, a secrets manager, or a cloud key management service to inject credentials at runtime.
Enforce HTTP-to-HTTPS redirection: Redirect all HTTP traffic to HTTPS to prevent man-in-the-middle attacks.
Disable legacy TLS protocols: In your server configuration, disable SSLv3, TLS 1.0, and TLS 1.1. Enable only TLS 1.2 and TLS 1.3.
Monitor certificates and automate renewal: After deployment, enable domain monitoring. Alibaba Cloud checks certificate validity and sends renewal reminders before expiration so you can act before any service interruption. See Purchase and enable public domain name monitoring.
FAQ
HTTPS is not working after installation
Check the following in order:
Port 443 is blocked: The security group or firewall is not allowing inbound traffic on port 443. See Open port 443.
Domain mismatch: The domain you're accessing is not listed in the certificate's Bound Domains. See the Prerequisites section for wildcard and exact-match coverage rules.
Jetty not restarted: Configuration changes take effect only after a restart. See Restart Jetty.
Wrong certificate path or password: Verify that
jetty.ssl.keyStorePathpoints to the correct.jksfile and that the password inssl.inimatchesjks-password.txt.Certificate missing from upstream services: If your domain uses a Content Delivery Network (CDN), Server Load Balancer (SLB), or Web Application Firewall (WAF), install the certificate on those services as well. See Certificate deployment locations when traffic passes through multiple Alibaba Cloud services.
Multiple servers: If DNS resolves to more than one server, install the certificate on all of them.
For further troubleshooting, see Resolve certificate deployment issues based on browser error messages and SSL certificate deployment troubleshooting guide.
How do I replace an SSL certificate in Jetty?
Back up old files: Save the existing
.jksandjks-password.txtfiles from your server.Get new files: Download the new certificate from the Certificate Management Service console.
Replace files: Upload the new files to the same path specified in
ssl.ini, overwriting the old ones.Restart Jetty: Restart the service to apply the new certificate.
Startup fails: "Address already in use" or "Port is already occupied"
Port 443 is already bound by another process. Run sudo ss -tlnp | grep :443 or sudo lsof -i:443 to identify the process and stop it. Common causes include Nginx, Apache, or a test listener that was not shut down.
Startup fails: "Permission denied"
On Linux, binding to ports below 1024 requires root permissions. Start Jetty with sudo. In production, avoid running services directly as root — use setcap to grant the Java binary the ability to bind to privileged ports:
sudo setcap 'cap_net_bind_service=+ep' /path/to/your/javaAlternatively, place Jetty behind a reverse proxy such as Nginx that listens on port 443 and forwards traffic to a non-privileged port.