Enable the Nginx stub_status module to expose real-time metrics such as active connections, reading, writing, and waiting states. Then use a Logtail plug-in to collect and analyze Nginx monitoring logs for continuous cluster performance monitoring.
Prerequisites
Logtail is installed on your server. Install Logtail (Linux) | Install Logtail (Windows).
This feature requires Logtail v0.16.0 or later for Linux and Logtail v1.0.0.8 or later for Windows.
Step 1: Configure the stub_status module
This example uses Linux.
-
Install and restart Nginx.
sudo yum install -y nginx sudo systemctl restart nginx -
Verify that Nginx supports the stub_status module.
nginx -V 2>&1 | grep -o with-http_stub_status_moduleExpected output:
with-http_stub_status_module -
Configure the Nginx server.
-
Add the following code to the
server {..}block in your Nginx configuration file. See the Nginx status page tutorial for details onnginx_status.location /nginx_status { stub_status on; # Enable the stub_status module. access_log off; allow ${YOUR_SERVER_IP}; # The IP address of the server that is allowed to access the page. deny all; # Deny access from all other IP addresses to this status page. } -
Verify the configuration.
nginx -t
sudo systemctl restart nginx
curl http://${YOUR_SERVER_IP}/nginx_status
Expected output on success:
Active connections: 1
server accepts handled requests
2507455 2507455 2512972
Reading: 0 Writing: 1 Waiting: 0
-
Step 2: Collect Nginx monitoring logs
Log on to the Simple Log Service console.
On the right side of the page that appears, click the Quick Data Import card.
-
On the Data Import page, click Custom Data Plug-in.
-
Select the destination project and Logstore, and then click Next.
-
Create a machine group.
-
If you have a machine group, click Use Existing Machine Groups.
-
If you do not have a machine group, follow these steps to create one. This example uses an ECS instance.
-
On the ECS Instance tab, select the target ECS instance and click Create.
For more information, see Install Logtail on ECS instances.
ImportantIf your server is an ECS instance from a different Alibaba Cloud account, a server from another cloud provider, or a server in your own data center, you must install Logtail manually. For more information, see Install Logtail on a Linux server or Install Logtail on a Windows server.
After you manually install Logtail, you must configure a user identifier on the server. For more information, see Configure a user identifier.
-
After the installation is complete, click Complete Installation.
-
On the Create Machine Group page, enter a Name and click Next.
Log Service supports IP address-based machine groups and custom identifier-based machine groups. For more information about the parameters, see Create an IP address-based machine group and Create a custom identifier-based machine group.
-
-
-
Confirm that the machine group is displayed in the Applied Server Groups section and click Next.
ImportantIf you apply a machine group immediately after you create the machine group, the heartbeat status of the machine group may be FAIL. This issue occurs because the machine group is not connected to Simple Log Service. To resolve this issue, you can click Automatic Retry. If the issue persists, see What do I do if no heartbeat connections are detected on Logtail?
-
On the Data source settings tab, paste the following code into Plug-in configuration, replace ${YOUR_SERVER_IP} with your server IP address, and click Next.
{ "inputs": [ { "type": "metric_http", "detail": { "IntervalMs": 60000, "Addresses": [ "http://${YOUR_SERVER_IP}/nginx_status" ], "IncludeBody": true } } ], "processors": [ { "type": "processor_regex", "detail": { "SourceKey": "content", "Regex": "Active connections: (\\d+)\\s+server accepts handled requests\\s+(\\d+)\\s+(\\d+)\\s+(\\d+)\\s+Reading: (\\d+) Writing: (\\d+) Waiting: (\\d+)[\\s\\S]*", "Keys": [ "connection", "accepts", "handled", "requests", "reading", "writing", "waiting" ], "FullMatch": true, "NoKeyError": true, "NoMatchError": true, "KeepSource": false } } ] }-
inputs is required and is used to configure the data source settings for the Logtail configuration.
ImportantYou can specify only one type of data source in inputs.
-
processors is optional and is used to configure the data processing settings for the Logtail configuration to parse data. You can specify one or more processing methods.
If your logs cannot be parsed based only on the setting of inputs, you can configure processors in the Plug-in Configuration field to add plugins for data processing. For example, extract fields, extract log time, mask data, and filter logs. For more information, see Logtail plugins for data processing.
Key parameters:
Parameter
Type
Required
Description
type
string
Yes
Data source type. Fixed to metric_http.
IntervalMs
int
Yes
Request interval in milliseconds.
Addresses
Array
Yes
URLs to monitor.
IncludeBody
boolean
No
Whether to collect the request body. Default: false. When true, the body is stored in the content field.
-
Logs appear about one minute after configuration. Simple Log Service automatically generates an nginx_status dashboard for query and analysis results. Sample log:
_address_: http://127.0.0.1/nginx_status
_method_: GET
_result_: success
_http_response_code_: 200
_response_time_ms_: 0.418
accepts: 6
connection: 3
handled: 6
reading: 0
requests: 6
waiting: 2
writing: 1
Step 3: Query and analyze logs
Log on to the Simple Log Service console.
In the Projects section, click the one you want.

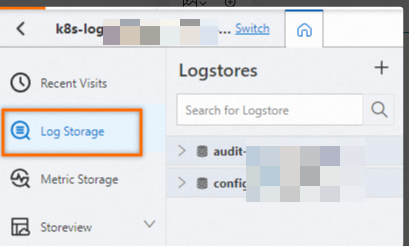
On the tab, click the logstore you want.
-
Enter a query and analysis statement, and then click Last 15 minutes to set the time range for the query.
For more information, see Step 1: Configure indexes.
-
Query logs
-
Query a specific IP address.
_address_: 10.10.0.0 -
Query requests with response time greater than 100 ms.
_response_time_ms_ > 100 -
Query non-200 responses.
not _http_response_code_ : 200
-
-
Analyze logs
-
Average
waiting,reading,writing, andconnectionvalues per 5 minutes.*| select avg(waiting) as waiting, avg(reading) as reading, avg(writing) as writing, avg(connection) as connection, from_unixtime( __time__ - __time__ % 300) as time group by __time__ - __time__ % 300 order by time limit 1440 -
Top 10 servers by waiting connections.
*| select max(waiting) as max_waiting, _address_, from_unixtime(max(__time__)) as time group by address order by max_waiting desc limit 10 -
Count unique IP addresses.
* | select count(distinct(_address_)) as total -
Count unique IPs with failed requests.
not _result_ : success | select count(distinct(_address_)) -
10 most recent failed request IPs.
not _result_ : success | select _address_ as address, from_unixtime(__time__) as time order by __time__ desc limit 10 -
Total requests per 5 minutes.
*| select avg(handled) * count(distinct(_address_)) as total_handled, avg(requests) * count(distinct(_address_)) as total_requests, from_unixtime( __time__ - __time__ % 300) as time group by __time__ - __time__ % 300 order by time limit 1440 -
Average request latency per 5 minutes.
*| select avg(_response_time_ms_) as avg_delay, from_unixtime( __time__ - __time__ % 300) as time group by __time__ - __time__ % 300 order by time limit 1440 -
Count failed and successful requests.
not _http_response_code_ : 200 | select count(1)_http_response_code_ : 200 | select count(1)
-
-