The Scheduled SQL feature lets you analyze data on a schedule, store aggregates, and project or filter data. Use a Scheduled SQL job to process data from a source MetricStore and write the results to a target MetricStore.
Prerequisites
-
Data is collected in the source MetricStore. Ingest time series data.
-
A target MetricStore is created. Create a MetricStore.
Procedure
Scheduled SQL is in public preview and free of charge. After public preview ends, you are charged for computing resources consumed by exclusive SQL resource pools. For more information, see Billable items in the pay-by-feature billing model.
-
Log on to the Simple Log Service console.
-
In the Projects section, click the target project.
-
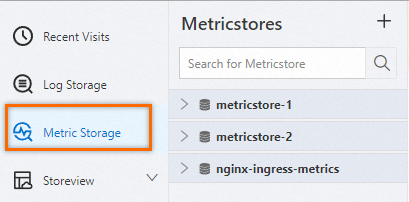
On the tab, click the target MetricStore.
-
Query and analyze data.
-
In the upper-right corner, click 15 Minutes (Relative) to set a time range for your query.
-
Enter a PromQL statement and click Execute Now.
NotePreview your query results to verify the statement is valid before creating the Scheduled SQL job.
-
-
Choose .

-
Create the Scheduled SQL job.
-
In the Compute Settings wizard, configure the following parameters and click Next.
Parameter
Description
Task Name
The unique job name.
Display Name
The display name for the job.
Job Description
The job description.
Resource Pool
An enhanced resource pool for data analysis.
This pool reuses exclusive SQL computing power, provides sufficient analysis concurrency, and isolates resources from console SQL operations. You are charged based on CPU time consumed. High-performance and high-accuracy query and analysis (exclusive SQL).
Write Mode
Select Import Data from Metricstore to Metricstore to process source MetricStore data and write results to a target MetricStore.
SQL Code
The query statements entered in Step 4. As in Step 4, verify that your statements return expected data before the job runs.
When the Scheduled SQL job runs, Simple Log Service executes this statement to analyze the data.
ImportantImport only current-time metric values per run using the
promql_queryfunction. Thepromql_query_rangefunction can cause significant data inflation.SQL Settings
Result Metric Name
Enter a new name to rename the metric being analyzed. Time series data (Metric).
ImportantOnly use this when analyzing a single metric.
For multiple metrics, this renames all of them to the same name.
Rehash
Turn on Rehash and configure the Hash Column to write data that has the same label value to a single shard. This improves data locality and query performance.
The available values for the Hash Column depend on the existing labels of your time series data. For example, if the labels are
{"alert_id":"alert-1608815762-545495","alert_name":"Alert recovery closed","status":"inactive"}, the available values for the Hash Column are alert_id, alert_name, and status. If you set the Hash Column to status, data with the same value for the status label is written to the same shard.Additional Labels
Add static labels as key-value pairs to identify the attributes of a metric.
For example, set label_key to app and label_value to ingress-nginx.
Target
Destination Region
The region of the target project.
Destination Project
The target project for storing analysis results.
Target Store
The target MetricStore for storing analysis results.
WarningDo not configure the destination store as the current source store (same-source configuration). Otherwise, logs may be written in a loop, which incurs additional storage and traffic costs. You are responsible for the resource consumption and costs incurred.
Write Authorization
Grant the Scheduled SQL job write permissions to the target MetricStore using one of the following methods.
-
Default Role: The Scheduled SQL job assumes the Default Role system role to write the results to the target MetricStore.
ImportantThe Alibaba Cloud account that owns the target project must grant this authorization. You need to grant this authorization only for the first job.
-
Custom Role: The Scheduled SQL job assumes a custom role to write the results to the target MetricStore.
Grant the custom role write permissions to the target MetricStore, then enter the role ARN in the Role ARN field. Grant a custom RAM role the permissions to write data to a destination Logstore.
SQL Execution Authorization
Grant the Scheduled SQL job permissions to read data from the source MetricStore and perform SQL analysis in the current project using one of the following methods.
-
Default Role: The Scheduled SQL job assumes the Default Role system role to perform the required operations.
ImportantThe Alibaba Cloud account that owns the target project must grant this authorization. You need to grant this authorization only for the first job.
-
Custom Role: The Scheduled SQL job assumes a custom role to perform the required operations.
Grant the custom role the required permissions, then enter the role ARN in the Role ARN field. Grant a custom RAM role the permissions to analyze data in a source Logstore.
-
-
In the Scheduling Settings wizard, configure the following parameters and click OK.
Parameter
Description
Scheduling Interval
The job run frequency. Each run creates one execution instance.
-
Fixed Interval: Runs the job at a fixed interval.
-
Cron: Specify a cron expression to run the job.
The minimum precision is 1 minute. The format uses a 24-hour clock. For example,
0 0/1 * * *runs the job once every hour, starting at 00:00.When you need to configure a time zone, you must select Cron mode. For a list of common time zones, see Time zone formats.
Scheduling Time Range
The time range for job execution.
-
From Specific Time: Specifies the start time for the first job instance.
-
Specific Time Range: Specifies a start and end time. The job is executed only within this time range.
Note-
Instance scheduled times must fall within this range. No new instances are generated after the end time.
-
The schedule time range refers to the
__time__field. Reserved fields.
SQL Time Window
The data time range for each run. This setting works with the scheduled time of the instance. Must not exceed 5x the Scheduling Interval or 1 day. Time expression syntax.
For example, if the Scheduling Interval is a fixed interval of 10 minutes, the Start At is 2021-04-01 00:00:00, the Delay Task is 30 seconds, and the SQL Time Window is [@m-10m,@m), the first execution instance is generated at 00:00:30 and analyzes data in the
[23:50:00, 00:00:00)time range. Scheduling and execution scenarios.Note-
The SQL time window refers to the
__time__field. Reserved fields. -
If the
__time__field is not defined in the SQL code, the__time__value written to the target MetricStore defaults to the start time of the time window for that run.
SQL Timeout
The timeout for SQL analysis. On failure, the job retries until this timeout or the maximum retry count is reached. Manually retry failed instances after identifying the cause. Retry a failed instance of a Scheduled SQL job.
Delay Task
The delay after the scheduled time. Valid values: 0 to 120. Unit: seconds.
Compensates for data ingestion delays to ensure completeness.
After you create the job, view execution results in the target MetricStore.
-
-