To enhance cloud security, you can control access to your NLB instances based on protocol, port, or IP address by using security groups. Unlike Classic Load Balancer (CLB), which uses access control lists (ACLs), NLB uses security groups to provide more fine-grained, instance-wide access control based on protocol and port. This topic describes how to configure security groups to control access to individual listeners on an NLB instance.
Scenarios
If an NLB instance is not associated with a security group, all traffic to the NLB listener ports is allowed by default.
If an NLB instance is associated with a security group but no deny rules are configured, all traffic to the NLB listener ports is allowed by default. If you want to allow only specific IP addresses to access the NLB instance, make sure to add a deny rule as a fallback.
If you want to control inbound traffic to your NLB instance, you can associate security groups with the instance and configure security group rules based on your business requirements.
Outbound traffic from the load balancer consists of response packets to client requests. To ensure normal business operation, the NLB security group does not restrict outbound traffic. You do not need to configure outbound rules for the security group.
After an NLB instance is created, the system automatically creates a managed security group in the VPC where the instance resides. This managed security group is controlled by the NLB instance, and you have read-only access. The managed security group includes the following two types of rules:
Priority 1 rule: allows traffic from the Local IP of the instance by default for communication with backend servers and health checks.
When you add security group rules, avoid adding deny rules with priority 1 for the NLB Local IP. Such rules may conflict with the managed security group policies and affect communication between NLB and your backend services. You can log on to the NLB console and view the Local IP on the instance details page.
Priority 100 rule: allows traffic from all IP addresses by default. This means that if an NLB instance is associated with a security group but no deny rules are configured, all traffic to the NLB listener ports is allowed.
The implicit rules of a basic or advanced security group contain a rule that denies all other traffic. In this case, the default allow rule in the NLB managed security group takes precedence.
This topic describes three scenarios that demonstrate how to control access to an NLB instance by using a security group. The examples use an NLB instance configured with a TCP listener on port 80 and another on port 81.
Scenario | Security group rule | Expected result | Related procedure |
1: The NLB instance is not associated with a security group. | By default, NLB listener ports allow all traffic. | This example uses an NLB instance with TCP listeners on ports 80 and 81.
| |
2: The NLB instance is associated with a security group. | Deny access to TCP port 81. Note Only security group rules relevant to this topic are listed. Default rules are not shown. |
| Step 4: Add the NLB instance to a security group and verify the result |
3: The security group associated with the NLB instance is modified. |
Note Only security group rules relevant to this topic are listed. Default rules are not shown. |
|
Limitations
|
Item |
Details |
|
Supported security group types |
Basic security group, advanced security group |
|
Unsupported security group type |
Managed security group |
|
Same VPC required |
The security group and the NLB instance must belong to the same VPC |
|
Maximum number of security groups |
Up to 4 security groups per NLB instance |
|
Mixed types not allowed |
All security groups associated with an NLB instance must be of the same type. To switch from basic to advanced, remove the NLB instance from the basic security group first. To switch from advanced to basic, remove the NLB instance from the advanced security group first |
|
Quota calculation |
Available security group slots = ENI security group quota for ECS − 1 (reserved for the managed security group) |
|
Security group rule quota |
Available rule slots = ENI security group rule quota for ECS − number of rules in the managed security group |
|
Legacy instances |
NLB instances created before September 30, 2022 (during the public preview) cannot be added to security groups. Replace these instances or purchase new ones to use this feature |
For details on basic and advanced security group differences, see Basic and advanced security groups.
Prerequisites
You have created a VPC named VPC1. For more information, see Create and manage a VPC.
You have created two ECS instances, ECS01 and ECS02, in VPC1 to serve as backend servers for the NLB instance. Application services are deployed on both ECS instances.
For more information about how to create an ECS instance, see Create an instance by using the wizard.
This topic uses the following example application deployments on ECS01 and ECS02:
You have registered a domain name, completed ICP filing, and configured a CNAME record for the NLB instance.
Step 1: Create a server group
Log on to the NLB console.
In the top navigation bar, select the region where the server group is deployed. In this example, China (Hangzhou) is selected.
-
In the left-side navigation pane, choose NLB > Server Groups.
On the Server Groups page, click Create Server Group.
In the Create Server Group dialog box, configure the following parameters and click Create.
This section describes only the parameters relevant to this topic. You can keep the default values for other parameters. For more information, see Create a server group.
Parameter
Description
Server Group Type
Select a server group type. In this example, Server is selected.
Server Group Name
Enter a name for the server group. In this example, RS01 is used.
VPC
Select a VPC from the drop-down list. In this example, VPC1 is selected.
Backend Server Protocol
Select a protocol for the backend servers. In this example, TCP is selected.
Scheduling Algorithm
Select a scheduling algorithm. In this example, Weighted Round-Robin is selected.
In the The server group is created dialog box, click Add Backend Server.
In the Add Backend Server panel, select the ECS01 and ECS02 instances that you created, and then click Next.
Set the ports and weights for the added servers, and then click OK.
Step 2: Create an NLB instance and configure listeners
Log on to the NLB console.
In the top navigation bar, select the region where the NLB instance is deployed. In this example, China (Hangzhou) is selected.
On the Instances page, click Create NLB.
On the Create NLB(Pay-As-You-Go) purchase page, configure the following parameters and click Create.
This section describes only the parameters that are relevant to this topic. For more information about other parameters, see Create an NLB instance.
Select a region. In this example, China (Hangzhou) is selected.
Network Type: In this example, Private is selected.
VPC: In this example, VPC1 is selected.
Return to the Instances page, find the created NLB instance, and click the NLB instance ID.
Click the Listener tab. On the Listener tab, click Quick Create Listener. In the Quick Create Listener dialog box, configure the following parameters to create a TCP listener on port 80, and then click OK.
Listener configuration
Description
Listener Protocol
Select a listener protocol. In this example, TCP is selected.
Listener Port
Enter a listener port. In this example, port 80 is used.
Server Group
Select a Server and a server group under the Server.
In this example, the server group RS01 that you created in Step 1: Create a server group is selected.
On the Listener tab, click Quick Create Listener. In the Quick Create Listener dialog box, configure the following parameters to create a TCP listener on port 81, and then click OK.
Listener configuration
Description
Listener Protocol
Select a listener protocol. In this example, TCP is selected.
Listener Port
Enter a listener port. In this example, port 81 is used.
Server Group
Select the Server and the backend server group under Server.
In this example, the server group RS01 that you created in Step 1: Create a server group is selected.
Verify the accessibility of the NLB instance before it is associated with a security group.
Log on to a Linux client that has internet access. If you are using a CentOS system and Telnet is not installed, you can run the
yum install -y telnetcommand to install it.Run the
telnet <domain_name> 80command to test whether the client can access TCP port 80 of the NLB instance.The following response indicates that the connection is successful.
Trying *.*.*.*...
Connected to www.example.com.
Escape character is '^]'.
Enter the domain name and port number, such as
http://<domain_name>:80, in your browser. A page similar to the one shown in the following figure indicates that the NLB instance can forward requests to the backend servers.
Run the
telnet <domain_name> 81command to test whether the client can access TCP port 81 of the NLB instance.Trying *.*.*.*... Connected to www.example.com. Escape character is '^]'.Enter the domain name and port number, such as
http://<domain_name>:81, in your browser. A page similar to the one shown in the following figure indicates that the NLB instance can forward requests to the backend servers.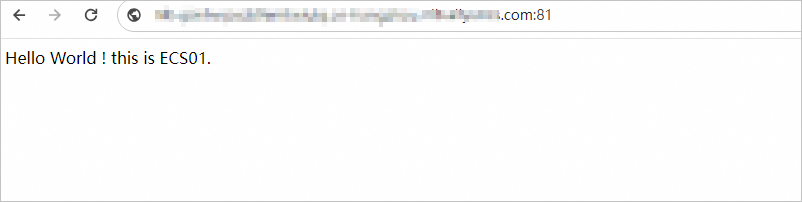
The test results show that when the NLB instance is not associated with a security group, clients can access both the TCP listener on port 80 and the TCP listener on port 81.
Step 3: Create a security group
Before you add an NLB instance to a security group, you must first create a security group in the ECS console.
Log on to the ECS console.
In the left-side navigation pane, under Network & Security, click Security Groups.
In the top navigation bar, select the region where you want to create the security group. In this example, China (Hangzhou) is selected.
On the Security Groups page, click Create Security Group.
On the Create Security Group page, configure the parameters in the Basic Information section.
This section describes only the parameters that are relevant to this topic. For more information about other parameters, see Create a security group.
Network: In this example, the VPC named VPC1 is selected.
Security Group Type: In this example, Basic Security Group is selected.
On the Create Security Group page, configure the parameters in the Rules section.
Click Add Rule. On the Create Security Group Rule page, add an inbound rule to deny access to port 81 based on the following parameters. Then, add a second inbound rule to allow access to port 80 with the same priority. Click Submit.
Parameter
Description
Traffic Direction
Select Inbound.
Action
Select Deny.
Priority
Keep the default value 1.
Protocol
Select Custom TCP.
Source
Select
0.0.0.0/0.Port Range
Enter the port number 81.
Description
Enter a description for the security group rule.
Step 4: Associate the NLB instance and verify
Associate the NLB instance with the security group that you created in Step 3: Create a security group and verify that the security group rules take effect for the NLB instance.
Log on to the NLB console.
In the top navigation bar, select the region where the NLB instance is deployed. In this example, China (Hangzhou) is selected.
On the NLB Instances page, find the NLB instance created in Step 2: Create an NLB instance and configure listeners and click the instance ID. On the Instance Details tab, click the Security Groups tab.
On the Security Groups tab, click Create Security Group. In the Add NLB Instance to Security Group dialog box, select the security group created in Step 3: Create a security group, and then click OK.
In the list on the left, click the ID of the target security group. You can then click the Inbound or Outbound tab to view the security group rules.
Only the relevant inbound security group rules are shown here. The rules for the security group associated with the NLB instance are as follows:
Action
Priority
Protocol type
Port range
Source
Allow
1
Custom TCP
Destination: 80/80Source: 0.0.0.0/0Deny
1
Custom TCP
Destination: 81/81Source: 0.0.0.0/0Verify the access results after associating the NLB instance with the security group.
Log on to a Linux client that has internet access.
Run the
telnet <domain_name> 80command to test whether the client can access the TCP listener on port 80 of the NLB instance.The following response indicates that the connection is successful.
Trying *.*.*.*...
Connected to www.example.com.
Escape character is '^]'.
Enter the domain name and port number, such as
http://<domain_name>:80, in your browser. A page similar to the one shown in the following figure indicates that the NLB instance can forward requests to the backend servers.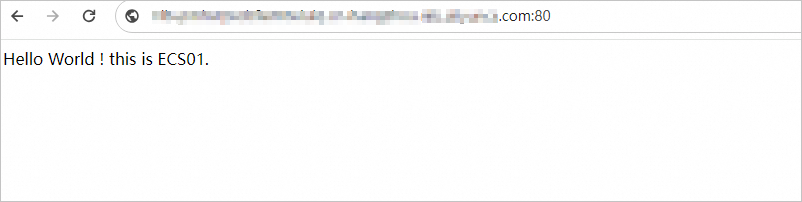
Run the
telnet <domain_name> 81command to test whether the client can access the TCP listener on port 81 of the NLB instance.If you receive a response message as shown below, it means that the client cannot access port 81 of the NLB instance's TCP listener. This also means that the security group to which the NLB instance is added is enforcing access control on the NLB instance.
Trying *.*.*.*...
telnet: connect to address *.*.*.*: Connection timed out
Trying *.*.*.*...
telnet: connect to address *.*.*.*: Connection timed out
Enter the domain name and port number in your browser, for example,
http://domain_name:81. If the web page is inaccessible, this indicates that clients cannot access port 81 of the TCP listener for the NLB instance, and that the access control of the security group to which the NLB instance is added has taken effect on the NLB instance.
Step 5: Modify the security group and verify
Modify the security group rules and verify that the updated rules for the NLB instance are effective.
Return to the NLB Instances page, find the NLB instance created in Step 2: Create an NLB instance and configure listeners, and click the instance ID. On the Instance Details tab, click the Security Groups tab.
On the Security Groups tab, click ECS Console.
On the Security Group Details page, find the rule that allows access to TCP port 80. In the Actions column, click Edit, and change the Action to Deny.
Only the relevant security group rules are shown here. The modified security group rules are as follows:
Action
Priority
Protocol type
Port range
Source
Deny
1
Custom TCP
Destination: 80/80Source: 0.0.0.0/0Deny
1
Custom TCP
Destination: 81/81Source: 0.0.0.0/0ImportantAfter you modify or add security group rules, the system may automatically add high-priority security group rules, such as Allow rules for All TCP traffic from 192.168.0.0/16 with Priority 1. These system-generated rules have a higher priority than user-defined rules and may override your manually configured Deny rules.
Before you verify the access control results, we recommend that you check the security group rules and delete or adjust any system-generated rules that may conflict with your intended access control policies.
Verify the access results after modifying the security group rules for the NLB instance.
Log on to a Linux client that has internet access.
Run the
telnet <domain_name> 80command to test whether the client can access the TCP listener on port 80 of the NLB instance.A response message as shown below indicates that the client cannot access port 80 of the NLB instance's TCP listener. This confirms that the access control of the modified security group rule for the NLB instance has taken effect.
Trying *.*.*.*...
telnet: connect to address *.*.*.*: Connection timed out
Trying *.*.*.*...
telnet: connect to address *.*.*.*: Connection timed out
Enter the domain name and port number in a browser, for example,
http://domain_name:80. If the webpage is inaccessible, this indicates that the client cannot access port 80 of the TCP listener for the NLB instance and that the access control of the security group to which the NLB instance is added has taken effect on the NLB instance.Run the
telnet <domain_name> 81command to test whether the client can access the TCP listener on port 81 of the NLB instance.If you receive the response message shown below, it means that the client cannot access port 81 of the NLB instance's TCP listener and the modified security group rule for access control on the NLB instance has taken effect.
Trying *.*.*.*...
telnet: connect to address *.*.*.*: Connection timed out
Trying *.*.*.*...
telnet: connect to address *.*.*.*: Connection timed out
Enter the domain name and port number in your browser, for example,
http://domain_name:81. If the webpage is inaccessible, it indicates that the client cannot access port 81 of the NLB instance's TCP listener, and that the access control of the security group for the NLB instance has taken effect on the NLB instance.
Related topics
For information about how to associate an NLB instance with or disassociate it from a security group, see Associate an NLB instance with a security group.
To allow or deny access from specific IP addresses to an NLB instance, see Use security groups as allowlists or blocklists.
For more information about security groups, see Security groups.
LoadBalancerJoinSecurityGroup: Associates a security group with an NLB instance.
LoadBalancerLeaveSecurityGroup: Disassociates a security group from an NLB instance.