This topic describes how to create a pass workflow.
Procedure
In this example, the Create Flow with Code method is used to create a pass workflow.
Log on to the Serverless Workflow console.
In the top navigation bar, select a region.
On the Flows page, click Create Flow.
On the Create Flow page, click Create Flow with Code and configure parameters.
 Note
NoteThe Hello World and Sample Projects methods can also be used to create a workflow. However, you cannot modify Definition if you use one of these methods to create a workflow.
Name: Enter a name for the workflow. The name must be 1 to 128 characters in length and can contain only letters, digits, underscores (_), and hyphens (-). It cannot start with a hyphen (-).
Description (Optional): Enter a description for the workflow.
Definition: Configure a workflow definition in a graphic interface.
You must change the content in the YAML file of Definition to the following code:
version: v1
type: flow
steps:
   - type: pass
     name: pass1
The following table describes the parameters that are included in the YAML file.
Parameter
Description
version
The version of the workflow. Only
v1is supported.type
The type of the workflow. Default value:
flow.steps
The steps in the workflow.
type
pass: The type of the step. For more information, see Overview.name
The name of the step. You can specify a step name.
Click Next Step.
Configure a workflow role.
NoteIf other cloud services such as Function Compute need to be invoked in your workflow, you can grant Serverless Workflow the permission to invoke other cloud services by adding RAM roles to the Config Flow Role section. In this example, yon can skip this step because no other cloud services need to be invoked in the workflow. For more information, see Create execution roles.
If you have created RAM roles, you can click Select an existing RAM role.
If you are using Serverless Workflow for the first time, you can create a RAM role by performing the following operations:
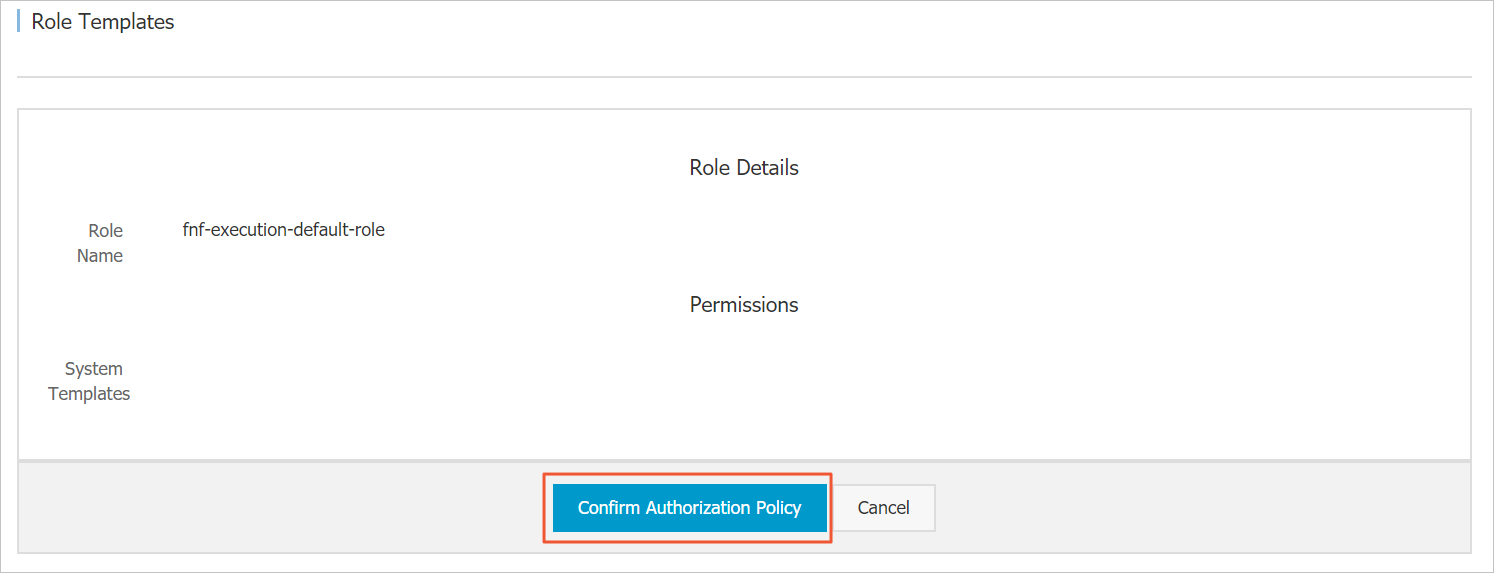
In the Config Flow Role section, click Create a RAM role. Configure the Role Name field.
Select AliyunFCInvocationAccess from the System Policies drop-down list and click Create Role.

On the Role Templates page, click Confirm Authorization Policy.
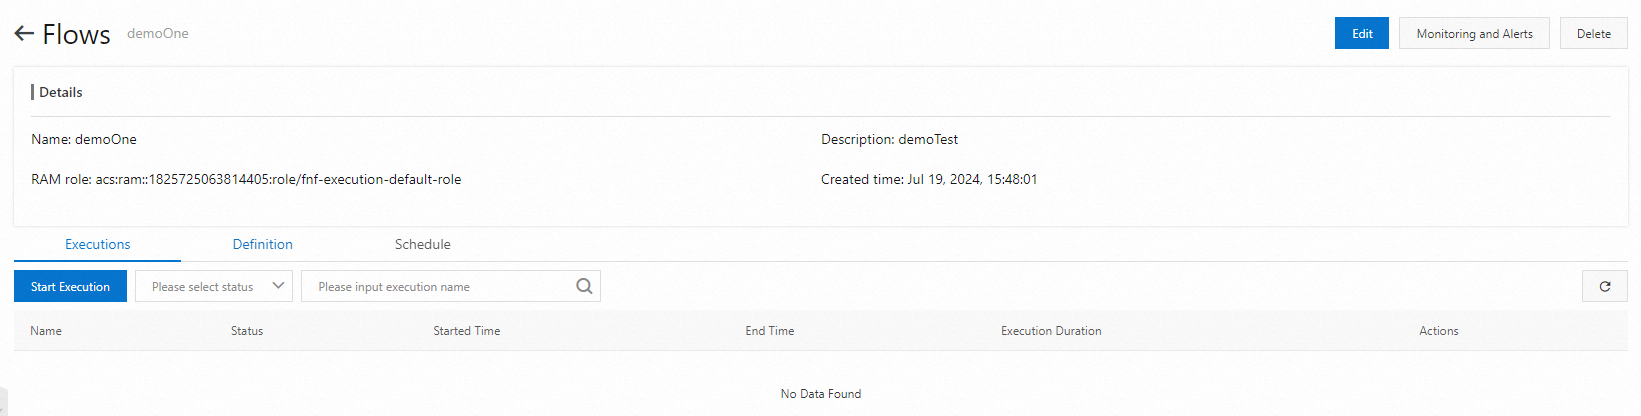
On the Create Flow page, click Create Flow.
After the workflow is created, the following page appears.
References
In addition to using the Serverless Workflow console, you can also call the CreateFlow API operation to create a workflow. For more information, see CreateFlow.