Connect to your ApsaraDB for SelectDB instance by using SQL Editor, then create a database and a table. For other clients such as Data Management (DMS) or a MySQL client, see the related documentation in this topic.
Prerequisites
You have created a SelectDB instance. For instructions, see Step 1: Create a SelectDB instance.
Procedure
Step 1: Set the admin account password
An admin account is created by default when you create a SelectDB instance. You must set its password before you can use it to log in.
-
Go to the SelectDB Instances page. In the top-left corner, select your instance's region. Click the ID of your target instance.
-
On the Instance Details page, click Reset Password in the top-right corner.
-
In the Reset Password dialog box, set a new password and click OK.
Step 2: Connect to the instance
After you set the password, you remain on the Instance Details page.
-
On the Instance Details page, click Data Development and Management in the top-right corner.
NoteIf this is your first time using Data Development and Management, a message prompts you to add your local public IP address to the webui_whitelist IP whitelist group. Read the message carefully and click OK.
-
In the drop-down list, click SQL Editor to open the SQL Editor page.
If the page opens successfully, you are connected to your SelectDB instance.
Note-
If this is your first time using SQL Editor and you are not logged in to WebUI, you are redirected to the login page. Log in with the
adminaccount. After you log in, the SQL Editor page appears. -
If you have used SQL Editor before, clicking SQL Editor takes you directly to the SQL Editor page.
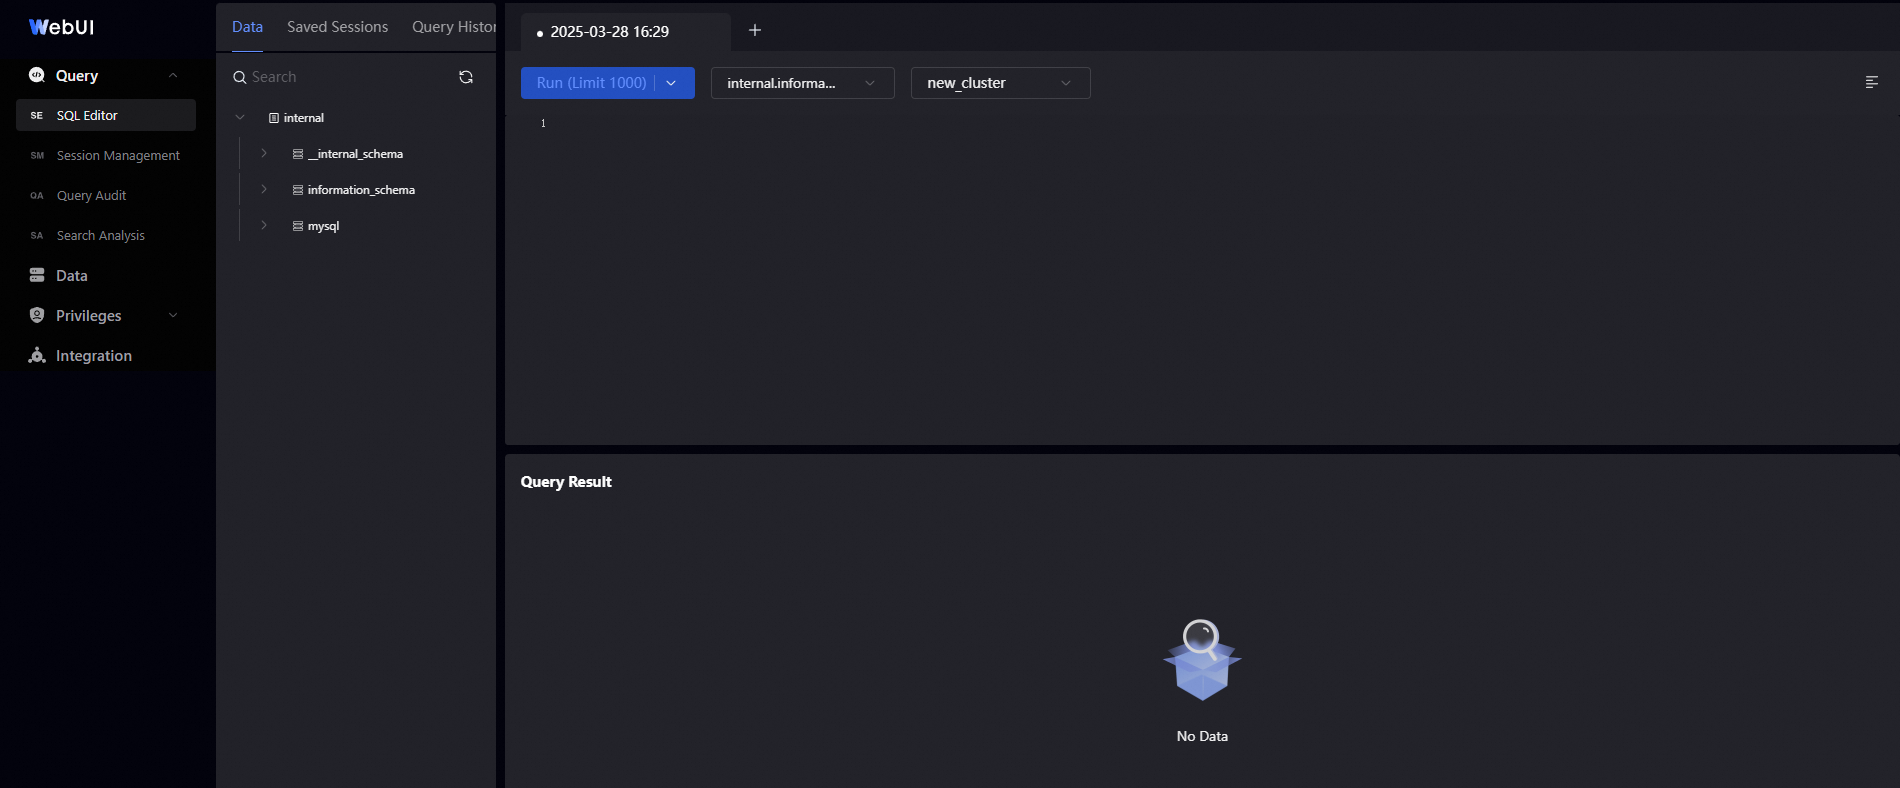
-
Step 3: Create a database
On the SQL Editor page, enter and run the following statement.
CREATE DATABASE test_db;-
In the text editor on the right, enter the statement.
-
Click Run (limit 1000).
A success message in the Execution Result area indicates that the database is created. You can also click the refresh icon in the top-right corner to view the new database.
Step 4: Create a table
On the SQL Editor page, enter and run the following statement.
CREATE TABLE test_tb
(
    k1 TINYINT,
    k2 DECIMAL(10, 2) DEFAULT "10.05",
    k3 CHAR(10) COMMENT "string column",
    k4 INT NOT NULL DEFAULT "1" COMMENT "int column"
)
COMMENT "my first table"
DISTRIBUTED BY HASH(k1) BUCKETS 16;-
Select the target database and cluster.
In the top-right corner of the page, select the target database from the second drop-down list and the target cluster from the third drop-down list.
-
In the text editor on the right, enter the statement.
-
Click Run (limit 1000).
A success message in the Execution Result area indicates that the table is created. You can also click the refresh icon in the top-right corner to view the new table.
Step 5 (Optional): Import and query data
SelectDB supports multiple data import methods. This section uses Stream Load to import local CSV data into the test_tb table. For more information, see Stream Load.
-
Add an IP address to the whitelist.
In the left-side navigation pane of the Instance Details page, click Data Security. On the Data Security page, click Create Whitelist and add your local environment's public IP address to the instance's IP address whitelist.
-
Prepare the source data.
In your local environment, prepare a data file in CSV format. For an example, see test_tb.csv.
-
Import the data.
Open a terminal in your local environment and run a curl command to start a Stream Load job.
Syntax
curl --location-trusted -u <username>:<password> -H "expect:100-continue" -H "column_separator:," -T <file_path> -XPUT http://<host>:<port>/api/<db_name>/<table_name>/_stream_loadParameters
Parameter
Description
--location-trustedPasses the
usernameandpasswordto the redirected host if authentication is required.-uThe username and password for your ApsaraDB for SelectDB instance.
-HA request header for the Stream Load job. Common parameters:
-
label: A unique identifier for the import job. -
column_separator: The column delimiter in the source file. The default is\t. You can also use a multi-character string as a delimiter. For non-printable characters, use\xas a prefix followed by the character's hexadecimal value.
-TThe local path of the data file to import.
-XPUTThe HTTP PUT method. The request URL specifies the import destination with the following components:ApsaraDB for SelectDB
-
host: The VPC endpoint or ApsaraDB for SelectDB of the ApsaraDB for SelectDB instance.NoteIf the client running the command is not in the same VPC as your SelectDB instance, you must use the public endpoint. To apply for a public endpoint, see Apply for and release a public endpoint.
If your client is an Alibaba Cloud service in the same VPC as your SelectDB instance, we recommend that you use the VPC endpoint.
-
port: The HTTP port of the ApsaraDB for SelectDB instance. The default is 8080.NoteYou can find the endpoint and port of your ApsaraDB for SelectDB instance on its ApsaraDB for SelectDB page.
-
db_name: The database name. -
table_name: The table name.
Example
curl --location-trusted -u admin:07b1**** -T C:\Users\****\Downloads\test_tb.csv -H "label:test123" -H "expect:100-continue" -H "column_separator:," selectdb-cn-vc****-public.selectdbfe.rds.aliyuncs.com:8080/api/test_db/test_tb/_stream_load -
-
View the import results.
On the SQL Editor page, enter and run the following statement:
SELECT * FROM test_tb;Click Run (limit 1000). The imported sample data is displayed in the Execution Result area at the bottom right of the page.
Next steps
You have connected to a SelectDB instance, created a database and a table, and imported data by using Stream Load. To design tables that fit your business requirements, we strongly recommend that you learn the key principles of SelectDB database and table design. Proper table design helps avoid potential issues in production.
Step 3: Learn the key principles of database and table design
Related documents
-
To connect with a different account, log in as admin, create a new account, grant it cluster management permissions, and reconnect. For more information, see Basic permission management and Cluster permission management.
-
For more information about the SQL syntax for SelectDB, see the SQL Reference.
-
Data Development and Management is a visual toolset built into the SelectDB WebUI. SQL Editor is one of its sub-tools. For other sub-tools, see Data Development and Management.
-
Other clients that connect to a SelectDB instance require a database connector that is compatible with MySQL 5.7. See the following topics:
Related APIs
-
Reset account password: ResetAccountPassword
-
Query instance IP address whitelist: DescribeSecurityIPList
-
Modify instance IP address whitelist: ModifySecurityIPList