The weakness detection feature identifies defects and vulnerabilities in your application at runtime, including misconfigured mainstream Java frameworks and weak passwords in applications and databases. Use this feature to find weaknesses before attackers can exploit them.
Prerequisites
Before you begin, make sure that:
Your processes are added to the application protection feature
The runtime application self-protection (RASP) agent installed on those processes is version 0.5.0 or later
To check the RASP agent version, go to the Application Configurations tab, find the application group to which the processes belong, and click the number in the Access instance column to open the Instance details panel.
If the RASP agent version is earlier than 0.5.0, restart the application. The RASP agent updates automatically on restart.
View weakness detection results
Log on to the Security Center console. In the top navigation bar, select the region of the asset you want to manage. You can select China or Outside China.
In the left-side navigation pane, choose Protection Configuration > Application Protection.
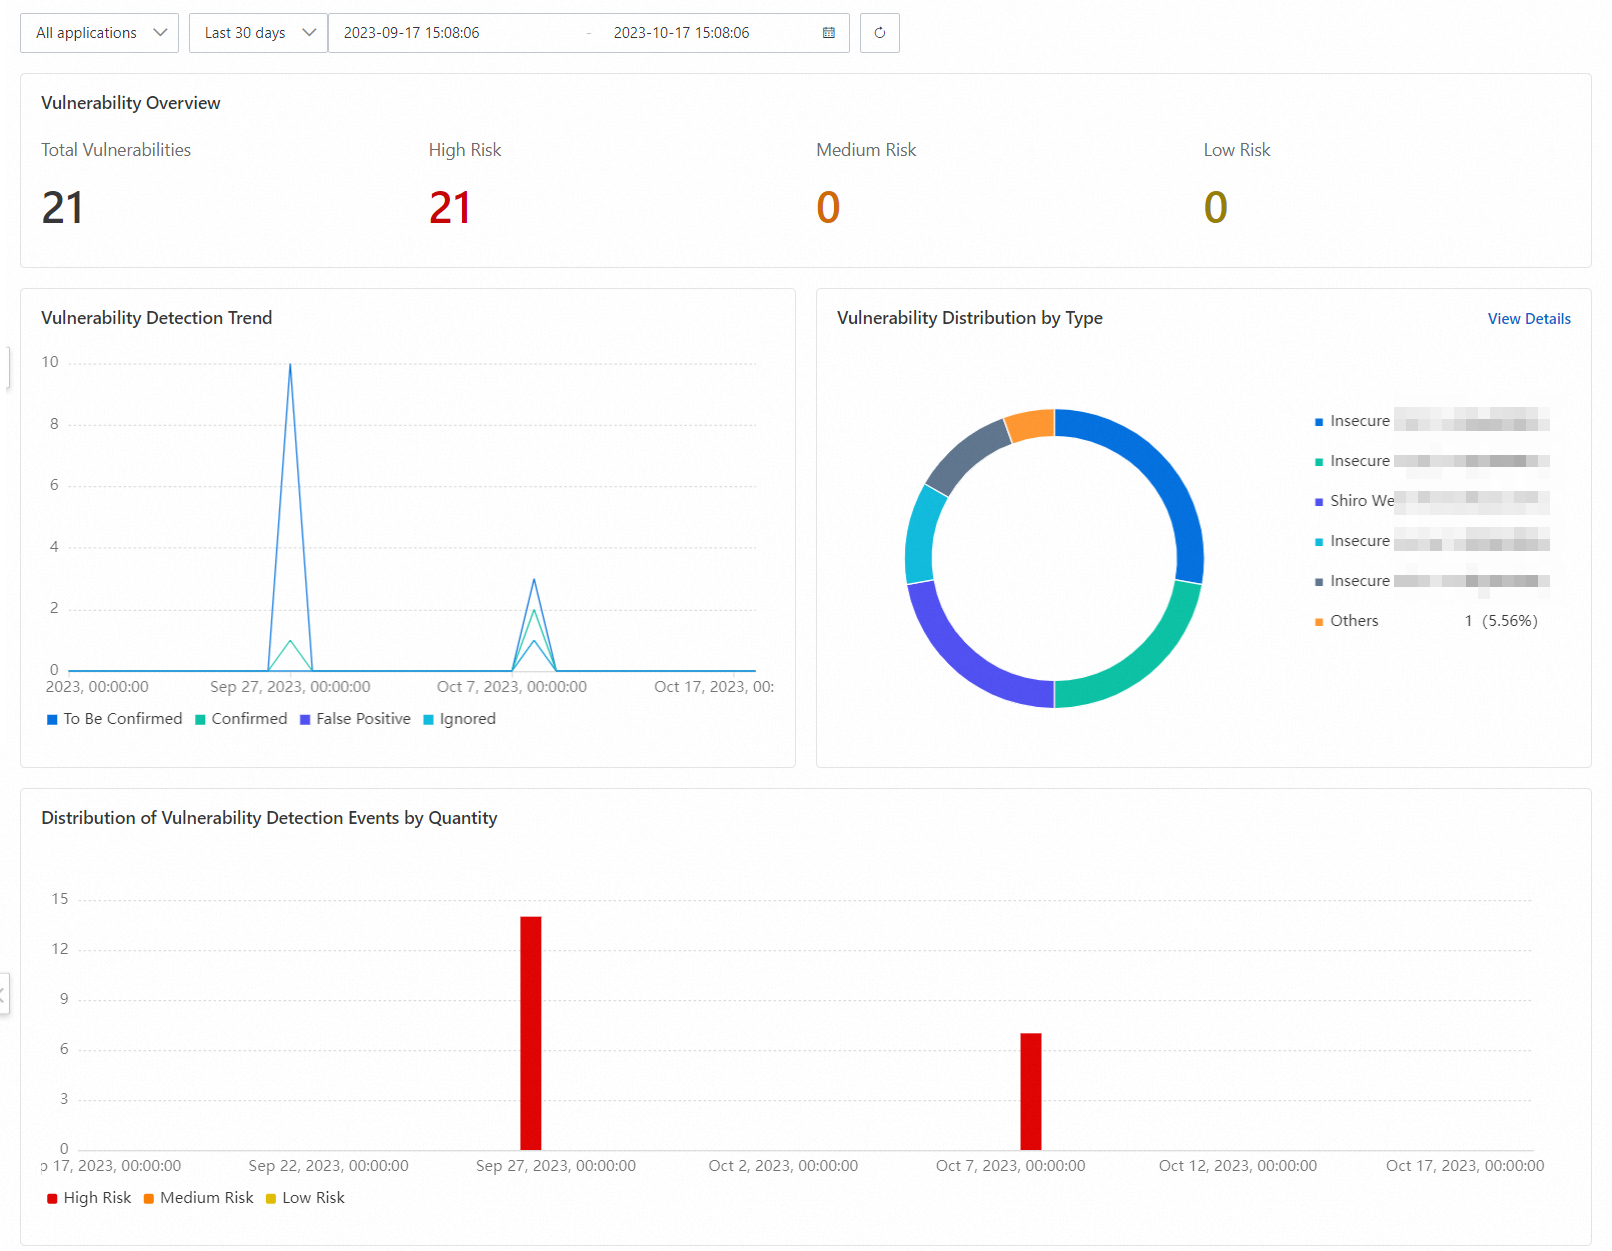
On the Weakness Detection tab, review the summary sections at the top of the page:
Vulnerability Overview
Vulnerability Detection Trend
Vulnerability Distribution by Type
Distribution of Vulnerability Detection Events by Quantity
In the lower part of the Weakness Detection tab, review the list of applications with detected weaknesses. Two columns are especially useful:
Application Startup ID: a unique ID within each startup cycle of the application. If the same application has been restarted multiple times, each startup has its own ID, so you can tell which weaknesses were detected during which startup.
Status: the overall handling status for all weaknesses in that startup. To Be Confirmed means a weakness detected on the application has not been confirmed. Confirmed means all weaknesses have been handled.
Click the
 icon to the left of an Application Startup ID to expand the weakness list. Find the weakness you want to review and click Details in the Actions column.
The details pane shows three fields to help you decide whether to fix the weakness:
Weakness description: what the weakness is and why it poses a risk
Fixing suggestion: the recommended remediation action
Weakness location: where in the application the weakness was found
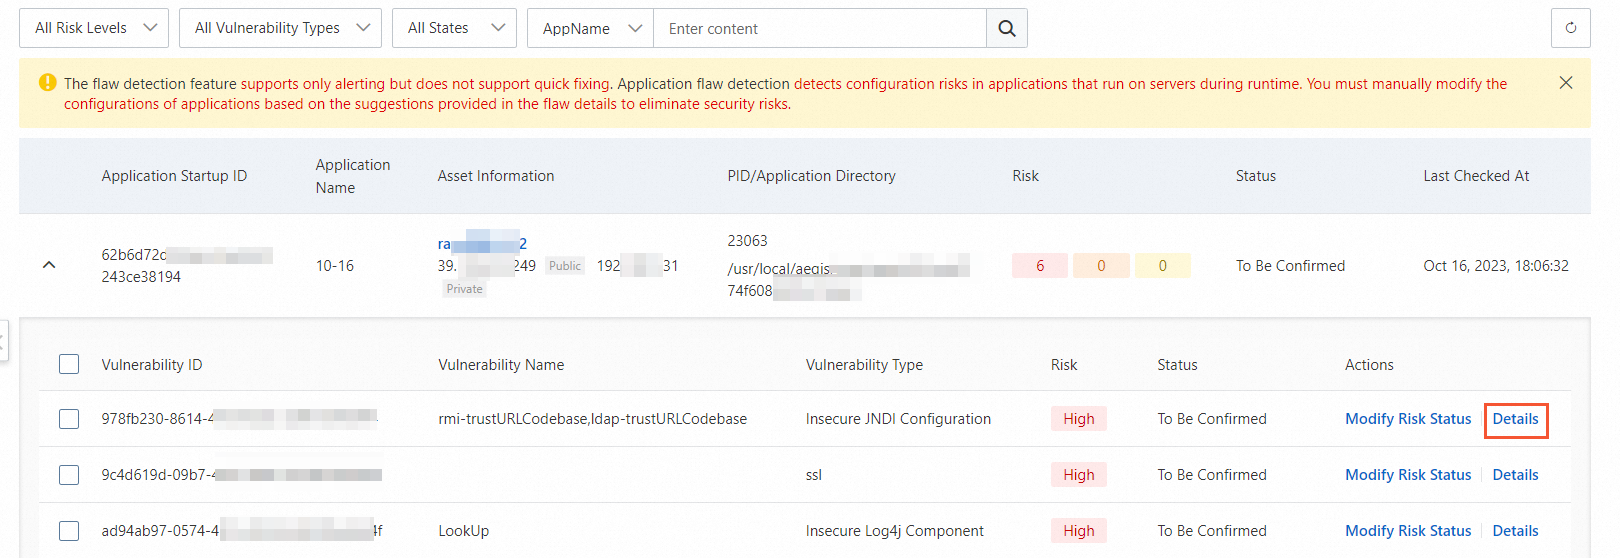
After reviewing the details, return to the weakness list. Click Modify Risk Status in the Actions column for that weakness.
In the Modify Risk Status dialog, set Risk Status and optionally add Remarks, then click OK.
Choose the status that best reflects your decision:
Status When to use To Be Confirmed You cannot confirm how to handle the weakness Confirmed You have confirmed how to handle the weakness False Positive The weakness does not actually exist or the detection information is incorrect Ignore You want to ignore the weakness
What's next
To understand how weakness detection differs from weak password baseline checks, see What are the differences between the weakness detection feature and the weak password baseline check feature?
To check system-level security configurations, see Baseline check