Due to IP address restrictions in the 100.0.0.0/8 range, connections from your data center to the Security Center service may fail. To resolve this issue, Security Center allows you to establish a private and reliable connection using PrivateLink. This method reduces operational costs and improves network reliability.
Benefits
PrivateLink provides an efficient and secure method to connect to Security Center. You can securely access Security Center directly from your on-premises data center or private cloud environment without needing intermediate components such as proxies. This direct connection lets your organization use Security Center features seamlessly and improve overall operational efficiency.
Direct connection: Establishes a secure, direct connection to Security Center, avoiding complex network paths and reducing latency to improve access efficiency.
Cost reduction: Eliminates intermediate proxies, reducing bandwidth costs and improving operational efficiency.
Enhanced security: Uses standard security policies from Security Center to protect data in transit and mitigate potential security risks.
Seamless integration: Integrates seamlessly with your existing enterprise infrastructure, ensuring architectural consistency and efficiency.
Limitations
Only the China (Shanghai) region supports connecting to Security Center via PrivateLink. Currently, only the cn-shanghai-f and cn-shanghai-b zones are supported.
Prerequisites
You have activated PrivateLink. If not, follow the instructions on the PrivateLink activation page to activate it.
You have created a VPC and a vSwitch for use with PrivateLink.
You have created a security group.
Step 1: Create a connection
Create an endpoint to access the Security Center service by following these steps:
Log on to the Security Center console.
In the left-side navigation pane, choose . In the upper-left corner of the console, select the region where your assets are located: Chinese Mainland or Outside Chinese Mainland.
On the tab, click Create Connection.
In the Create Connection panel, configure the parameters as follows and then click OK.
Parameter
Description
Example
Node Name
A custom name for the endpoint to identify the connection.
test_01
Region
The region where the Security Center service supports private access.
China (Shanghai)
VPC
The VPC that you want to connect to Security Center.
vpc-uf64XXXXs90dob | XXXX-test
Security Group
The security group that defines network traffic rules. Make sure you have configured inbound and outbound rules to allow the required traffic.
sg-uf61XXXXfs749ip14g|alikafXXXX
Zone and vSwitch
Add two zones, cn-shanghai-f and cn-shanghai-b, and select a VSwitch associated with each zone.
cn-shanghai-f
cn-shanghai-b
Step 2: Create an installation command
In the left-side navigation pane, choose . Then, select your asset region: Chinese Mainland or Outside Chinese Mainland.
On the tab, click Create Installation Command.
In the Create Installation Command dialog box, configure the parameters as described in the following table, and then click OK.
Parameter
Description
Example
Expiration Time
The expiration date and time for the command. An expired command cannot be used to install the agent.
2025-03-13
Service Provider
From the drop-down list, select the server's cloud provider.
Alibaba Cloud
Default Group
The server group for the server on which you will install the agent.
Hybrid Cloud
OS
The operating system of the server on which you will install the agent.
Windows
Create Image System
Select No to install the agent on a single server.
If you want to deploy multiple servers from an image that has the agent pre-installed, select Yes. For more information, see Install the agent.
No
Access Method
The server's access method. Select PrivateLink-based Access and then choose your desired endpoint.
PrivateLink-based Access
test_01
On the tab for your specified operating system, view and copy the newly generated command.
Step 3: Install the agent
Log on to the server with an administrator account. Then, run the installation command based on the server's operating system.
Windows: In Command Prompt (CMD), run the copied installation command to download and install the agent.
Linux: In the command-line interface, run the copied installation command to download and install the agent.
For more information about how to install the agent, see Install the agent.
Step 4: Manage protection editions for your servers
Associate your servers with your purchased Security Center protection editions to ensure they receive the intended protection.
If you use the subscription billing method, see Manage protection editions for servers of a subscription instance.
If you use the pay-as-you-go billing method, see Manage protection editions for servers of a pay-as-you-go instance.
Step 5: Verify the installation status
After you install the agent, the system automatically downloads the required files to your server and starts the related processes. You can use the following methods to verify the installation:
Verify on the console: This is the most convenient method. You can check the agent status from a single interface without logging in to the server. This method relies on data synchronization, which typically has a delay of a few minutes. This method is suitable for a quick status overview.
Verify on the server: This provides immediate and accurate feedback on the server's local status. You must log in to the server and run commands, making it ideal for immediate confirmation or for troubleshooting installation issues.
Console (approximately 5-minute latency)
You can check the online status of the agent on the Host page of the Security Center console:
For an Alibaba Cloud server, the icon in the Agent column changes from
 to
to  .
.A non-Alibaba Cloud server appears in the server list, and the icon in the Agent column changes from
to .ImportantThe Security Center console automatically synchronizes asset information for installed agents every minute. Due to network conditions, information synchronization for non-Alibaba Cloud servers may be delayed after the agent is installed. If the server does not appear on the Host page, click Synchronize Assets to manually synchronize the asset information. For more information, see Synchronize Assets.
Server (real-time)
Verify that the installation was successful by checking the status of agent processes and the server's network connectivity.
Check the service processes: Check whether the core processes of the Security Center agent (AliYunDun, AliYunDunMonitor, and AliYunDunUpdate) are running on the server. For more information about the agent processes, see Security Center agent processes.
Linux
Run the following commands in a terminal:
# Check that AliYunDun, AliYunDunMonitor, and AliYunDunUpdate are all running.
ps -ef | grep -E 'AliYunDun|YunDunMonitor|YunDunUpdate'

# Check the service status. The output should show "active (running)".
systemctl status aegis
Expected output when all processes are healthy:
root        5472       1  0 Sep10 ?        00:00:18 /usr/local/aegis/aegis_update/AliYunDunUpdate
root        5524       1  0 Sep10 ?        00:01:34 /usr/local/aegis/aegis_client/aegis_12_61/AliYunDun
root        5546       1  0 Sep10 ?        00:03:13 /usr/local/aegis/aegis_client/aegis_12_61/AliYunDunMonitor

● aegis.service - LSB: Aegis service
   Loaded: loaded (/etc/rc.d/init.d/aegis; generated)
   Active: active (running) since Mon 2023-10-30 10:00:00 CST; 1 day 2h ago
If any of the three core processes is missing from the
psoutput, or the service status is notactive (running), the agent is not fully operational.Windows
Use one of the following methods.
Method 1: Open Task Manager and check that
AliYunDun,AliYunDunMonitor, andAliYunDunUpdateappear in the process list.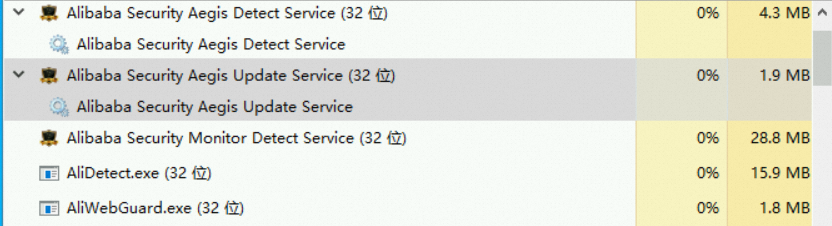
Method 2: Run the following commands in PowerShell:
# Check that the three core processes are running.
Get-Process | Where-Object {$_.Name -match '^(AliYunDun|AliYunDunMonitor|AliYunDunUpdate)$'}

# Check the service status. The Status column should show "Running".
Get-Service | Where-Object {$_.Name -match 'Aegis|AliYunDun'}
Expected output when all processes are healthy:
Handles  NPM(K)    PM(K)      WS(K)     CPU(s)     Id  SI ProcessName
-------  ------    -----      -----     ------     --  -- -----------
    380      26    15948      19656     615.75   6072   0 AliYunDun
    599      31    47576      37356     968.73   2488   0 AliYunDunMonitor
    257      14     8072      11336     232.03   2904   0 AliYunDunUpdate

Status   Name               DisplayName
------   ----               -----------
Running  Alibaba Securit... Alibaba Security Aegis Detect Service
Running  Alibaba Securit... Alibaba Security Aegis Update Service
If any core process is missing or a service status shows anything other than
Running, the agent is not fully operational.Check network connectivity: On your server, run the following command to check whether you can connect to the Security Center service endpoint on port 443 or 80. If the connection is successful, the terminal displays a
Connected to ...message. If the connection fails, aConnection refusedorConnection timed outmessage is returned.NoteMake sure that the server can connect to at least one jsrv domain name and one update domain name. The jsrv domain name is used to issue instructions, such as vulnerability scans and virus detection. The update domain name is used to download and update agent plugins.
telnet jsrv.aegis.aliyun.com 443telnet jsrv2.aegis.aliyun.com 443telnet jsrv3.aegis.aliyun.com 443telnet update.aegis.aliyun.com 443telnet update2.aegis.aliyun.com 443telnet update3.aegis.aliyun.com 443