Connect a Golang application to SchedulerX by using SDK for Golang
SchedulerX SDK for Golang lets your Go application receive and run scheduled jobs managed through the SchedulerX console. You install the SDK, implement the Processor interface with your job logic, register the job with the SchedulerX client, and verify the connection.
Prerequisites
Before you begin, make sure you have:
A SchedulerX application created in the console (see Create an application)
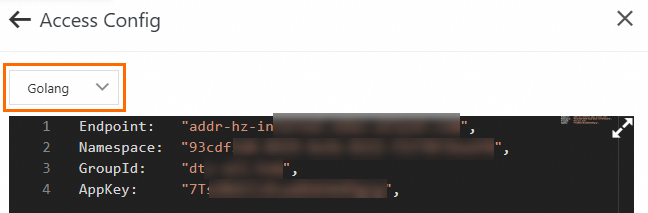
The application configurations ready, including the endpoint, namespace, GroupId, and AppKey (see Step 2 of the Connect to SchedulerX over the Internet from an on-premises environment topic)
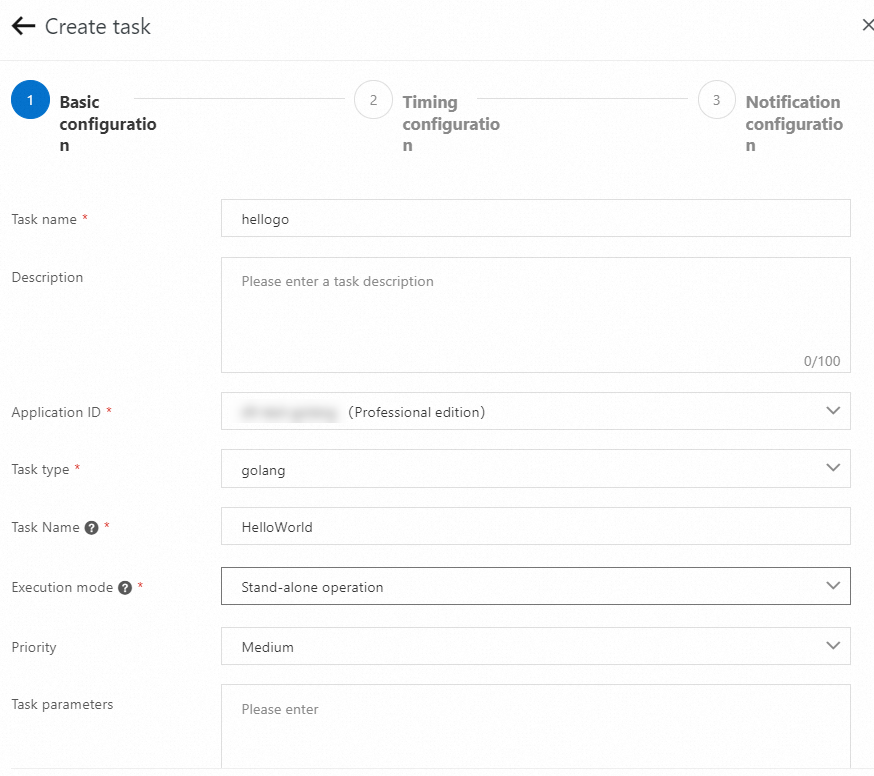
A Golang job created in the console (see Job management)

Core types
The SDK uses two core types that you interact with directly:
Processorinterface: Defines how your job runs. Implement theProcessmethod with your job logic. It receives aJobContextcontaining runtime information about the current execution and returns aProcessResultthat indicates success or failure.Configstruct: Holds the connection details for your SchedulerX application:Endpoint,Namespace,GroupId, andAppKey.
Step 1: Install the SDK
Initialize a Go module for your project and install the SchedulerX SDK for Golang:
mkdir schedulerx-demo && cd schedulerx-demo
go mod init schedulerx-demo
go get github.com/alibaba/schedulerx-worker-go@{Latest tag}
Alternatively, install from a specific branch:
go get github.com/alibaba/schedulerx-worker-go@{Branch name}Step 2: Implement the Processor interface
Create a processor.go file with a struct that implements the Processor interface. The Process method contains your job logic and returns a ProcessResult to indicate the execution status.
// processor.go
package main

import (
	"fmt"
	"time"

	"github.com/alibaba/schedulerx-worker-go/processor"
	"github.com/alibaba/schedulerx-worker-go/processor/jobcontext"
)

// Verify that HelloWorld implements the Processor interface at compile time.
var _ processor.Processor = &HelloWorld{}

type HelloWorld struct{}

func (h *HelloWorld) Process(ctx *jobcontext.JobContext) (*processor.ProcessResult, error) {
	fmt.Println("[Process] Start process my task: Hello world!")
	// Simulate a task that takes 3 seconds to complete.
	time.Sleep(3 * time.Second)
	ret := new(processor.ProcessResult)
	ret.SetStatus(processor.InstanceStatusSucceed)
	fmt.Println("[Process] End process my task: Hello world!")
	return ret, nil
}
Step 3: Register the job and start the client
Create a main.go file that initializes the SchedulerX client with your application configurations and registers the job. The job name passed to RegisterTask must match the name configured in the SchedulerX console.
// main.go
package main

import (
	"github.com/alibaba/schedulerx-worker-go"
)

func main() {
	// Replace these values with the configurations from your SchedulerX application.
	cfg := &schedulerx.Config{
		Endpoint:  "<your-endpoint>",         // Example: acm.aliyun.com
		Namespace: "<your-namespace>",        // Example: 433d8b23-xxxx-xxxx-xxxx-90d4d1b9a4af
		GroupId:   "<your-group-id>",          // Example: xueren_sub
		AppKey:    "<your-app-key>",           // Example: myV5K5Xaf1kxxxxxxxx
	}
	client, err := schedulerx.GetClient(cfg)
	if err != nil {
		panic(err)
	}

	task := &HelloWorld{}

	// The job name must match the one configured in the SchedulerX console.
	client.RegisterTask("HelloWorld", task)

	// Block the main goroutine to keep the worker running.
	select {}
}
Replace the following placeholders with your actual values:
| Placeholder | Description | Example |
|---|---|---|
<your-endpoint> | SchedulerX endpoint | acm.aliyun.com |
<your-namespace> | Namespace ID (UUID format) | 433d8b23-xxxx-xxxx-xxxx-90d4d1b9a4af |
<your-group-id> | Application group ID | xueren_sub |
<your-app-key> | Application key | myV5K5Xaf1kxxxxxxxx |
Optional client parameters
Pass additional options to schedulerx.GetClient to customize the client behavior.
| Parameter | Option | Description |
|---|---|---|
| Custom port | config.WithGrpcPort | Specify a gRPC port for non-standalone jobs that run on multiple workers and need to communicate with each other. If not specified, the system selects a random idle port. |
| Custom NIC | config.WithIface | Specify which network interface controller (NIC) to use when a worker has multiple NICs. The system obtains the IP address from the specified NIC. |
| Custom tag | config.WithLabel | Add tags to the client and configure job scheduling based on specific tags. Tags are suitable for canary release and testing scenarios. |
// main.go
package main

import (
	"github.com/alibaba/schedulerx-worker-go"
	"github.com/alibaba/schedulerx-worker-go/config"
)

func main() {
	cfg := &schedulerx.Config{
		Endpoint:  "<your-endpoint>",
		Namespace: "<your-namespace>",
		GroupId:   "<your-group-id>",
		AppKey:    "<your-app-key>",
	}

	client, err := schedulerx.GetClient(cfg,
		schedulerx.WithWorkerConfig(config.NewWorkerConfig(
			config.WithGrpcPort(8001),
			config.WithIface("eth0"),
		)),
		config.WithLabel("test"),
	)
	if err != nil {
		panic(err)
	}

	// The name registered here must be consistent with the one configured in the console.
	task := &TestMapReduceJob{
		mapjob.NewMapReduceJobProcessor(), // FIXME how define user behavior
	}
	client.RegisterTask("TestMapReduceJob", task)
	select {}
}
Verify the connection
After deploying your application to Alibaba Cloud, verify the connection to SchedulerX:
Log on to the SchedulerX console.
In the top navigation bar, select a region.
In the left-side navigation pane, click Application Management.
On the Application Management page, check the Total number of instances column.
0: The application is not connected. Check your application configurations and network connectivity.
Non-zero: The application is connected. Click View instances in the Operation column to see the connected instances in the Connect to an instance panel.
What to do next
Create jobs in the SchedulerX console. For more information, see the "Create a job" section of the Job management topic.