RDS for PostgreSQL instances run inside a Virtual Private Cloud (VPC) and cannot reach the public internet directly. This topic walks you through configuring an Internet NAT gateway and a Source Network Address Translation (SNAT) entry so that your RDS for PostgreSQL instance can connect to an external database — MySQL, SQL Server, PostgreSQL, or Redis — over the Internet using the foreign data wrapper (FDW) extension.
The SNAT entry grants outbound internet access to the instance. External networks cannot reach the instance through the NAT gateway.
Prerequisites
Before you begin, ensure that you have:
An RDS for PostgreSQL instance. See Quickly create an RDS for PostgreSQL instance
A target database (MySQL, SQL Server, PostgreSQL, or Redis) accessible over the Internet with a public IP address
The FDW extension supported by your RDS for PostgreSQL version. Check Extensions supported by RDS for PostgreSQL for the required extension per database type:
MySQL:
mysql_fdwSQL Server:
tds_fdwPostgreSQL:
postgres_fdwRedis:
redis_fdw
An account on the RDS for PostgreSQL instance. See Create an account
An account on the target database, and a database containing data
Before configuring FDW, collect the following details from the target database:
Public IP address or hostname
Port number (default:
3306for MySQL)Database name
Username and password for the FDW connection
Configure an Internet NAT gateway
Step 1: Create a NAT gateway
Log on to the NAT Gateway console.
On the Internet NAT Gateway page, click Create Internet NAT Gateway.
(Optional) If this is your first time using NAT Gateway, click Create Service-linked Role in the Service-linked Role Creation section. The button appears on the Internet NAT Gateway page.
On the Create Internet NAT Gateway page, set the following parameters and click Buy Now.
The table below lists key parameters only. For all parameters, see Use the SNAT feature of an Internet NAT gateway to access the Internet.
Parameter Description Region Select the same region as your RDS for PostgreSQL instance Network And Zone Select the VPC and vSwitch of your RDS for PostgreSQL instance. To find the VPC, go to the Database Connection page in the RDS console Network Type Select Internet NAT Gateway EIP Select Configure Later On the Confirm page, review the configuration and click Activate Now.
After the gateway is created, it appears on the Internet NAT Gateway page.

Step 2: Associate an Elastic IP Address (EIP)
In the NAT Gateway console, click the instance ID of the NAT gateway you created.
On the Associated EIP tab, click Associate EIP.
In the Associate EIP dialog box, select Purchase and Associate EIP.
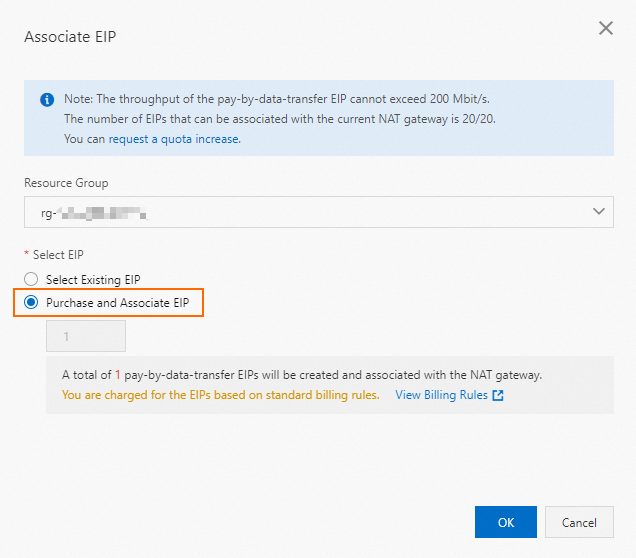
Click OK.
The EIP appears in the Associated EIP section.

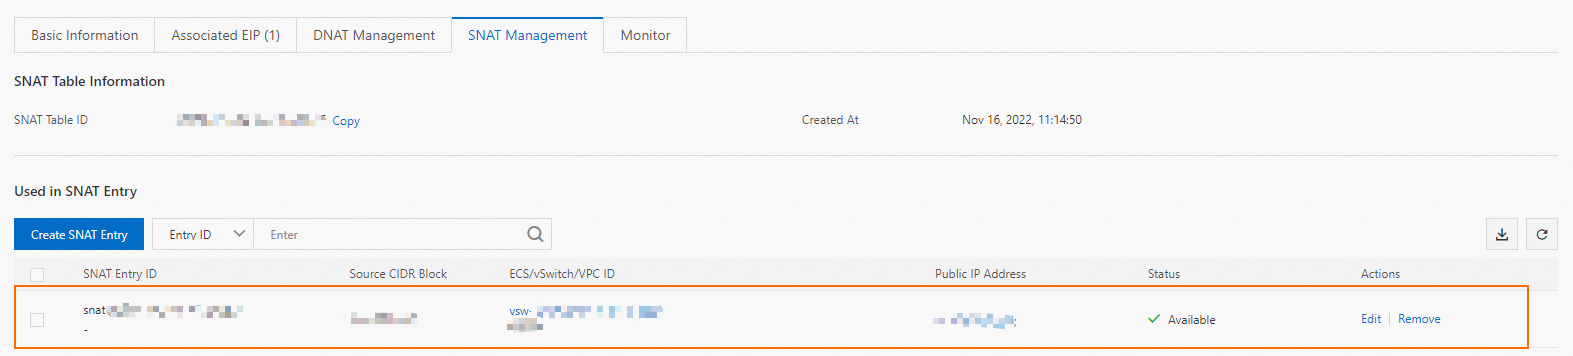
Step 3: Create an SNAT entry
In the NAT Gateway console, click the instance ID of the NAT gateway you created.
On the SNAT tab, click Create SNAT Entry.
Configure the following parameters and click OK.
Parameter Description SNAT Entry Select vSwitch Granularity. All instances in the vSwitch use the EIP to access the internet Select vSwitch Select the vSwitch of your RDS for PostgreSQL instance Select EIP Select the EIP associated in the previous step
The SNAT entry appears in the SNAT Entry List.
Configure the target database
Add the EIP to the whitelist or firewall rules of the target database so that it accepts connections from your RDS instance.
MySQL: See Privileges provided by MySQL
PostgreSQL: See The pg_hba.conf file
SQL Server: See Configure the Windows firewall to allow SQL Server access
Redis: Use a firewall to allow traffic from the EIP on the Redis port. For example, on CentOS with iptables:
iptables -A INPUT -s <EIP_associated_with_the_Internet_NAT_gateway> -p tcp --dport <Redis_port_number> -j ACCEPT
Configure the RDS for PostgreSQL instance
The following steps use a MySQL database as an example. The mysql_fdw extension is used throughout. Replace the extension name and FDW options with the appropriate values for your target database type.
Step 1: Connect to the RDS instance
Connect to your RDS for PostgreSQL instance. See Connect to a PostgreSQL instance.
Step 2: Install the FDW extension
Run the following command:
CREATE EXTENSION mysql_fdw;Step 3: Create a server definition
Create a server definition that points to the target database. Replace the placeholders with actual values:
CREATE SERVER <server_name>
FOREIGN DATA WRAPPER mysql_fdw OPTIONS (
  host '<public_IP_of_the_target_database>',
  port '<port_of_the_target_database>'
);
Example for a MySQL database:
CREATE SERVER mysql_server80
FOREIGN DATA WRAPPER mysql_fdw OPTIONS (
  host 'XX.XX.XX.XX',
  port '3306'
);
Expected output:
CREATE SERVERStep 4: Create a user mapping
Map the server definition to a user in the RDS instance. This lets the user authenticate to the target MySQL database:
CREATE USER MAPPING
FOR <RDS_for_PostgreSQL_username> SERVER <created_server_name> OPTIONS (
  username '<username_for_the_target_database>',
  password '<password_for_the_target_database>'
);
Example:
CREATE USER MAPPING
FOR pg_client SERVER mysql_server80 OPTIONS (
  username 'testuser',
  password 'U123456!'
);
Expected output:
CREATE USER MAPPINGStep 5: Create a foreign table
Create a foreign table that maps to a table in the target database. The column names and types must match the remote table:
CREATE FOREIGN TABLE <foreign_table_name> (
  id int,
  name varchar(10)
)
SERVER <created_server_name> OPTIONS (
  dbname '<database_name_of_the_target_database>',
  table_name '<table_name_of_the_target_database>'
);
Example:
CREATE FOREIGN TABLE mysql_fdw_test (
  id int,
  name varchar(10)
)
SERVER mysql_server80 OPTIONS (
  dbname 'testdb',
  table_name 'test'
);
Expected output:
CREATE FOREIGN TABLEStep 6: Verify the connection
Query the foreign table to confirm data is returned from the target MySQL database:
SELECT * FROM mysql_fdw_test;If the query returns rows from the target database, the configuration is complete.
What's next
To access a different type of external database, repeat the steps above with the corresponding FDW extension (
tds_fdwfor SQL Server,postgres_fdwfor PostgreSQL,redis_fdwfor Redis).To manage your NAT gateway settings, see Use the SNAT feature of an Internet NAT gateway to access the Internet.