ApsaraDB RDS for PostgreSQL includes a built-in cloud migration feature that lets you move data between instances in different regions without third-party tools. This topic covers the cross-region RDS-to-RDS scenario: setting up network connectivity with Cloud Enterprise Network (CEN), configuring both instances, running a feasibility assessment, and cutting over traffic to the destination.
Usage notes
When you migrate data between RDS instances that reside in different regions, you must use Cloud Enterprise Network (CEN) to enable cross-region communication over an internal network. You are charged for cross-region communication based on CEN. For more information, see What is CEN? and Billing.
Prerequisites
Before you begin, ensure that you have:
-
Source and destination instances running the same major engine version (PostgreSQL 10 or later)
-
A destination instance that is a primary instance (read-only instances do not support cloud migration)
-
A destination instance that uses cloud disks
-
A destination instance that is empty, with available storage greater than or equal to the data size of the source instance
-
Source and destination VPCs with different CIDR blocks
Restrictions
During migration, do not:
-
Run any other data migration from or to the source instance
-
Restart the source instance
-
Change the specifications of the source instance
Reading from and writing to the source instance is allowed during migration.
Step 1: Set up cross-region connectivity with CEN
In this example, the source instance is in China (Beijing) and the destination instance is in China (Hangzhou).
1.1 Create a CEN instance
-
Log on to the CEN console.
-
On the Instances page, click Create CEN Instance.
-
In the Create CEN Instance dialog box, configure the parameters and click OK.
| Parameter | Description |
|---|---|
| Name | 2–128 characters; can contain digits, hyphens (-), and underscores (_); must start with a letter |
| Description | 2–256 characters; cannot start with http:// or https://; can be left blank |
1.2 Add both VPCs to the CEN instance
Add the VPC of the source instance and the VPC of the destination instance to the CEN instance separately.
-
On the Instances page, click the ID of the CEN instance you created.
-
On the Basic Information tab, click the
 icon to the right of the VPC count.
-
On the Connection with Peer Network Instance page, configure the parameters and click OK.
| Parameter | Description |
|---|---|
| Instance Type | Retain the default value Virtual Private Cloud (VPC) |
| Region | Select the region of the instance you are adding. For the source instance, select China (Beijing) |
| Transit Router | CEN automatically creates a transit router. Select the primary zone and secondary zone |
| Resource Owner ID | Select Current Account |
| Attachment Name | Enter a name for the attachment |
| Network Instance | Select the VPC ID. Find the VPC ID on the Database Connection page of the instance in the ApsaraDB RDS console.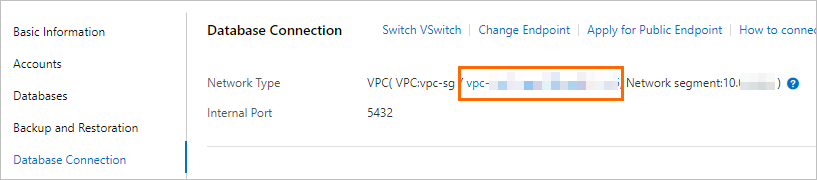 After selecting the VPC, choose the vSwitches for the primary zone and secondary zone of the transit router After selecting the VPC, choose the vSwitches for the primary zone and secondary zone of the transit router |
After adding both VPCs, the Basic Information tab looks similar to the following.![]()
1.3 Purchase a bandwidth plan
-
On the Instances page, click the ID of your CEN instance.
-
On the Basic Information tab, click the Bandwidth Plans tab, then click Purchase Bandwidth Plan (Subscription).
-
Configure the parameters and click Buy Now, then complete the payment.
| Parameter | Description |
|---|---|
| CEN ID | Retain the displayed CEN instance. The bandwidth plan is automatically associated after purchase |
| Area A | Select the area for cross-region communication. In this example, select Mainland China. Cannot be changed after purchase |
| Area B | Select the other area. In this example, select Mainland China |
| Billing Method | Retain the default value Pay-By-Bandwidth |
| Bandwidth | Specify the bandwidth. Unit: Mbit/s |
| Bandwidth Package Name | Enter a name for the bandwidth plan |
| Order time | Select a subscription duration. Optionally enable Auto-renewal |
After the purchase, the Bandwidth Plans tab looks similar to the following.![]()
1.4 Allocate bandwidth for cross-region communication
-
On the Bandwidth Plans tab, click Allocate Bandwidth for Inter-region Communication.
-
On the Connection with Peer Network Instance page, configure the parameters and click OK.
| Parameter | Description |
|---|---|
| Instance Type | Select Inter-region Connection |
| Region | Select the region of the source instance. In this example, select China (Beijing) |
| Transit Router | CEN automatically identifies the transit router in the source region |
| Peer Region | Select the region of the destination instance. In this example, select China (Hangzhou) |
| Transit Router | CEN automatically identifies the transit router in the destination region |
| Bandwidth Allocation Mode | Select an allocation method: Allocate from Bandwidth Plan or Pay-By-Data-Transfer |
| Bandwidth Plan | Select the bandwidth plan associated with your CEN instance. Required only when Bandwidth Allocation Mode is set to Allocate from Bandwidth Plan |
| Bandwidth | Enter the bandwidth. Unit: Mbit/s |
| Default Line Type | Select Platinum or Gold. Platinum is available only when Bandwidth Allocation Mode is set to Pay-By-Data-Transfer |
After the configuration succeeds, the page looks similar to the following.![]()
Step 2: Configure the source instance
2.1 Add an IP address whitelist entry
Add the CIDR block of the destination instance's VPC to the source instance's IP address whitelist. This allows the destination to connect to the source during migration.
-
Log on to the ApsaraDB RDS console. In the top navigation bar, select the destination instance's region, then click the instance ID.
-
In the left-side navigation pane, click Database Connection. Check the Network Type parameter to get the VPC CIDR block.
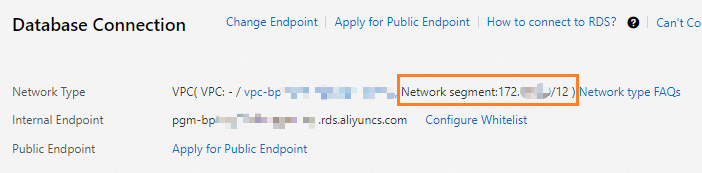
After getting the CIDR block, add it to the source instance's whitelist. For instructions, see Configure an IP address whitelist.
2.2 Create a privileged account on the source instance
The migration process requires a privileged account with the CREATE ROLE, REPLICATION, and pg_monitor permissions. If you already have one, skip this step.
To create a privileged account, see Create an account. Set Account Type to Privileged Account.
Step 3: Run a feasibility assessment
Run a feasibility assessment before migrating data. The assessment verifies that your environment meets all requirements without moving any data. The destination instance status changes to Maintaining Instance while the assessment runs.
-
Log on to the ApsaraDB RDS console. Select the destination instance's region, then click the destination instance ID.
-
In the left-side navigation pane, click Cloud Migration/DR Construction. On the page that appears, click the Feasibility assessment tab.
-
In the Configure Scenario and Source Type step, set Scenario to Migration to Cloud and Source to ApsaraDB RDS Instance. Click Next.
-
In the Configure Destination Instance step, click Next.
-
In the Configure Source Instance step, select all listed items and click Next. Complete any listed preparation items before proceeding.
-
In the Start Feasibility Assessment step, enter the source instance details.
| Parameter | Description |
|---|---|
| Migration Task Name | Auto-generated. No change needed |
| Source VPC/DNS IP | Internal endpoint of the source instance. See View and change the endpoints and port numbers |
| Port of Source Instance | Internal port number of the source instance. See View and change the endpoints and port numbers |
| Username | Username of the privileged account on the source instance |
| Password | Password of the privileged account on the source instance |
-
Click Create Feasibility Assessment Task.
After the assessment completes, check the result in the Migration to Cloud section of the Feasibility assessment tab:
-
Successful — proceed to Step 4.
-
Failed — click View Report in the Actions column to review errors. For common errors and fixes, see Introduction to cloud migration assessment reports.
Step 4: Start the migration
-
In the left-side navigation pane of the destination instance, click Cloud Migration/DR Construction. Click the Migration to Cloud tab, then click Create Cloud Migration Task.
-
In the Create Cloud Migration Task dialog box, select the successful assessment task from the Associated Assessment Task drop-down list.
-
Click Initiate Migration to Cloud.
The migration starts automatically. The destination instance status changes to Migrating Data In.
Step 5: Switch over to the destination instance
-
Click the link in the Cloud Migration Phase column to monitor task progress.
-
When the cloud migration task enters the incremental data synchronization phase, click the switchover button in the Actions column.
-
In the Switchover dialog box, stop writes to the source instance. Either configure it to accept read-only requests, or stop the connected application from writing data.
To set the source instance to read-only:
a. Set the rds_force_trans_ro_non_sup parameter to on. See Modify the parameters of an ApsaraDB RDS for PostgreSQL instance.
b. Terminate all existing sessions:
SELECT pg_terminate_backend(pid) FROM pg_stat_activity
WHERE usename not in ('replicator', 'monitor', 'pgsql', 'aurora') AND pid != pg_backend_pid();-
Select all check boxes and click Switch Now. Wait for the migration to complete.