Use ClassicLink to connect a classic network-type Elastic Compute Service (ECS) instance to an ApsaraDB RDS for PostgreSQL instance that resides in a virtual private cloud (VPC).
This topic applies when your ECS instance is in the classic network and your RDS instance is in a VPC, with both in the same region. If you can migrate your ECS instance to the same VPC as the RDS instance, that approach provides direct internal network connectivity without ClassicLink. For migration instructions, see Migrate an ECS instance from the classic network to a VPC.
Background
ApsaraDB RDS for PostgreSQL instances that use standard SSDs or enhanced SSDs (ESSDs) no longer support the classic network. If migrating your ECS instance to a VPC is not immediately feasible, ClassicLink lets a classic network-type ECS instance reach a VPC-type RDS instance over an internal network.
Prerequisites
Before you begin, make sure that:
-
The ECS instance is in the classic network
-
The RDS instance is in a VPC
-
The ECS instance and the RDS instance are in the same region
-
The private IP address of the ECS instance is added to an IP address whitelist of the RDS instance — see Configure an IP address whitelist
Connect the instances
Step 1: Enable ClassicLink on the VPC
-
Log on to the ApsaraDB RDS console and go to the Instances page. In the top navigation bar, select the region where the RDS instance resides. Find the RDS instance and click its ID.
-
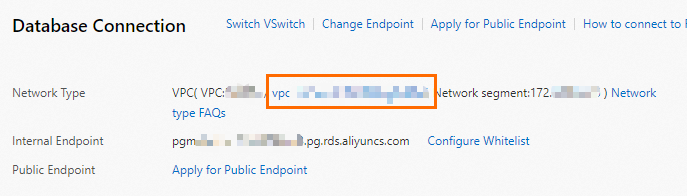
In the left-side navigation pane, click Database Connection.
-
Click the VPC ID next to Network Type to open the VPC console.
-
In the upper-right corner, click Enable ClassicLink.

-
In the confirmation dialog, click OK.
Step 2: Add a ClassicLink security group rule to the ECS instance
-
Log on to the ECS console.
-
In the left-side navigation pane, choose Instances & Images > Instances. In the top navigation bar, select the region.
-
Find the classic network-type ECS instance. In the Actions column, click the
 icon and choose Network and Security Group > Connect to VPC.
 -
In the dialog that appears, set the VPC parameter and click Confirm.
-
Click Go to the instance security group list and add ClassicLink rules.

-
In the Actions column for the security group, click .
-
On the Security Group Rules page, click Add ClassicLink Rule in the upper-right corner. Configure the rule using the parameters in the following table, then click OK.
Parameter Description Classic Security Group The security group for the classic network. Pre-populated — no action required. Select VPC The VPC where you want to add the rule. VPC-type Security Groups The security groups in the VPC to connect to. Mode The direction of access. Select Classic <=> VPC (recommended) to allow bidirectional access between the classic network and the VPC. Alternatively, select Classic Network => VPCs for one-way access from the classic network to the VPC, or VPCs => Classic Network for one-way access from the VPC to the classic network. Protocol Type The protocol used in communication. Defaults to Custom TCP — no change required. Port Range The port range in xx/xxformat. To allow the default PostgreSQL port, enter5432/5432.Priority The rule priority. A lower value means higher priority. Example: 1.Description An optional description of the rule. 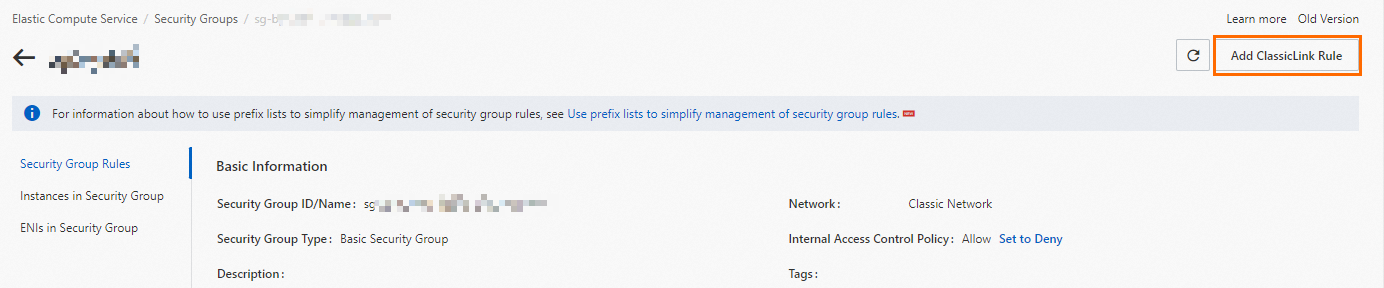
Step 3: Connect to the RDS instance
-
Make sure that the PostgreSQL client is installed on the ECS instance and that a database account exists on the RDS instance.
-
From the ECS instance, run the following command to connect to the RDS instance using the internal endpoint:
psql \
  --host=<internal-endpoint> \
  --port=<port-number> \
  --username=<database-account> \
  --dbname=<database-name>
Replace the placeholders with the actual values:
Placeholder Description <internal-endpoint>The internal endpoint of the RDS instance, available on the Database Connection page in the RDS console <port-number>The port number of the RDS instance (default: 5432)<database-account>The database account name <database-name>The name of the database to connect to For details on connecting to an RDS instance, see Connect to an ApsaraDB RDS for PostgreSQL instance.
Troubleshooting
If the connection fails, check the following:
-
ClassicLink is enabled on the VPC — Go to the VPC console and confirm that ClassicLink shows as enabled for the VPC where the RDS instance resides.
-
Security group rule is configured correctly — Verify that the ClassicLink rule on the ECS security group includes port
5432and uses the Classic <=> VPC mode. -
ECS private IP address is in the RDS whitelist — On the Database Connection page of the RDS console, check that the private IP address of the ECS instance is listed in the IP address whitelist.
-
ECS and RDS instances are in the same region — ClassicLink does not work across regions.
-
Port number matches — Confirm that the port in the security group rule and the
psqlcommand matches the port configured on the RDS instance.