Configure an SSL certificate for your RDS Supabase instance to encrypt traffic on port 443 and protect data in transit from man-in-the-middle (MITM) attacks.
Prerequisites
Before you begin, ensure that you have:
-
An RDS Supabase instance in the Running state. To create one, see Create an RDS Supabase project
-
An SSL certificate file and a matching private key file, both bound to the public IP address of the instance:
-
Production environment (recommended): Purchase or request an SSL certificate from a trusted Certificate Authority (CA). Use the RSA 2048-bit encryption algorithm for best compatibility. The certificate file uses a
.pemor.crtextension; the private key file uses a.keyextension. -
Test environment: Generate a self-signed certificate using a tool such as
mkcert. Self-signed certificates are not trusted by browsers or external clients and must not be used in production.
-
Before you start
Configuring or updating an SSL certificate triggers an automatic instance restart. This causes a brief service interruption, typically lasting several minutes. Perform this operation during off-peak hours or a scheduled maintenance window.
Step 1: Get the public IP address
-
Log on to the RDS Console. In the left-side navigation pane, click AI App Development Supabase.
-
In the top navigation bar, select a region, then click the instance ID to open the Basic Information page.
-
In the Network Information section, find and record the Outside the network connection address. Use the IP address from this endpoint when generating the certificate.
Step 2: Prepare an SSL certificate (for testing)
The self-signed certificate described in this section is for demonstration purposes only. In a production environment, use a valid certificate from a trusted CA.
The following steps generate a self-signed certificate for the instance's public IP address using mkcert on your local machine.
-
Install
mkcert. For example, on macOS using Homebrew:brew install mkcert -
Install a local CA and generate a root certificate. This adds the root certificate to your system's trust store so that certificates you generate are trusted on your local machine.
mkcert -install -
Generate a certificate for the public IP address of the instance. Replace
<your_public_ip_address>with the actual IP address, excluding the port number.mkcert 127.0.0.1 <your_public_ip_address> ::1 localhost my-dev.localExample:
mkcert 127.0.0.1 47.98.xx.xx ::1 localhost my-dev.localAfter the command completes, the certificate and private key are saved as./127.0.0.1+4.pemand./127.0.0.1+4-key.pem.
Step 3: Configure the SSL certificate
-
Return to the Basic Information page of the instance.
-
In the Network Information section, find SSL Encryption and click SSL Encryption.
-
In the SSL settings dialog box, fill in the following fields:
Field Description Server certificate Paste the full contents of your certificate file (for example, 127.0.0.1+4.pem).Server certificate private key Paste the full contents of your private key file (for example, 127.0.0.1+4-key.pem). -
Verify the information, then click OK.
After you submit, the instance restarts automatically to apply the SSL settings. A brief service interruption occurs during the restart.
Step 4: Configure an IP whitelist
Add client IP addresses to the instance's whitelist so they can connect.
-
On the Basic Information page, go to the White list information section.
-
Select a whitelist group and click Modify, or click Create Whitelist.
-
In the White list IP address: field, enter the IP addresses or CIDR blocks to allow. For example,
0.0.0.0/0allows connections from all IP addresses.Warning0.0.0.0/0poses a security risk. Use it in test environments only. -
Click OK.
Step 5: Verify HTTPS access
-
Wait for the instance status to return to Running.
-
Return to the Basic Information page. In the Network Information section, the Outside the network connection address field now includes a port 443 link starting with
https.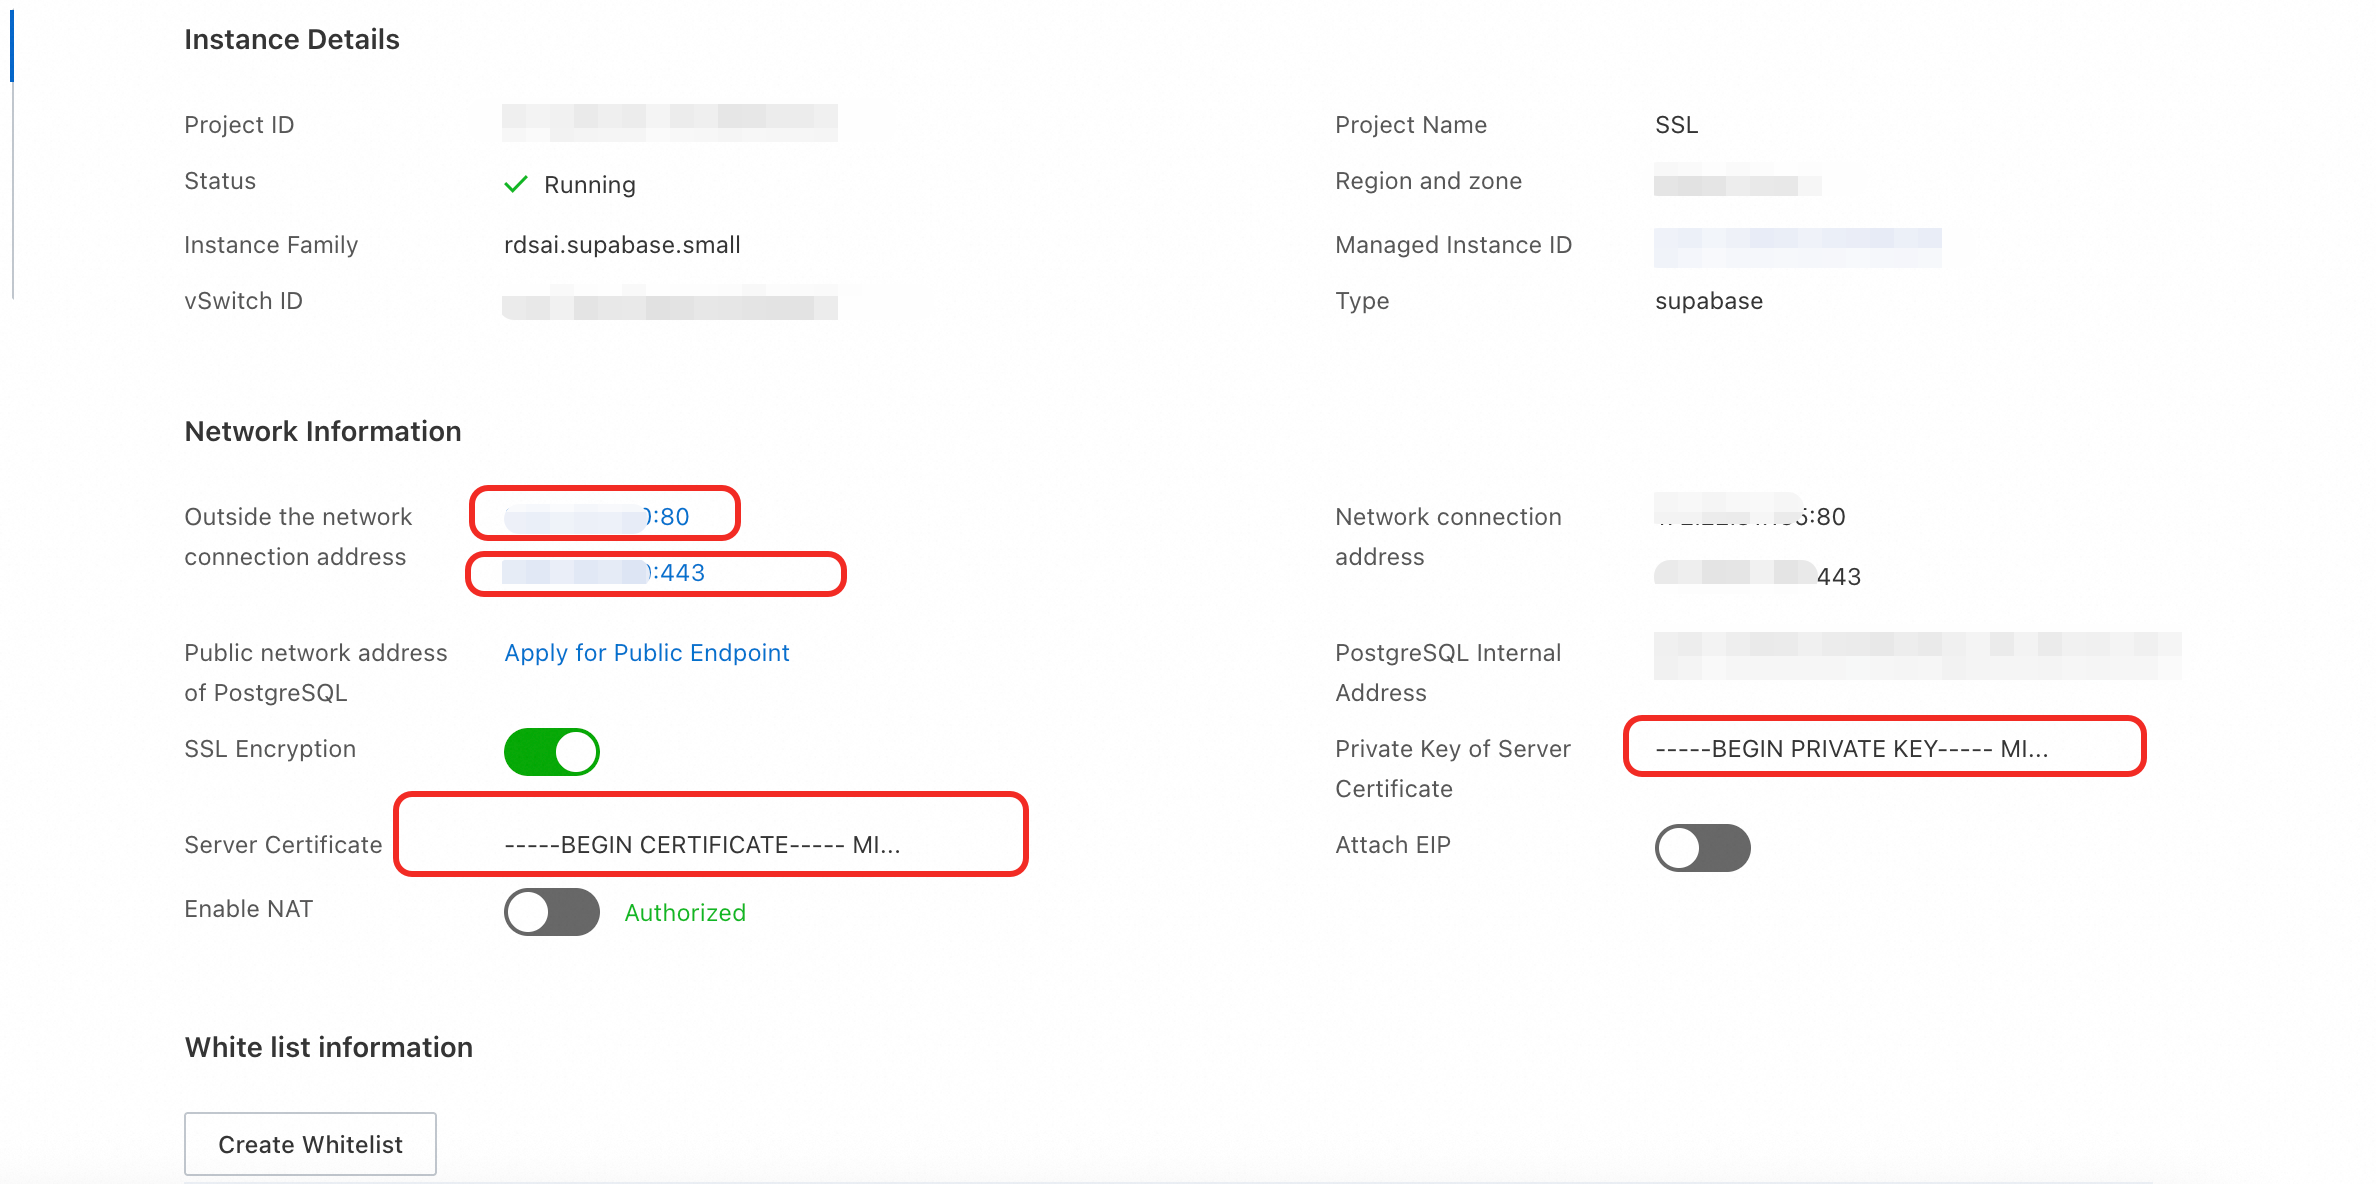
-
Click the HTTPS link.
-
If you are using a CA-issued certificate, the browser opens the Supabase welcome page directly.
-
If you are using a self-signed certificate, the browser displays a security warning such as "Your connection is not private". Click Proceed to the address (exact wording varies by browser) to continue.
-
-
Click the original HTTP link to confirm that access over port 80 is still available.
Billing
-
RDS Supabase instance fees: Charged based on instance specifications and subscription duration.
-
SSL certificate fees: Enabling SSL on the instance does not incur additional costs. Commercial CA-issued certificates require a separate purchase; self-signed and free certificates are available at no cost.
Risks and mitigations
| Risk | Impact | Mitigation |
|---|---|---|
| Service interruption during configuration | Brief downtime (typically several minutes) | Perform the operation during off-peak hours or a maintenance window |
| Certificate and private key mismatch | HTTPS fails to start | Verify that the certificate and key match before uploading |
| Certificate expiration | HTTPS access is interrupted | Monitor the expiration date and renew the certificate before it expires |
| Self-signed certificate in production | No valid authentication; users may ignore browser warnings | Use only CA-issued certificates in production environments |