Resource Access Management (RAM) user groups are physical identities. You can create RAM user groups to classify RAM users and grant permissions to the RAM users that have the same responsibilities. This simplifies the management of RAM users and their permissions.
Step 1: Create a RAM user group
Log on to the RAM console as a RAM administrator.
In the left-side navigation pane, choose .
On the Groups page, click Create User Group.

On the Create Group page, configure the Group Name, Display Name, and Note parameters.
Click OK.
Step 2: Add RAM users to the RAM user group
Log on to the RAM console as a RAM administrator.
In the left-side navigation pane, choose .
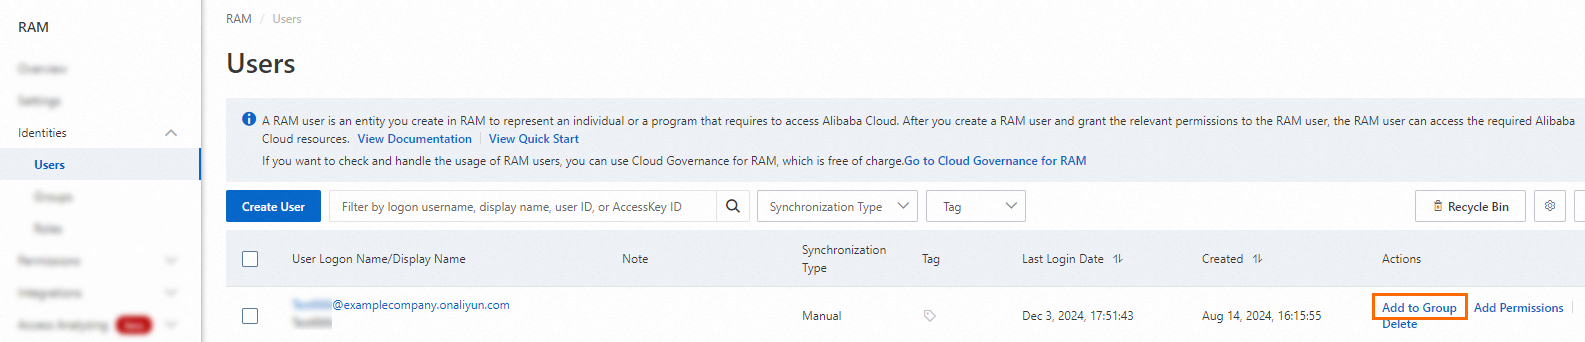
On the Users page, find the RAM user that you want to manage and click Add to Group in the Actions column.
In the Add Group Members panel, select a RAM user group that you want to add the RAM user. The information about the RAM user is automatically filled in.
Click OK.
On the page that appears, click Done.
Step 3: (Optional) Create a custom policy
RAM provides system policies and custom policies. System policies are provided by Alibaba Cloud and cannot be modified. If system policies cannot meet your business requirements, you can create a custom policy to implement fine-grained access control.
You can create a custom policy by using different methods. In this example, a custom policy is created on the Visual editor tab. For more information, see Create a custom policy.
Log on to the RAM console as a RAM user who has administrative rights.
In the left-side navigation pane, choose .
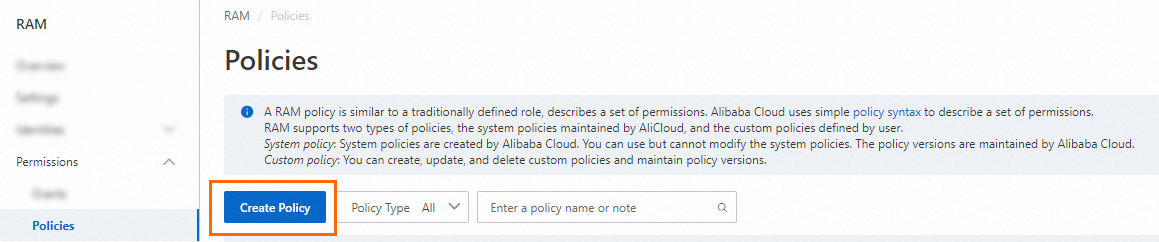
On the Policies page, click Create Policy.
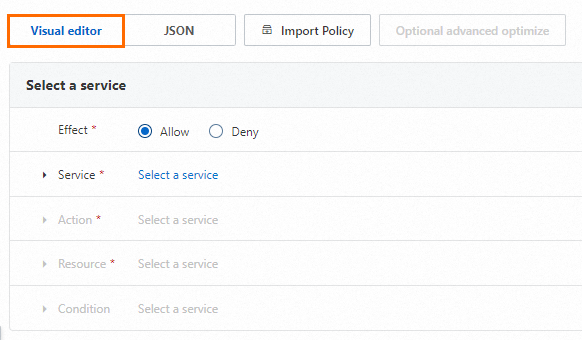
On the Create Policy page, click the Visual editor tab.
Configure a policy.
For more information, see Policy elements.
In the Effect section, select Allow or Deny.
In the Service section, select an Alibaba Cloud service.
NoteThe Alibaba Cloud services that you can select are displayed in the Service section.
In the Action section, select All action(s) or Select action(s).
The system displays the actions that can be configured based on the Alibaba Cloud service you select in the previous step. If you select Select action(s), you must select actions.
In the Resource section, select All resource(s) or Specified resource(s).
The system displays the resources that can be configured based on the actions you select in the previous step. If you select Specified resource(s), you must click Add resource to configure one or more Alibaba Cloud Resource Names (ARNs) of resources. You can also click Match all to select all resources for each action that you select.
NoteThe resource ARNs that are required for an action are tagged with Required. We strongly recommend that you configure the resource ARNs that are tagged with Required. This ensures that the custom policy takes effect as expected.
In the Condition section, click Add condition to configure a condition.
Conditions include Alibaba Cloud common conditions and service-specific conditions. The system displays the conditions that can be configured based on the Alibaba Cloud service and the actions that you select. You need only to select a condition key and configure the Operator and Value parameters.
Click Add statement and repeat the preceding steps to configure multiple custom policy statements.
Click Optional advanced optimize in the upper part. In the Optional advanced optimize message, click Perform to optimize the policy.
The system performs the following operations during the advanced optimization:
Split resources or conditions that are incompatible with actions.
Narrow down resources.
Deduplicate or merge policy statements.
On the Create Policy page, click OK.
In the Create Policy dialog box, configure the Name and Description parameters and click OK.
Step 4: Grant permissions to the RAM user group
When you grant permissions to a RAM user group, we recommend that you grant only the required permissions to the RAM user group based on the principle of least privilege.
Log on to the RAM console as a RAM administrator.
In the left-side navigation pane, choose .
On the Groups page, find the RAM user group that you want to manage and click Add Permissions in the Actions column.

You can also select multiple RAM user groups and click Add Permissions in the lower part of the page to grant permissions to the RAM user groups at a time.
In the Grant Permission panel, grant permissions to the RAM user group.
Configure the Resource Scope parameter.
Account: The authorization takes effect on the current Alibaba Cloud account.
Resource Group: The authorization takes effect on a specific resource group.
NoteIf you select Resource Group for the Resource Scope parameter, make sure that the required cloud service supports resource groups. For more information, see Services that work with Resource Group.
Configure the Principal parameter.
The principal is the RAM user group to which you want to grant permissions. The current RAM user group is automatically selected.
Configure the Policy parameter.
A policy contains a set of permissions. You can select multiple policies at a time.
System policies: policies that are created by Alibaba Cloud. You can use but cannot modify these policies. Version updates of the policies are maintained by Alibaba Cloud. For more information, see Services that work with RAM.
NoteThe system automatically identifies high-risk system policies, such as AdministratorAccess and AliyunRAMFullAccess. We recommend that you do not grant unnecessary permissions by attaching high-risk policies.
Custom policies: You can manage and update custom policies based on your business requirements. You can create, update, and delete custom policies. For more information, see Create a custom policy.
Click Grant permissions.
Click Close.