Quick BI provides a Lark mini program that allows users to view reports on mobile devices. Lark administrators can enable this mini program for their enterprise. After employees bind the mini program or are added as members of a Quick BI organization, they can view reports in the Lark mobile app. This topic describes how an enterprise administrator can enable the Lark mini program and authorize its Application Programming Interface (API) in Quick BI.
Prerequisites
You must be a Lark administrator and have downloaded and registered for Lark.
Limitations
Because of Lark's limitations, the total number of API calls for the Lark Basic Free Edition is limited to 10,000 per month, effective October 31, 2024. If this call volume is insufficient, you can upgrade to another Lark version to increase the call limit.
Quick BI supports adding multiple authorized enterprises. This is useful for scenarios where users from multiple independent entities, such as subsidiaries or branches, need to access the same Quick BI instance. You can add up to five authorized enterprises. The default is one. To add more enterprises, contact Quick BI staff to enable this feature.
You cannot connect to both Feishu and Lark enterprises at the same time.
Procedure
On the Lark API Authorization page, click Add Authorization. In the Add New Authorization dialog box, follow these steps to authorize the enterprise.
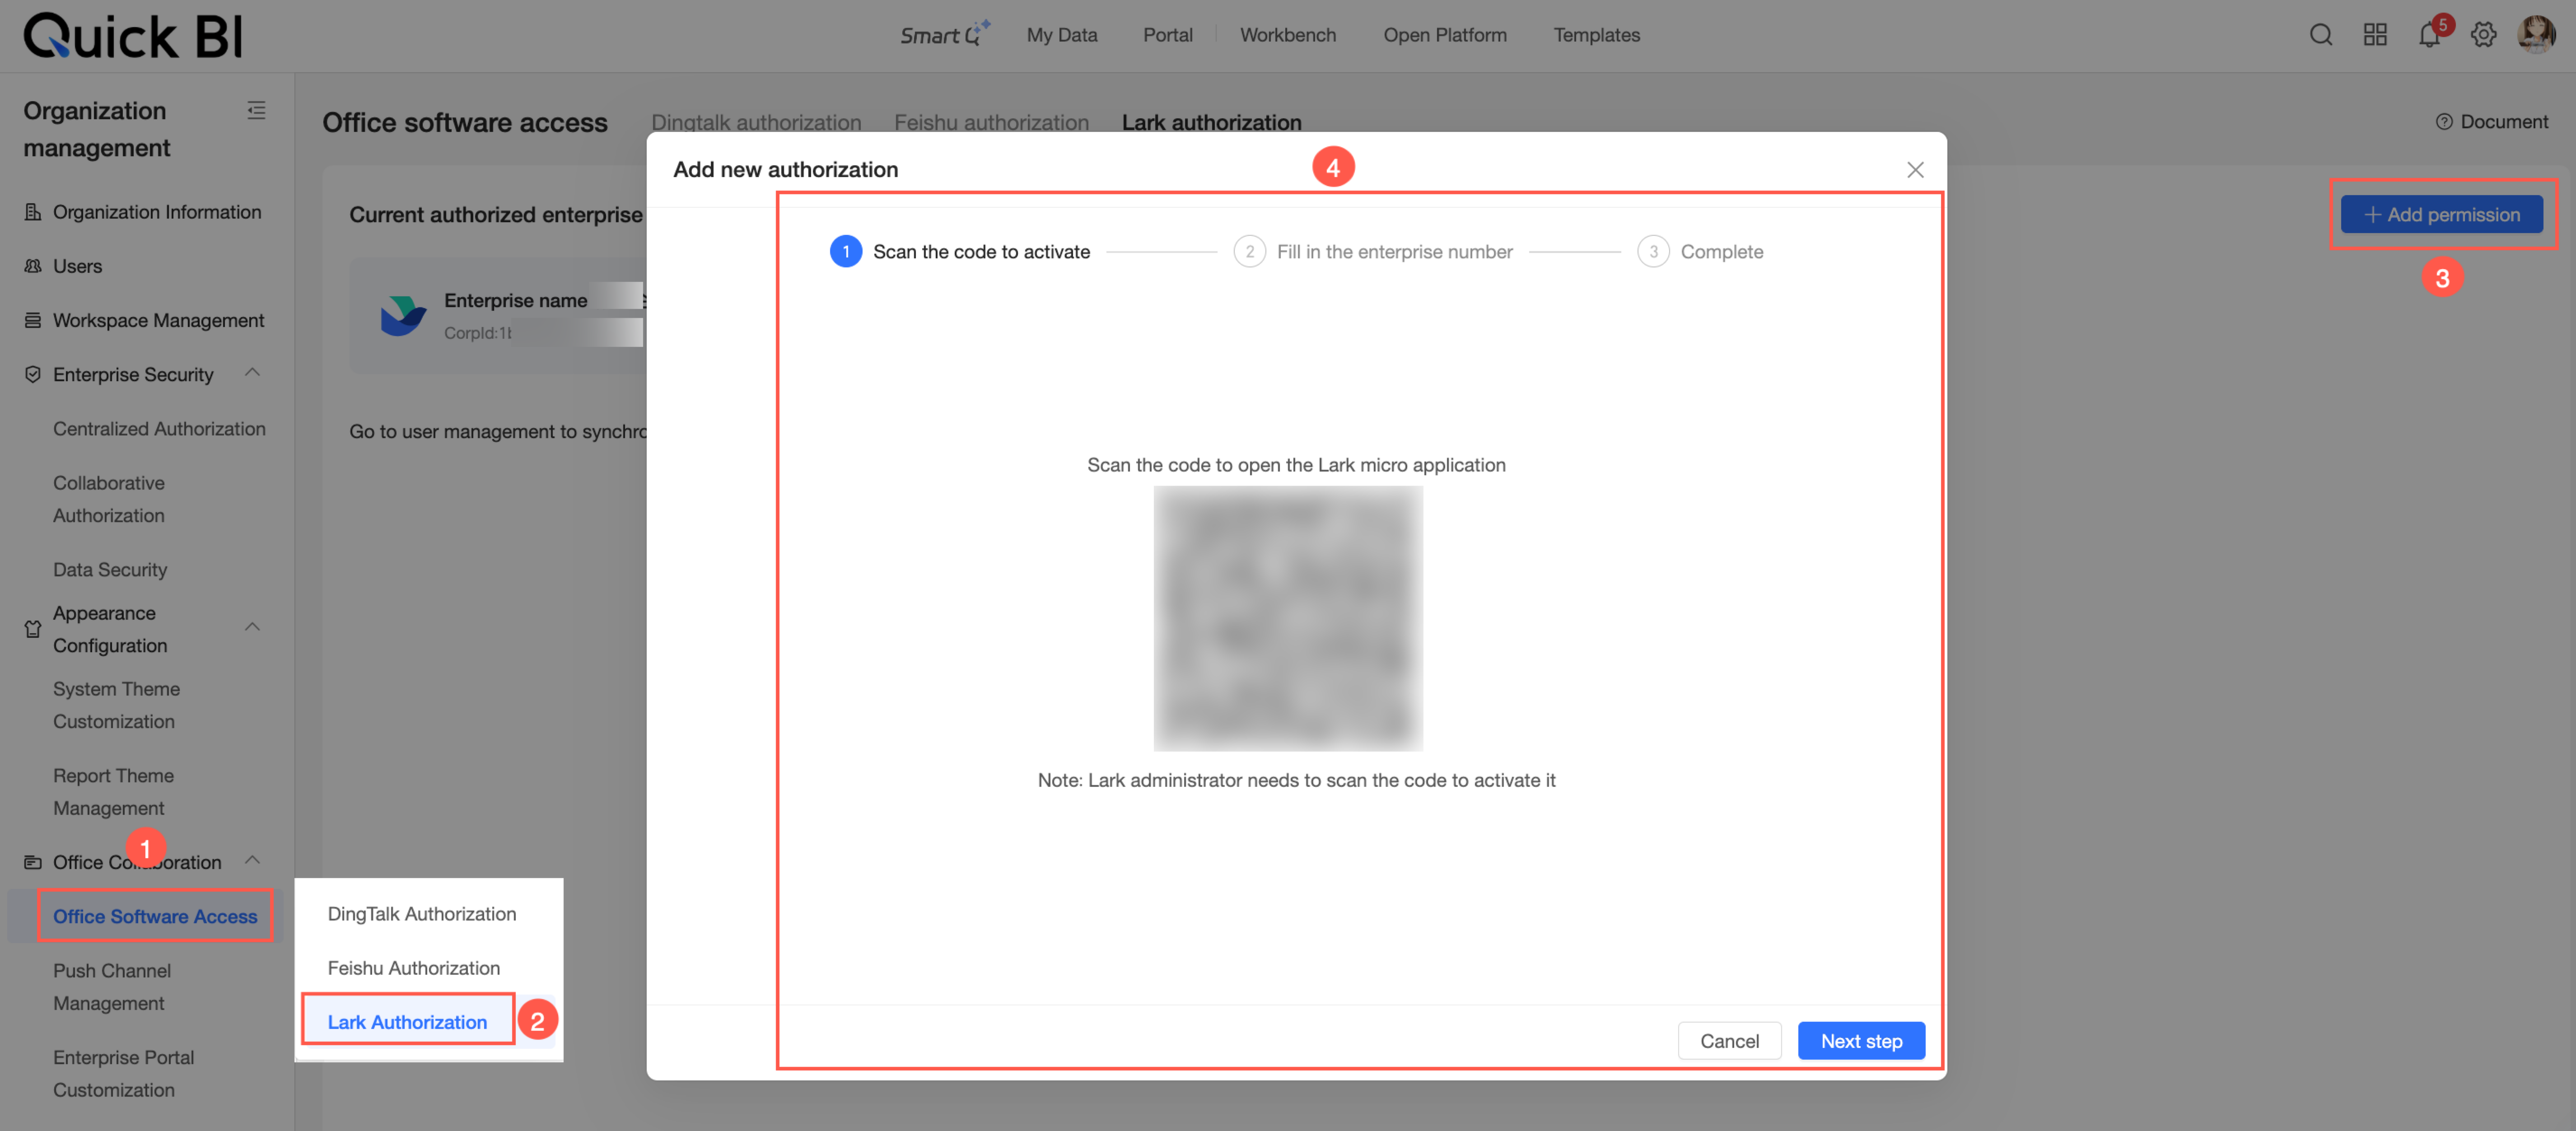
Step 1: Enable the Quick BI mini program
Open the Lark mobile app and scan the QR code in the Add New Authorization dialog box.
NoteThe QR code to enable the application is different for public cloud sites and the Alibaba Cloud International Website. Use the QR code for your environment.
On the Application Details page, click Get to install the application.
Step 2: Authorize the Lark API
After the mini program is installed, click Next in the Add New Authorization dialog box. The process proceeds from the Scan to Enable step to the Enter Enterprise ID step.
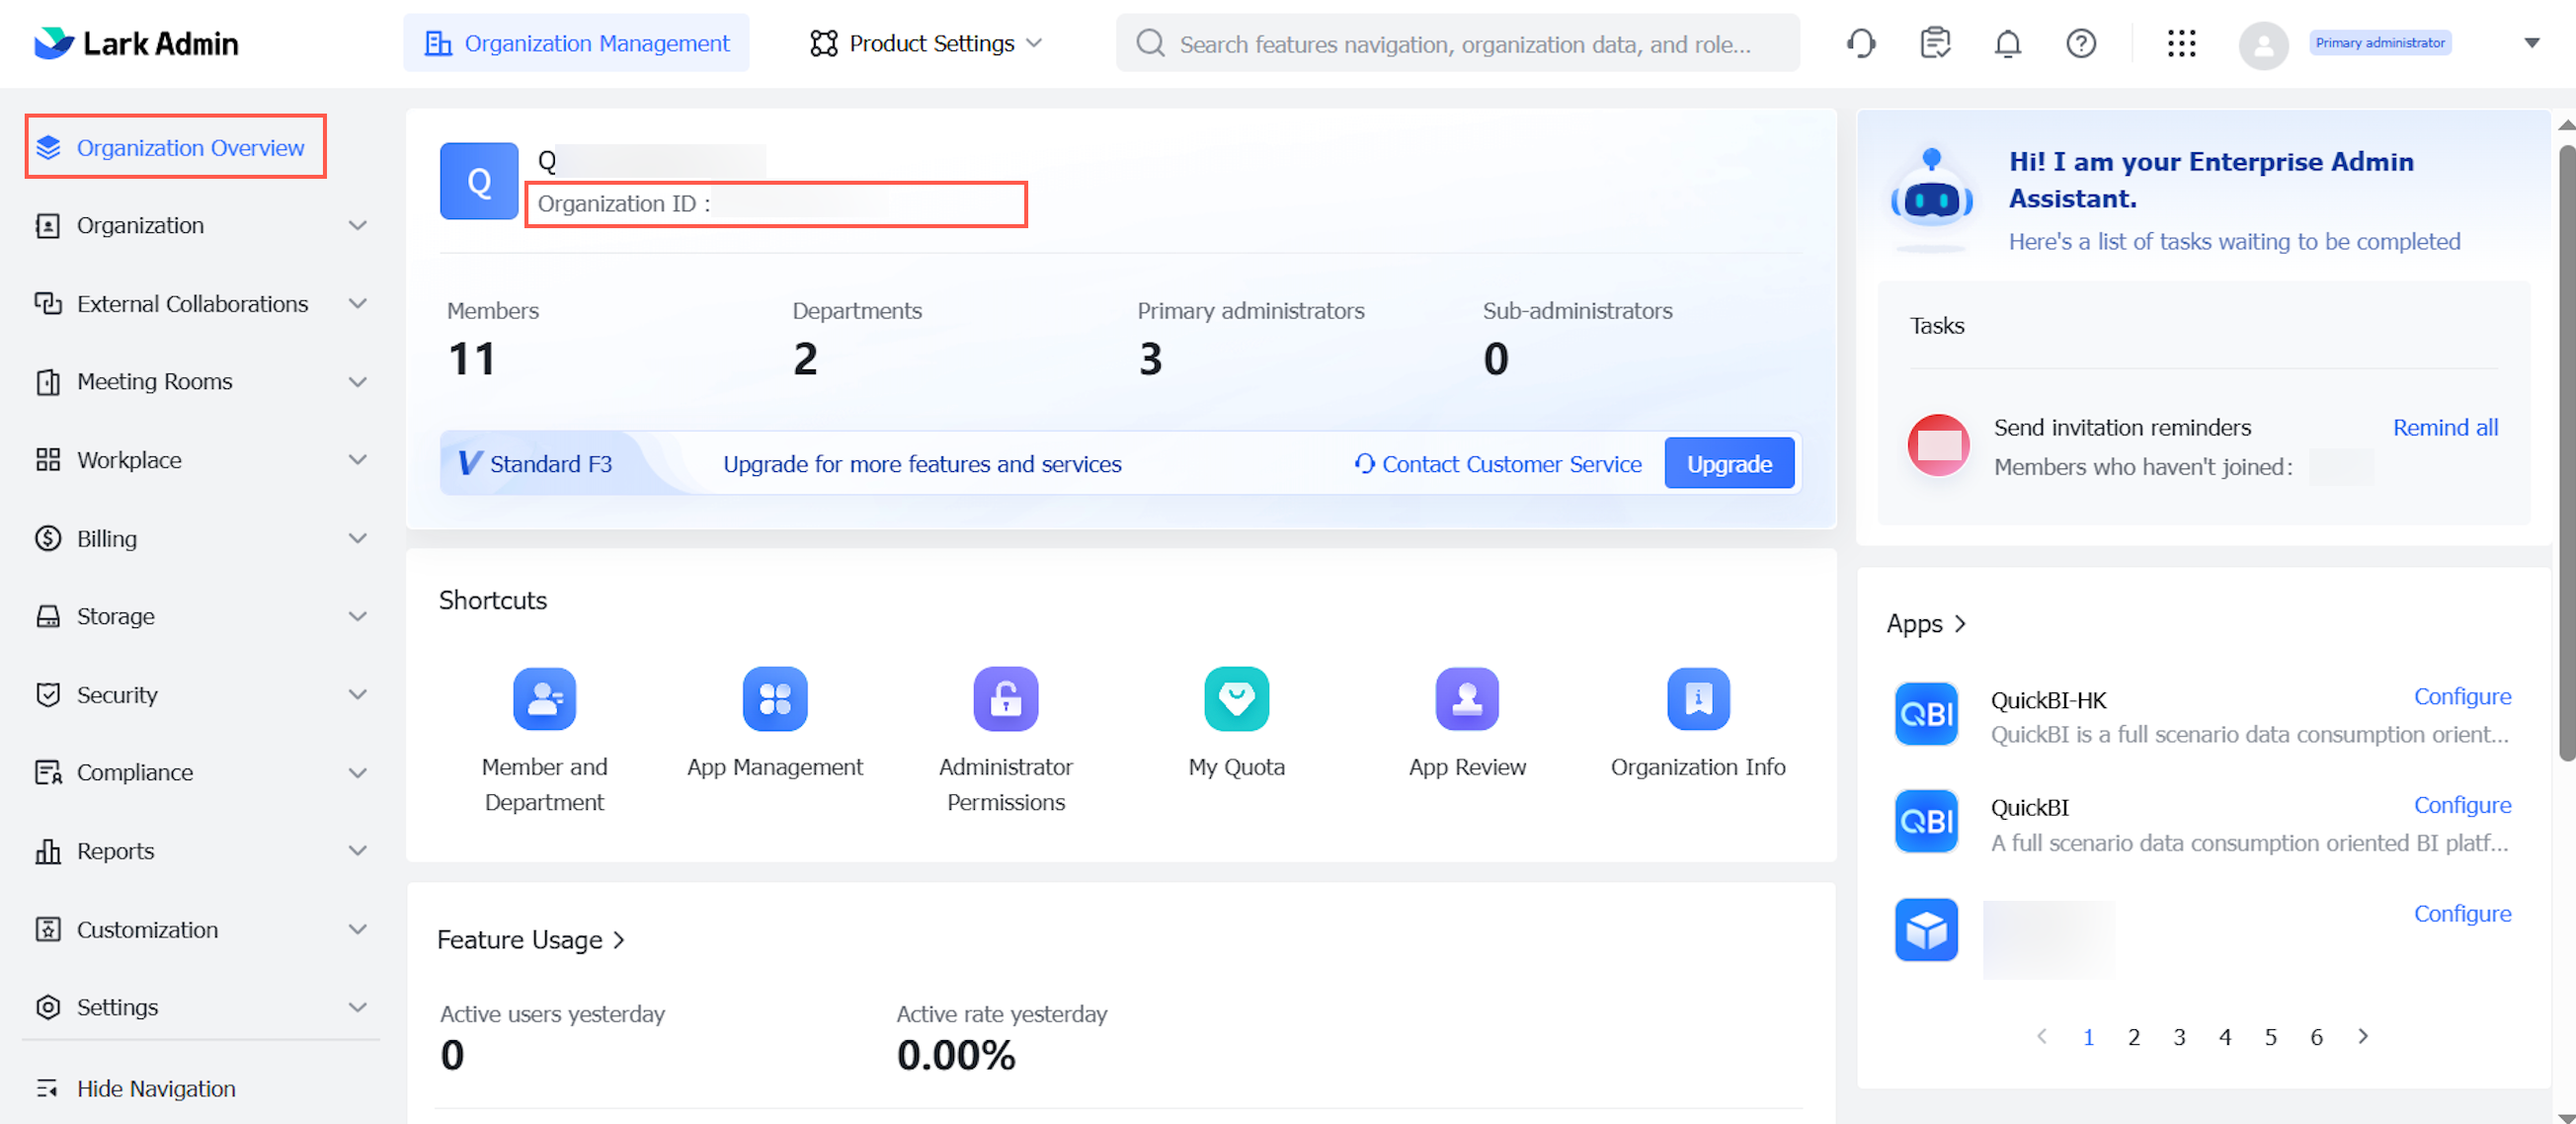
Obtain the enterprise ID of the current Lark enterprise
Log on to the Lark admin console as an administrator. On the Enterprise Overview page, obtain the Enterprise ID of the current enterprise.
Enter the enterprise ID
In the Add New Authorization dialog box, enter the Enterprise ID you obtained into the Enterprise ID text box and click Verify. The system automatically detects and displays the name of the current organization.
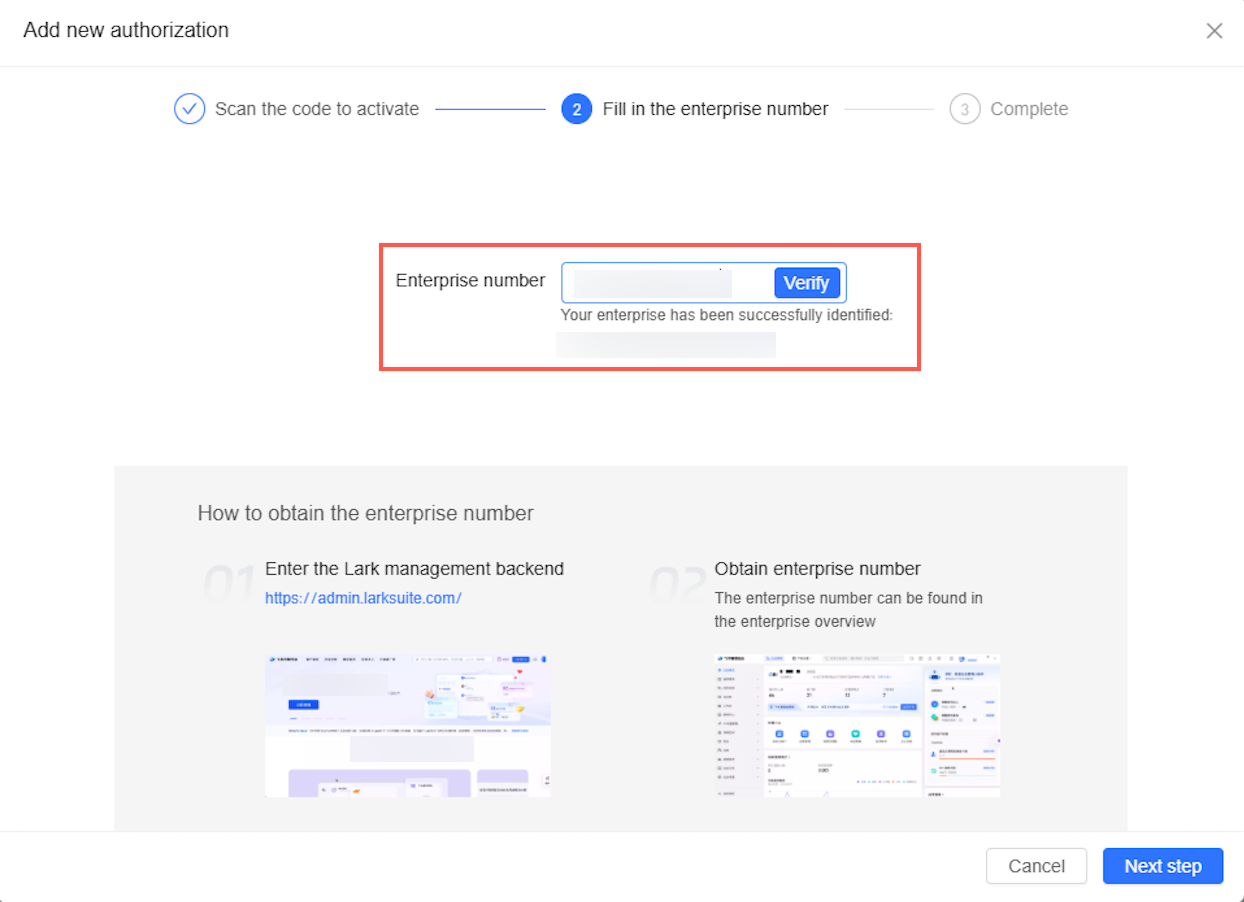
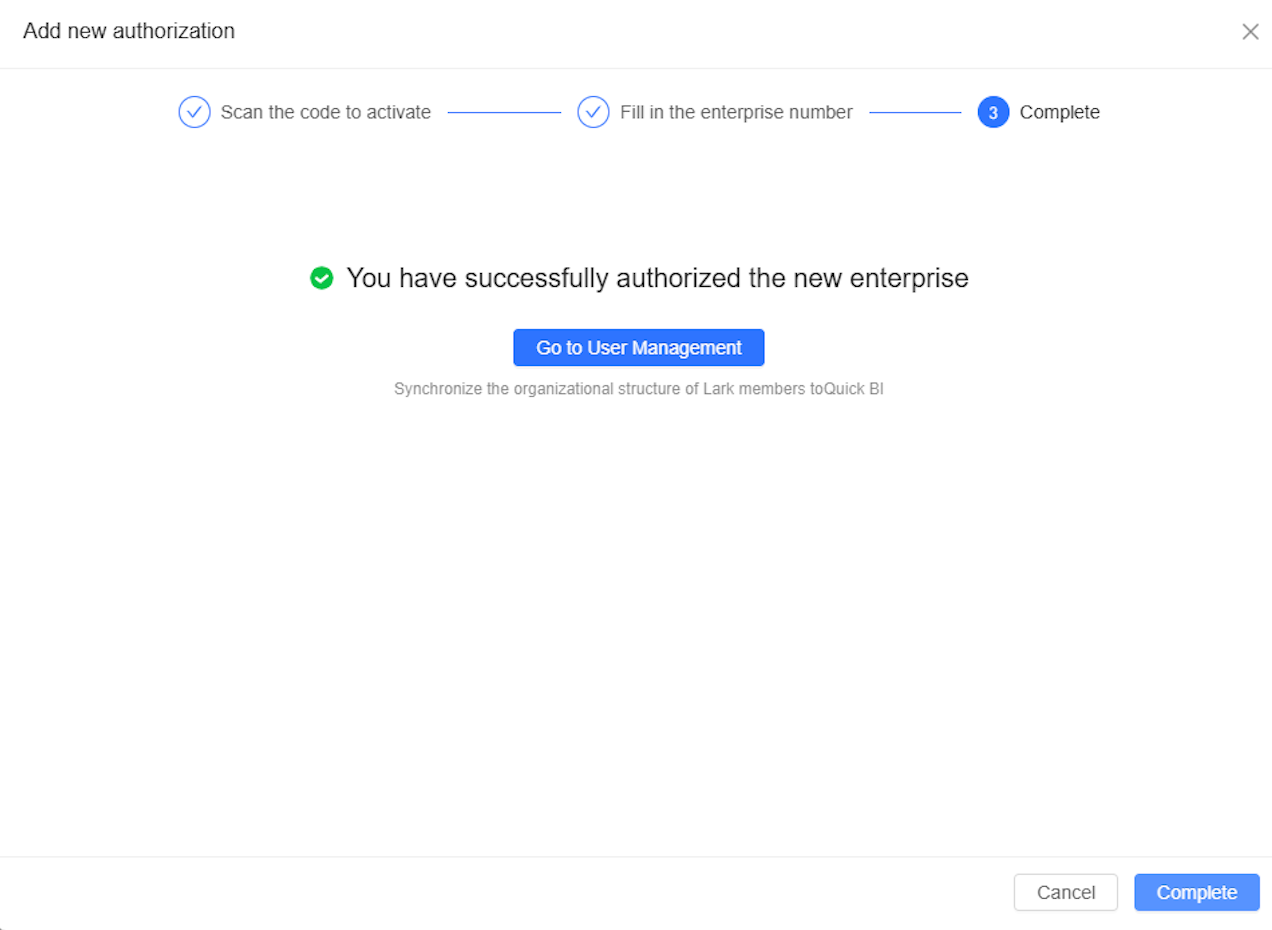
Confirm that the organization is correct and click Next to authorize the new enterprise.
The Lark organization's information is then synchronized to Quick BI. Click Go to User Management to open the Member Management page and synchronize the organization's members. For more information, see Add a Lark account.
Step 3: Configure the mini program
Accounts synchronized from office software, such as DingTalk, Feishu, or Lark, can create and edit reports in the PC mini program if they have editing permissions.
Currently, the mini program can only be opened in the Workbench.
What to do next
After you authorize an enterprise, you can unauthorize enterprises or synchronize Lark members.
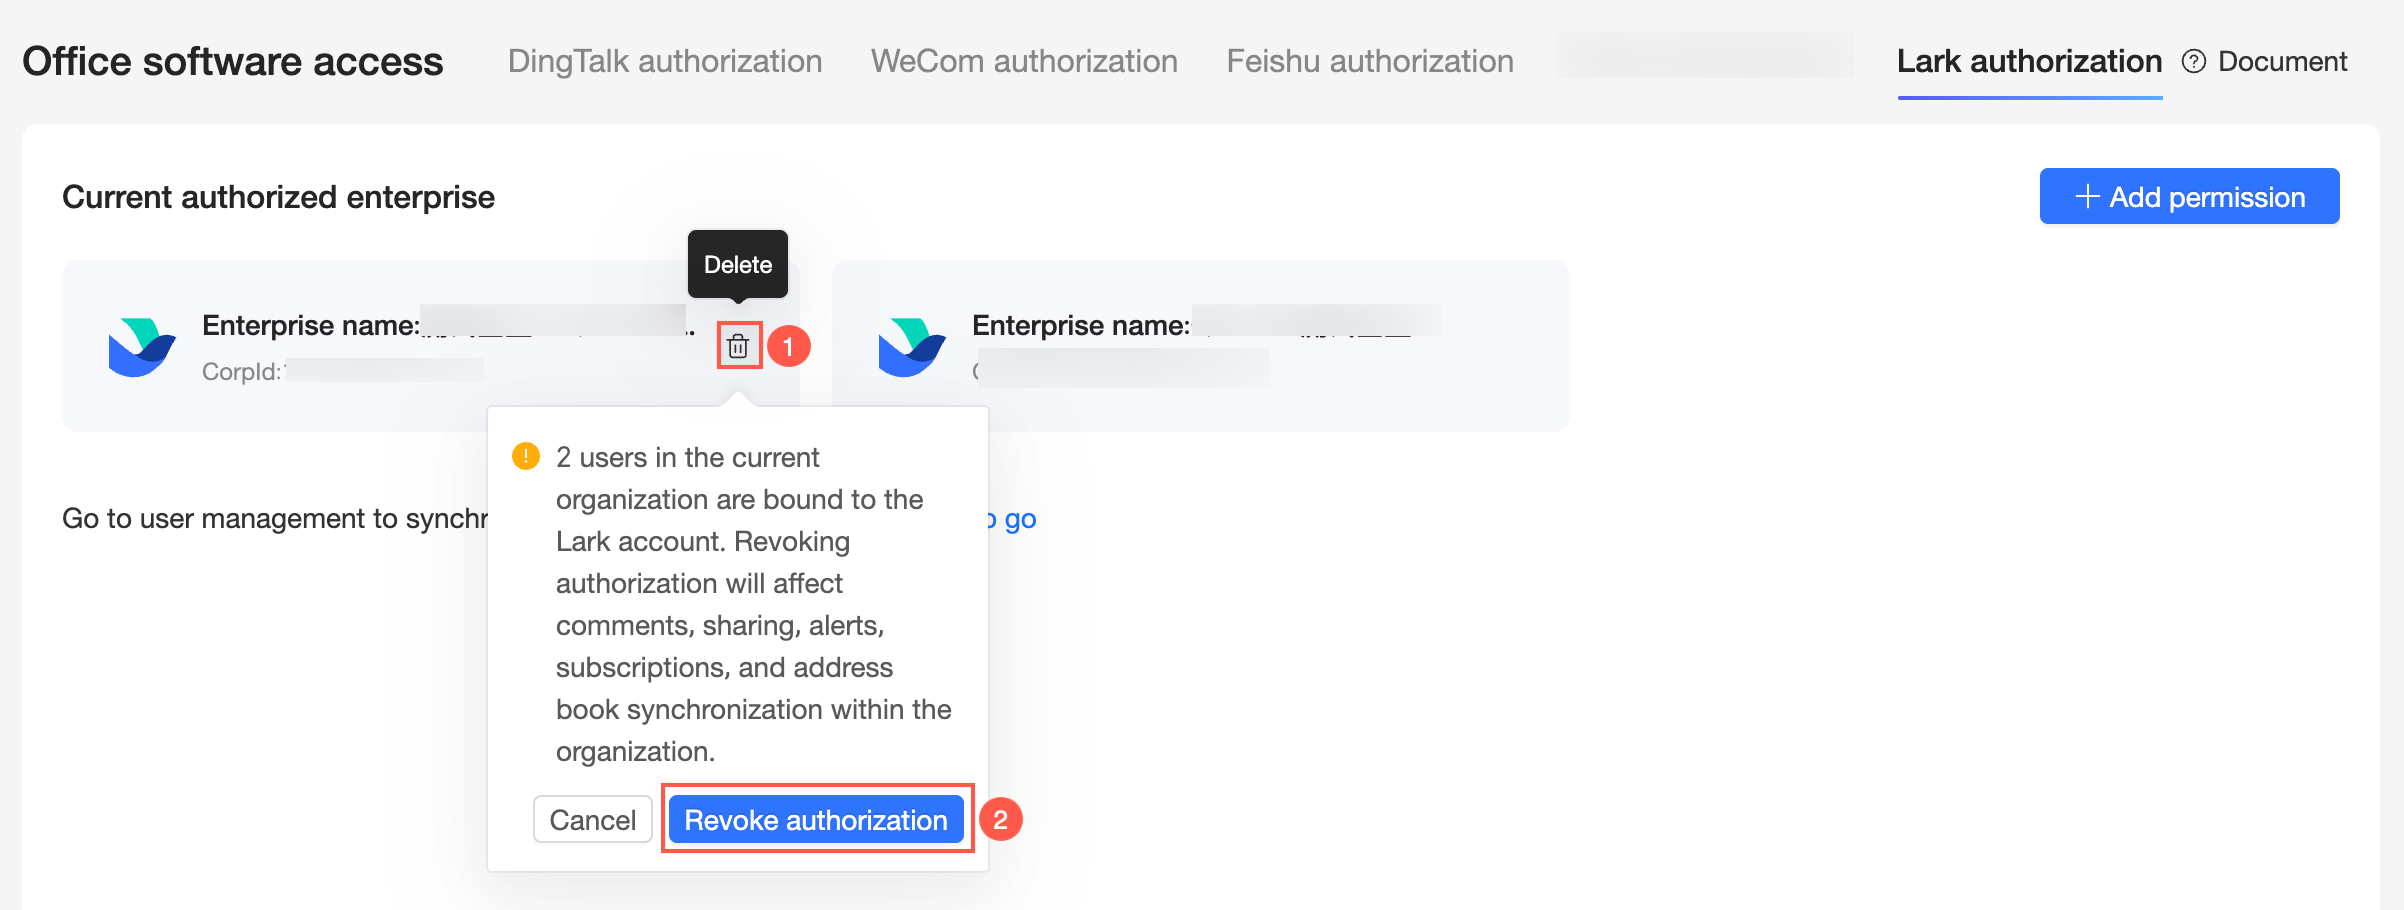
Unauthorize an enterprise
Click the ![]() icon on the right of the target enterprise card. In the dialog box that appears, click Unauthorize.
icon on the right of the target enterprise card. In the dialog box that appears, click Unauthorize.
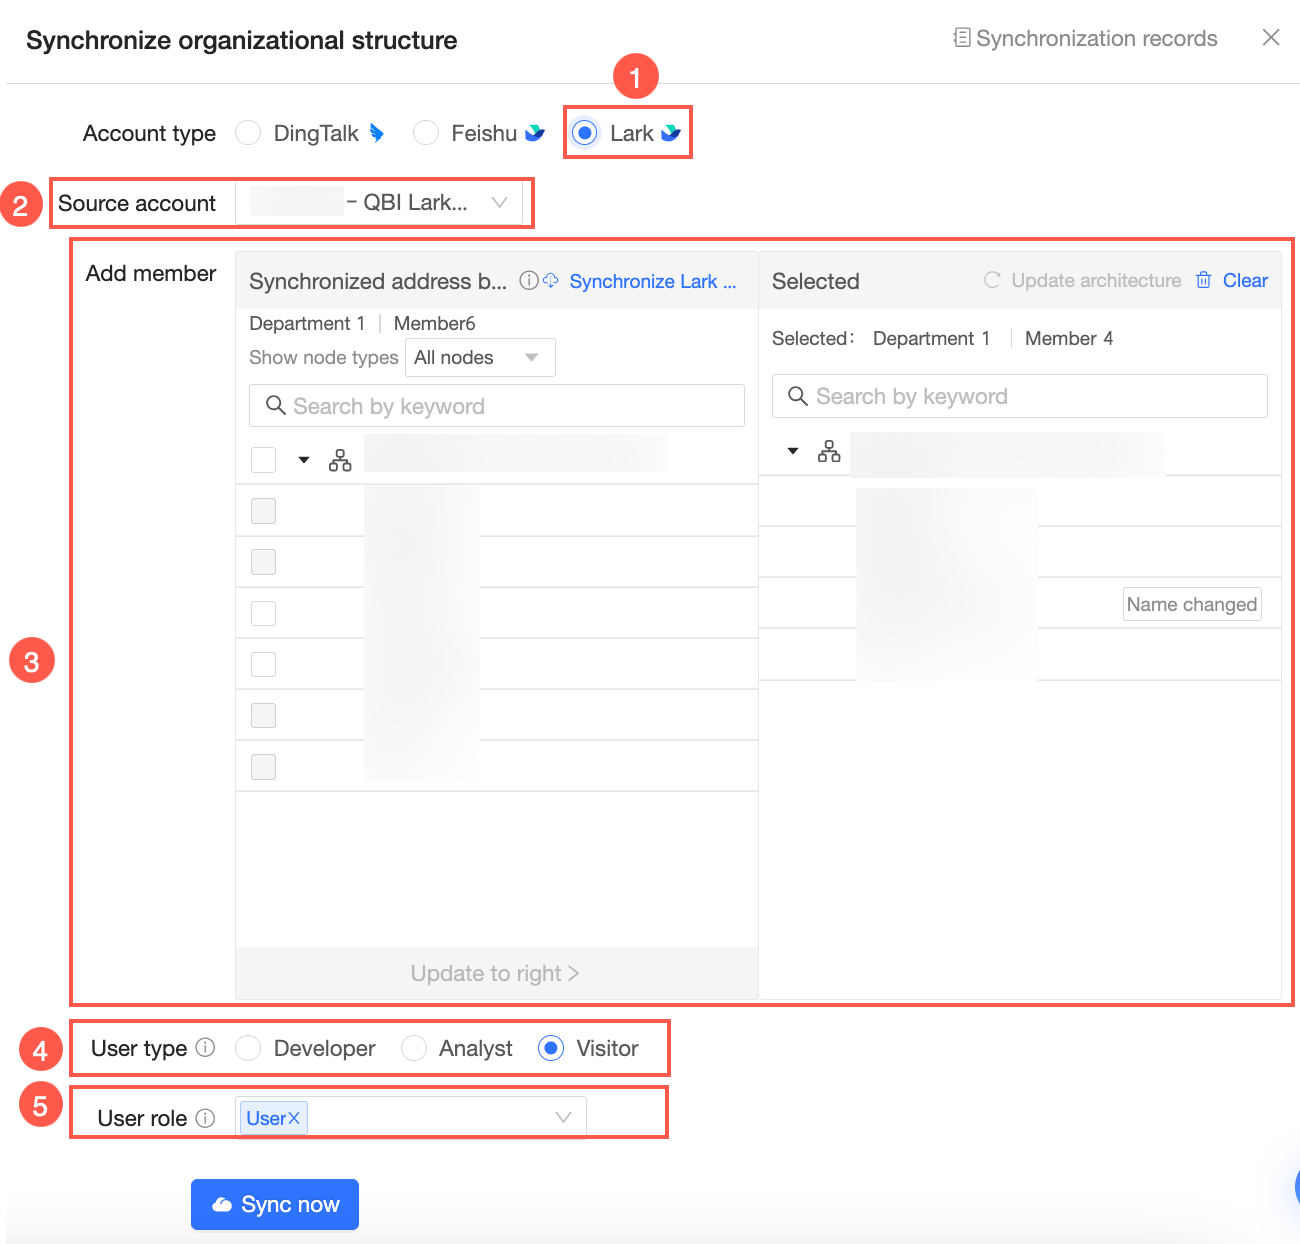
Synchronize Lark members
Navigate to Add User and select Sync from Office Software to add Lark accounts.
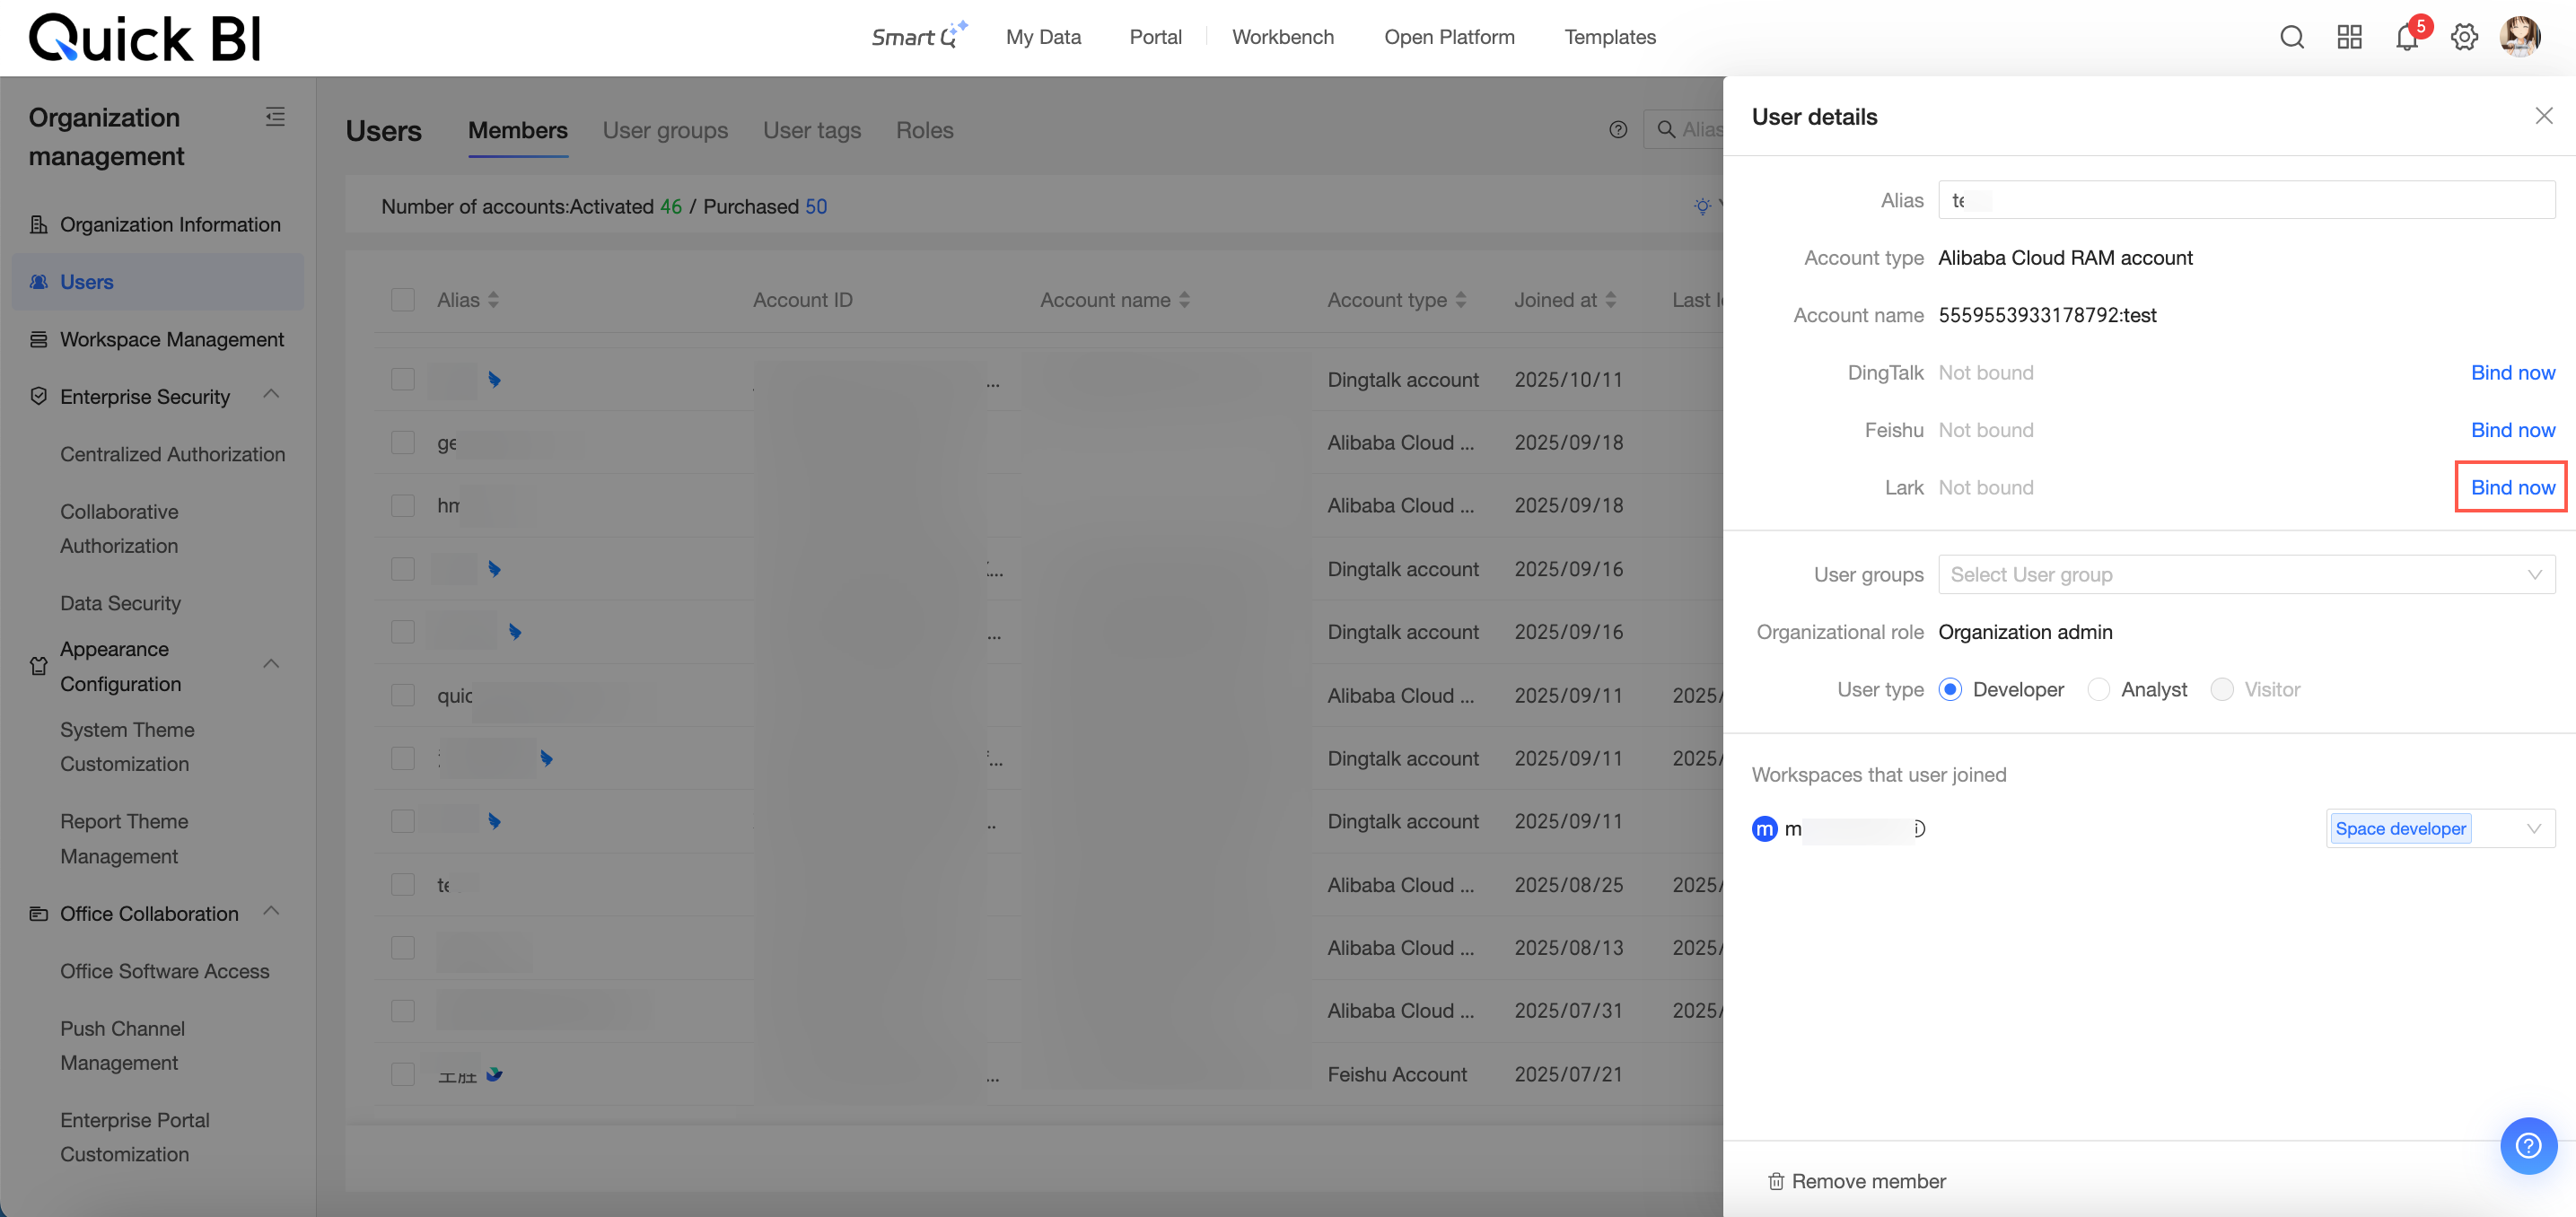
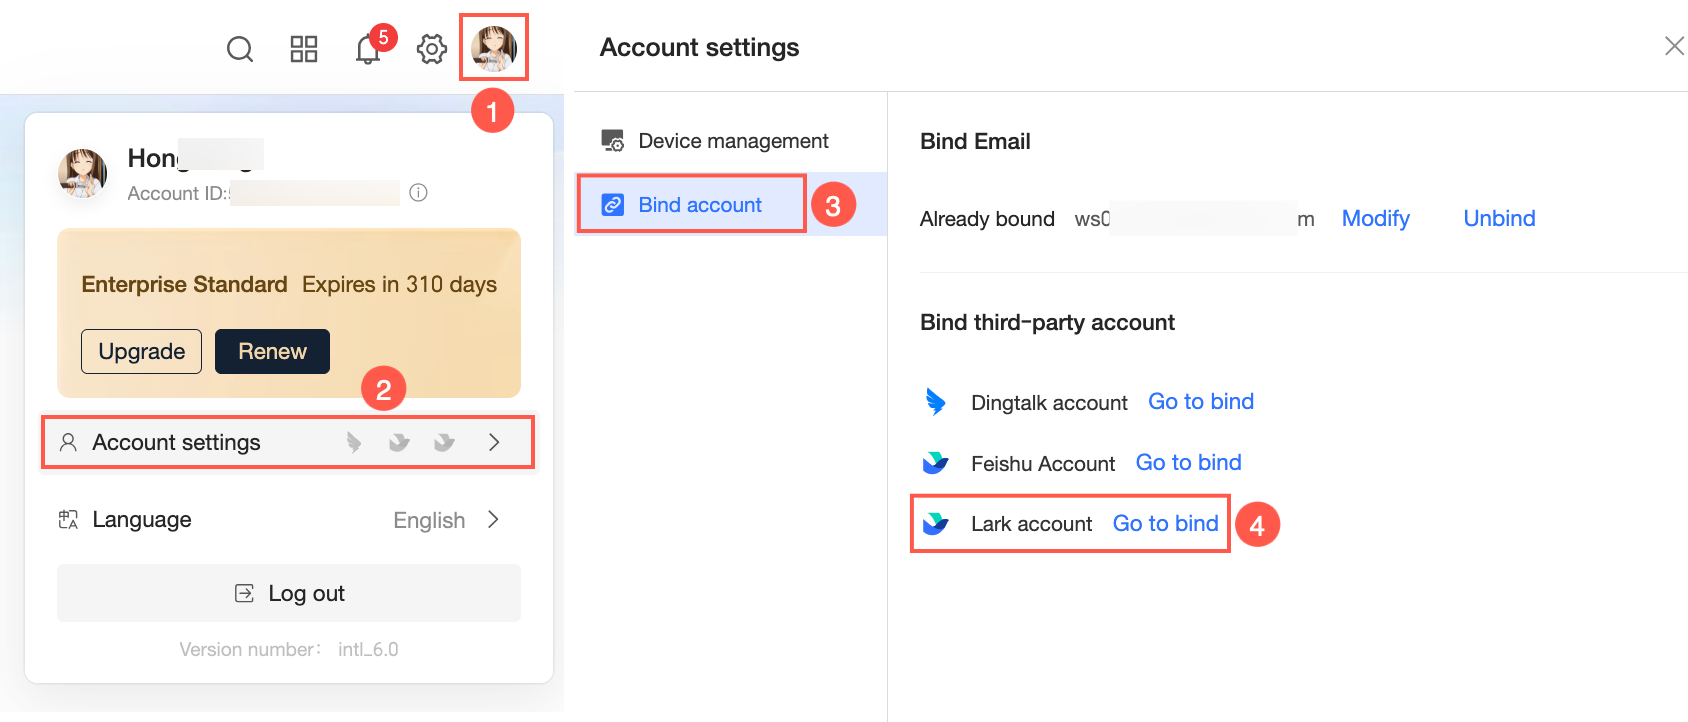
Bind a Lark account
After the Lark API is authorized, go to Personal Settings. Scan the QR code for Bind [Lark] Account to bind your account.
 An organization administrator can bind Lark accounts for other users on the Member Management page.