This topic describes how an organization administrator can add one or more Lark accounts to a Quick BI organization.
Prerequisites
Lark API authorization must be complete. For more information, see (Public Cloud) Enable Lark microapp.
Background information
Quick BI categorizes organization users into the following types and roles:
-
User types
Organization users are classified into three categories:
-
Developers: These include enterprise IT staff, data analysts, and data operations personnel.
-
Analysts: Business personnel who conduct business analysis with minimal technical requirements.
Analysts create and utilize dashboards, workbooks, and other analytical tools.
-
Visitors: Individuals such as executives or managers who only view reports, or frontline business staff who solely access data results. Visitors can access dashboards, workbooks, and sites via URLs or subscriptions.
-
User roles
-
Organization roles
There are three predefined roles at the organization level, with the option to add custom roles:
-
Organization Administrator: Manages project information, status, and members. They can also designate other users as organization administrators.
Typically, one to three individuals fill this role, often the project PM or those responsible for the BI platform.
-
Permission Administrator: Oversees permissions for project resources. One to three individuals usually assume this role, commonly those in charge of the BI platform. They are tasked with centralized permission management and allocation in the backend.
-
Regular User: Users who are not organization or permission administrators.
-
Custom Organization Roles: Tailored to specific business needs, these roles can be created as necessary. For more information, see Role Management.
-
Workspace roles
At the workspace level, there are four predefined roles, with the possibility of adding custom roles:
Workspace Administrator: Has permission to create, edit, use, and view all modules. This role has the highest level of permission in the workspace. A workspace administrator can also manage the permissions and work of other members in the workspace.
-
Workspace Developer: Granted permissions to create, edit, use, and view all modules.
-
Workspace Analyst: Authorized to create, edit, and view modules such as BI portals, dashboards, data dashboards, workbooks, ad hoc analysis, downloads, and data preparation. They also have viewing permissions for data reporting and data sources, along with the ability to use and view datasets.
-
Workspace Viewer: Has viewing permissions for all modules.
-
Custom Workspace Roles: Custom roles can be established based on business needs. For more information, see Role Management.
-
Limits
Only organization administrators can add third-party system accounts as organization members.
Add a Lark account
On the Quick BI home page, navigate to the User Management page as shown in the following figure.
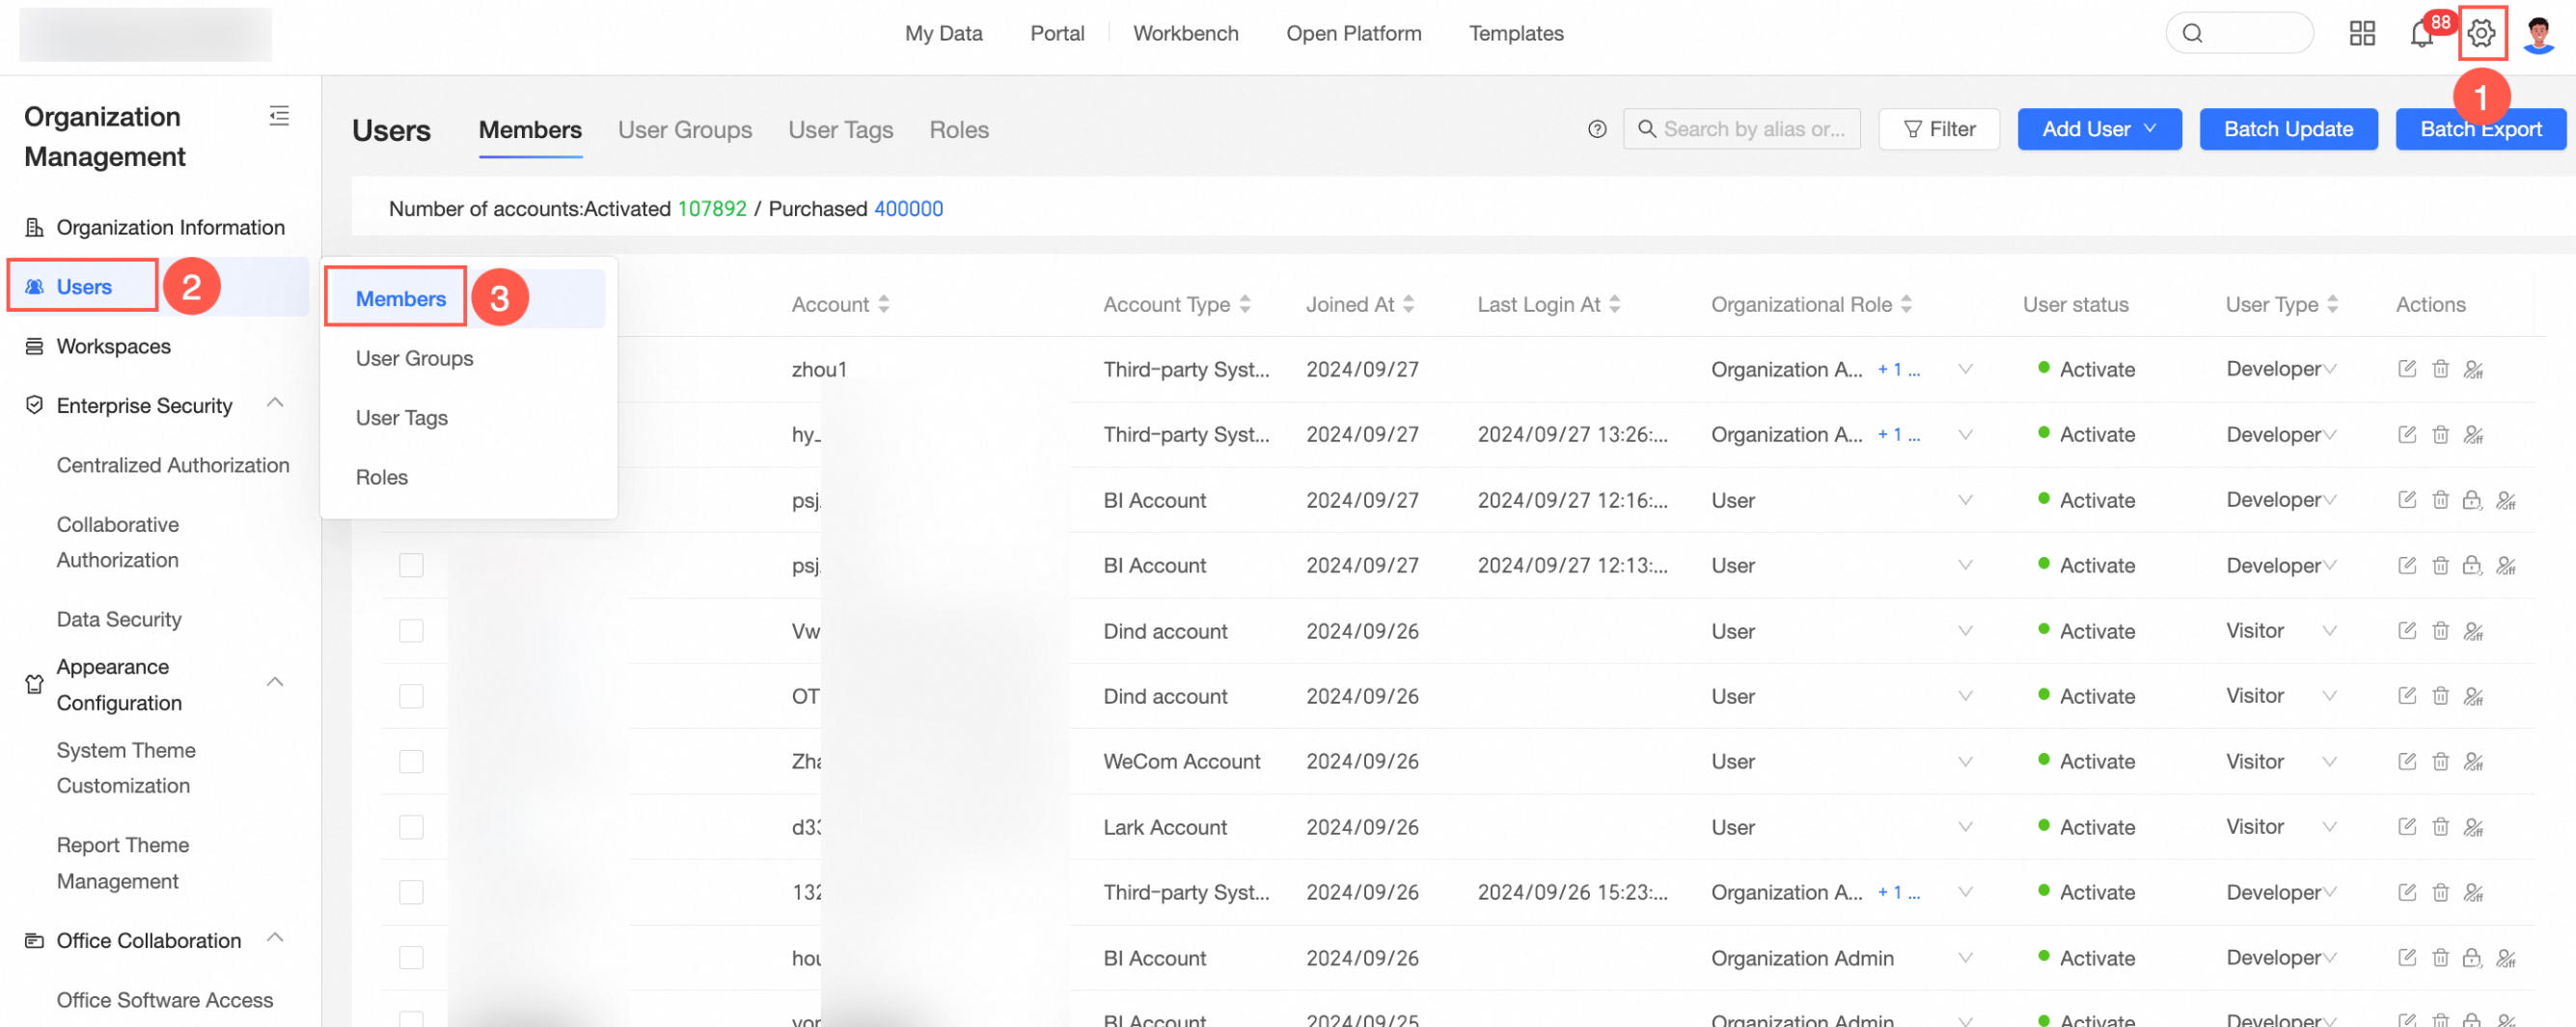
On the Member Management tab, in the upper-right corner, choose .
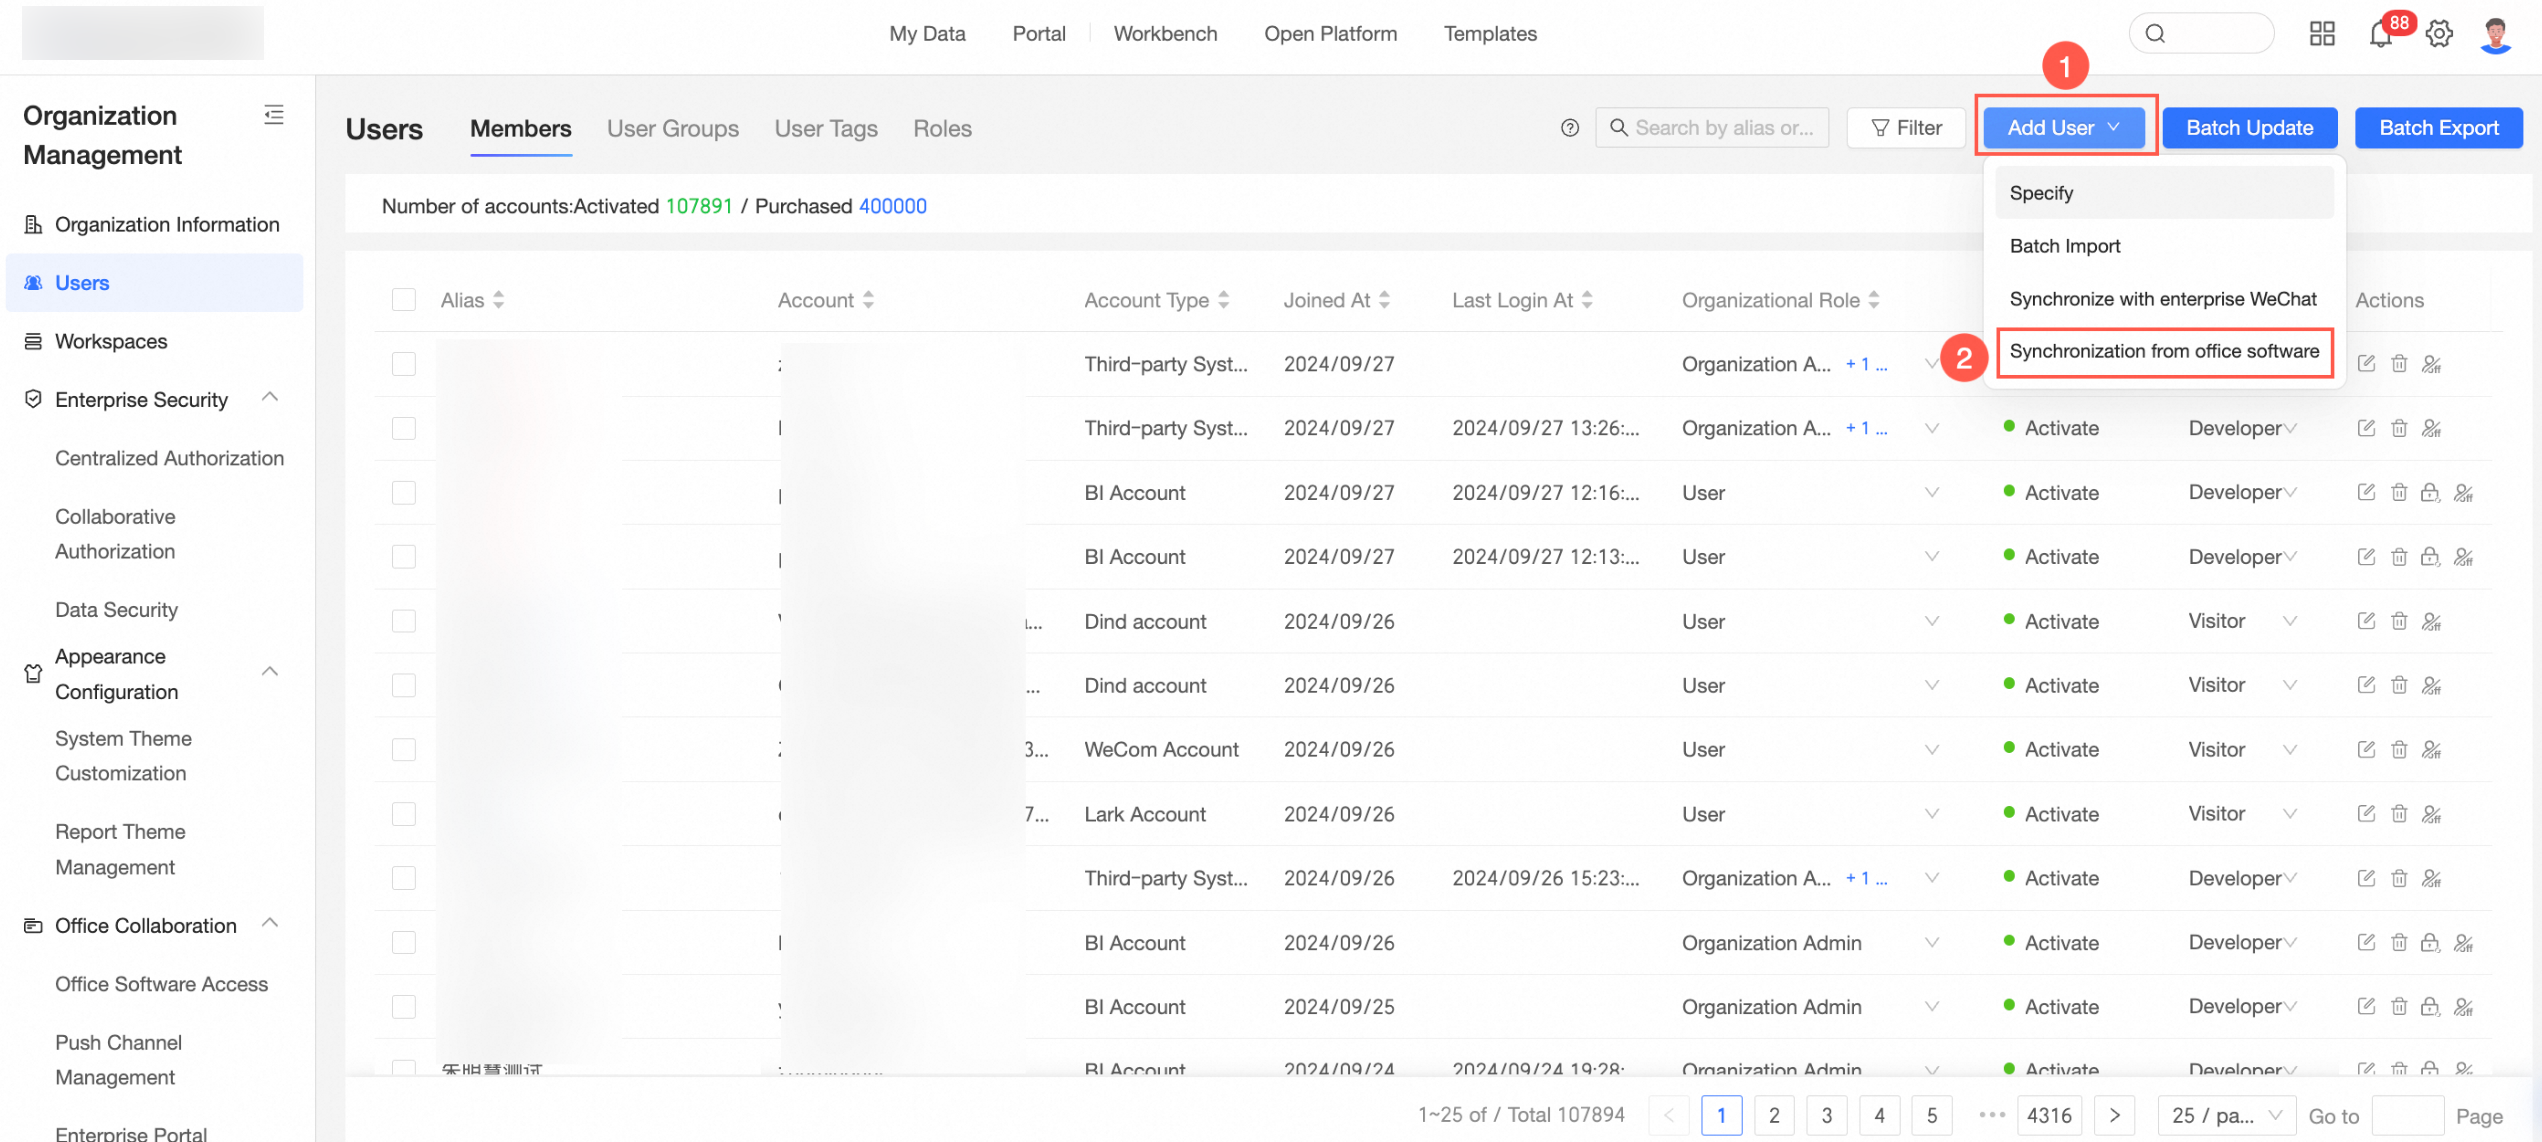
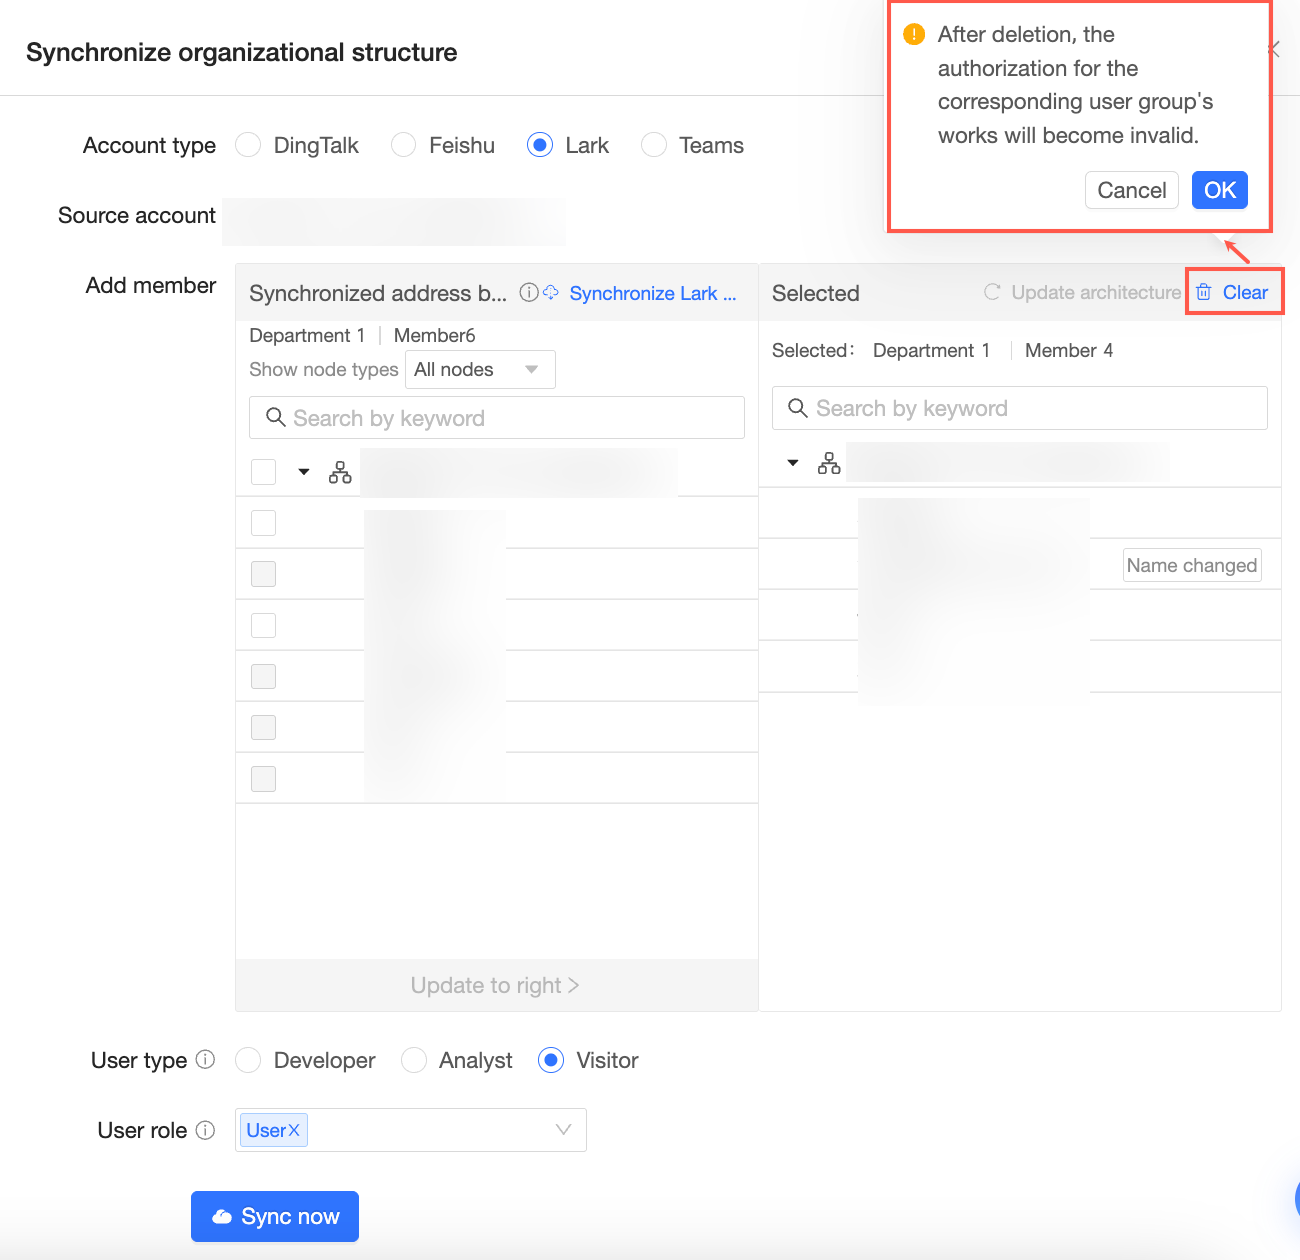
In the Sync Organizational Structure dialog box, set Account Type to Lark Account, and configure the synchronization settings as shown in the following figure.
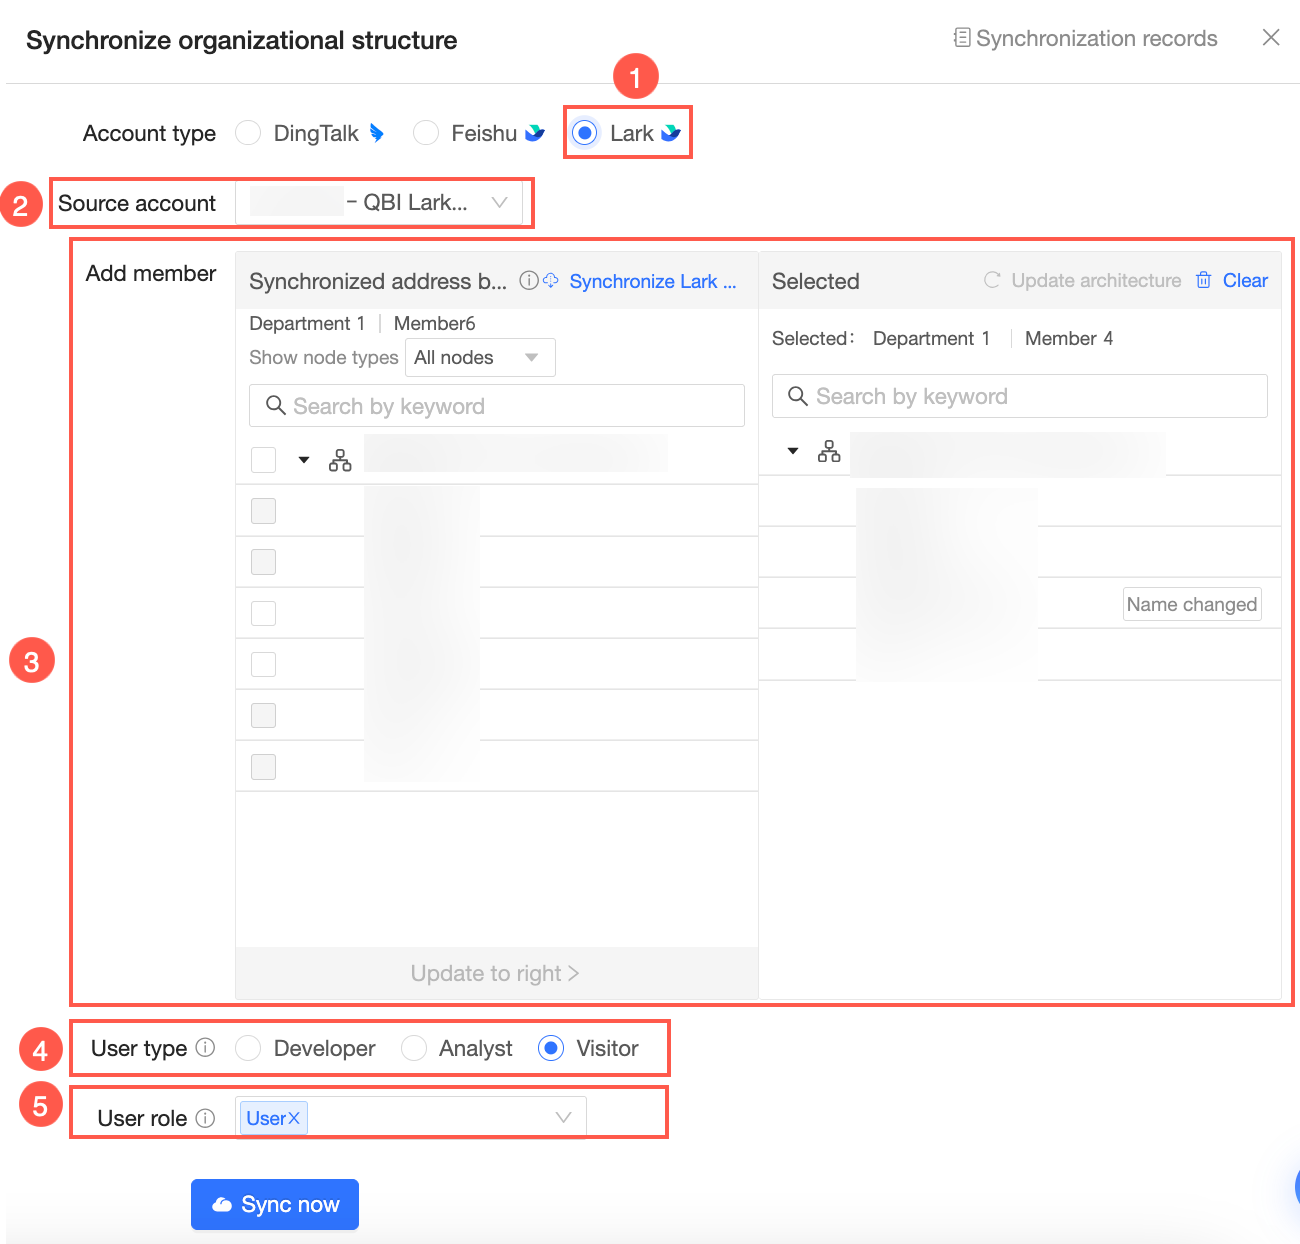
Account Type: Select Lark.
Account Source: Select the Lark organization that contains the accounts to be synced. If you connected to only one enterprise on the Office Software Integration > Lark API Authorization page, that enterprise is selected by default. If you connected to multiple enterprises, click the
 icon and select the desired Lark organization from the drop-down list.
Add Members: Select the members to sync and click the Update to the right button.
User Type: You can select Developer, Analyst, or Viewer.
User Role: You can select Organization Administrator, Permission Administrator, Regular User, or a custom user role. You can assign the organization administrator or permission administrator role only if the user type is Developer or Analyst.
Click Start Synchronization.
NoteIf the organizational structure changes, update the architecture, and then start the synchronization.
Click Synchronization Records in the upper-right corner to view the synchronization records.

Update the architecture
If the organizational structure changes, you can update the architecture. A name change does not affect the synchronization.
If a username changes, the Name changed prompt appears next to the username.
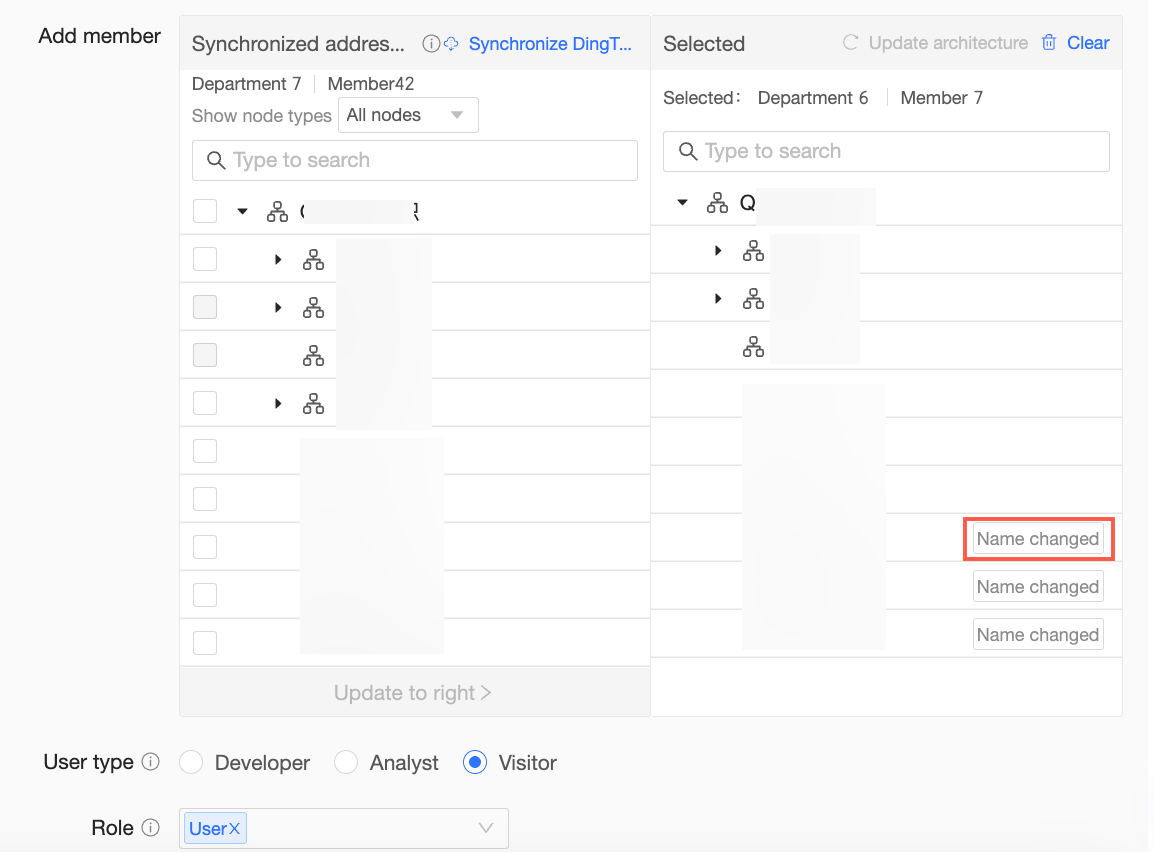 You can then click the
  icon to delete the user as needed.
If a department name changes, the Name changed prompt appears next to the department name. You can then click the
icon and click OK in the confirmation dialog box to delete the department.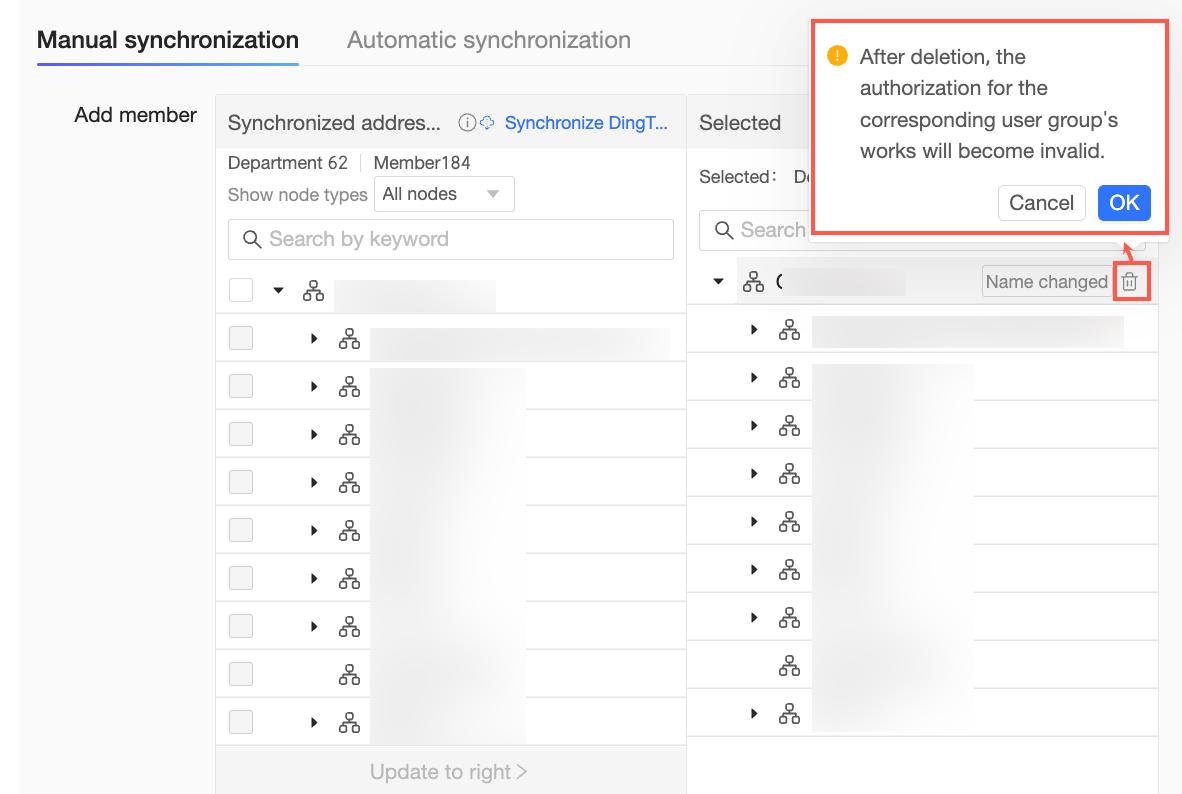 Note
NoteAfter the department is deleted, the permissions for the corresponding user group become invalid.
If a user is no longer in the organization, the To be deleted prompt appears next to the username.
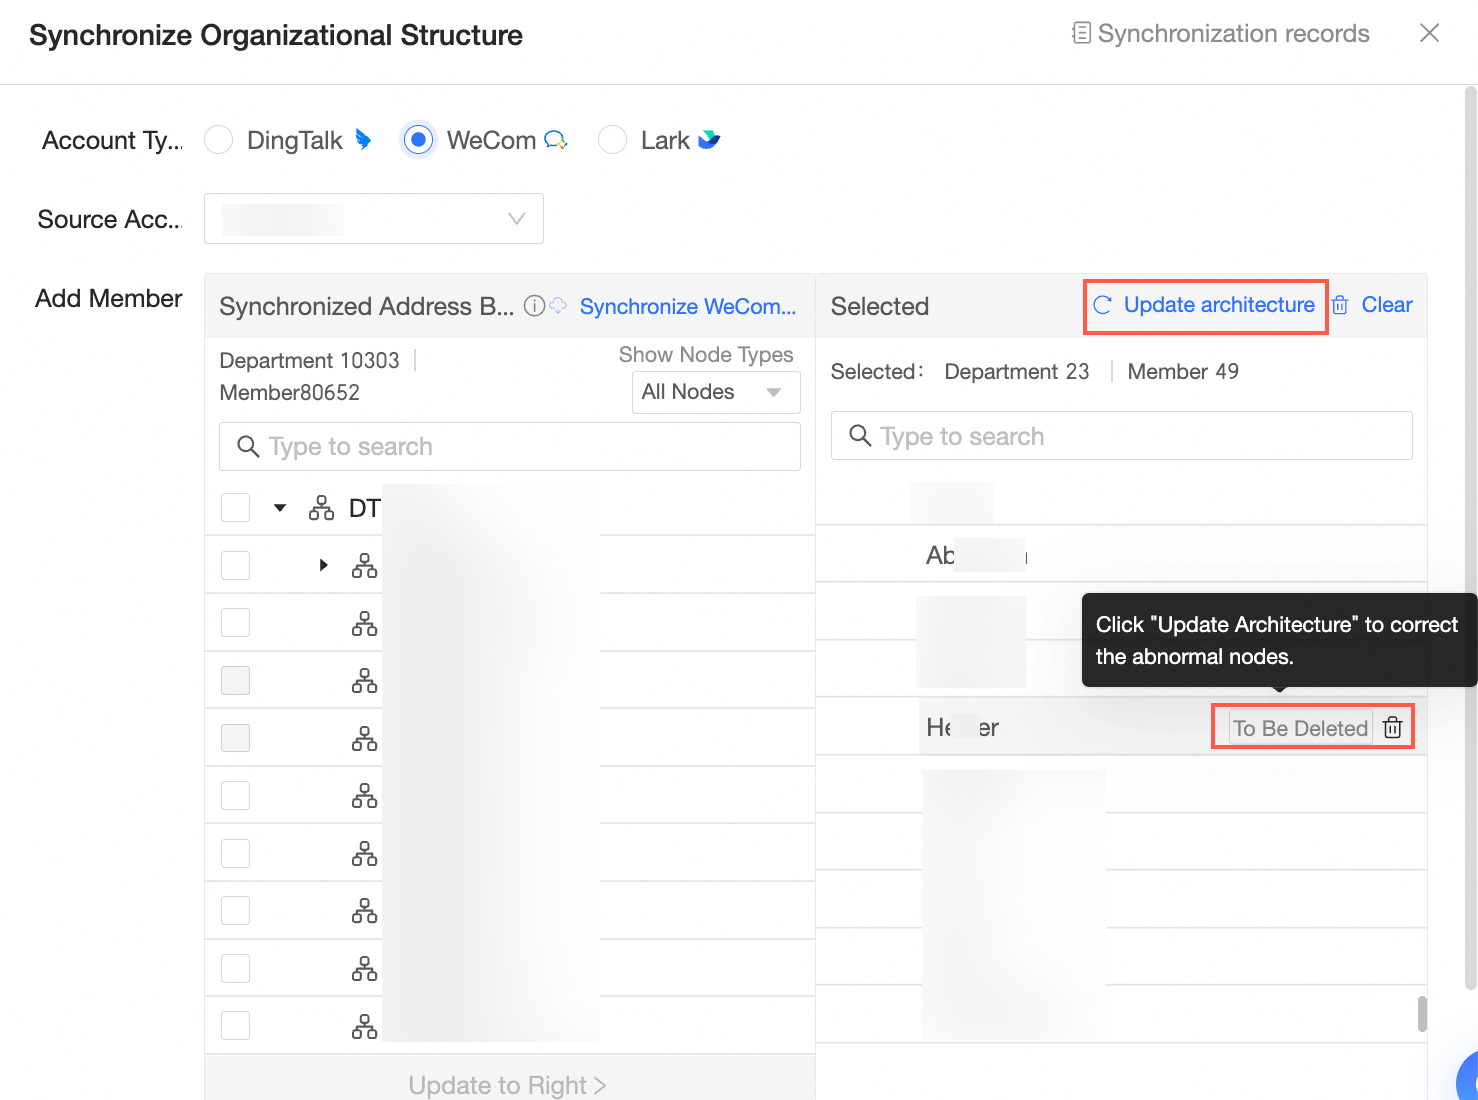
You can then click the
icon to delete the user or click Update Architecture to correct the abnormal node.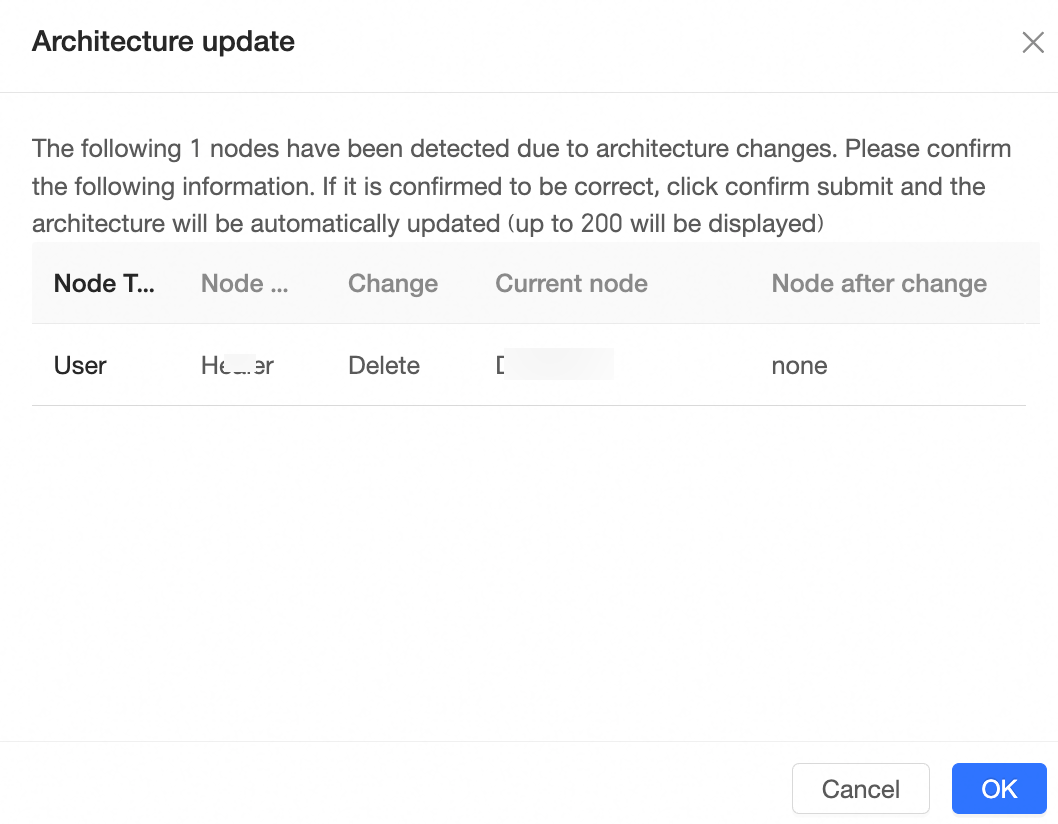
To clear the current organizational structure, click the Clear button and then click OK in the confirmation dialog box.
 Note
NoteAfter the structure is cleared, the permissions for the corresponding user group become invalid.
FAQ
Question 1: The synchronized Lark enterprise address book does not display existing users.
Cause: This issue occurs because of the application's visibility settings. Ensure that the application's visibility range includes the user.
Solution: Log in to the Lark management console. Go to Workbench > Application Management, search for Quick BI, and configure the application's visibility range.
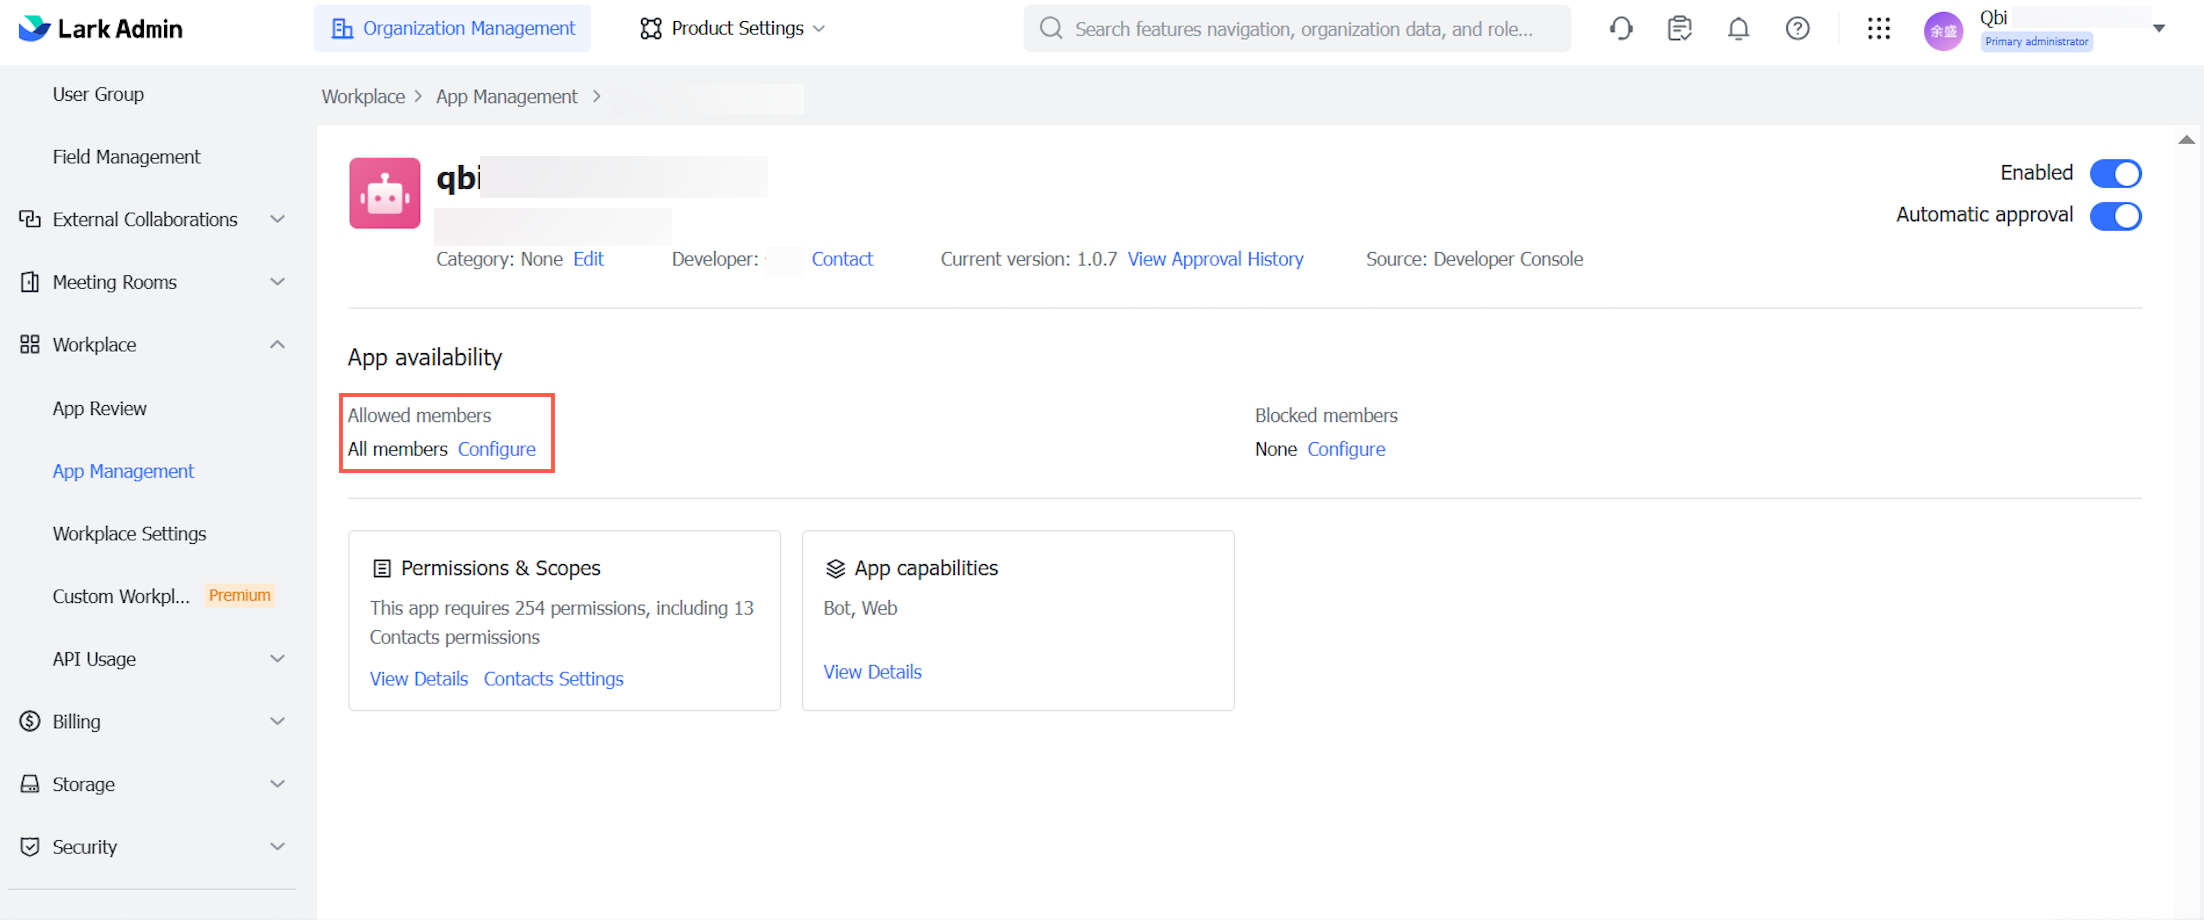
Go to Application Permissions > Address Book and select Keep consistent with the scope of available personnel.
Configure the Application Visible Scope as needed. You can select all members or add specific members to the visibility scope.