Grant users collaborative permissions to edit, view, or export BI portals within a workspace.
Scenarios
|
Scenario description |
Expected outcome |
|
After receiving Edit permissions, the authorized user can access and edit the portal. |
|
|
Grant a user permissions to view or export menus or content of a specified BI portal |
|

Procedures
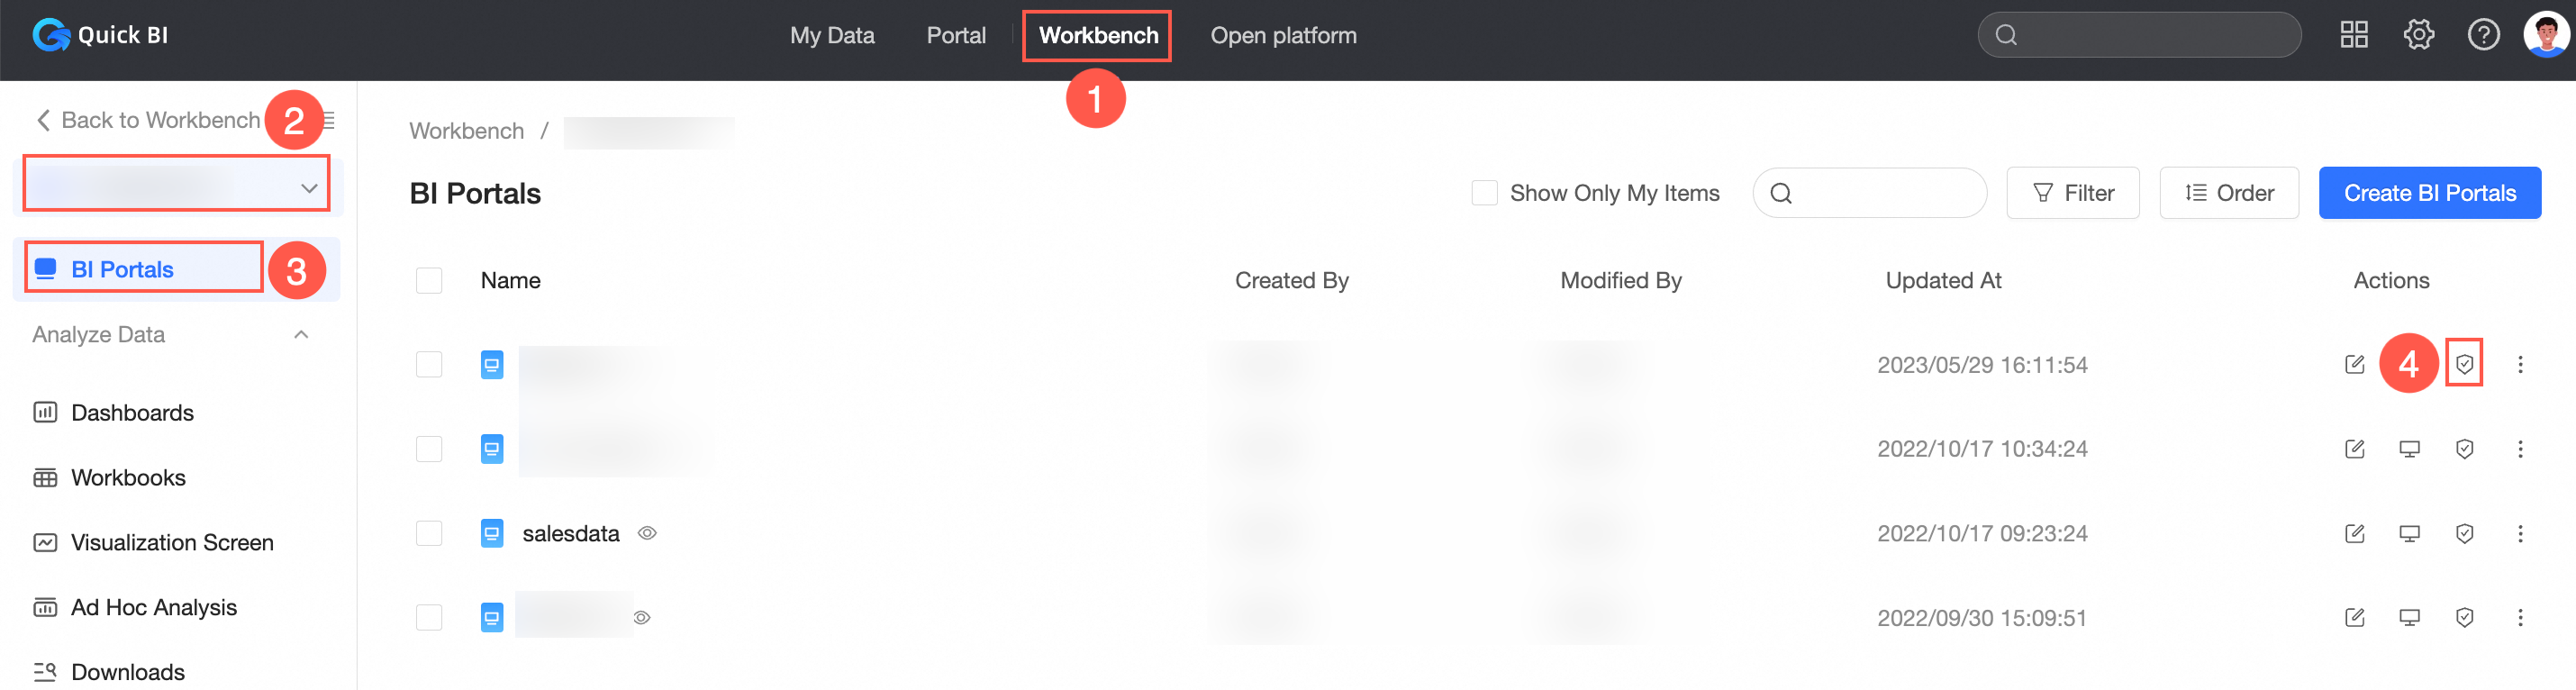
In the Quick BI console, you can set collaborative authorizations for a BI portal within the workspace.
Organization administrators, permission administrators, workspace administrators, or BI portal owners can grant users collaborative operation permissions on BI portals.
Grant a user the permissions to edit a specified BI portal
Developers and analysts in the workspace can receive edit permissions for BI portals only when Edit Permission Property is set to Specified Members or All Workspace Members. The following example grants Developer A edit permissions.
-
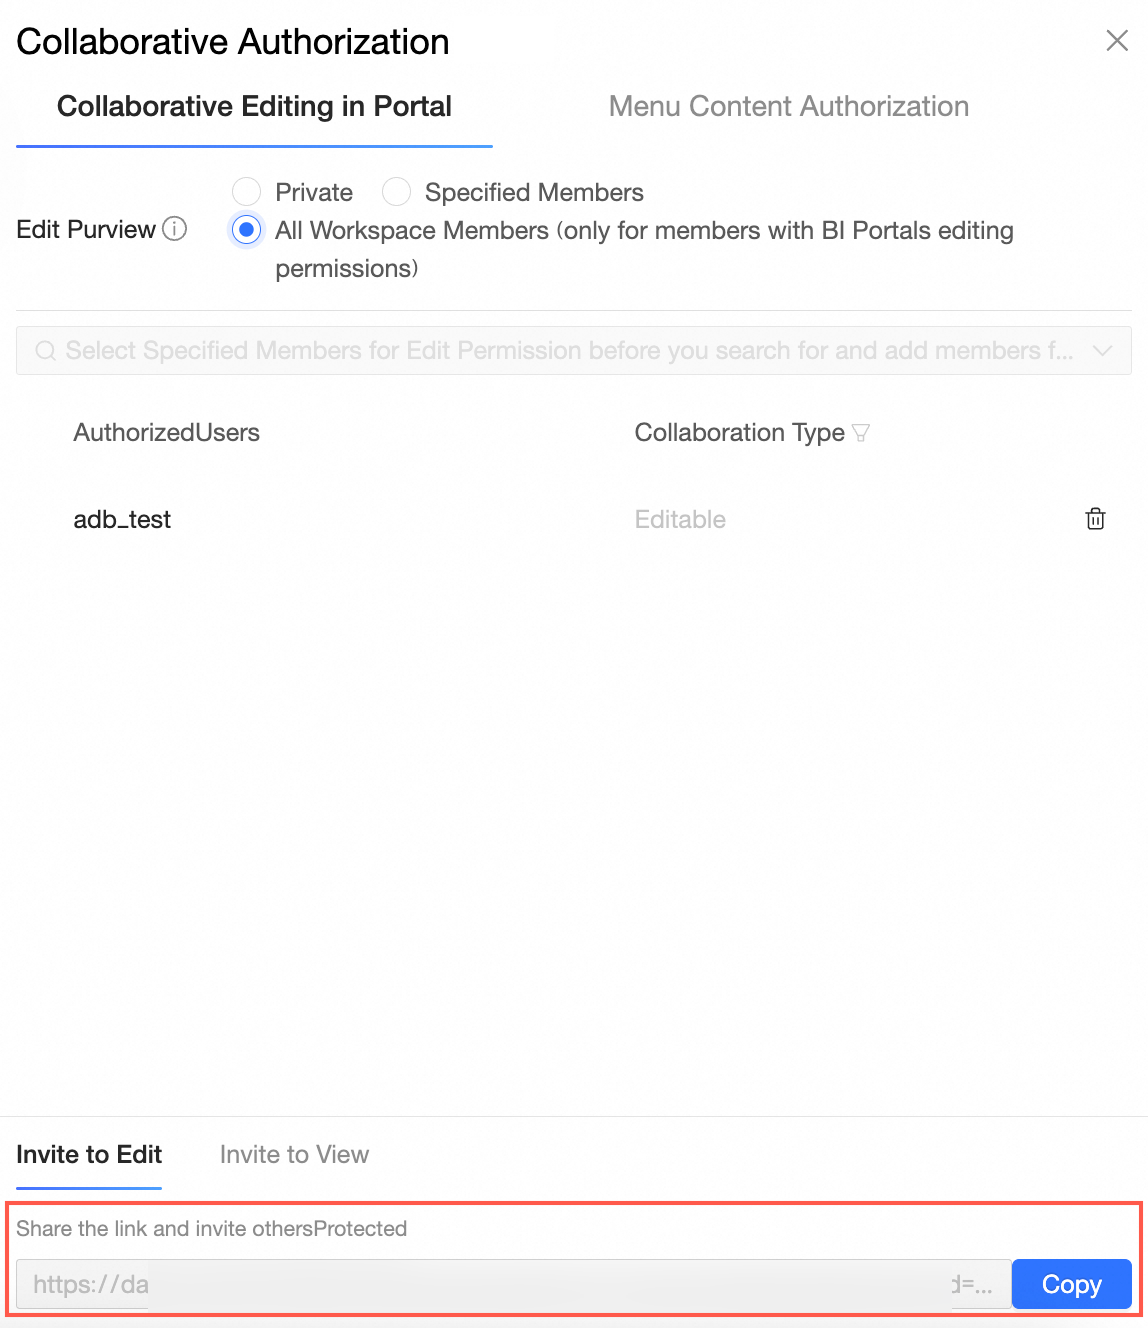
Navigate to the Collaborative Authorization page, under the Portal Collaborative Editing tab, select the edit permission property and grant the permissions.
The following example sets Edit Permission Property to Specified Members to grant Developer A edit permissions.

-
In the Invite To Edit tab, click Copy to share the URL with the authorized user.
Grant a user the permissions to view or export the menus or content of a specified BI portal
-
On the Collaborative Authorization page, under the Menu Content Authorization tab, select the effective permissions:
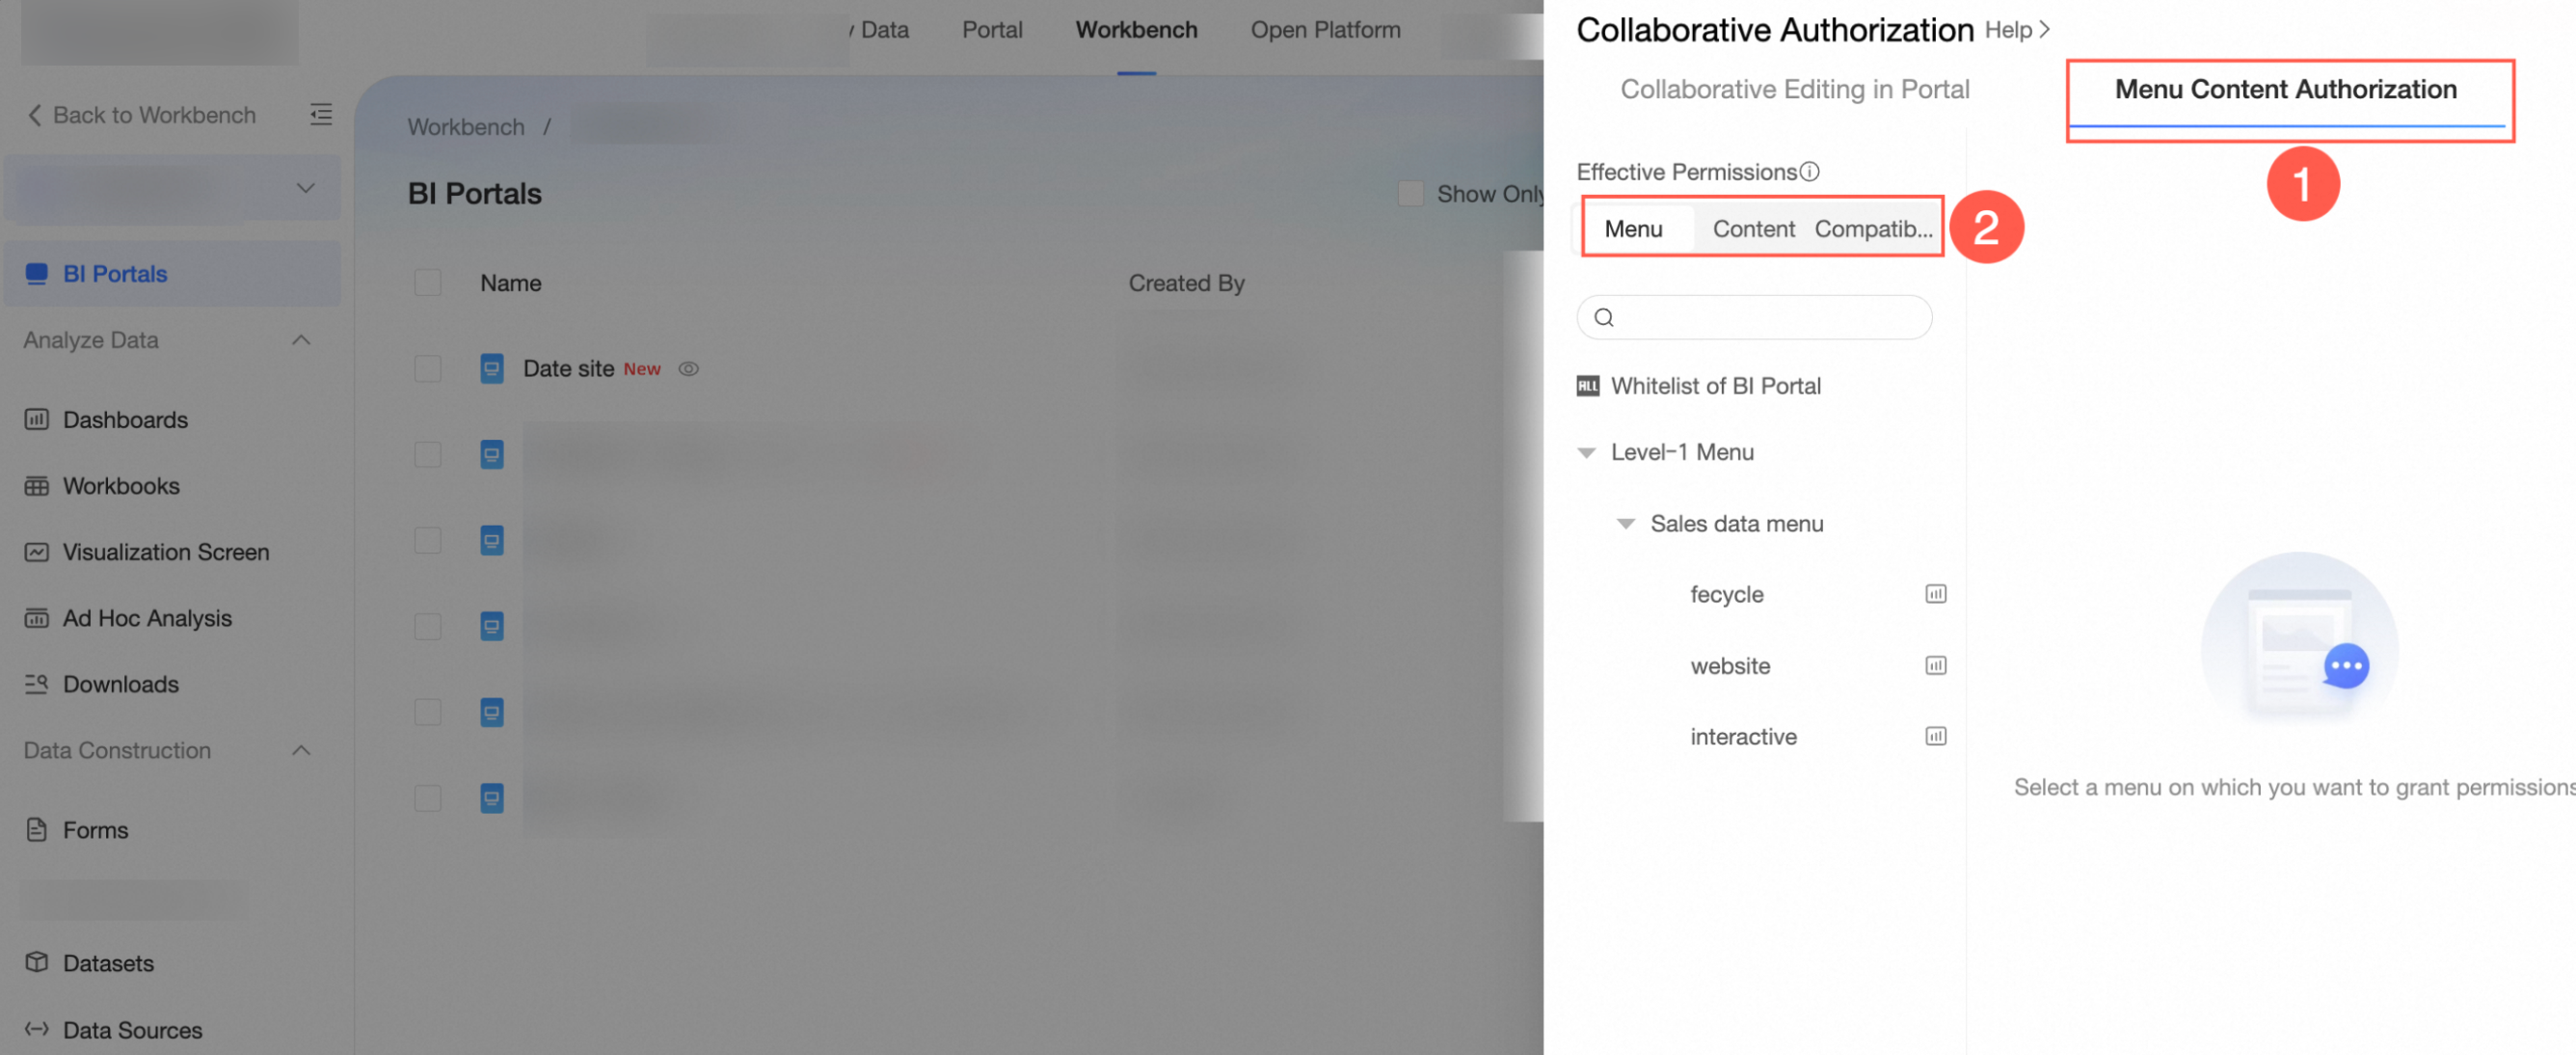
-
Select Menu: Permissions are based on the configurations set for the menu.
-
Select Content: Permissions are based on the permissions of reports (dashboards, workbooks, etc.) linked to the BI portal. If the original report has permissions, the menu inherits those permissions and no additional grant is required. For more details, see Grant Users Permissions on Data Works.

-
Select Compatible: Combines the permissions of linked reports with those granted here. Users can access the menu if the original report has permissions or if permissions are granted here.
-
-
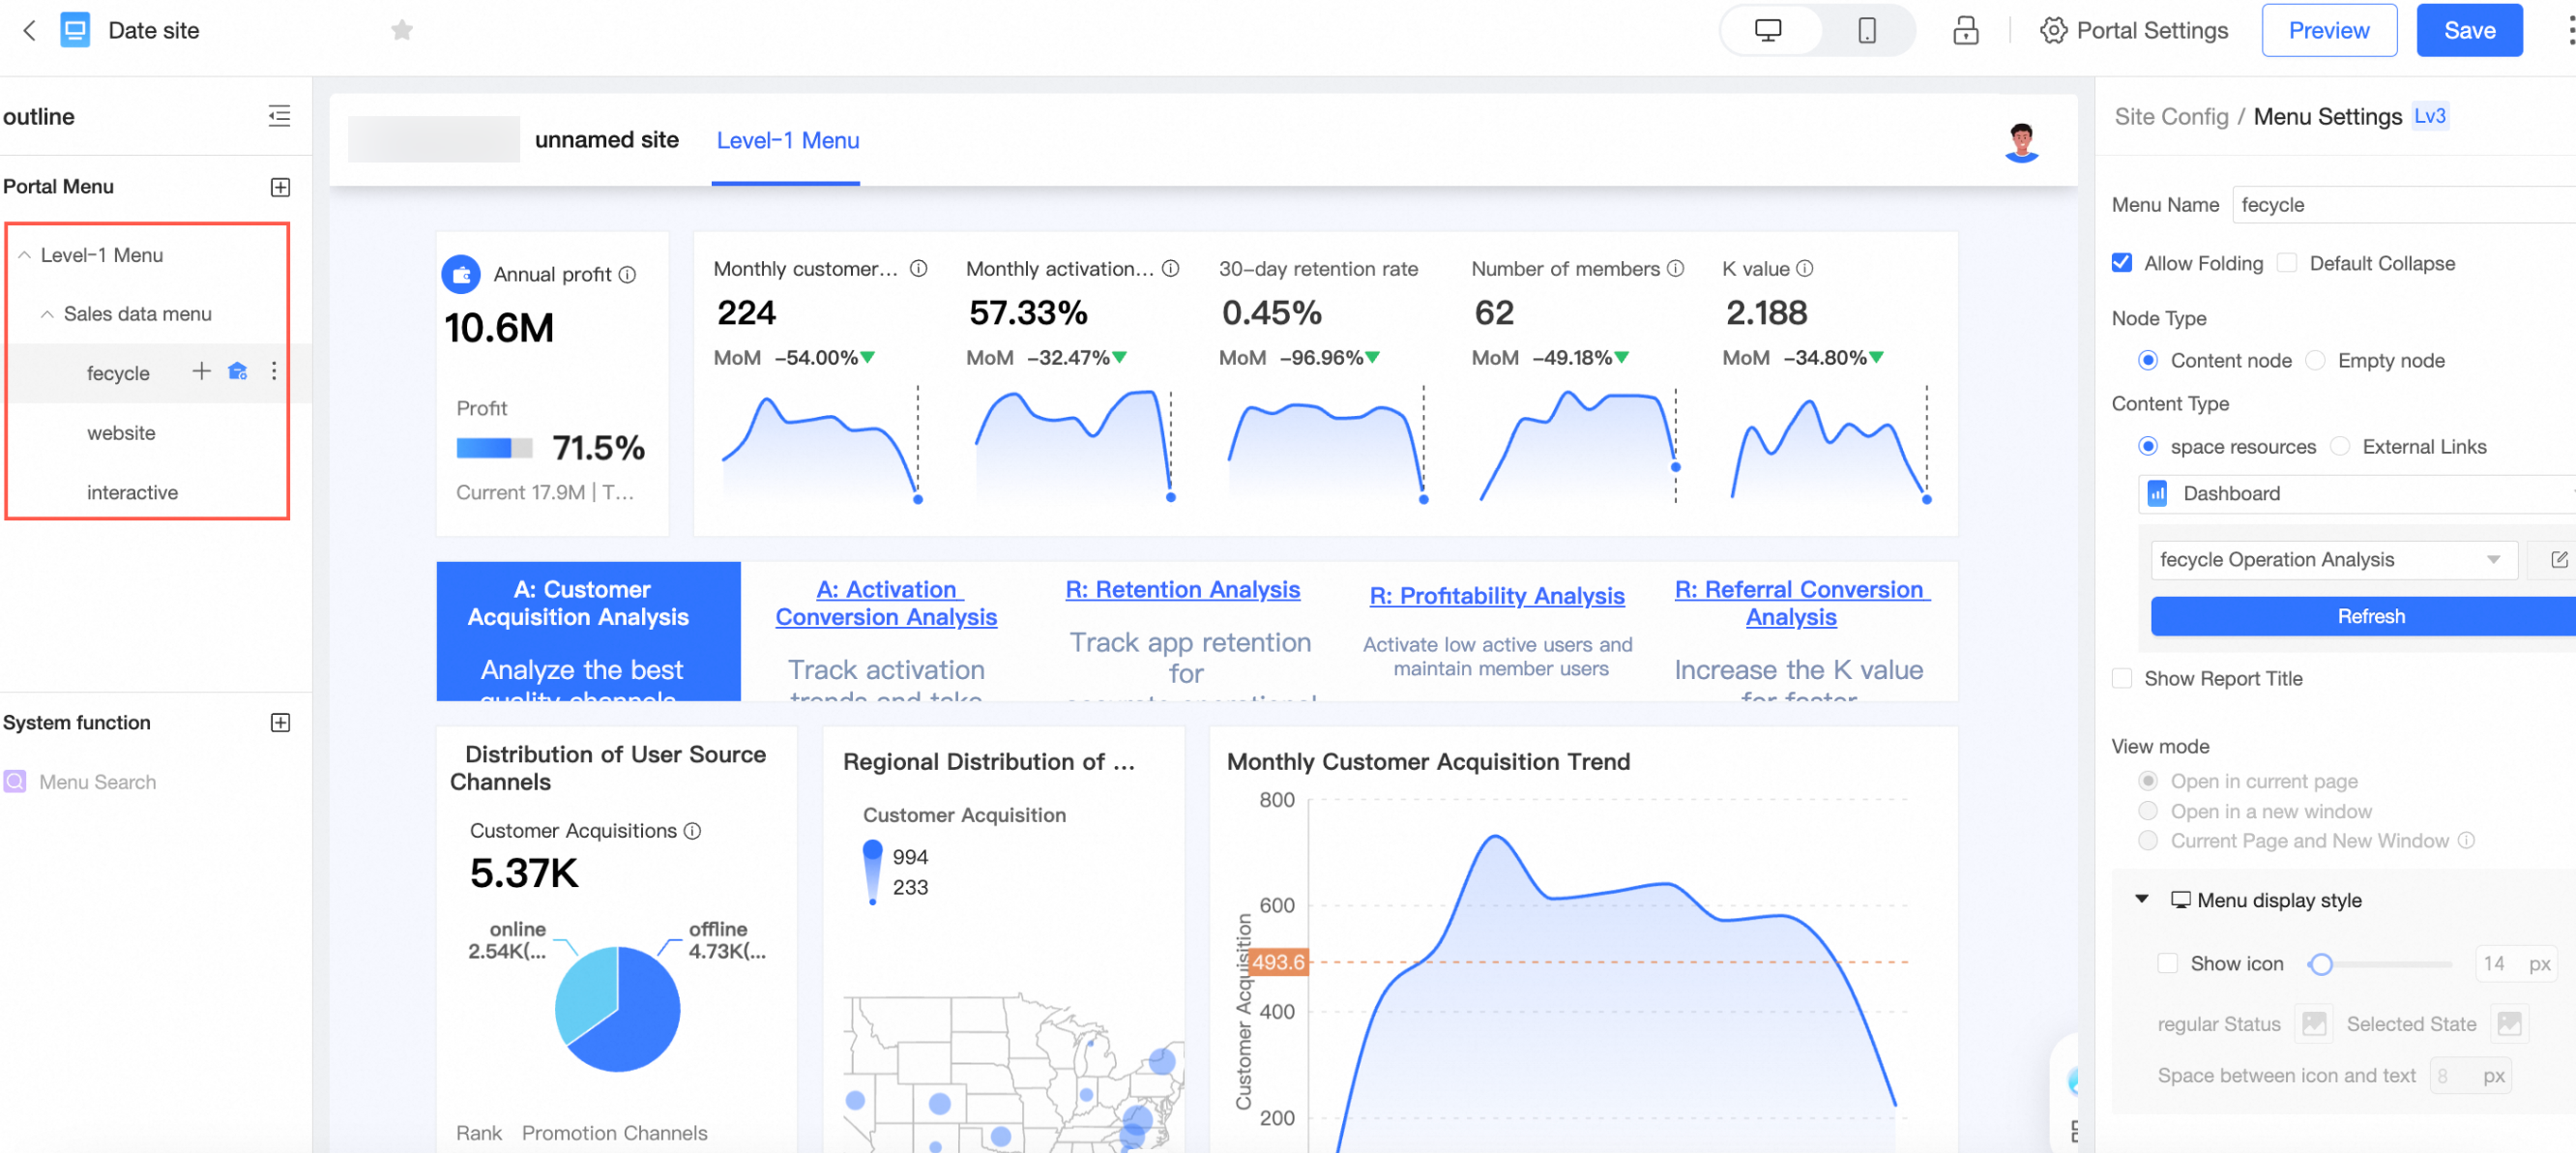
Select the target menu and specify the authorization object.
The following example sets Effective Permissions to Menu to grant Visitor B export permissions for the BI portal menu.

The visitor can now view and export the corresponding BI portal menu.

-
You can also adjust Sync settings:

-
Incremental synchronization: Adds missing permissions without affecting the existing permissions of the synchronized resource.
-
Overwrite synchronization: Removes the existing permissions of the synchronized resource and replaces them with the current resource's permissions.
-
The rule "Hide menu entry for users without permissions" cannot be synchronized.
-
Hide menu entry for users without permissions
Enable Hide menu entry for users without permissions as needed. For details, see Data Portal Permission Request in this topic.

When the parent menu has Hide menu entry for users without permissions selected, it is automatically applied to the child menu and cannot be unselected.
Data Portal Permission Request
If you lack permissions for the BI portal, you can request them.
-
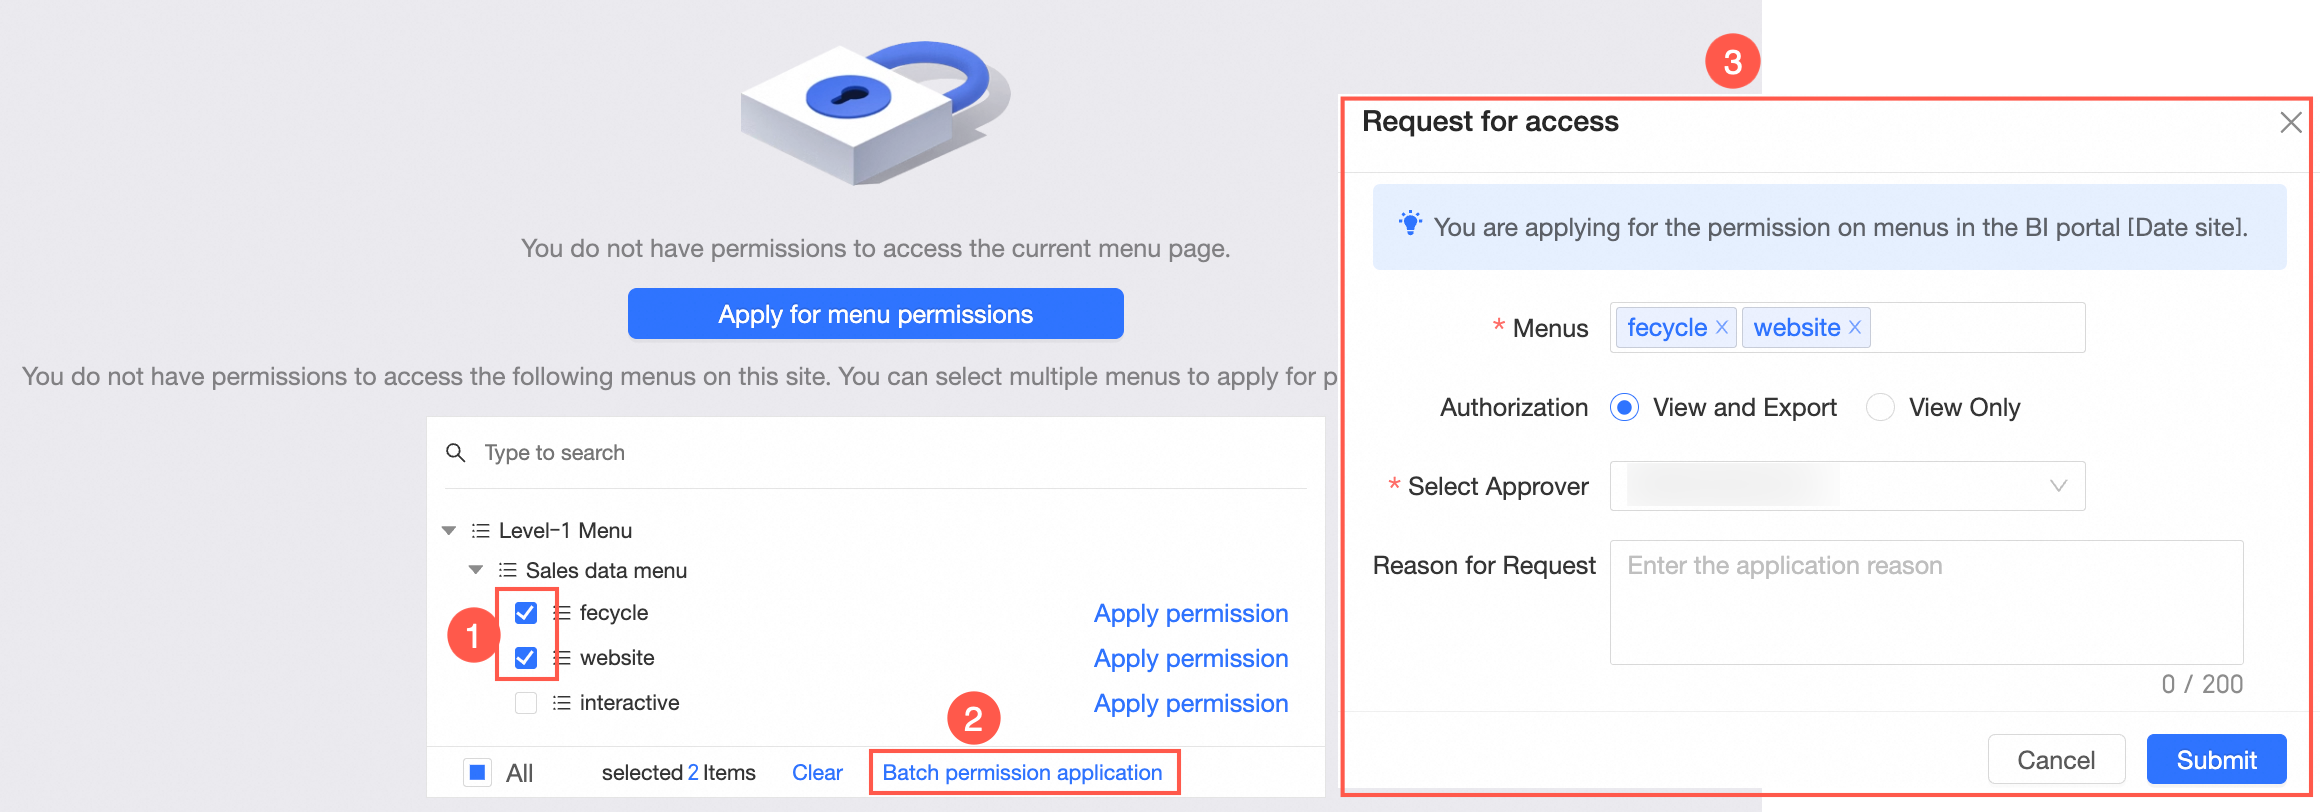
Select the menu to request permissions.
-
You can request permissions for an individual menu.
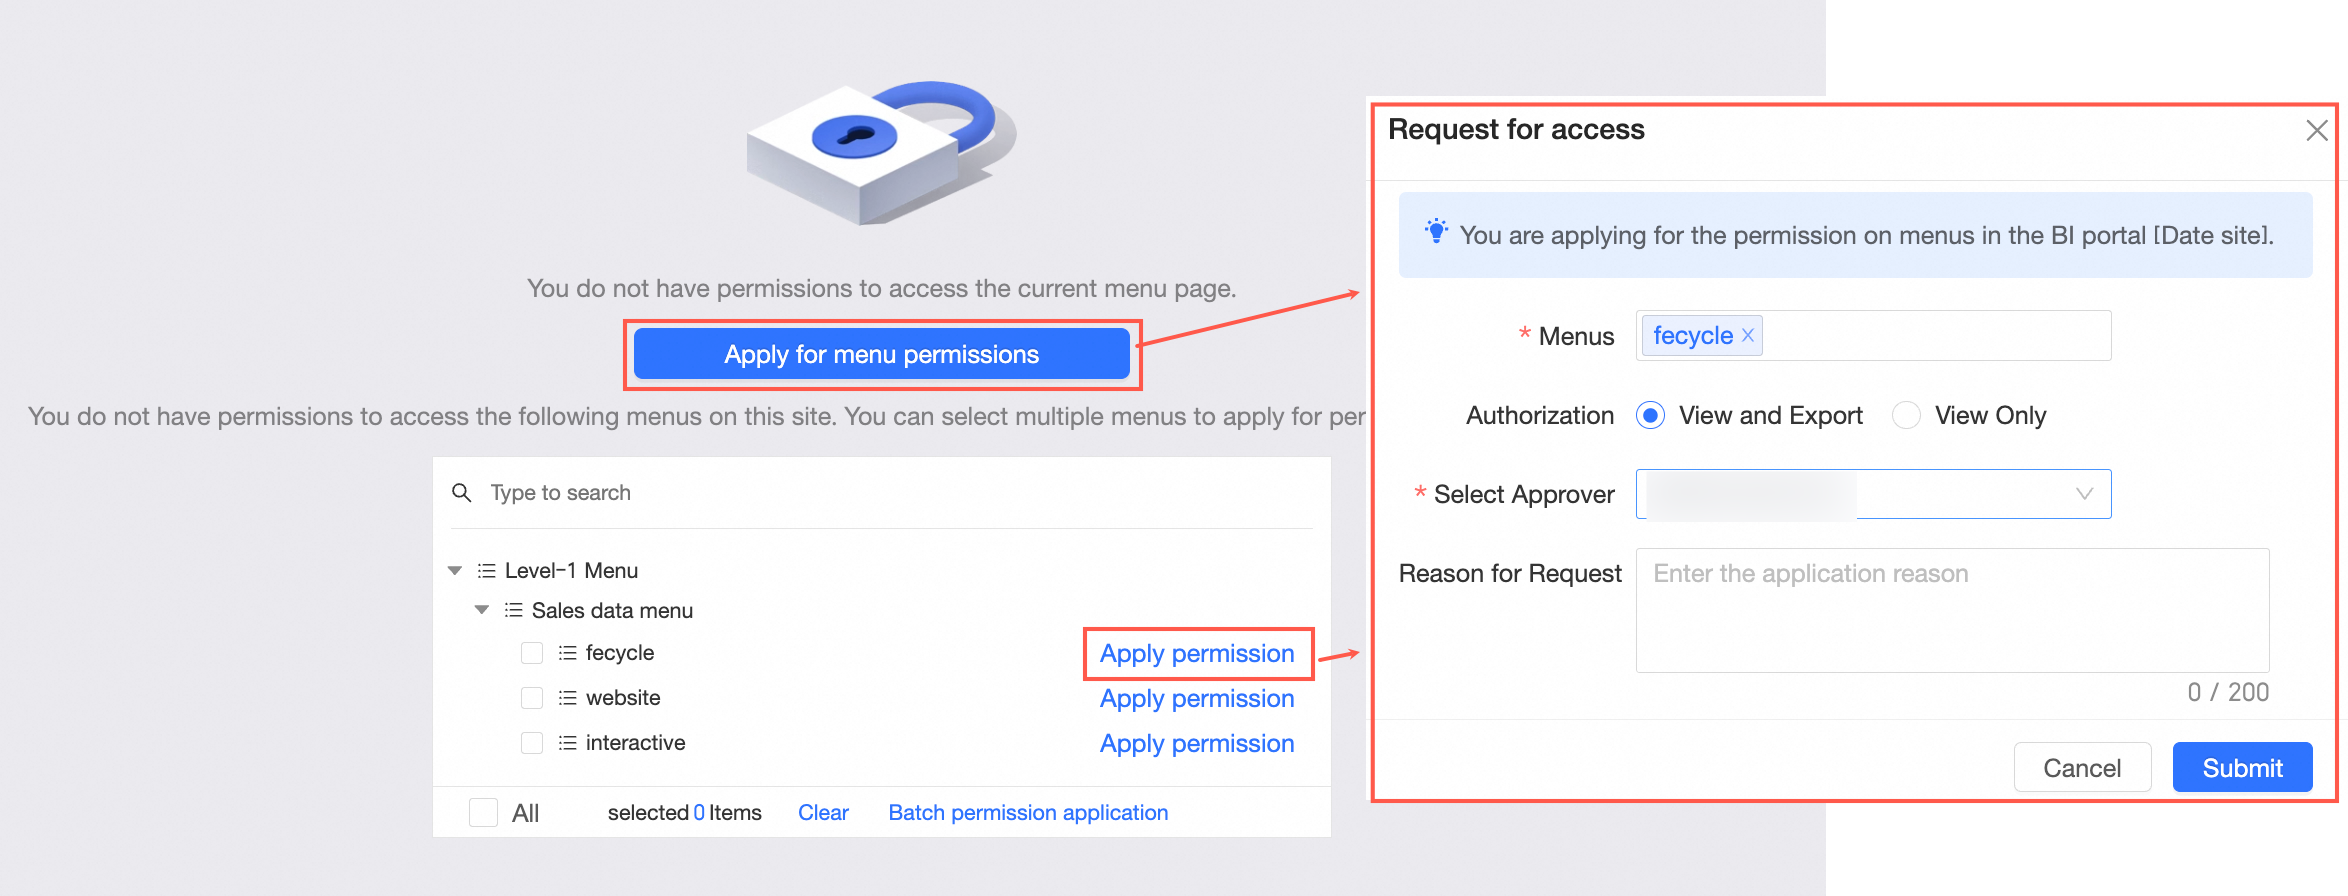
-
Batch permission requests are also supported.
-
-
Within the permission request interface, choose the report resource authorization level-either View and export or View only. Then, Select approver, provide a reason for the application (optional), and click Submit request.
-
You can check the approval flow details in My Requests.

-
Once approved, you will have the corresponding permissions for the BI portal.