This topic describes data processing operations such as data merging, cleansing, processing, aggregation, transposition, and association.
Prerequisites
Data input is configured. For more information, see Input Data.
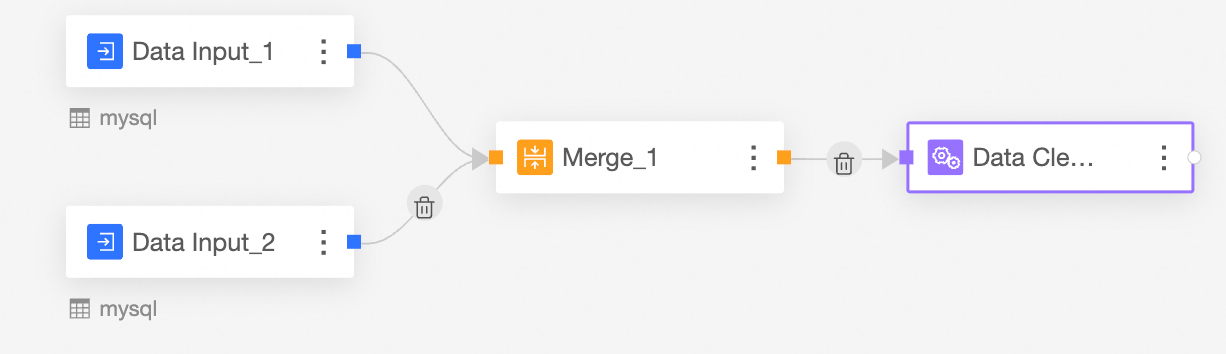
Merge
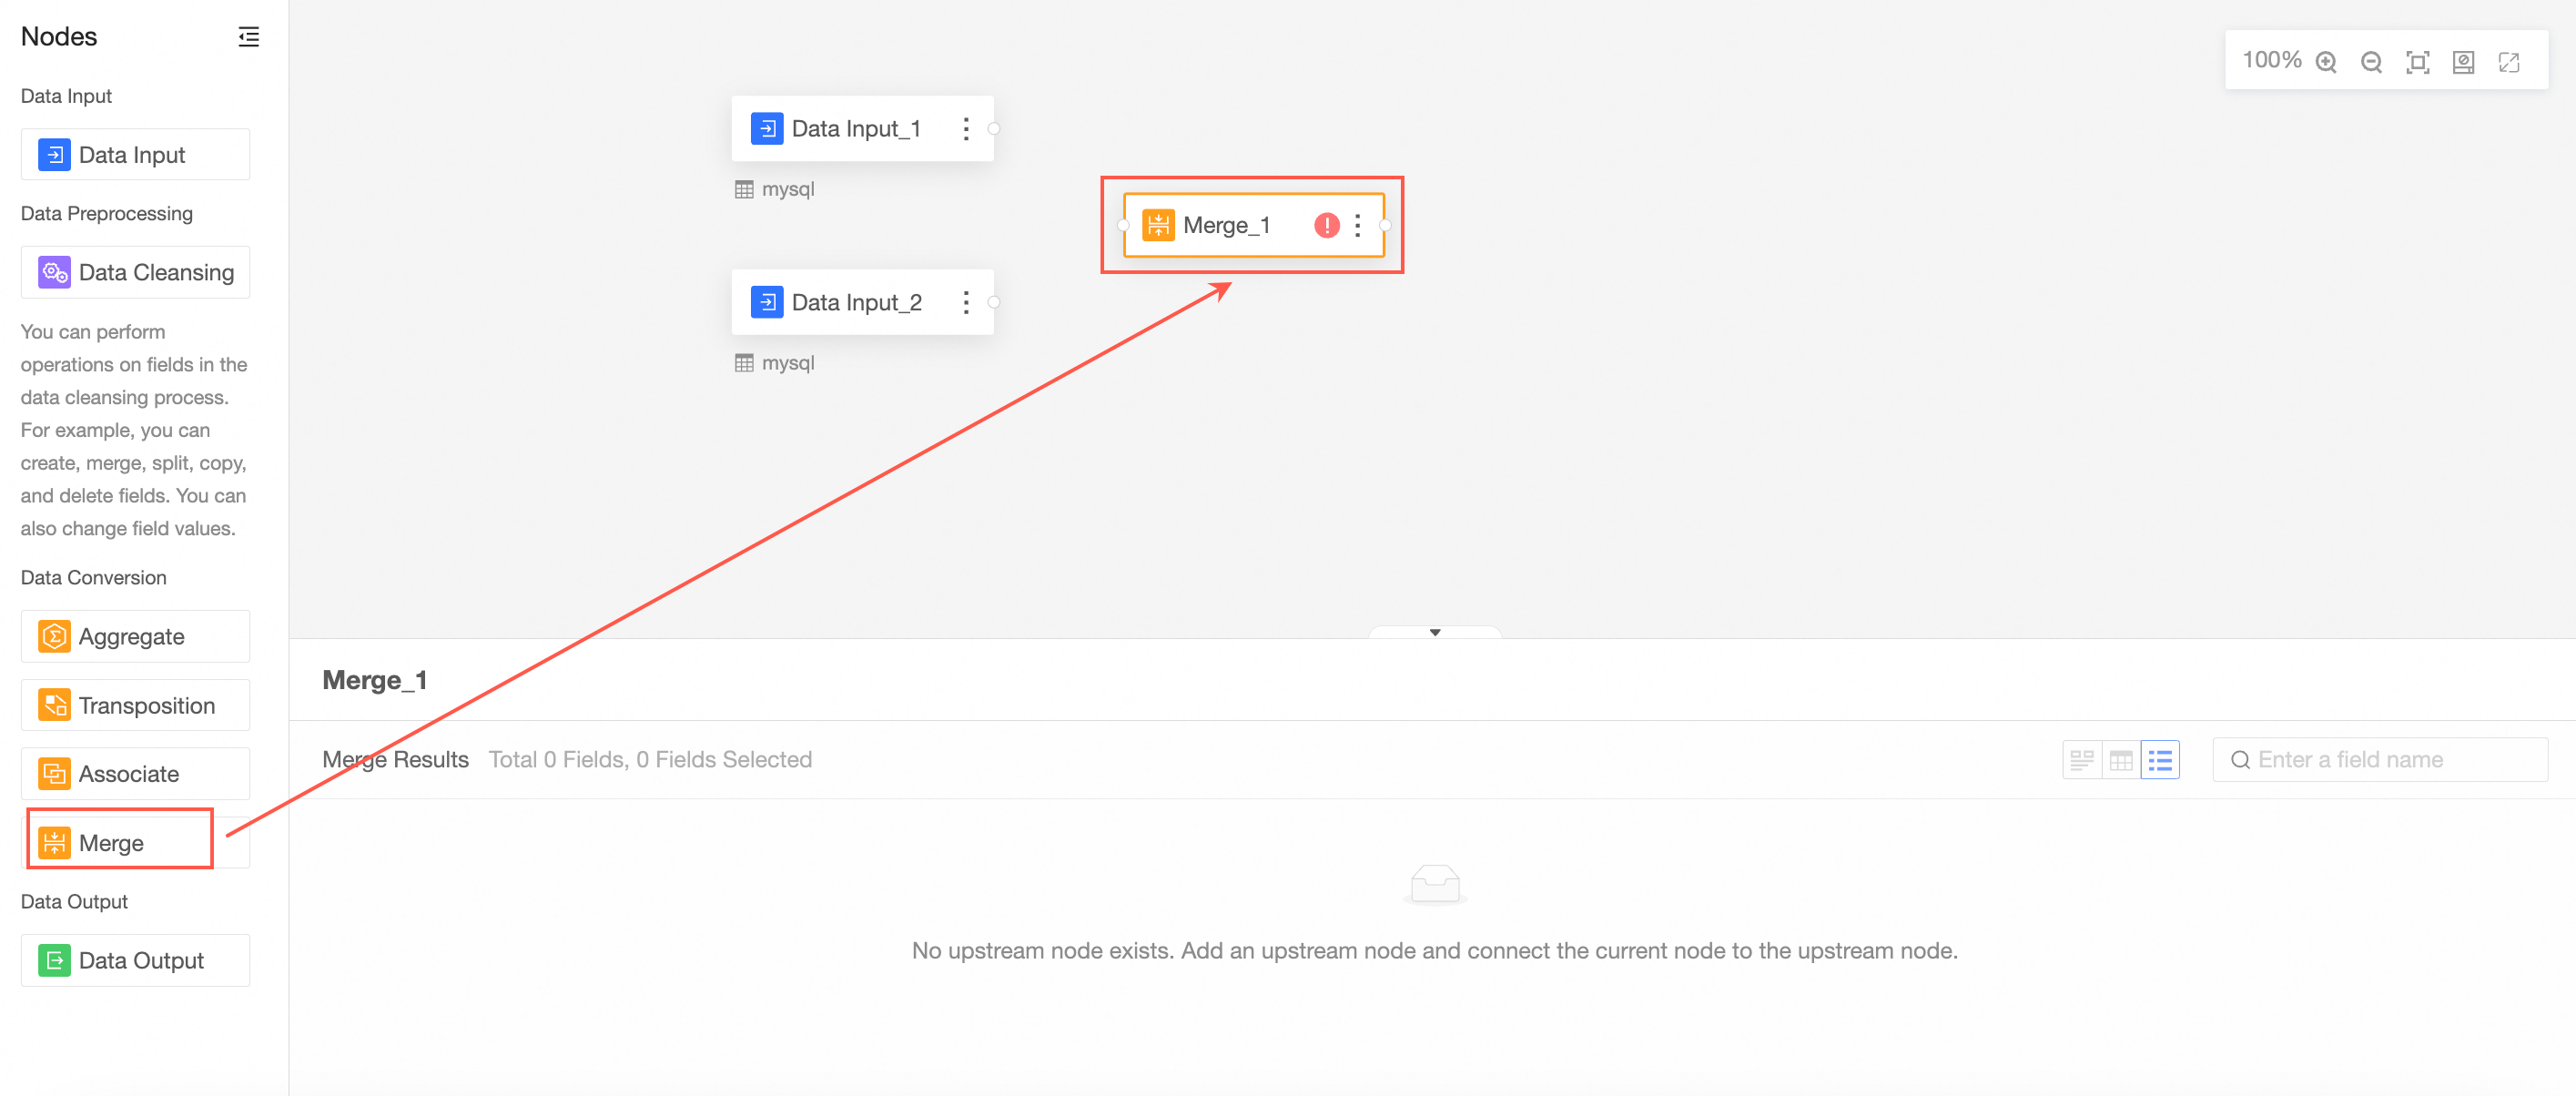
Merge is used to merge two tables into one table. The merged data is expanded in rows.
The merge node is used to merge the fields with the same name in the data input 1 node and the data input 2 node.
Drag Merge from the left-side node section to the canvas section.
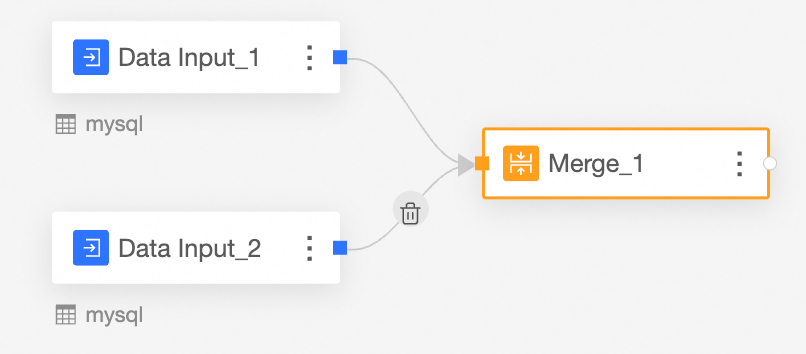
Connect the nodes to be merged.
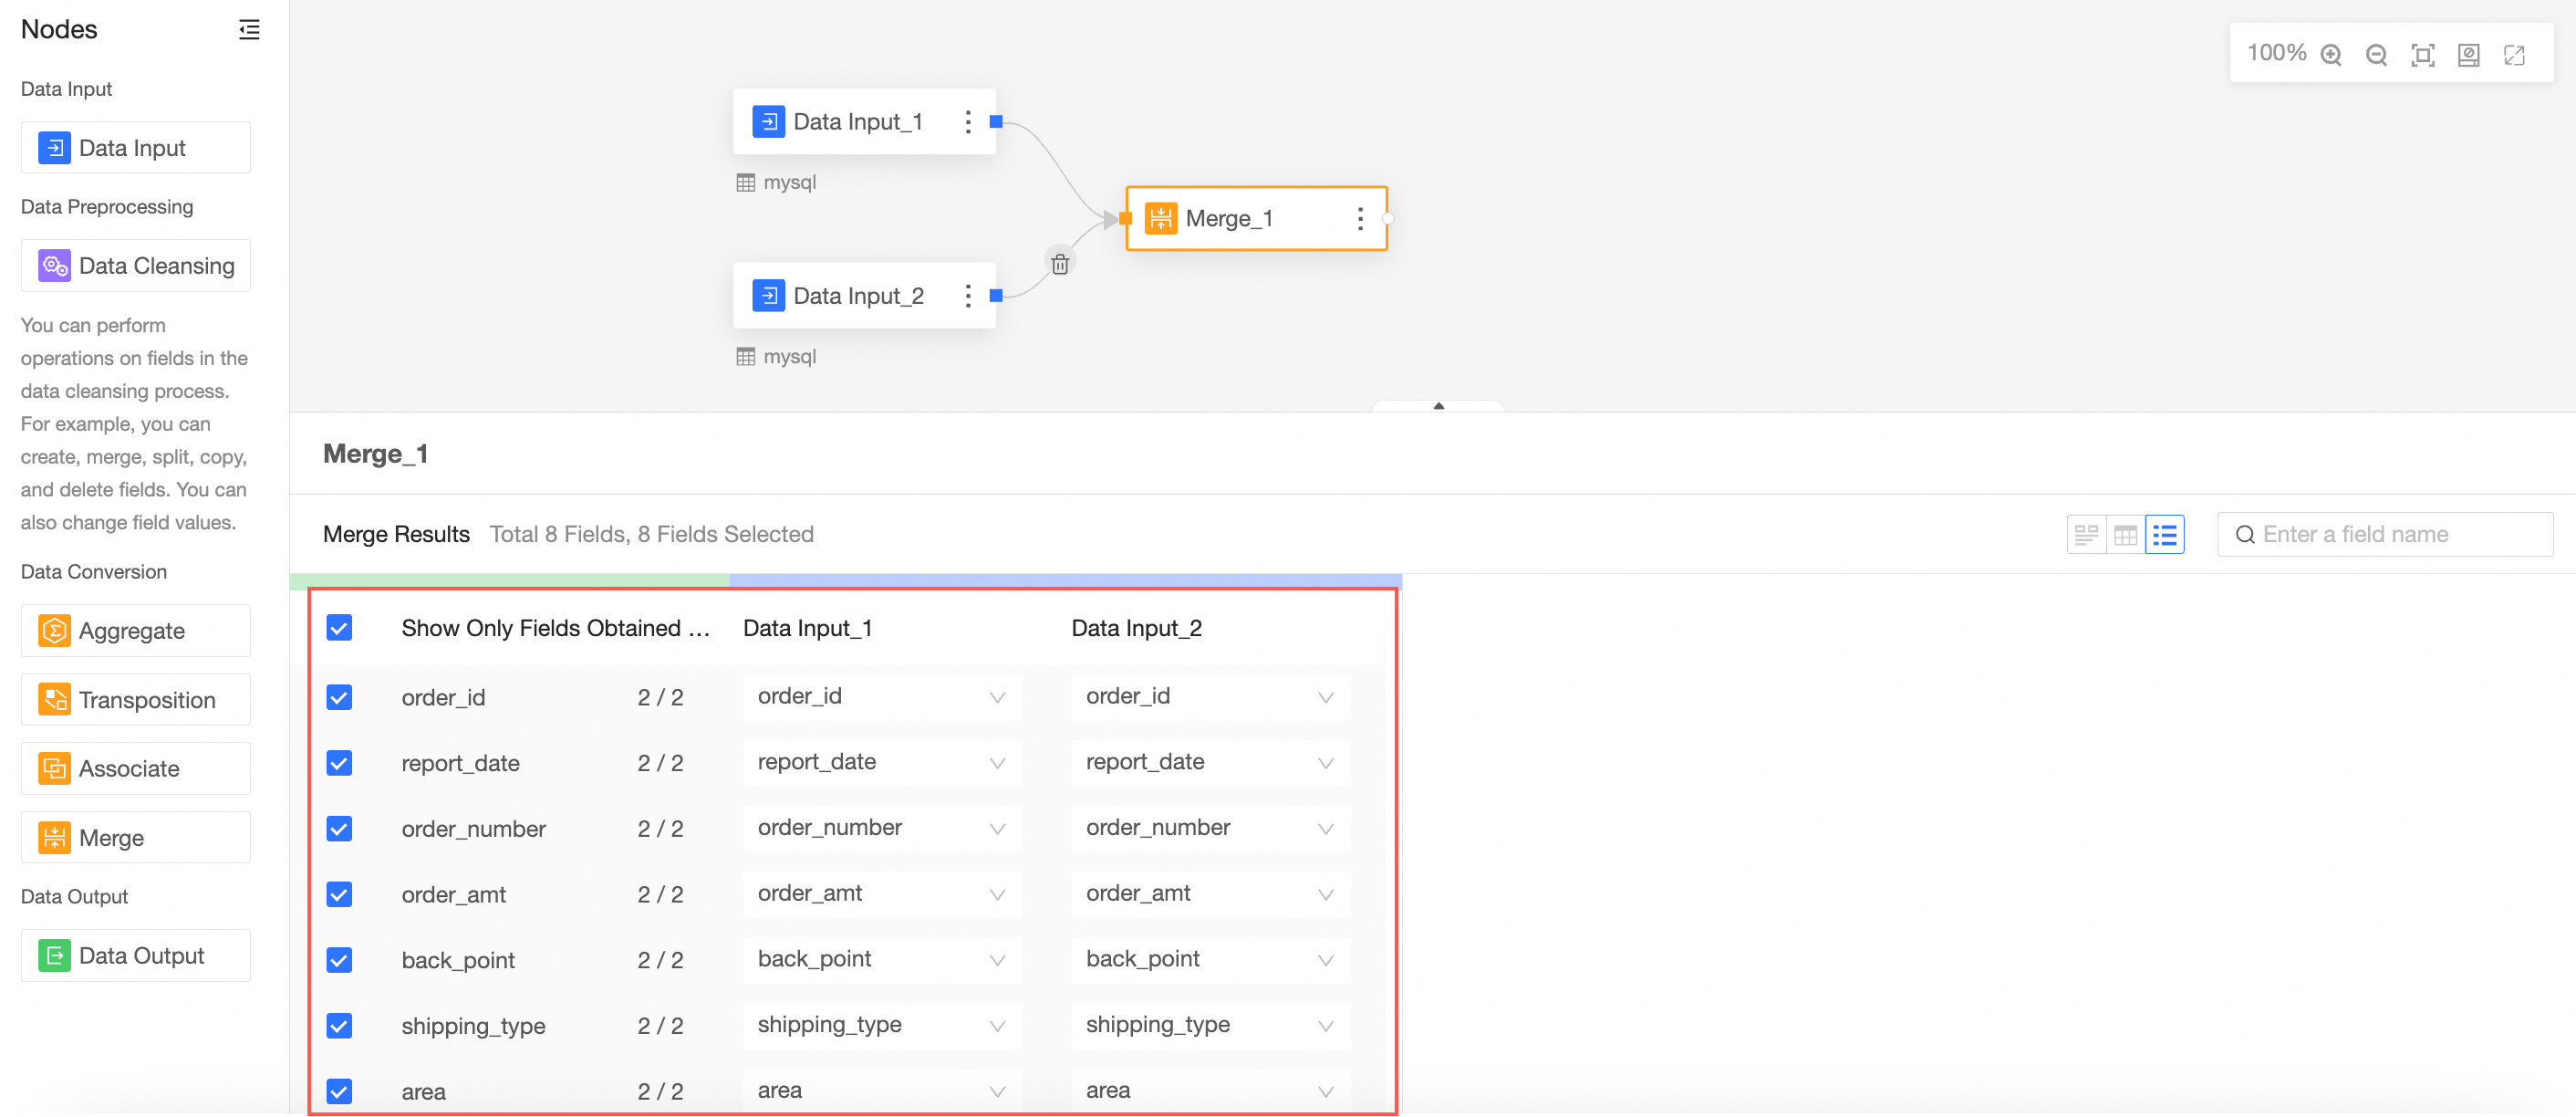
Configure the merge node.
In this case, the fields in the merge node are the fields with the same name in data input 1 and data input 2.
View data details.
You can view the Data Exploration, Data Details, and Field List parameters.

Data exploration, you can view the data in the table:
Basic characteristics (type, format)
Quality: normal value, null value | abnormal value
The distribution, type, and format of values in a single field.
The data relationship and value distribution law in the linkage mode.
For more information, see Data exploration.
Data Details: displays the merged columns and data of the two tables. All fields and data in the primary table (data input 1) will be displayed. Data corresponding to the same fields in the secondary table (data input 2) will be expanded on rows. Different fields and data will not be displayed.
Field List: displays the fields of the primary table whose data input is 1.
Cleaning and processing
Remove unnecessary columns and rows from the data table and add required columns and rows.
Drag Cleaning and Processing from the left-side node section to the canvas section.
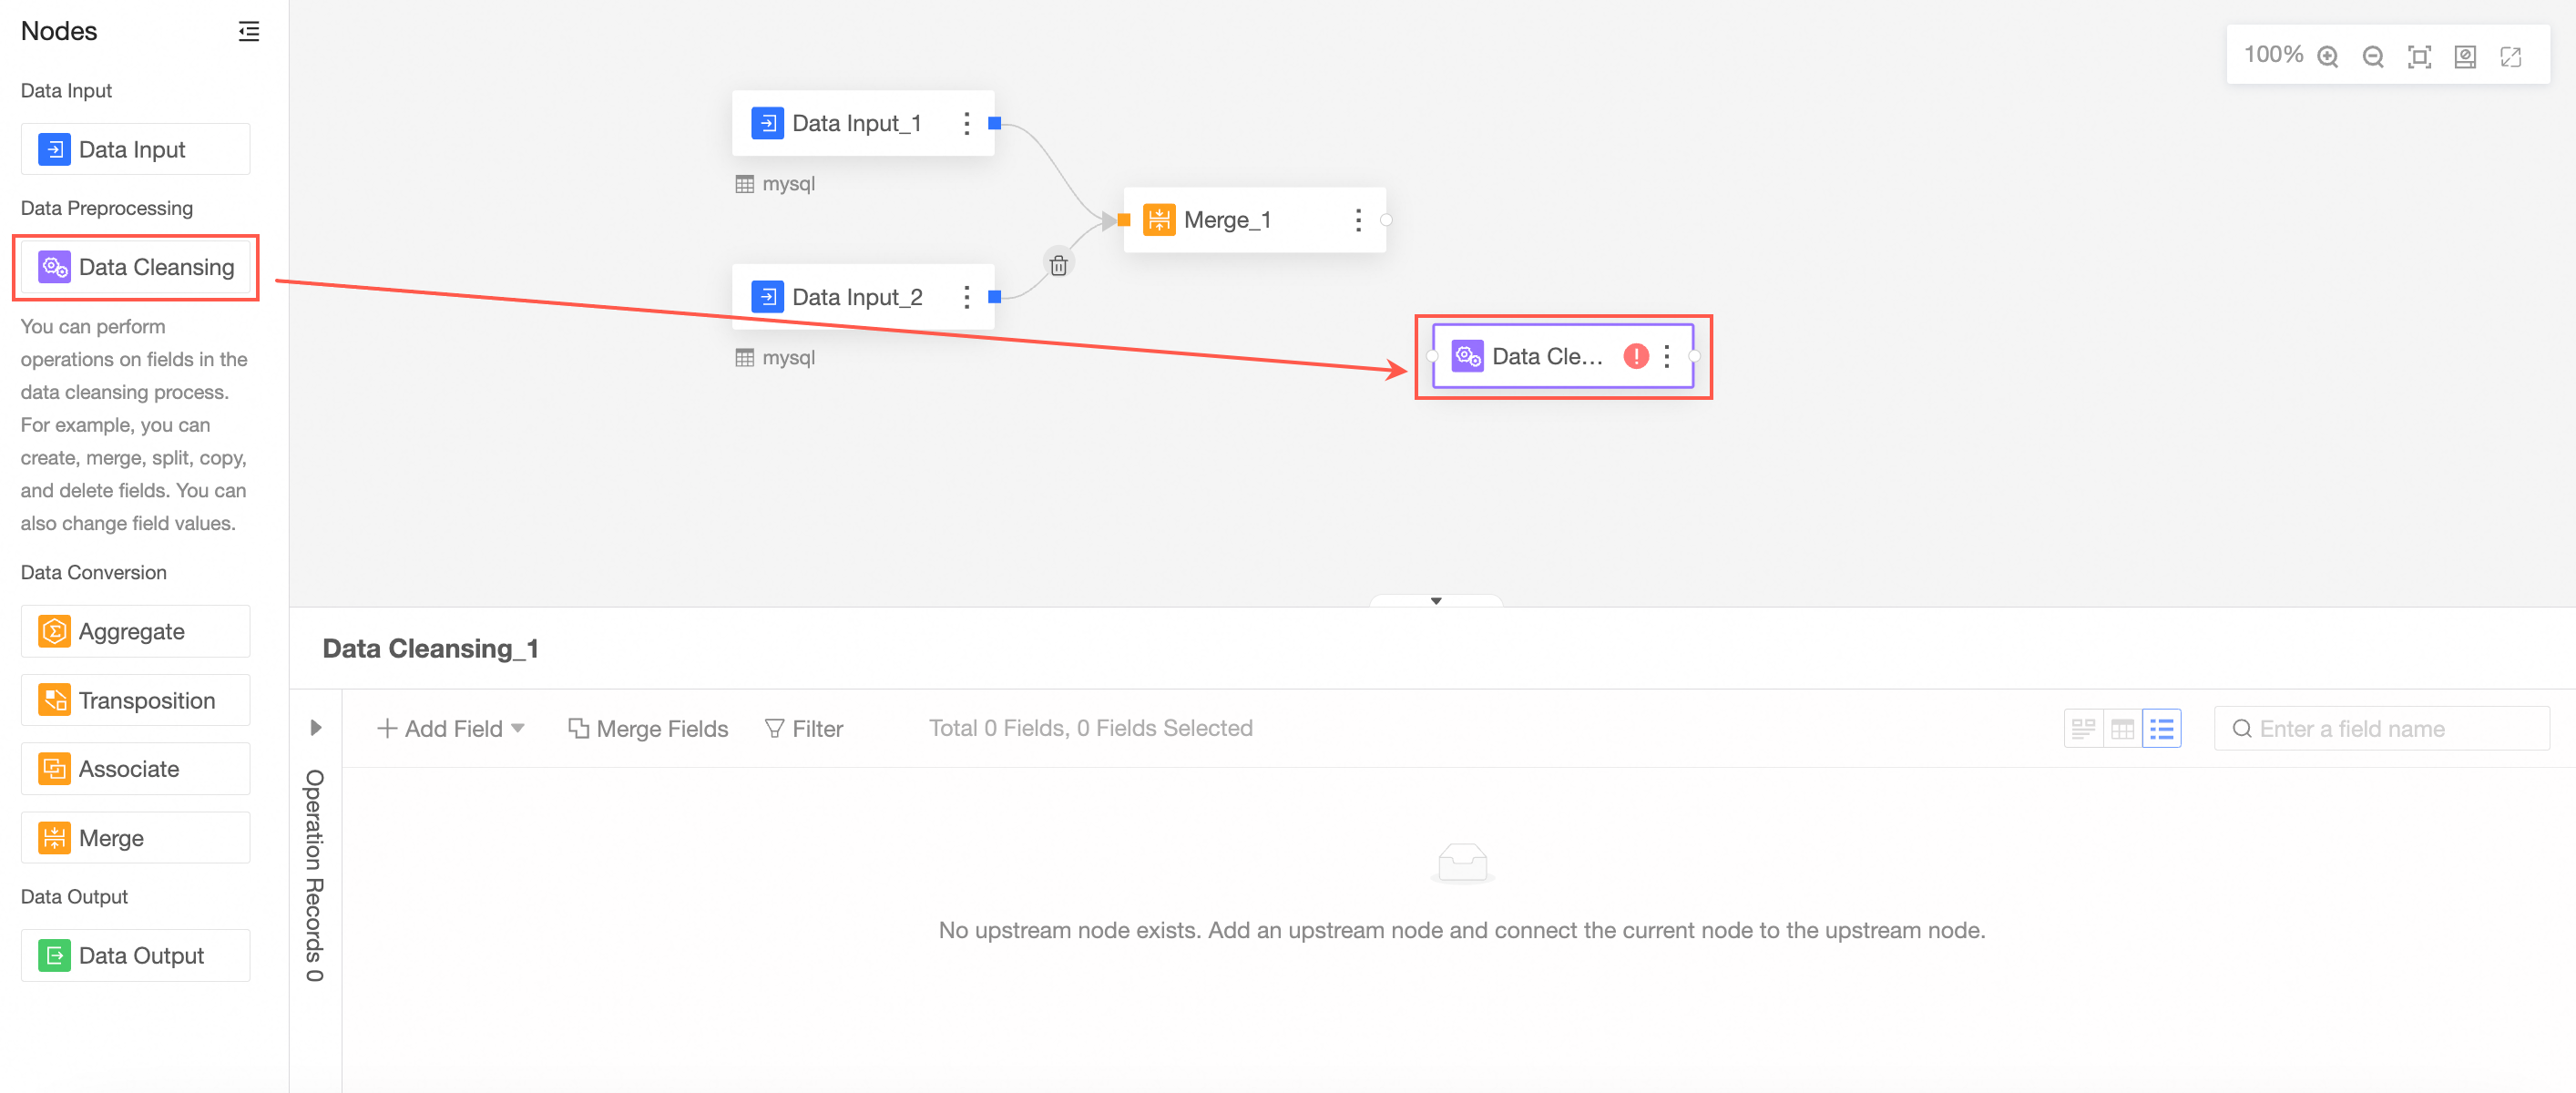
Connect the nodes to be cleaned and processed.
In the Cleaning and Processing Node Configuration section, configure the following parameters.
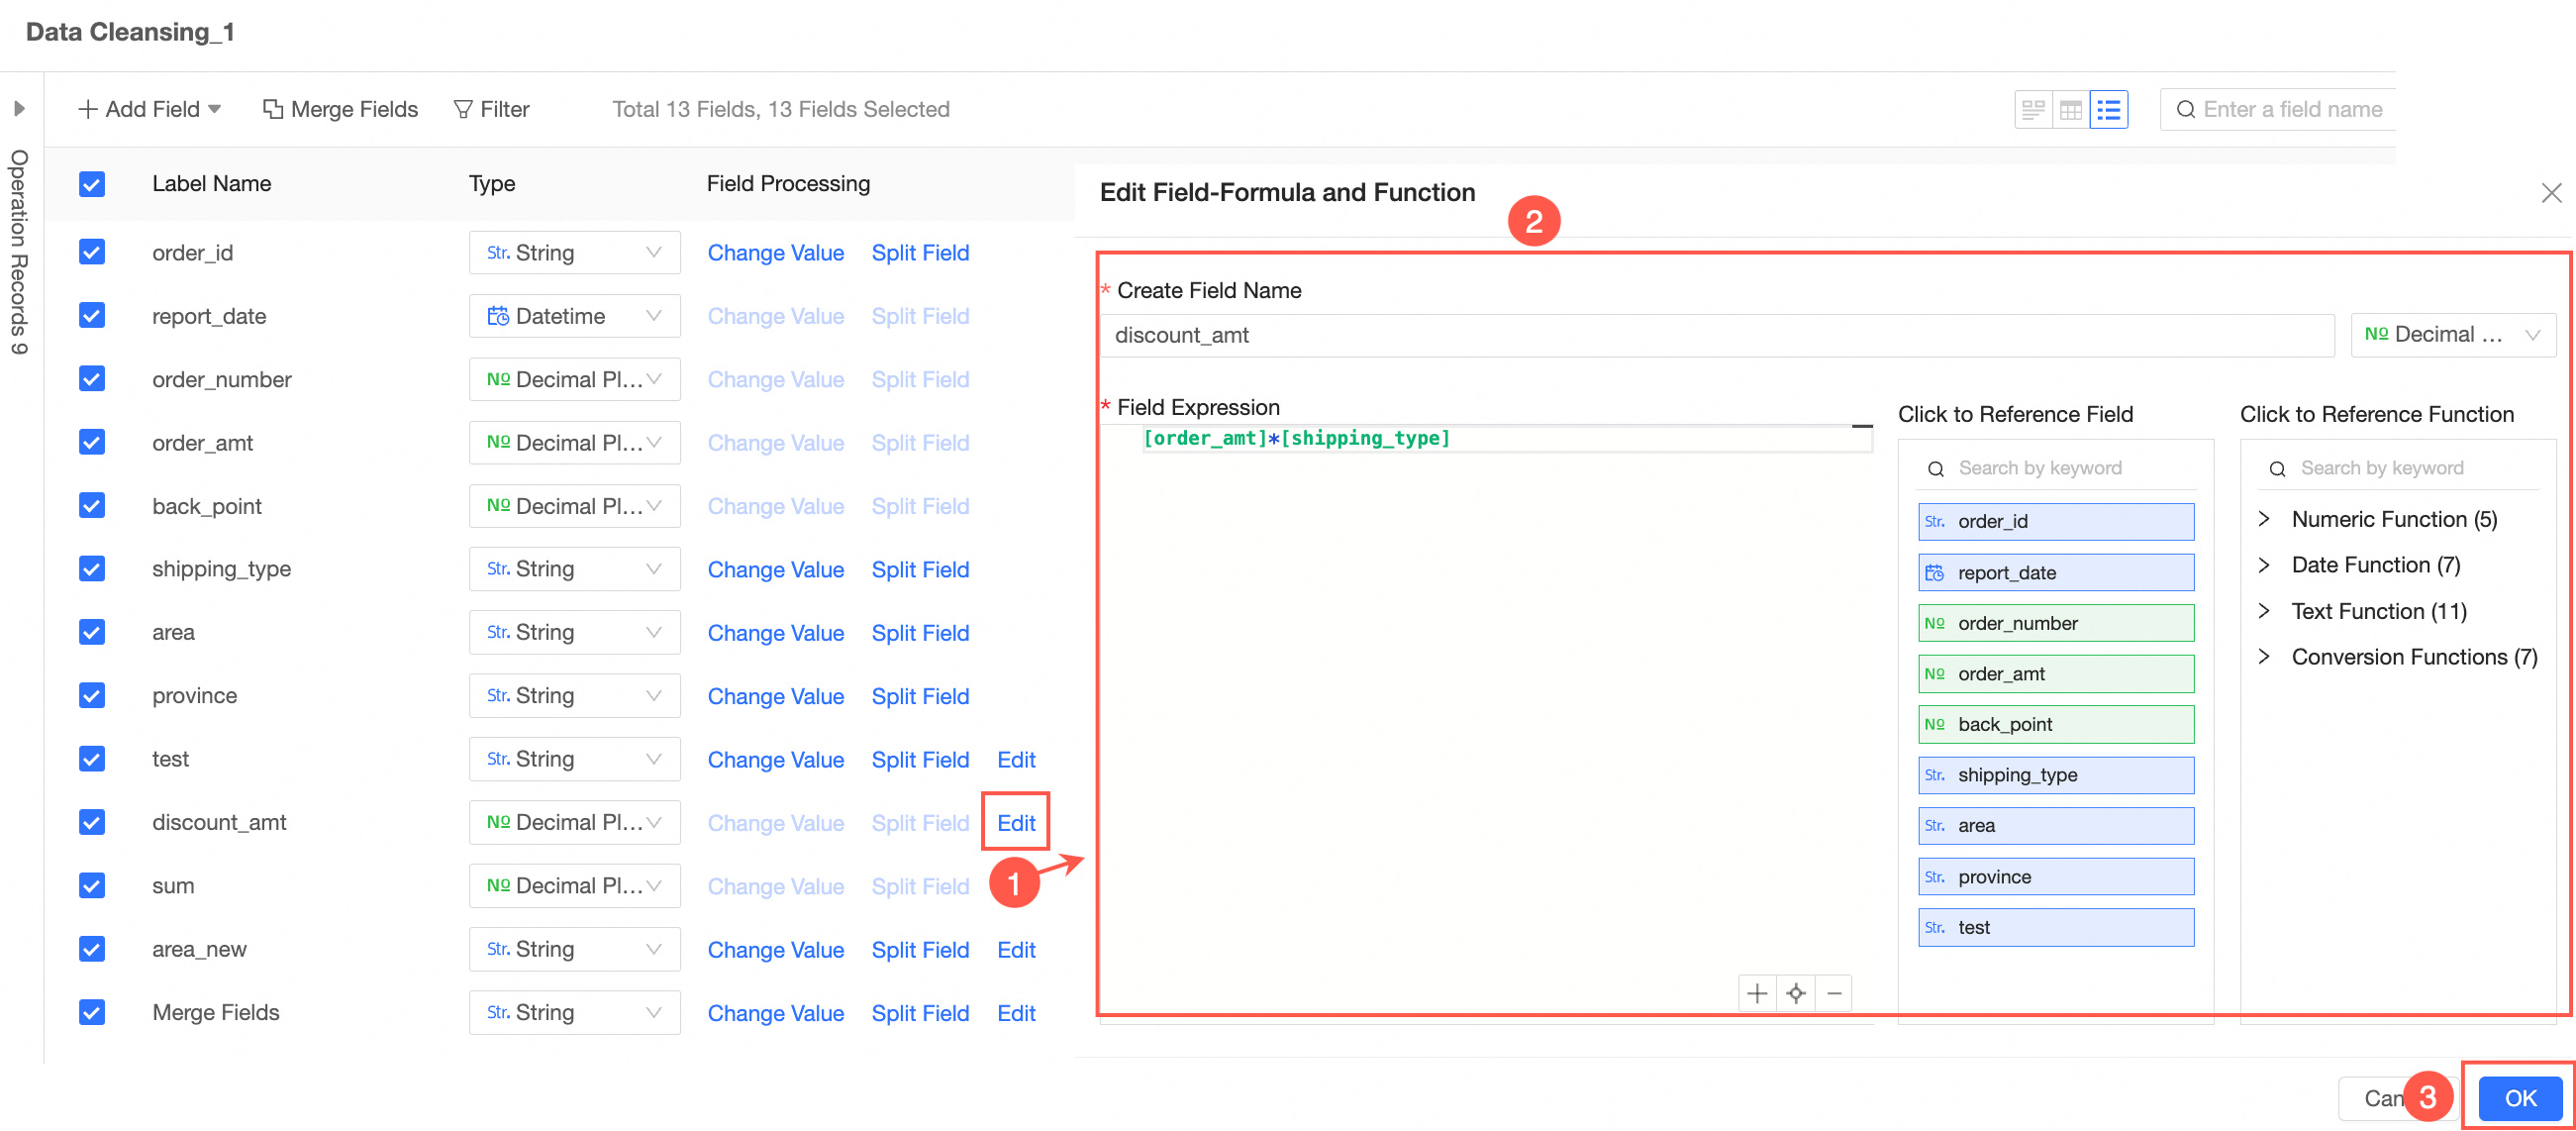
Add a calculated field
You can follow the steps shown in the following figure to go to the Add Calculated Field page.

In the Add Field-Formula Function dialog box, set New Field Name and Field Expression, select Field Type, and then click OK.
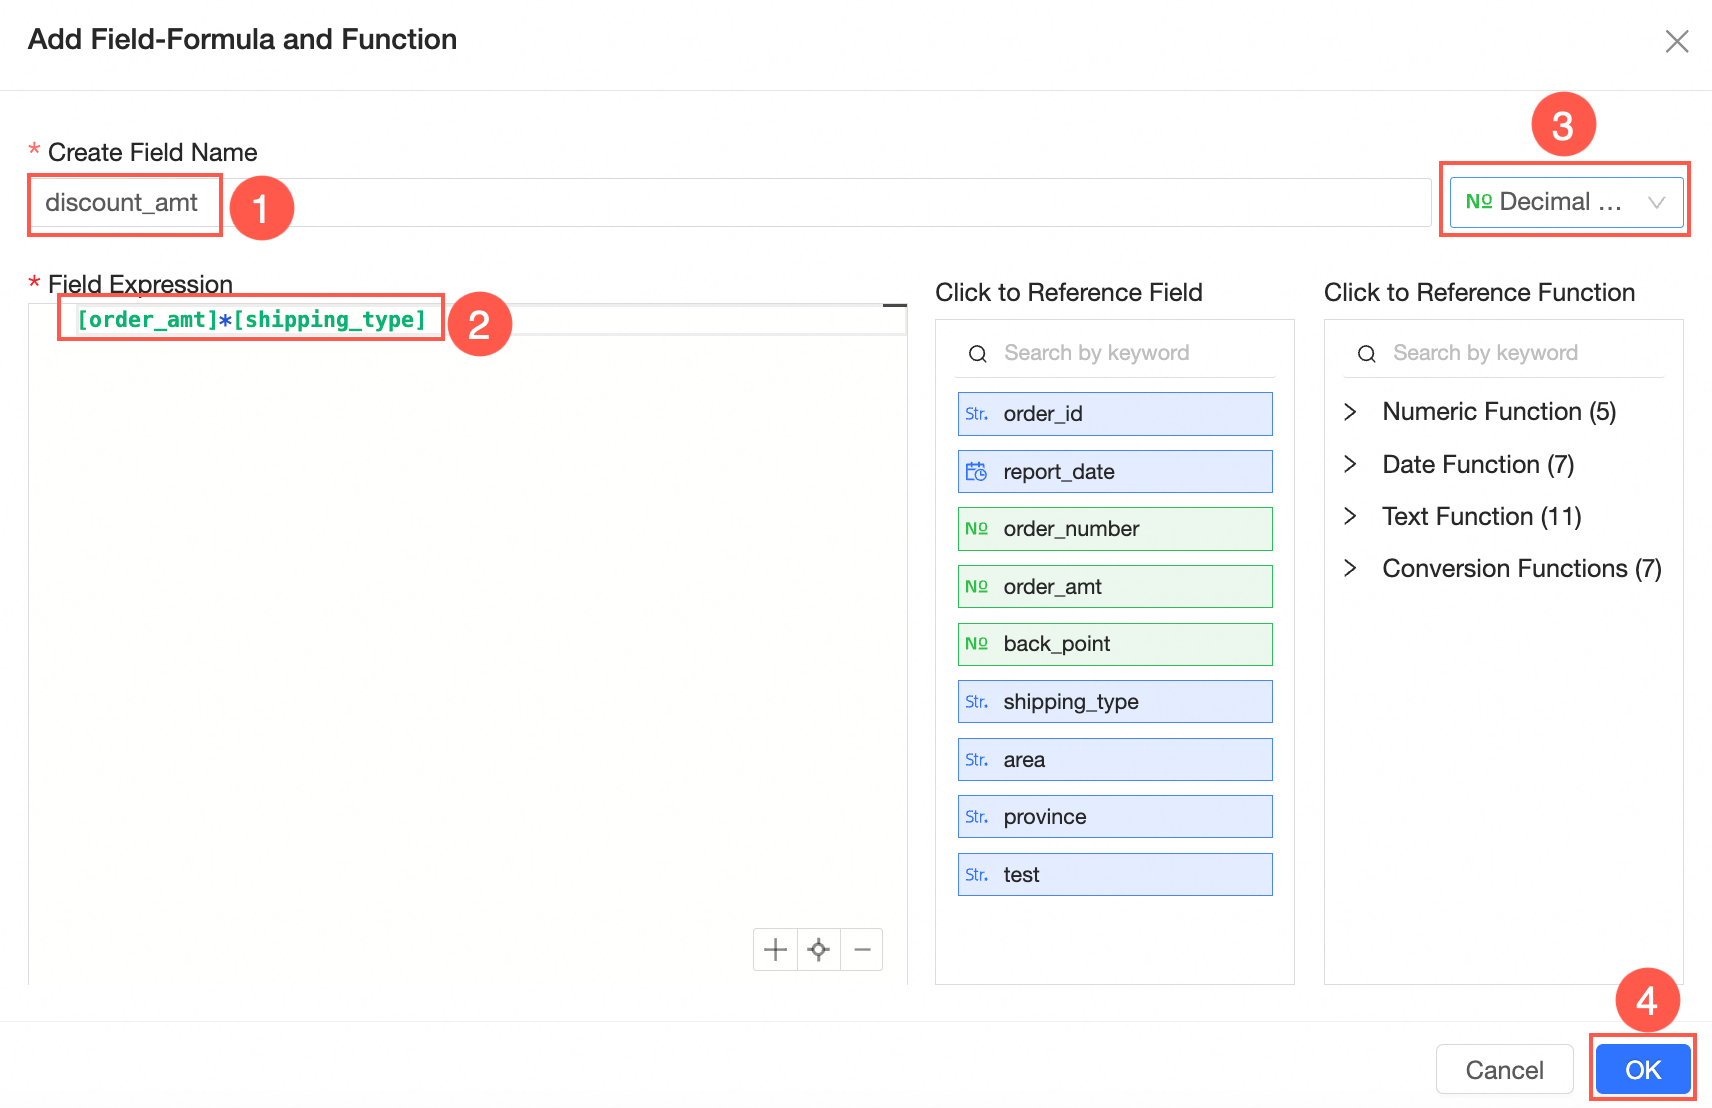
For more examples of calculated fields, see Create a calculated field.
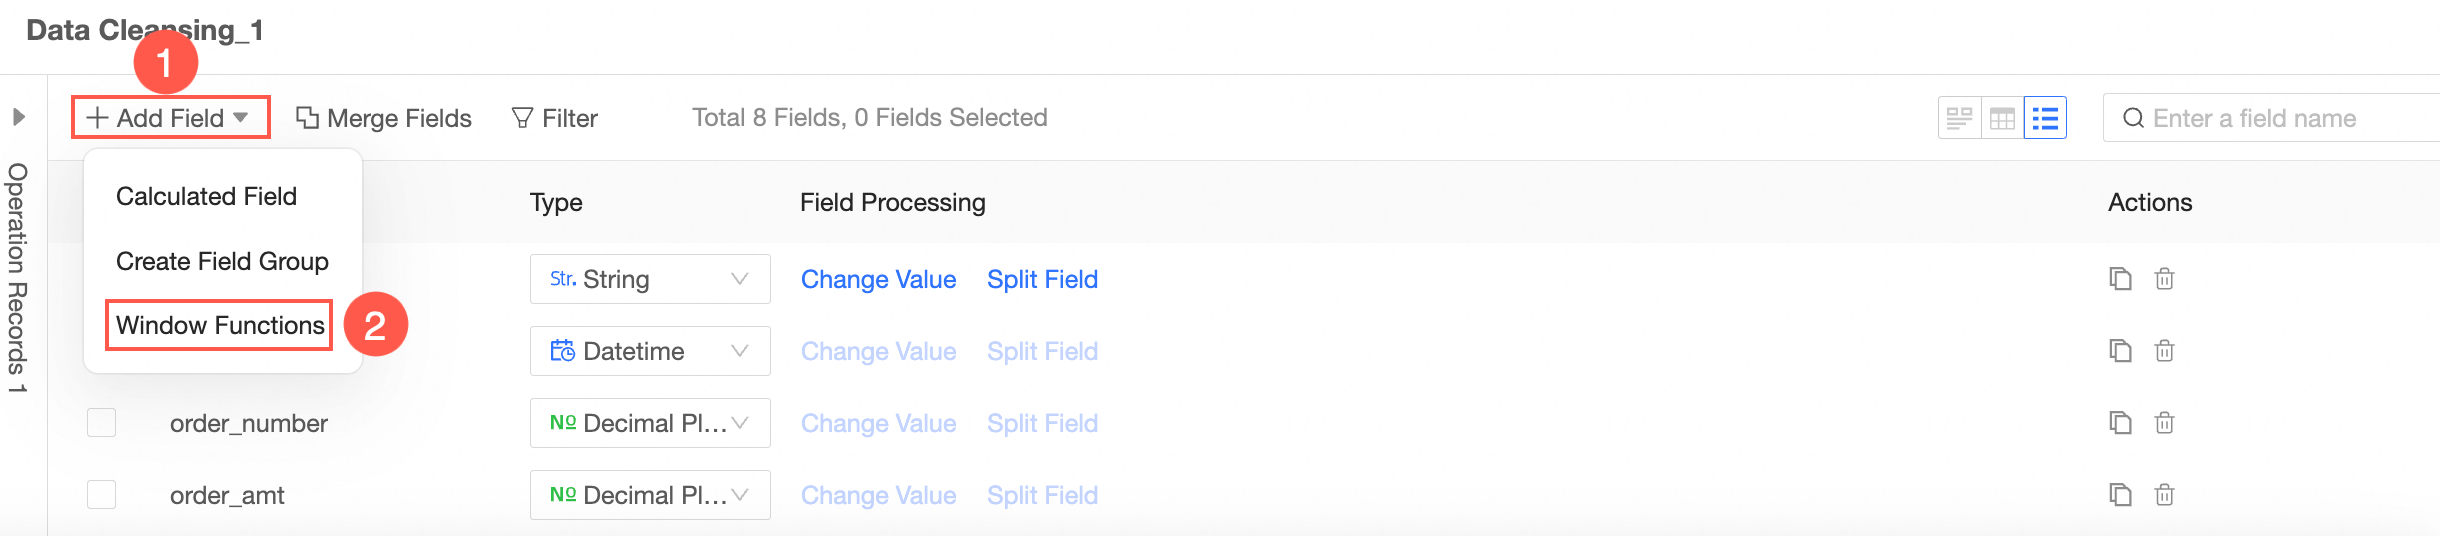
Add a window function
You can follow the steps shown in the following figure to go to the Add Window Function configuration page.
In the Add Field-Window Function dialog box, set New Field Name and Field Expression, select Field Type, and then click OK to save the configuration.
Noteyou only need to enter window_fuc(args) in the field expression. you do not need to enter the sql code after over. otherwise, an error is reported.
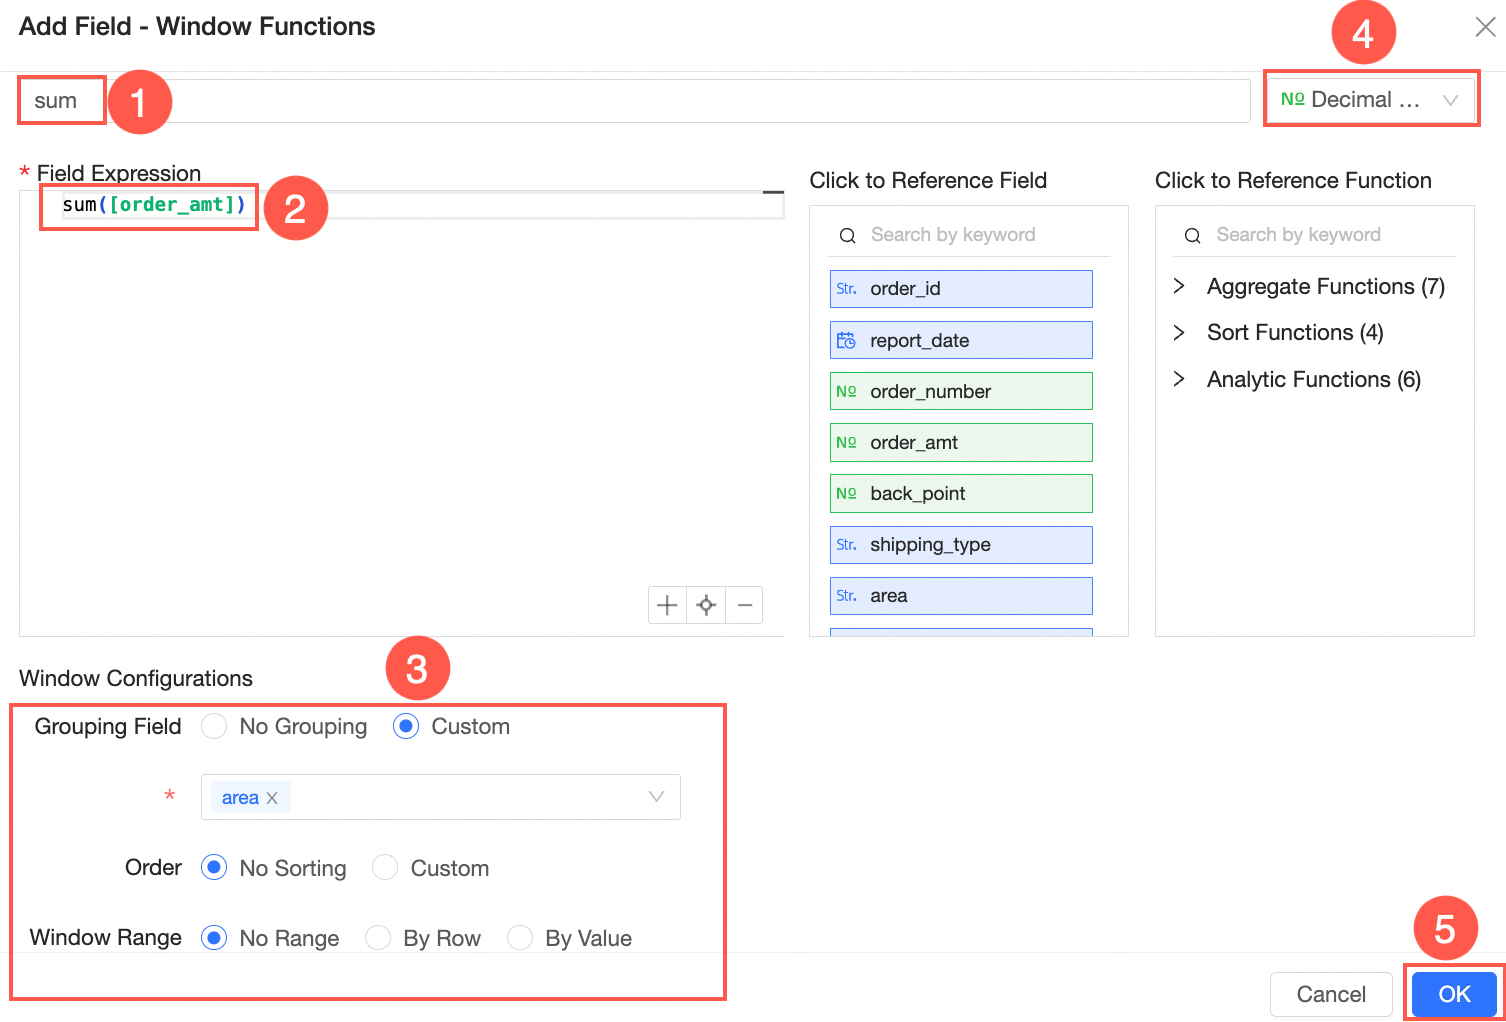 In the window configuration, configure the following parameters:
  ① Group field
By default, no group is selected.
NoteNo grouping indicates that all data is calculated as a group.
If the group field is set, the calculation will be performed within each group.
You can select multiple grouping fields.
You can also customize the grouping fields.
② Sorting
By default, no sorting is selected. You can also select a field to customize sorting settings.
NoteAfter sorting is set, the group is sorted based on the sorting field.
You can set a maximum of five sorting fields.
If the sorting function, cume_dist(), exists, the sorting field must be included.
③ Window range
By default, no range is specified. You can select By Row or By Value. After the window range is selected, the data involved in the calculation will be calculated in the window range. If the range is not set, the data will be calculated in the entire group.
You can select the start element, current element, and pre-offset n for the Window Start parameter.
Partition start element: the first row /value data in the group.
Current element: Current row /value.
Pre-offset n: Offsets the current row /value forward by n rows /values.
You can select the current element, the end element of the partition, and the post offset n for the Window End parameter.
Current element: Current row /value.
End of partition element: the last row /value data of the group.
Post offset n: The current row is offset backward by n rows /value.
NoteIf the sorting function and cume_dist(), ntile(), lead(), and lag() exist, the window range does not support "select by row" and "select by value".
If DateTime, Time, and text type exist in the sort field, the "pre-offset n" and "post-offset n" selected by value are not supported.
If the window range is selected by value, there must be 1 sort field (there is and can only be 1).
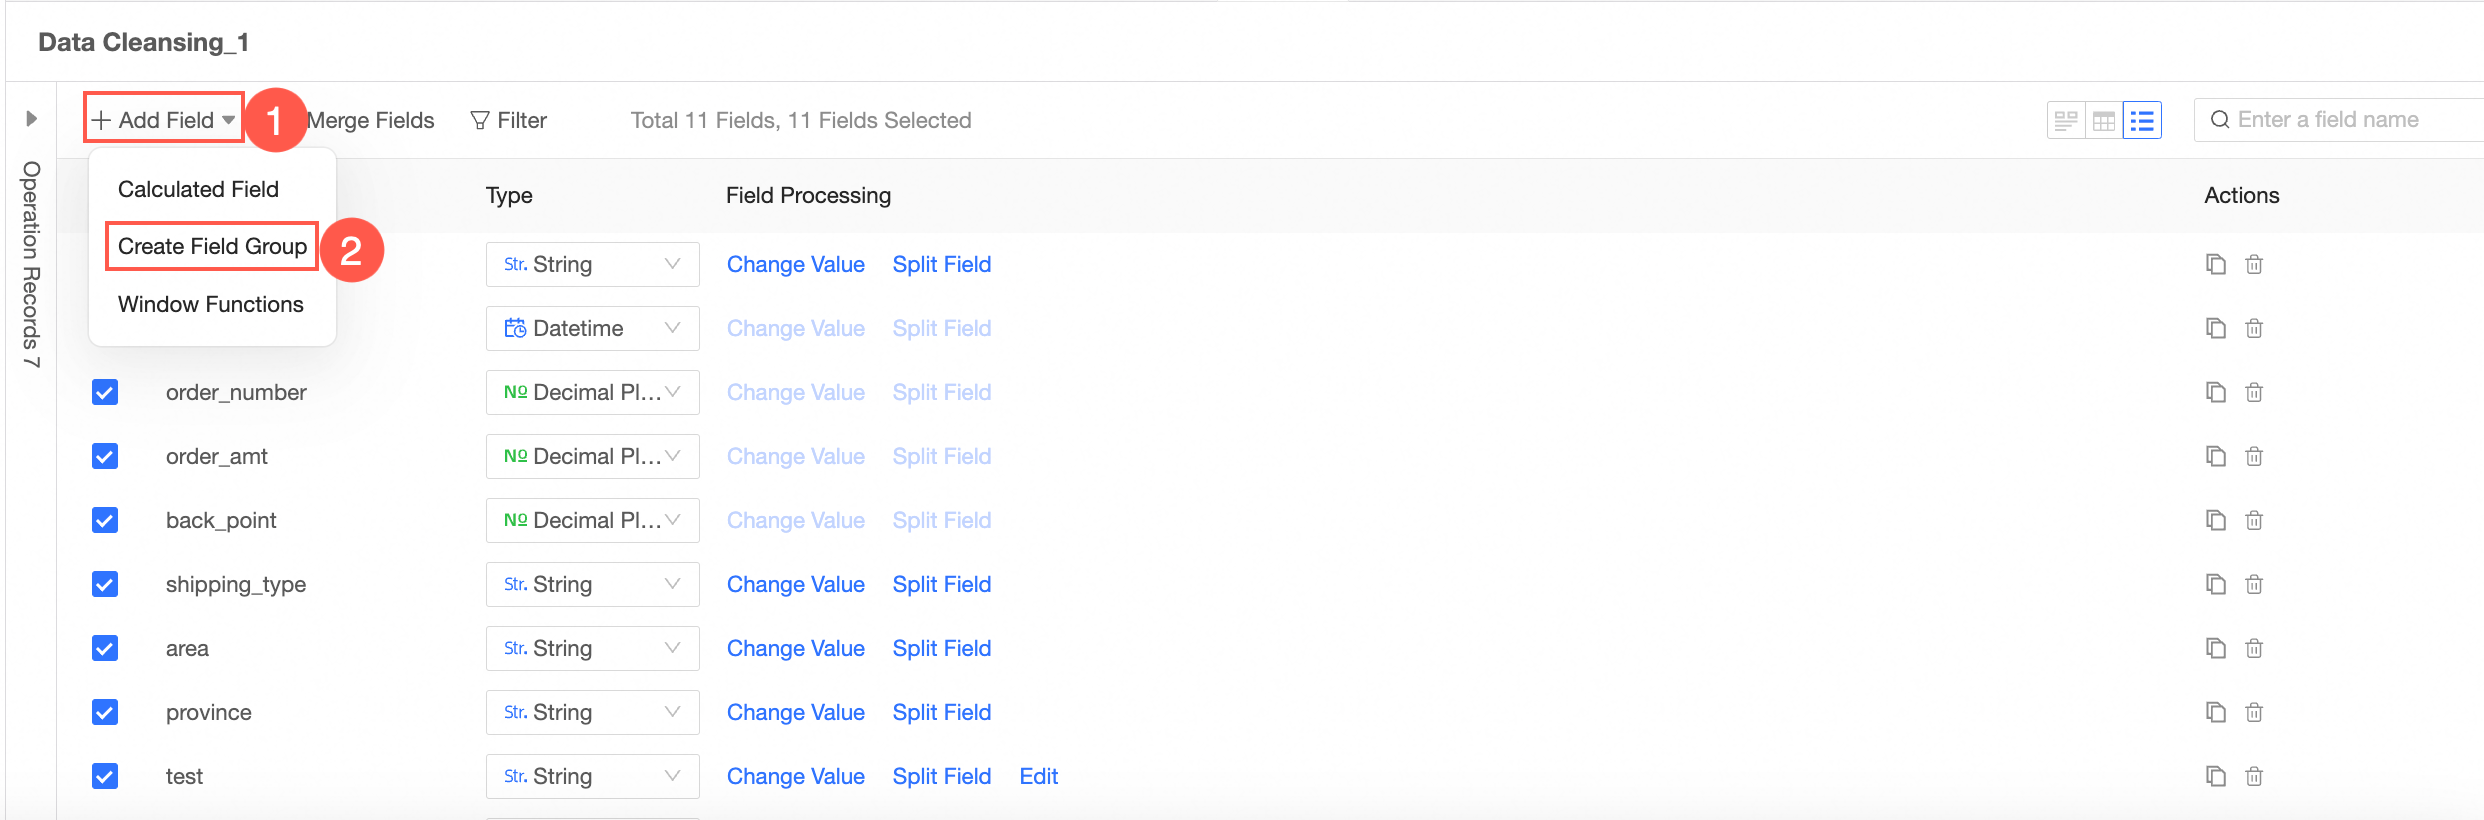
Add Group Assignment
You can follow the steps shown in the following figure to go to the Add Group Assignment configuration page.
In the Add Field-Group Assignment dialog box, set New Field Name, select Grouping Field, and then click Group Settings. Then, click OK.
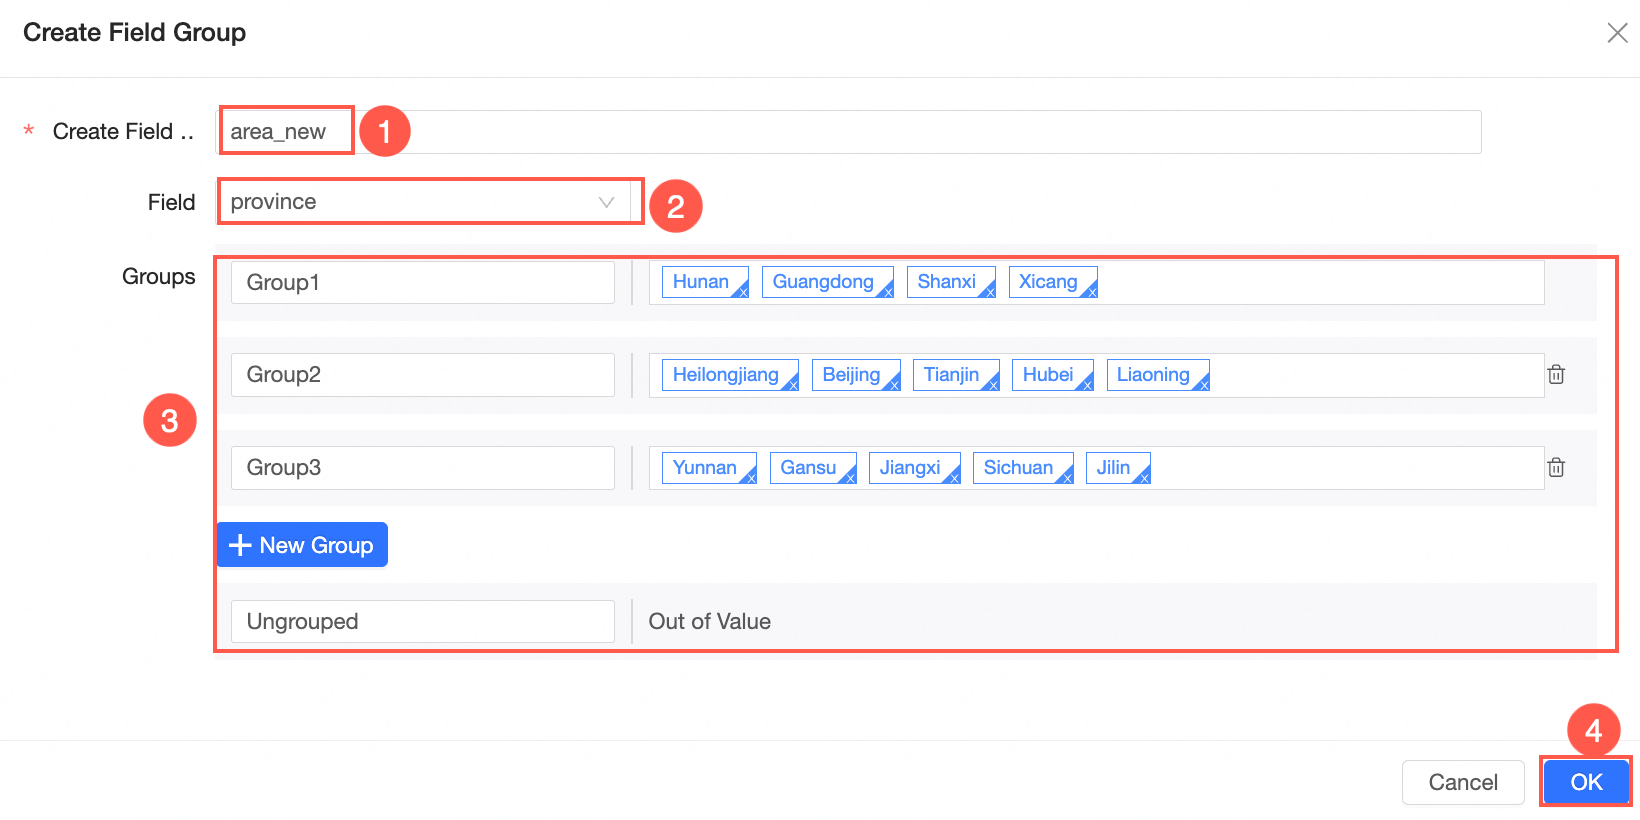
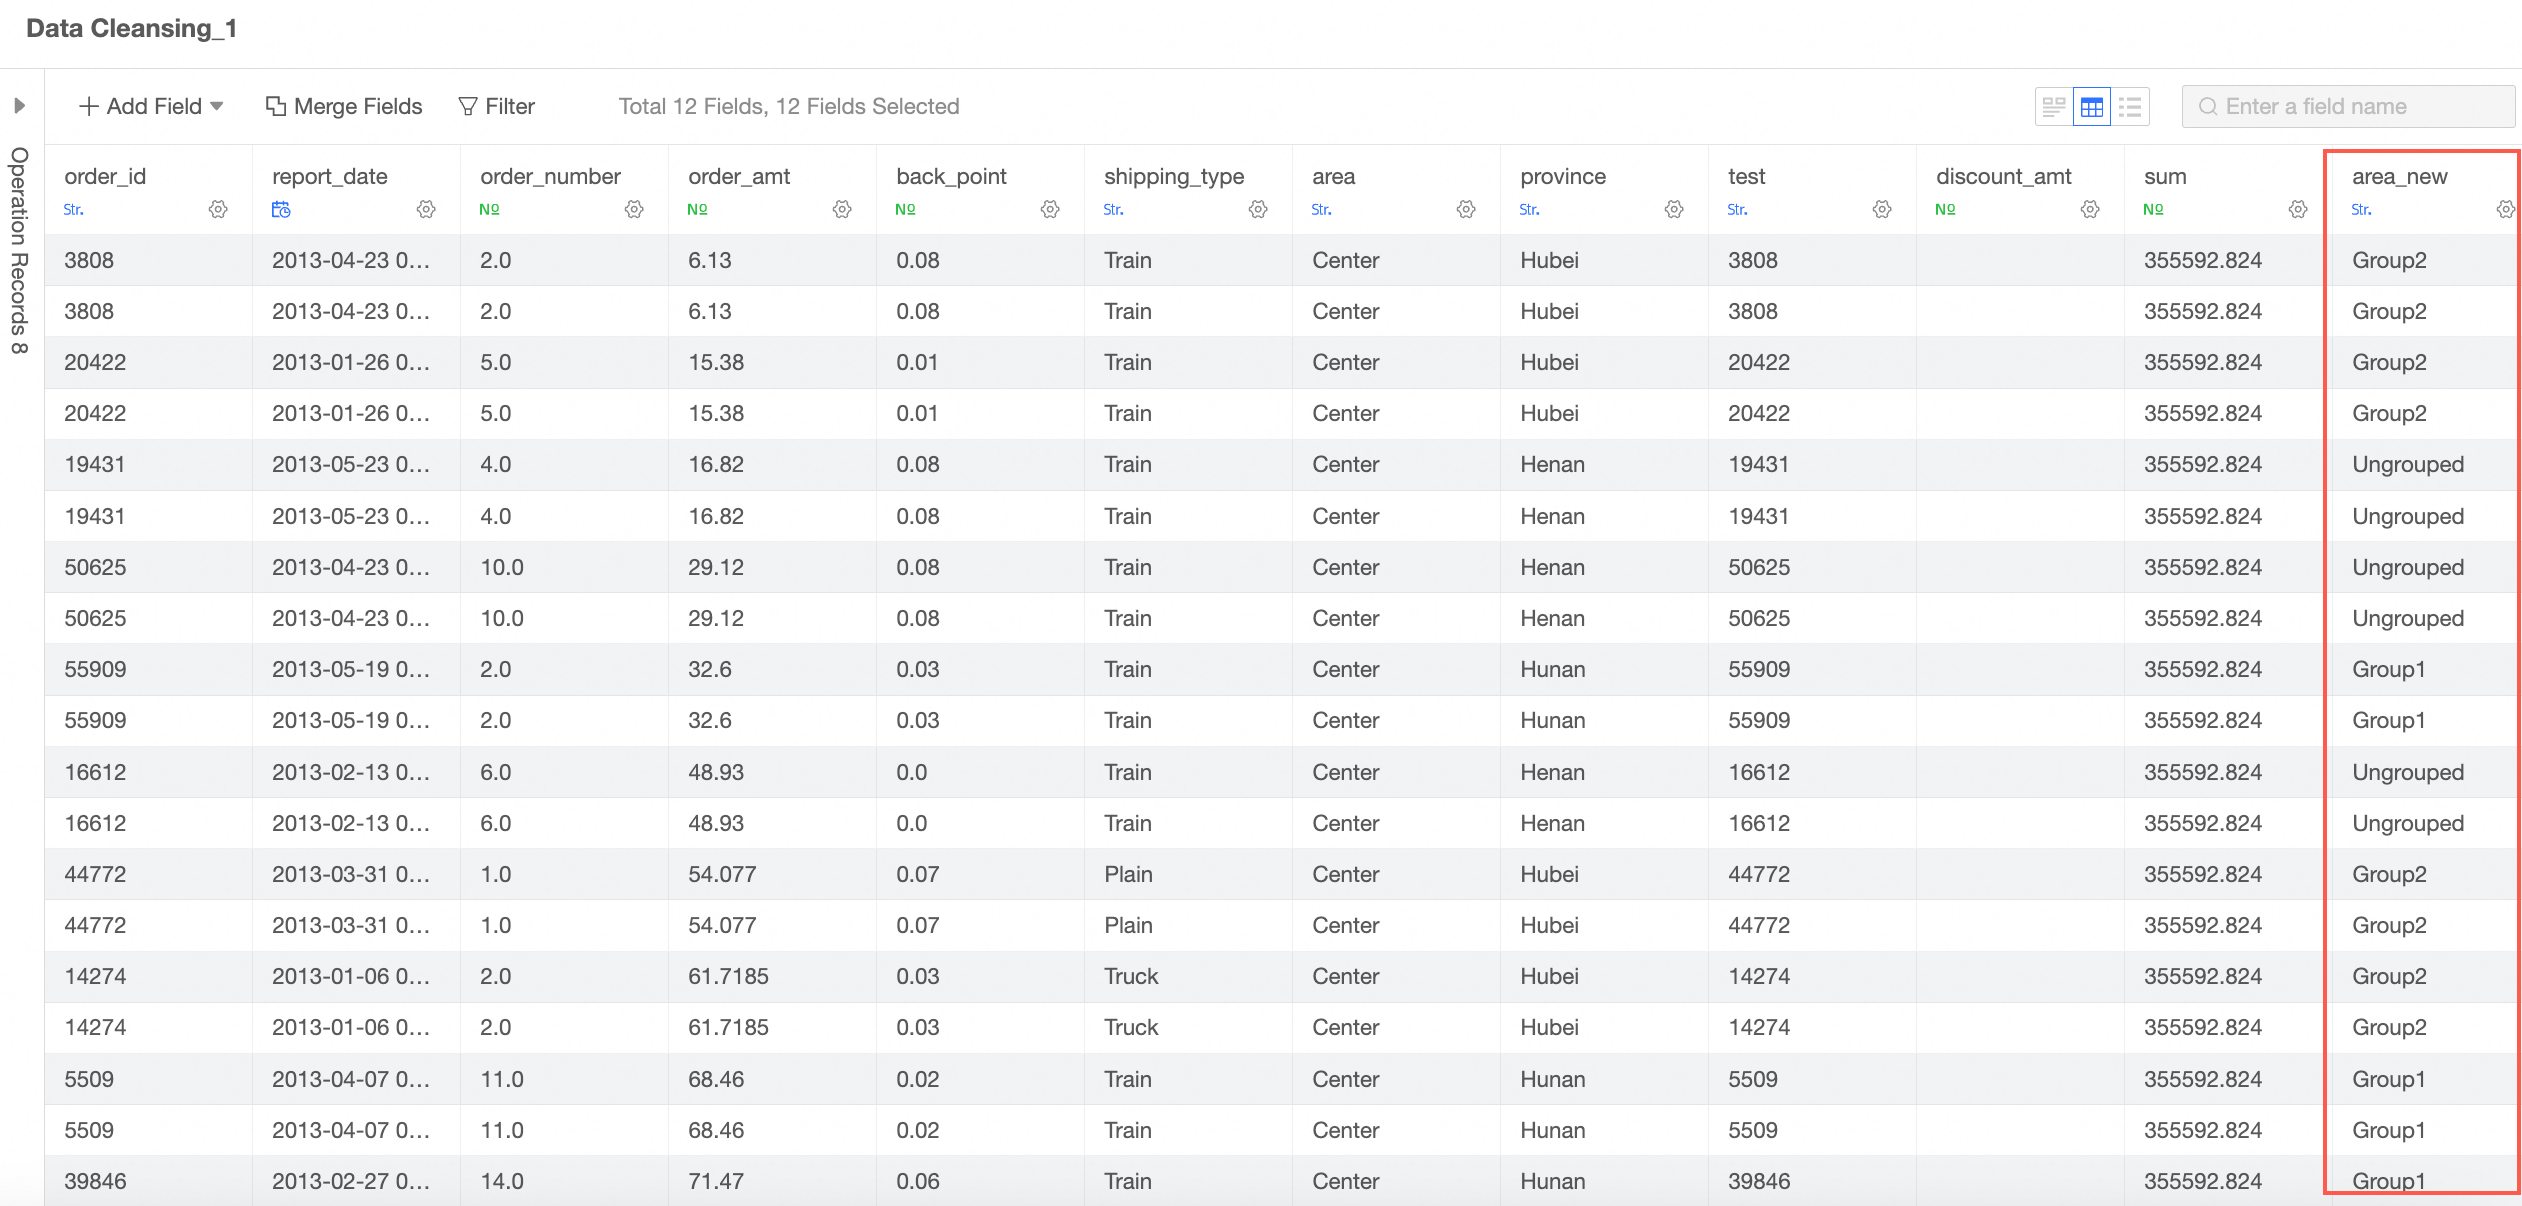
After you save the configurations, a dimension field is added to the dataset. You can enter group names in this column based on the configurations.
 For more information about grouping dimensions, see Grouping dimensions.
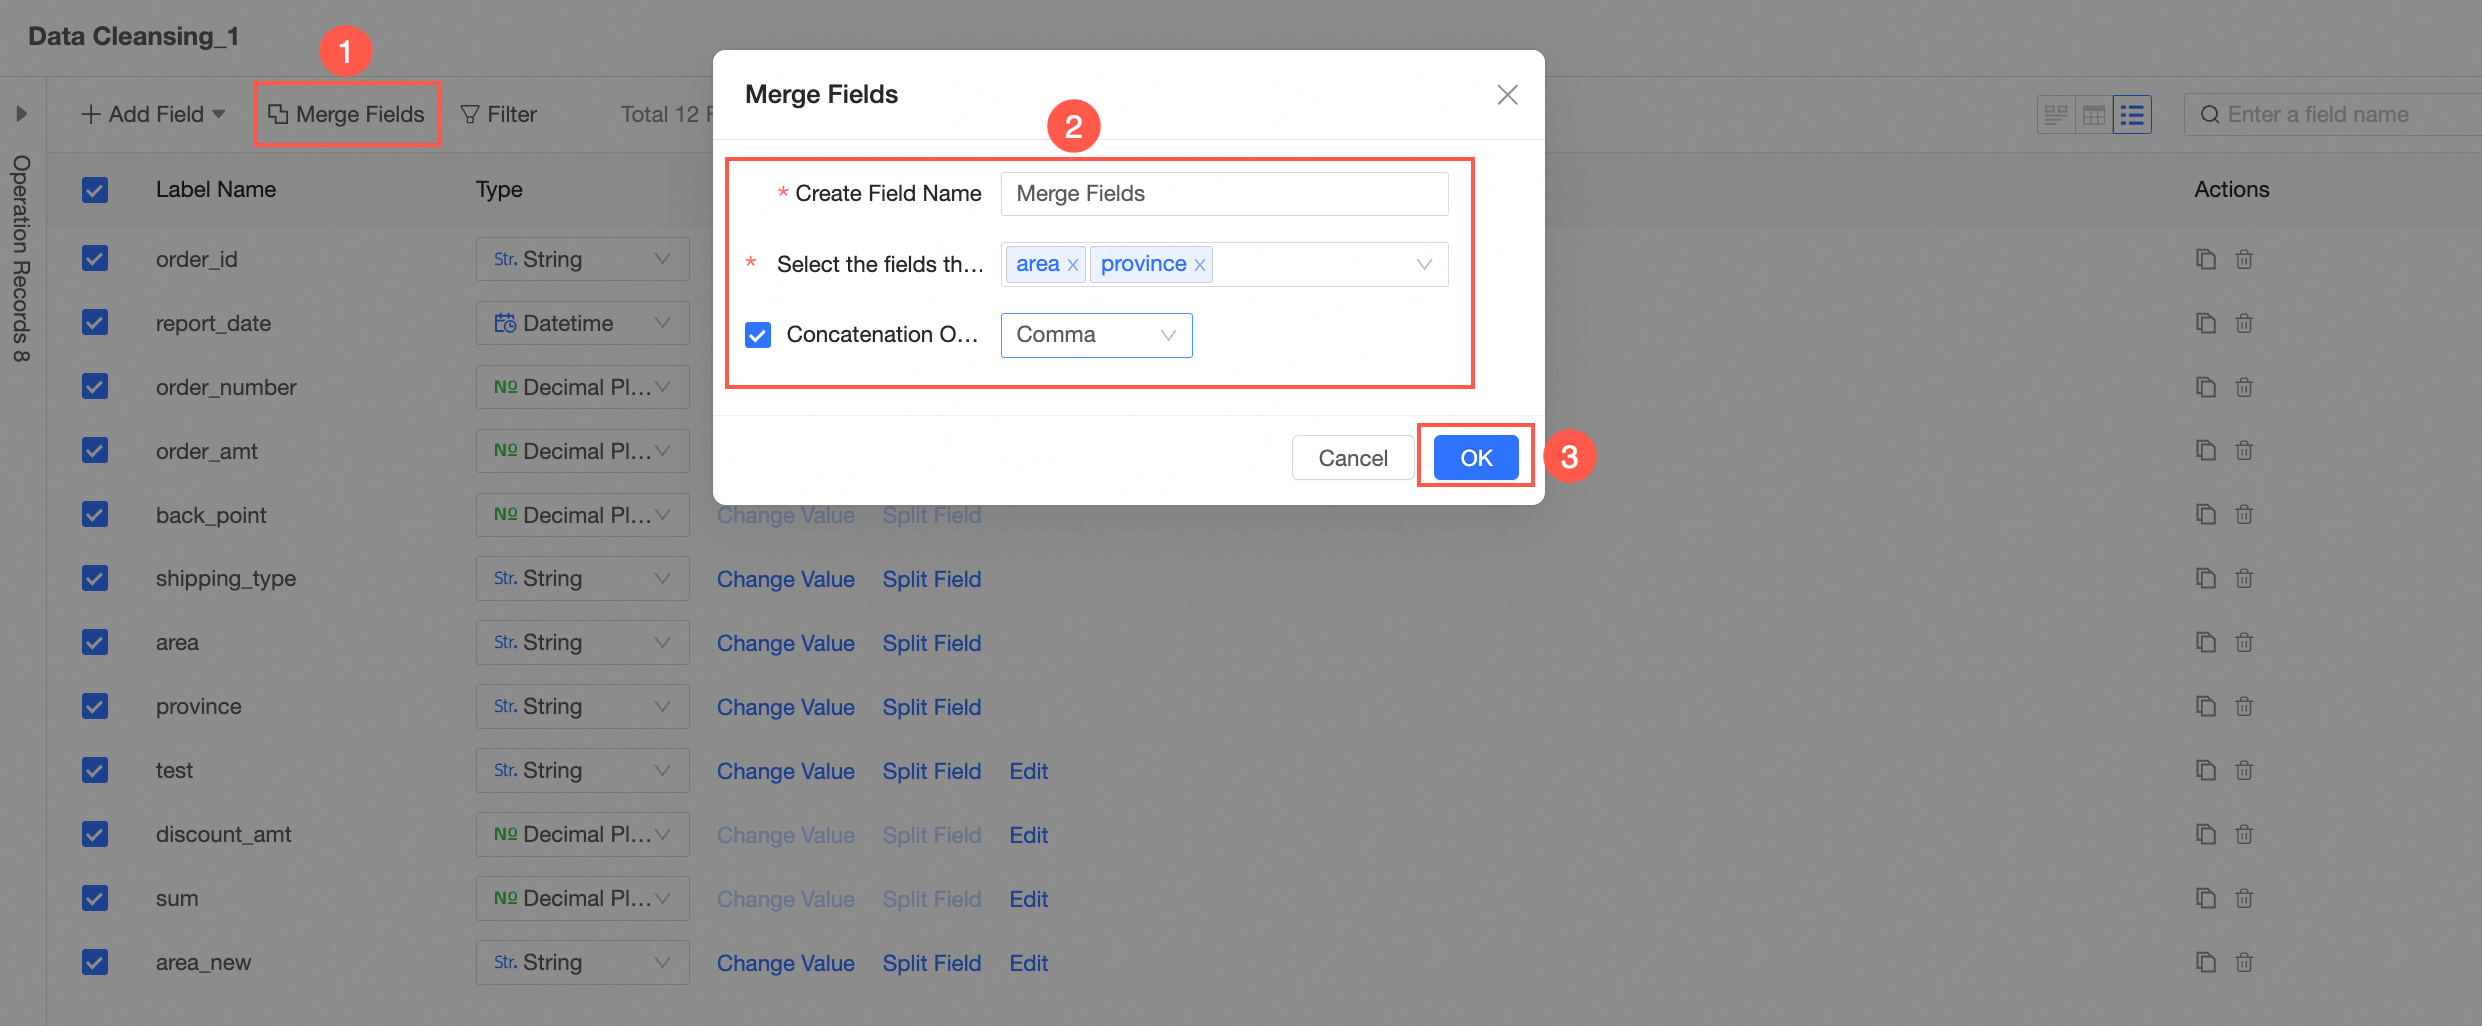
Merge Field
NoteThis operation is supported only when the field type is Text.
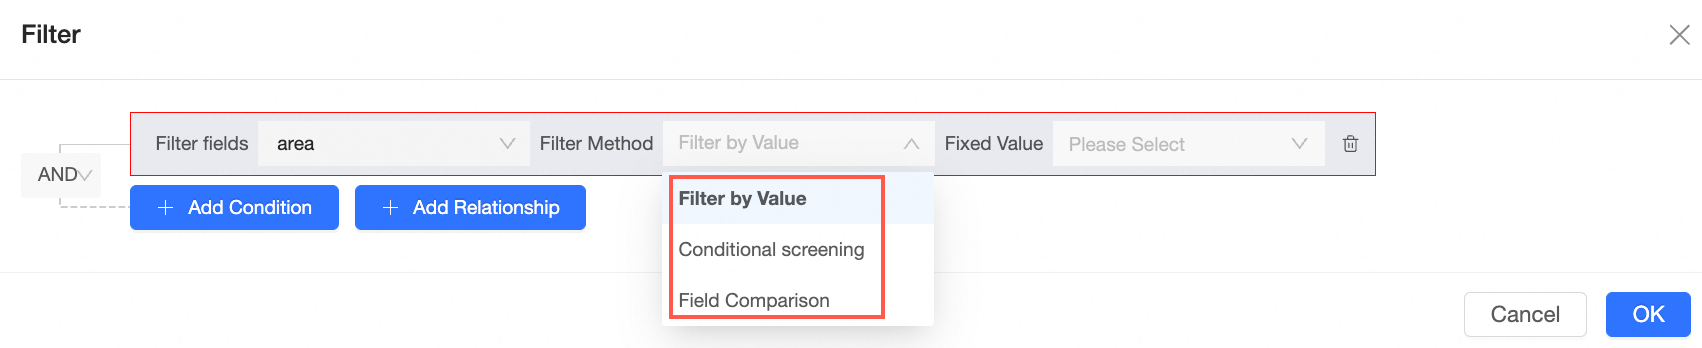
Filter
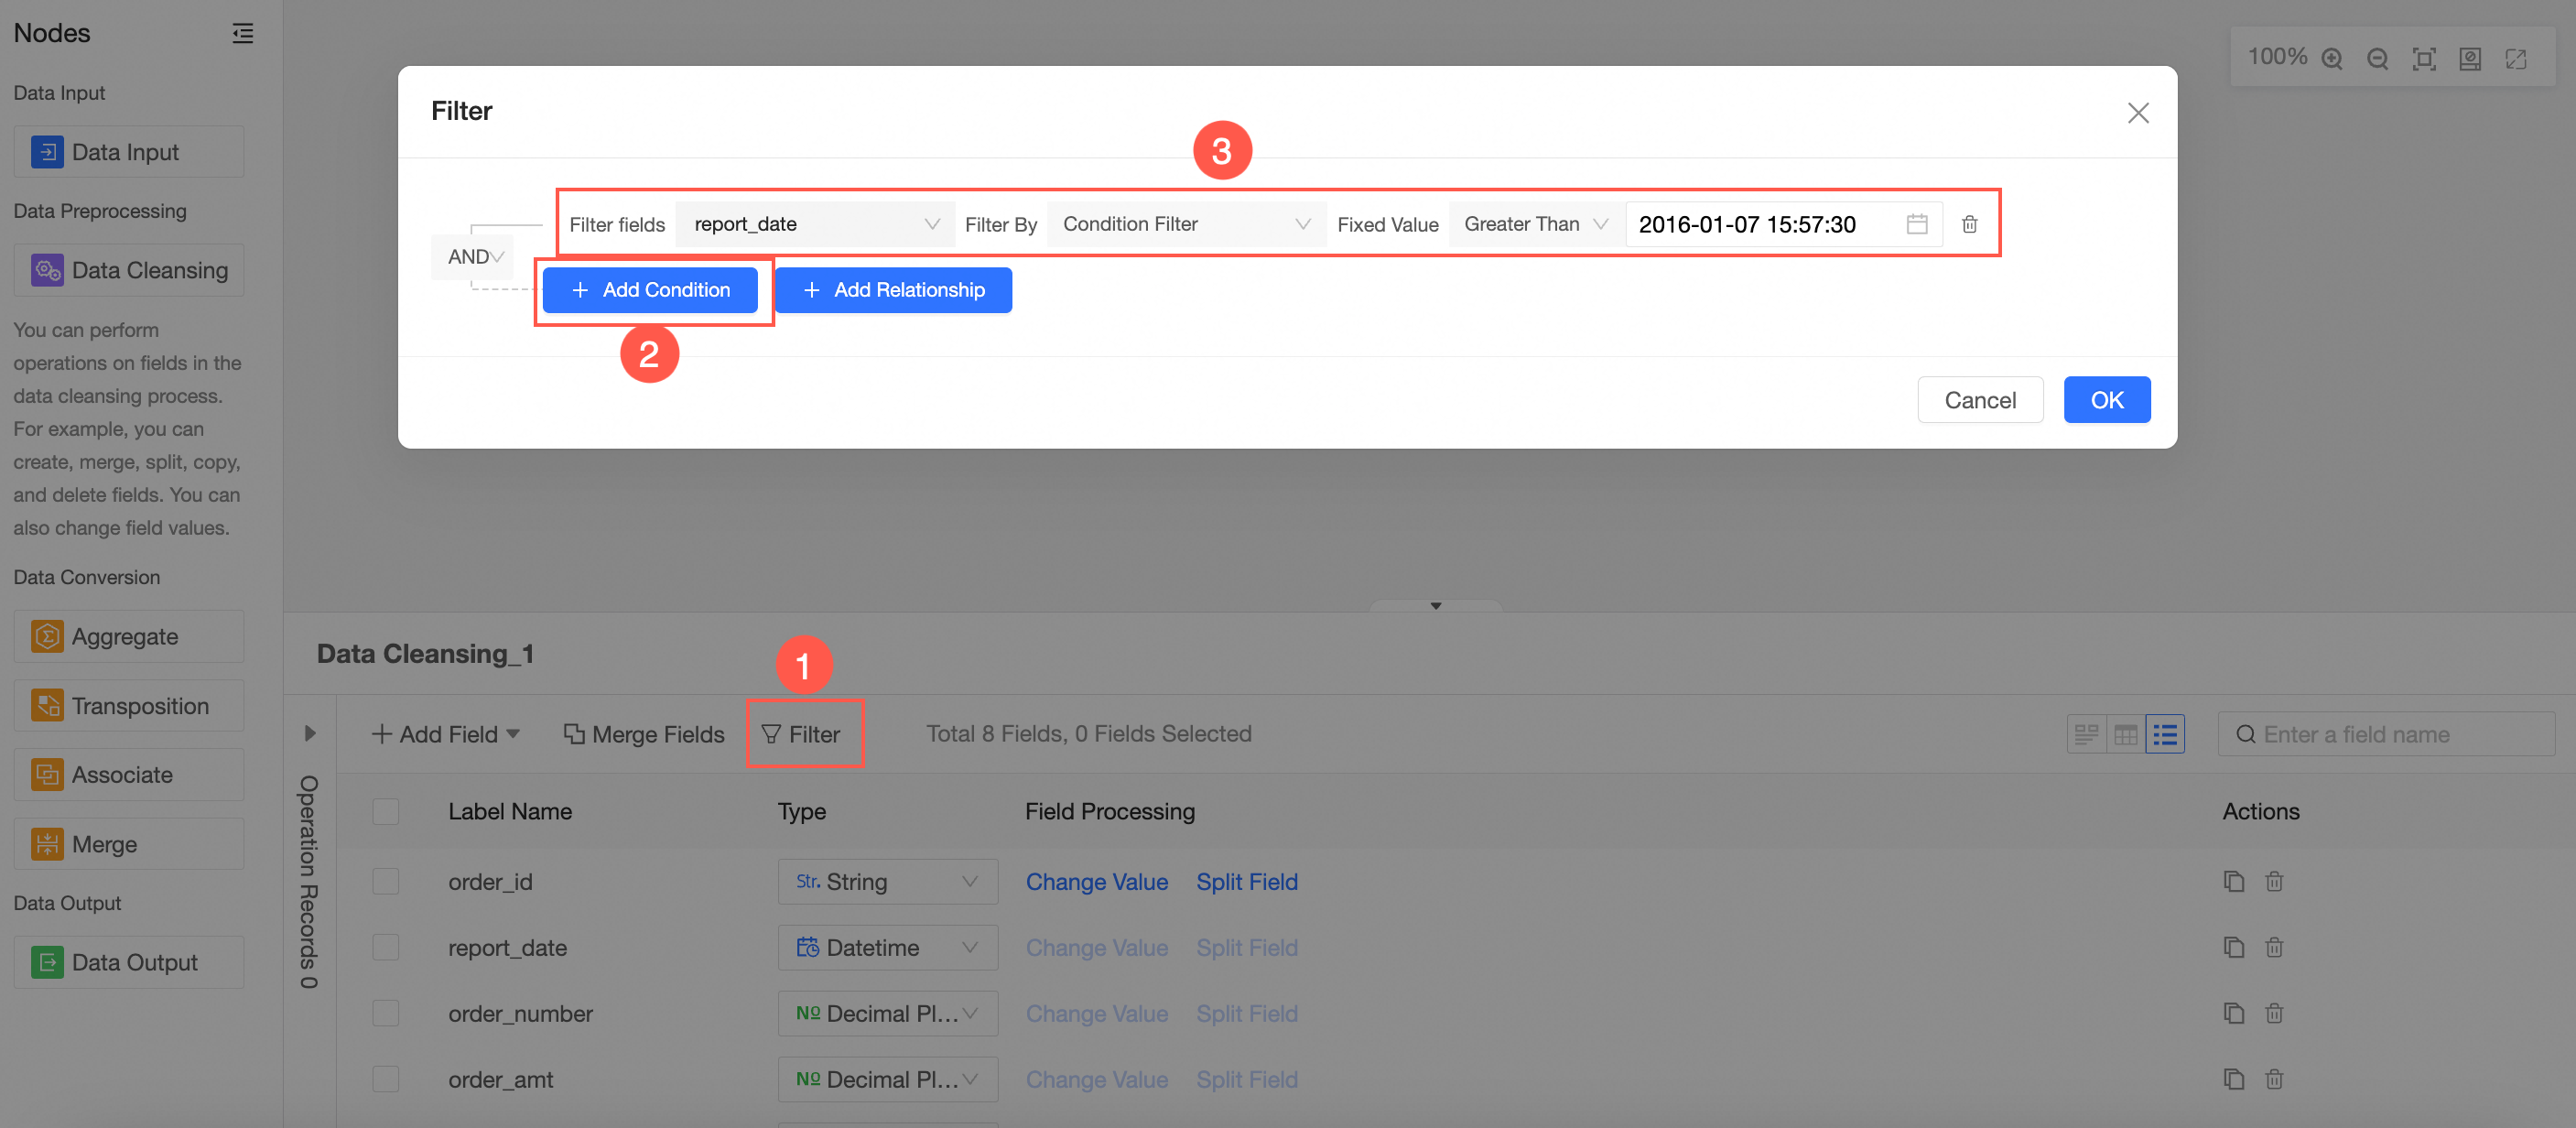
The filtering method supports enumeration filtering, conditional filtering, and field comparison.
For more information about filter examples, see Sample display of compound queries.
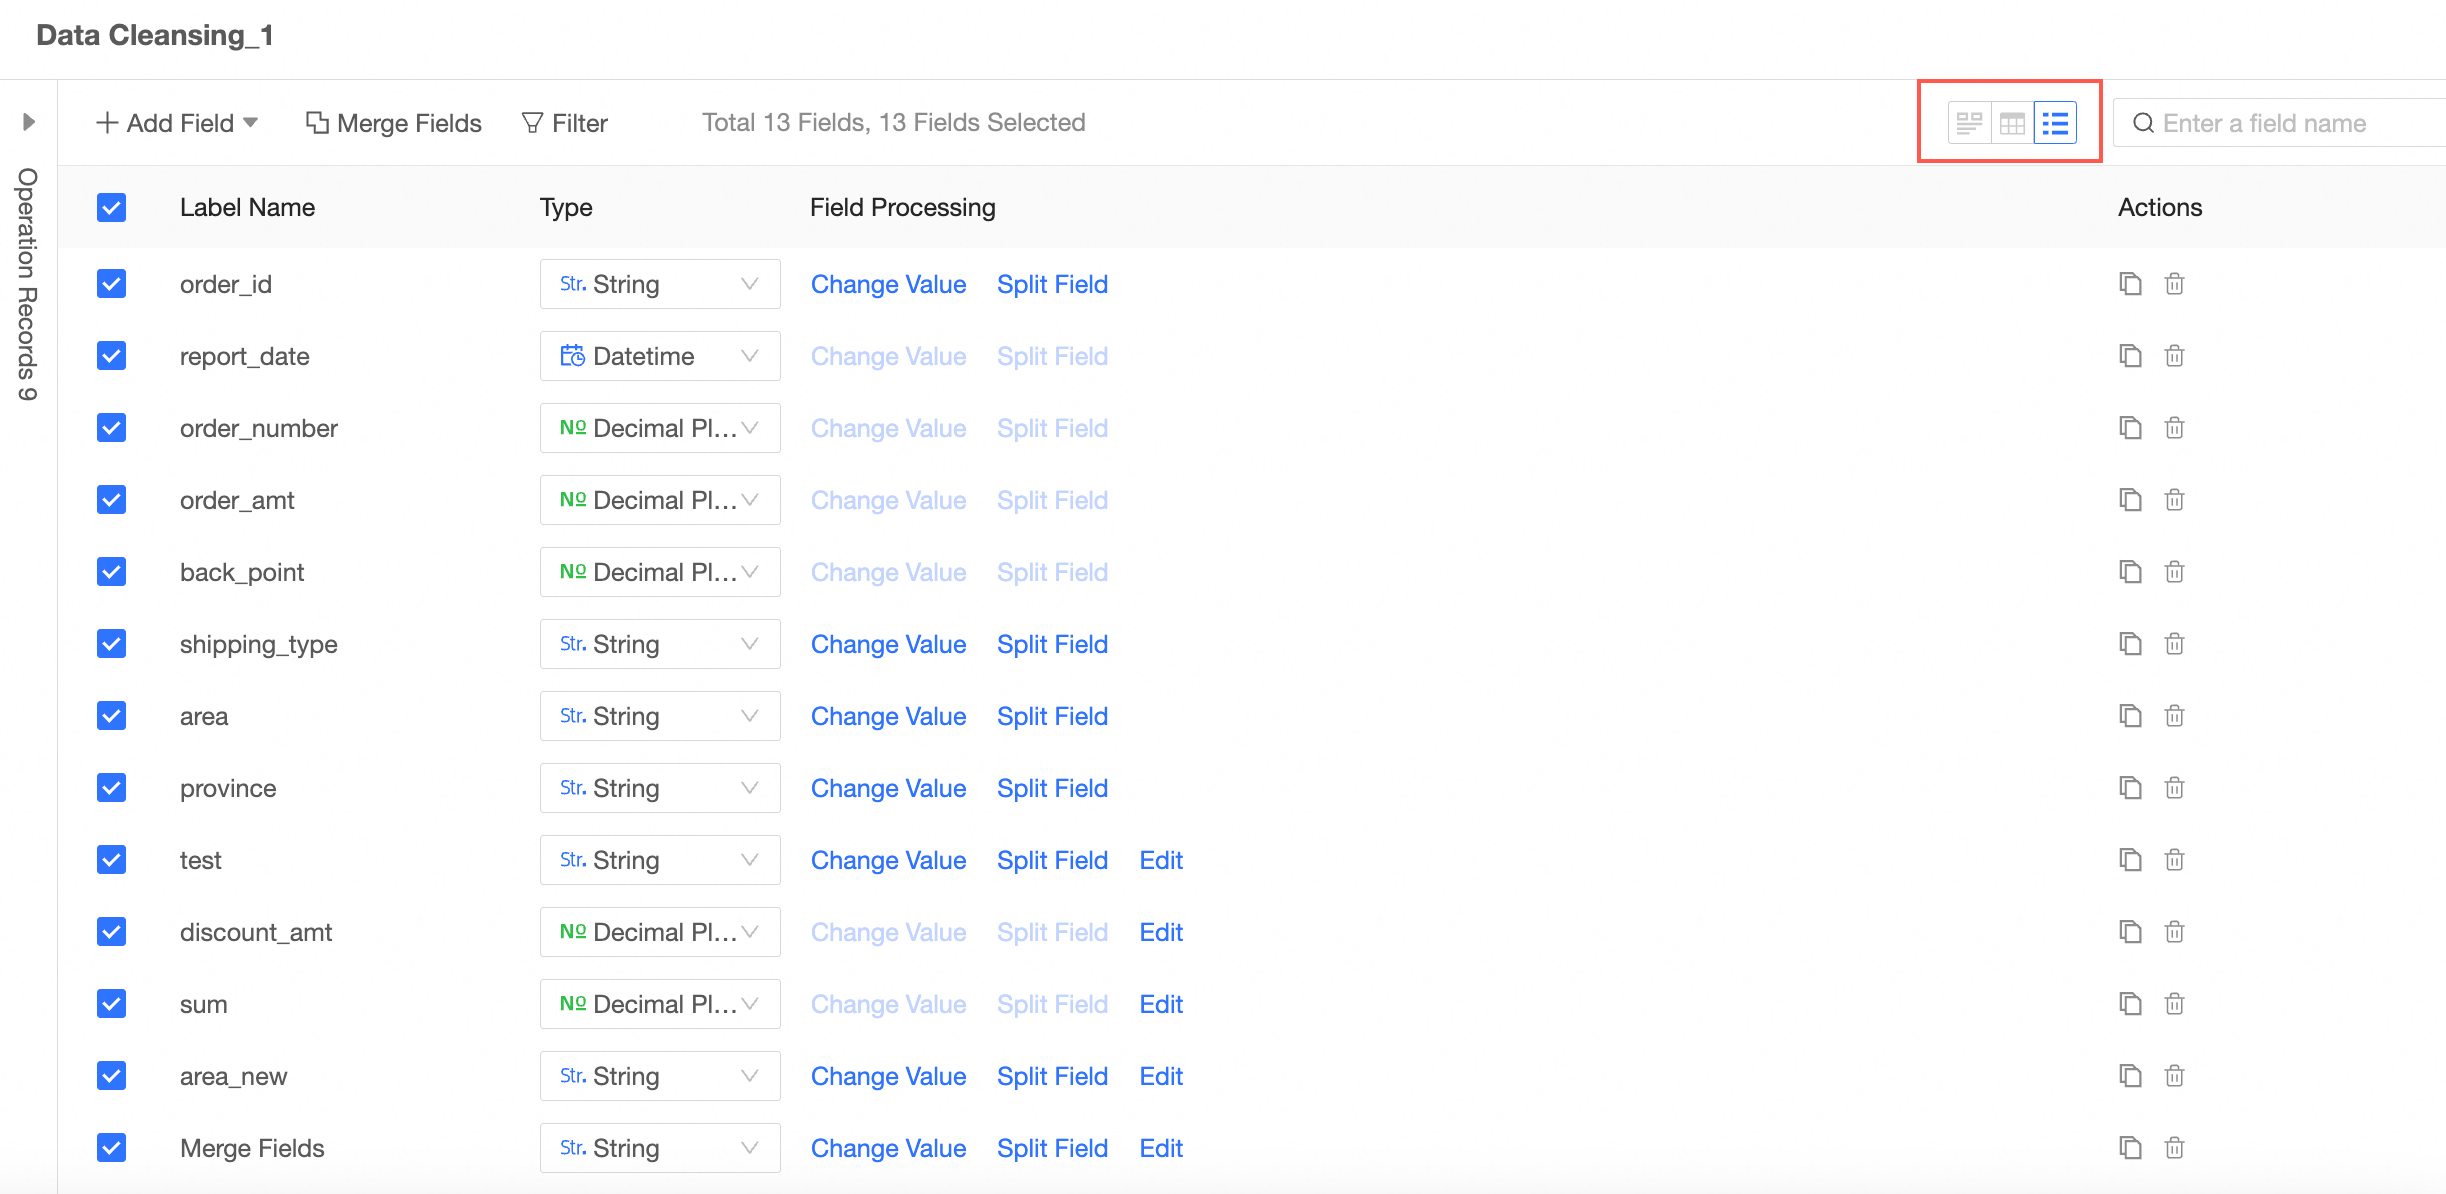
Modify a field type
In the Fields view, modify the field type.
 Note
NoteWhen converting to a date field, the following three date types are supported:
Date: Date format only, for example, yyyy-MM-dd.
DateTime: Date + Time format; for example, yyyy-MM-dd HH:mm:ss.
Time: Only the time format, for example, HH:mm:ss.
You can also customize the date format.
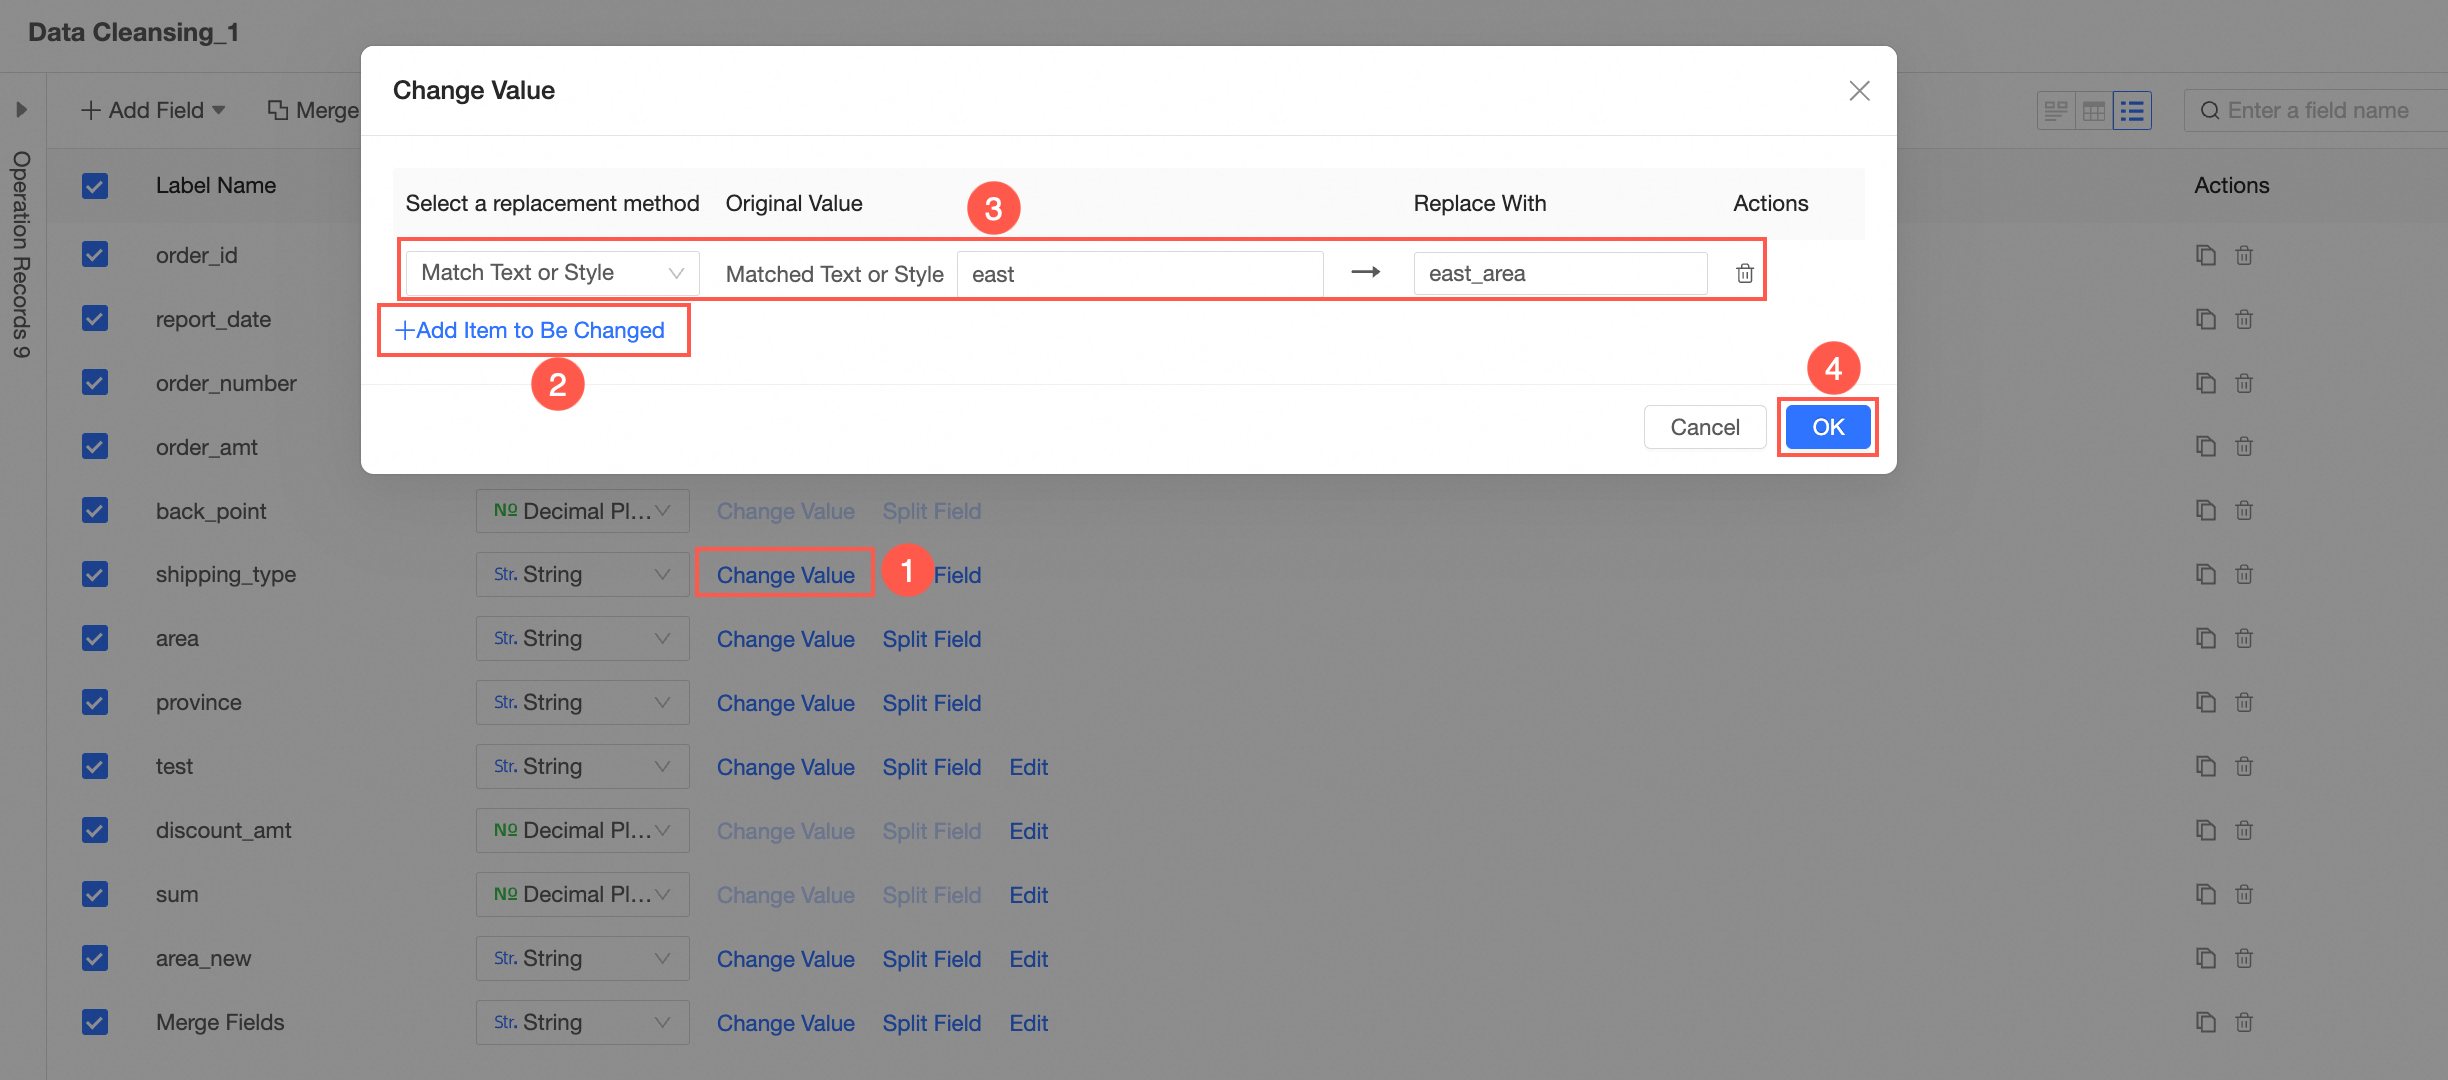
Value Replacement
In the Fields view, modify the value of a field.
NoteThis operation is supported only when the field type is Text.
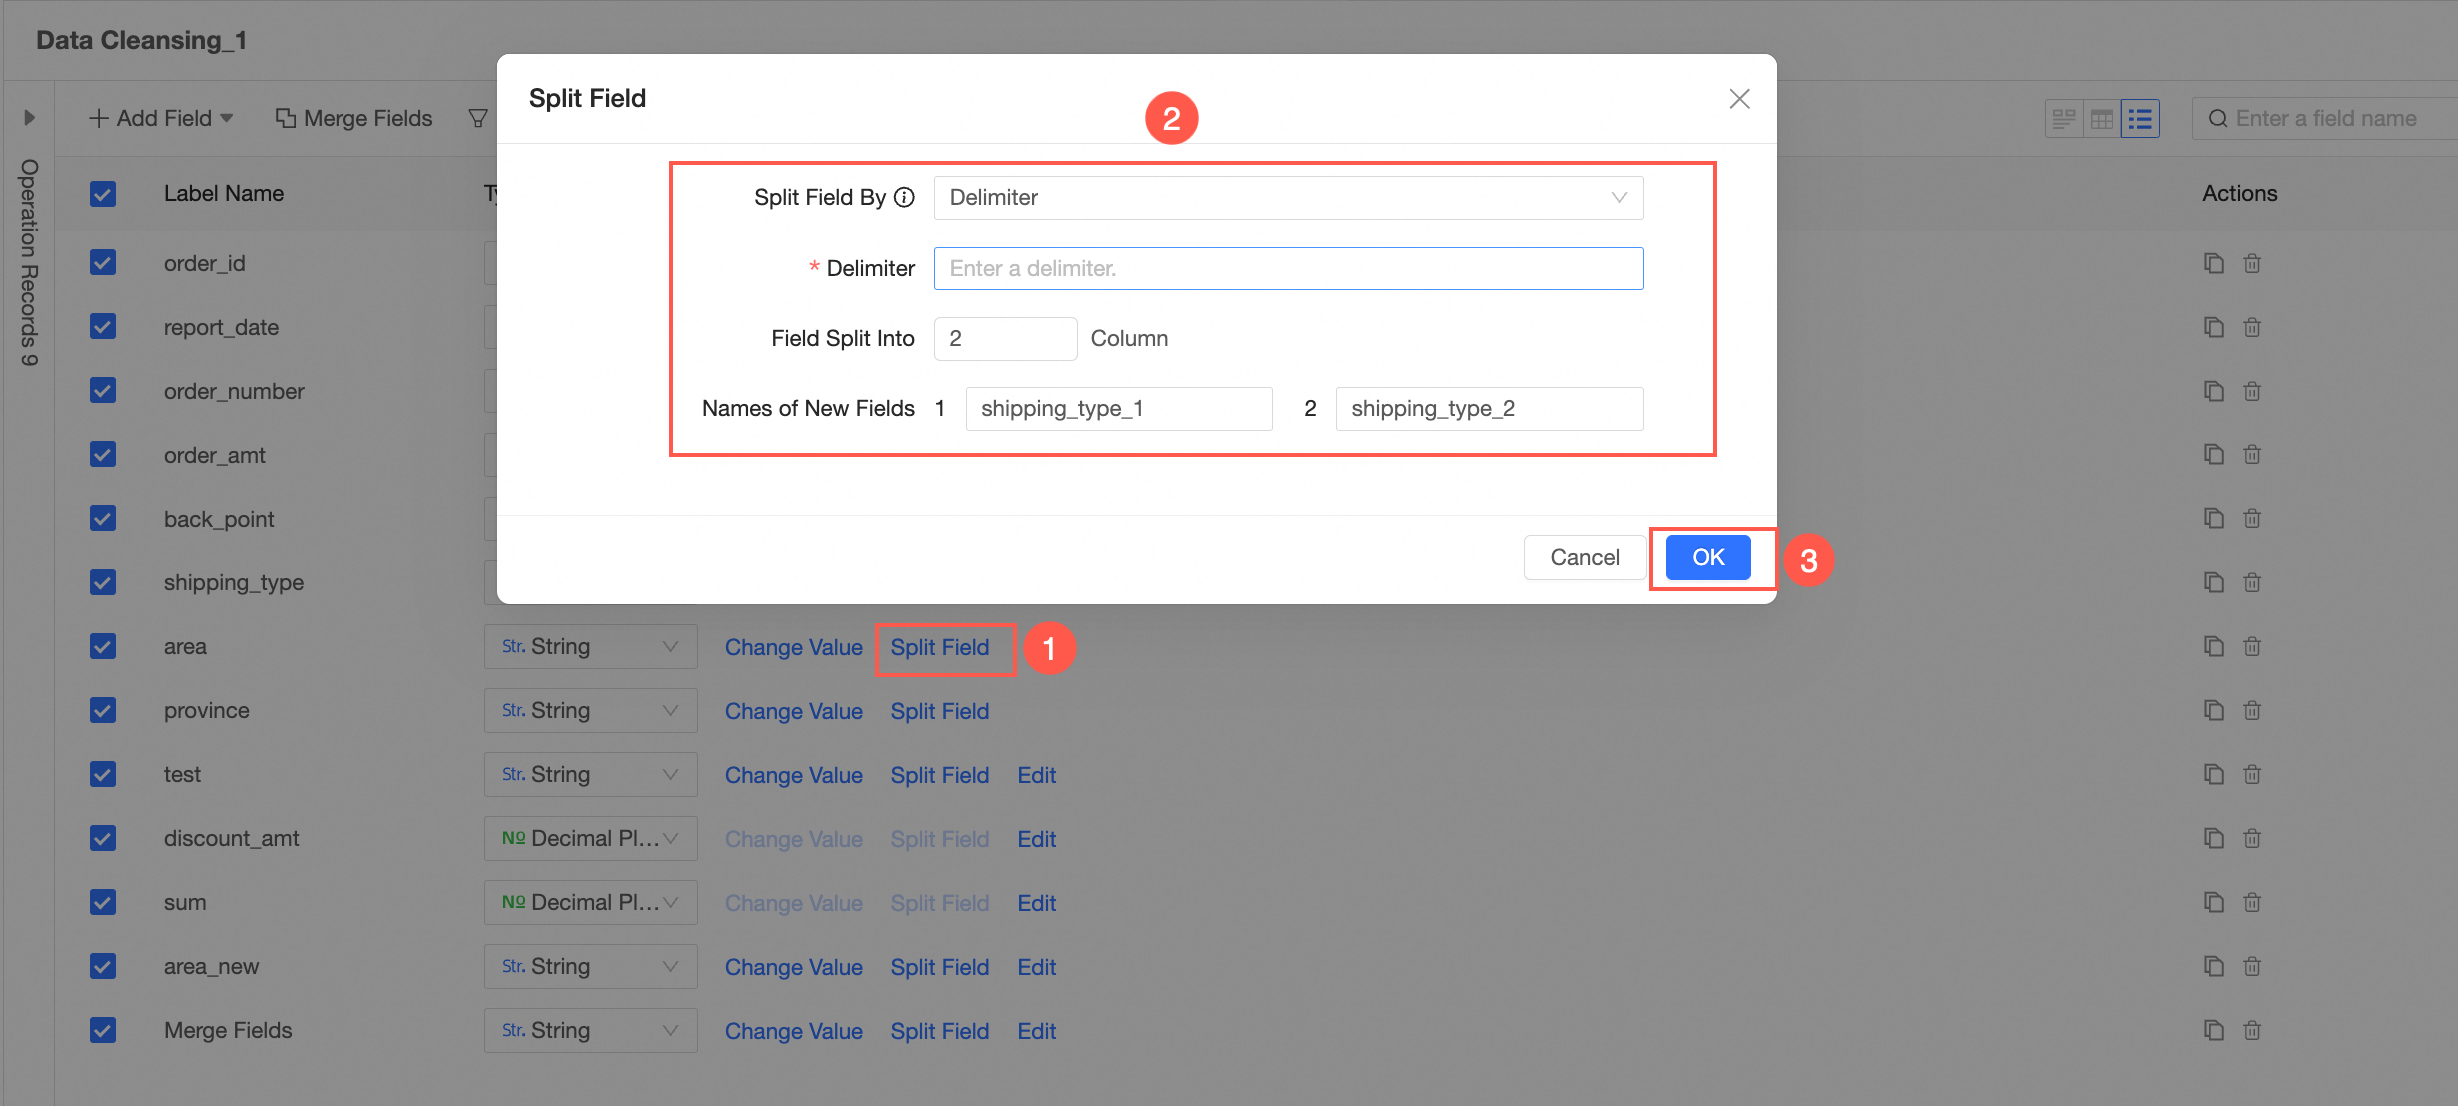
Split Field
In the Fields view, split fields based on their values.
NoteThis operation is supported only when the field type is Text.
Rename Field
Move the pointer over a field and click the
 icon (①) or double-click the field name (②) to rename the field.
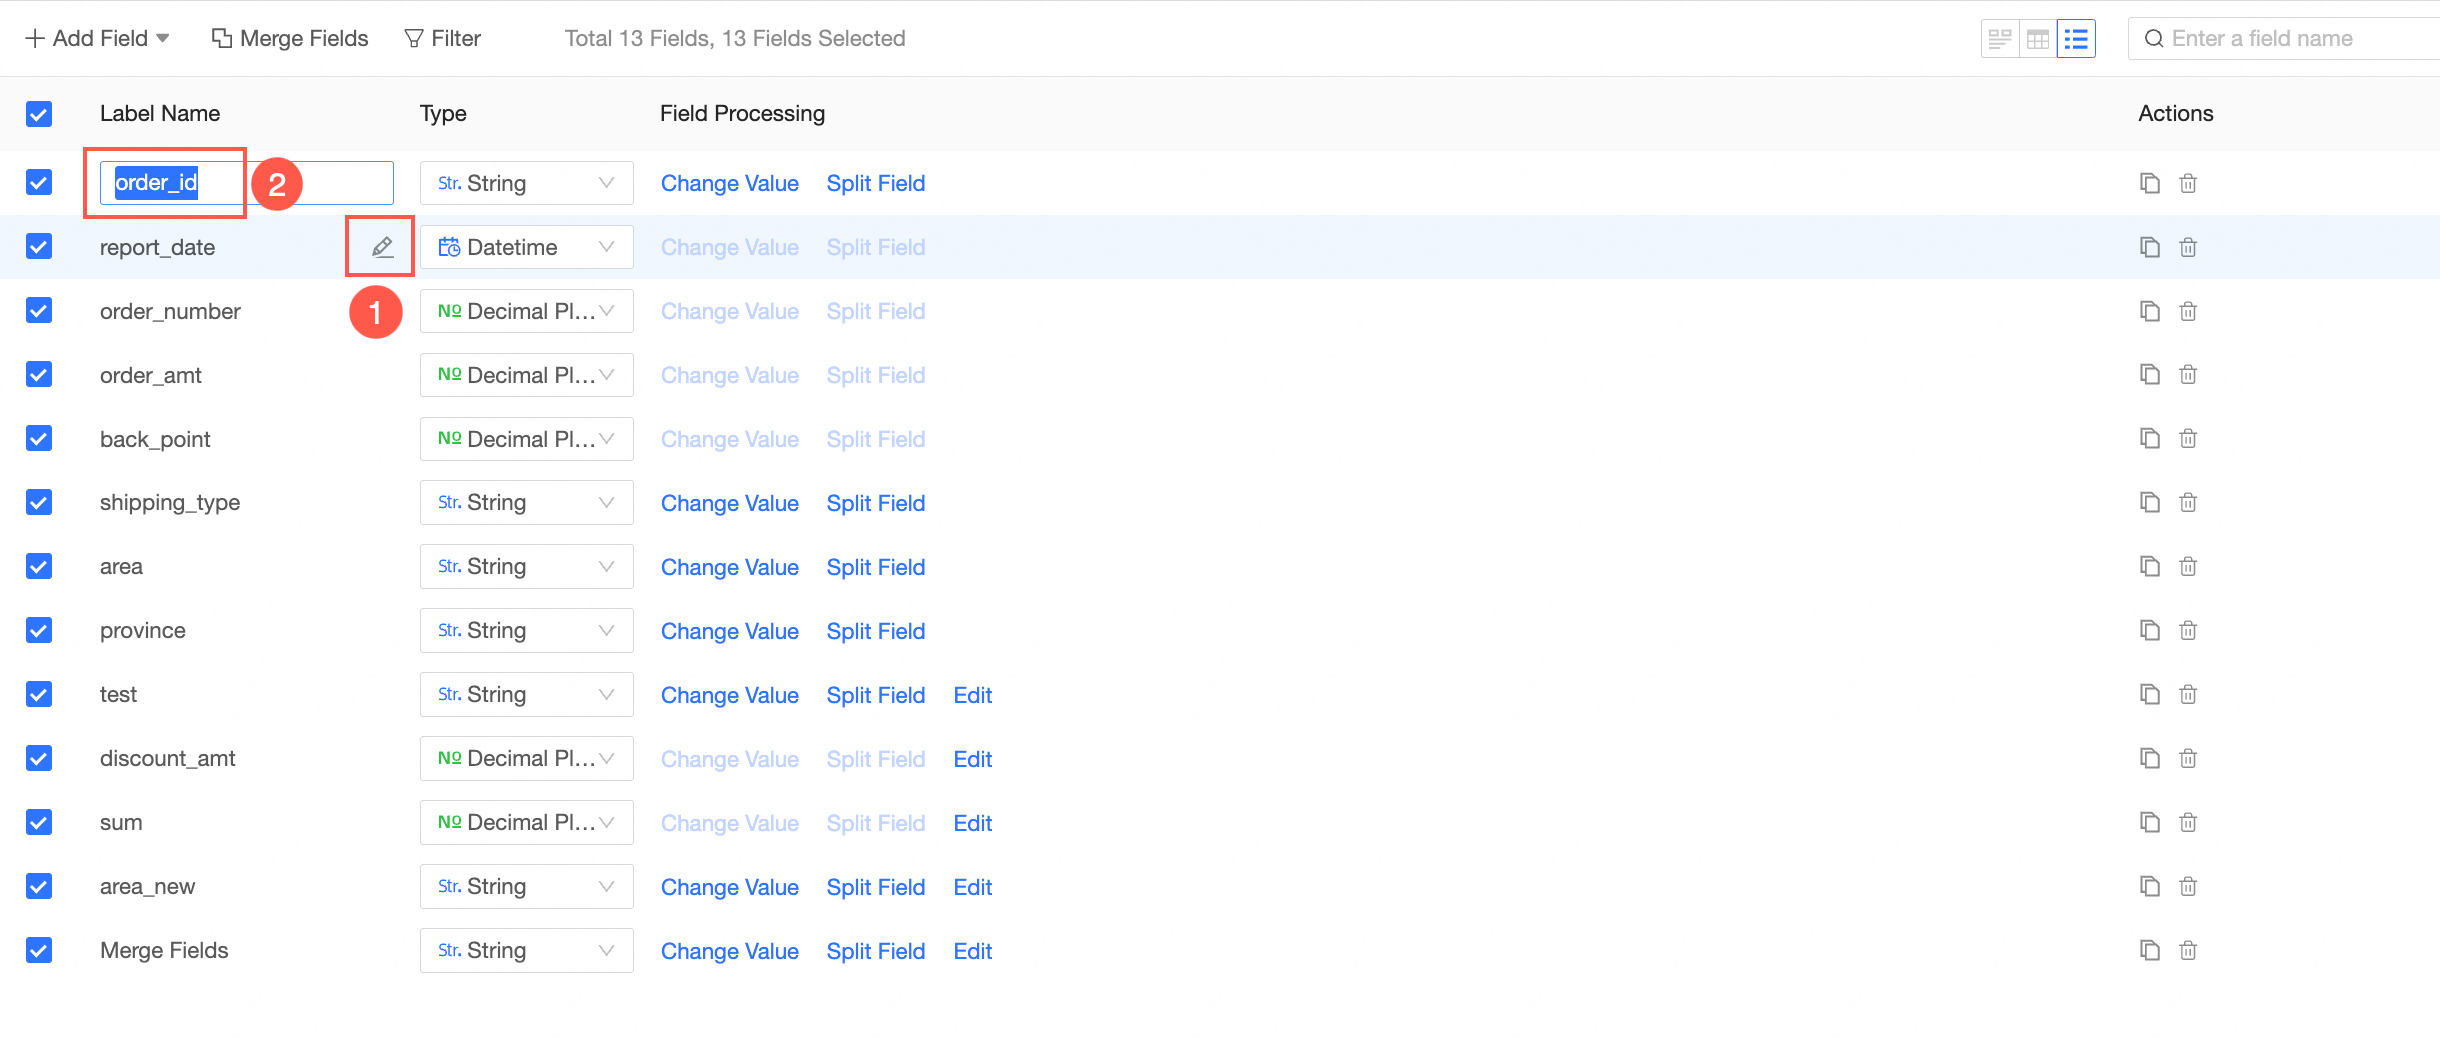
Edit Field
NoteThis operation is supported by Add Calculated Field, Add Window Function, Merge Field, and Split Field.
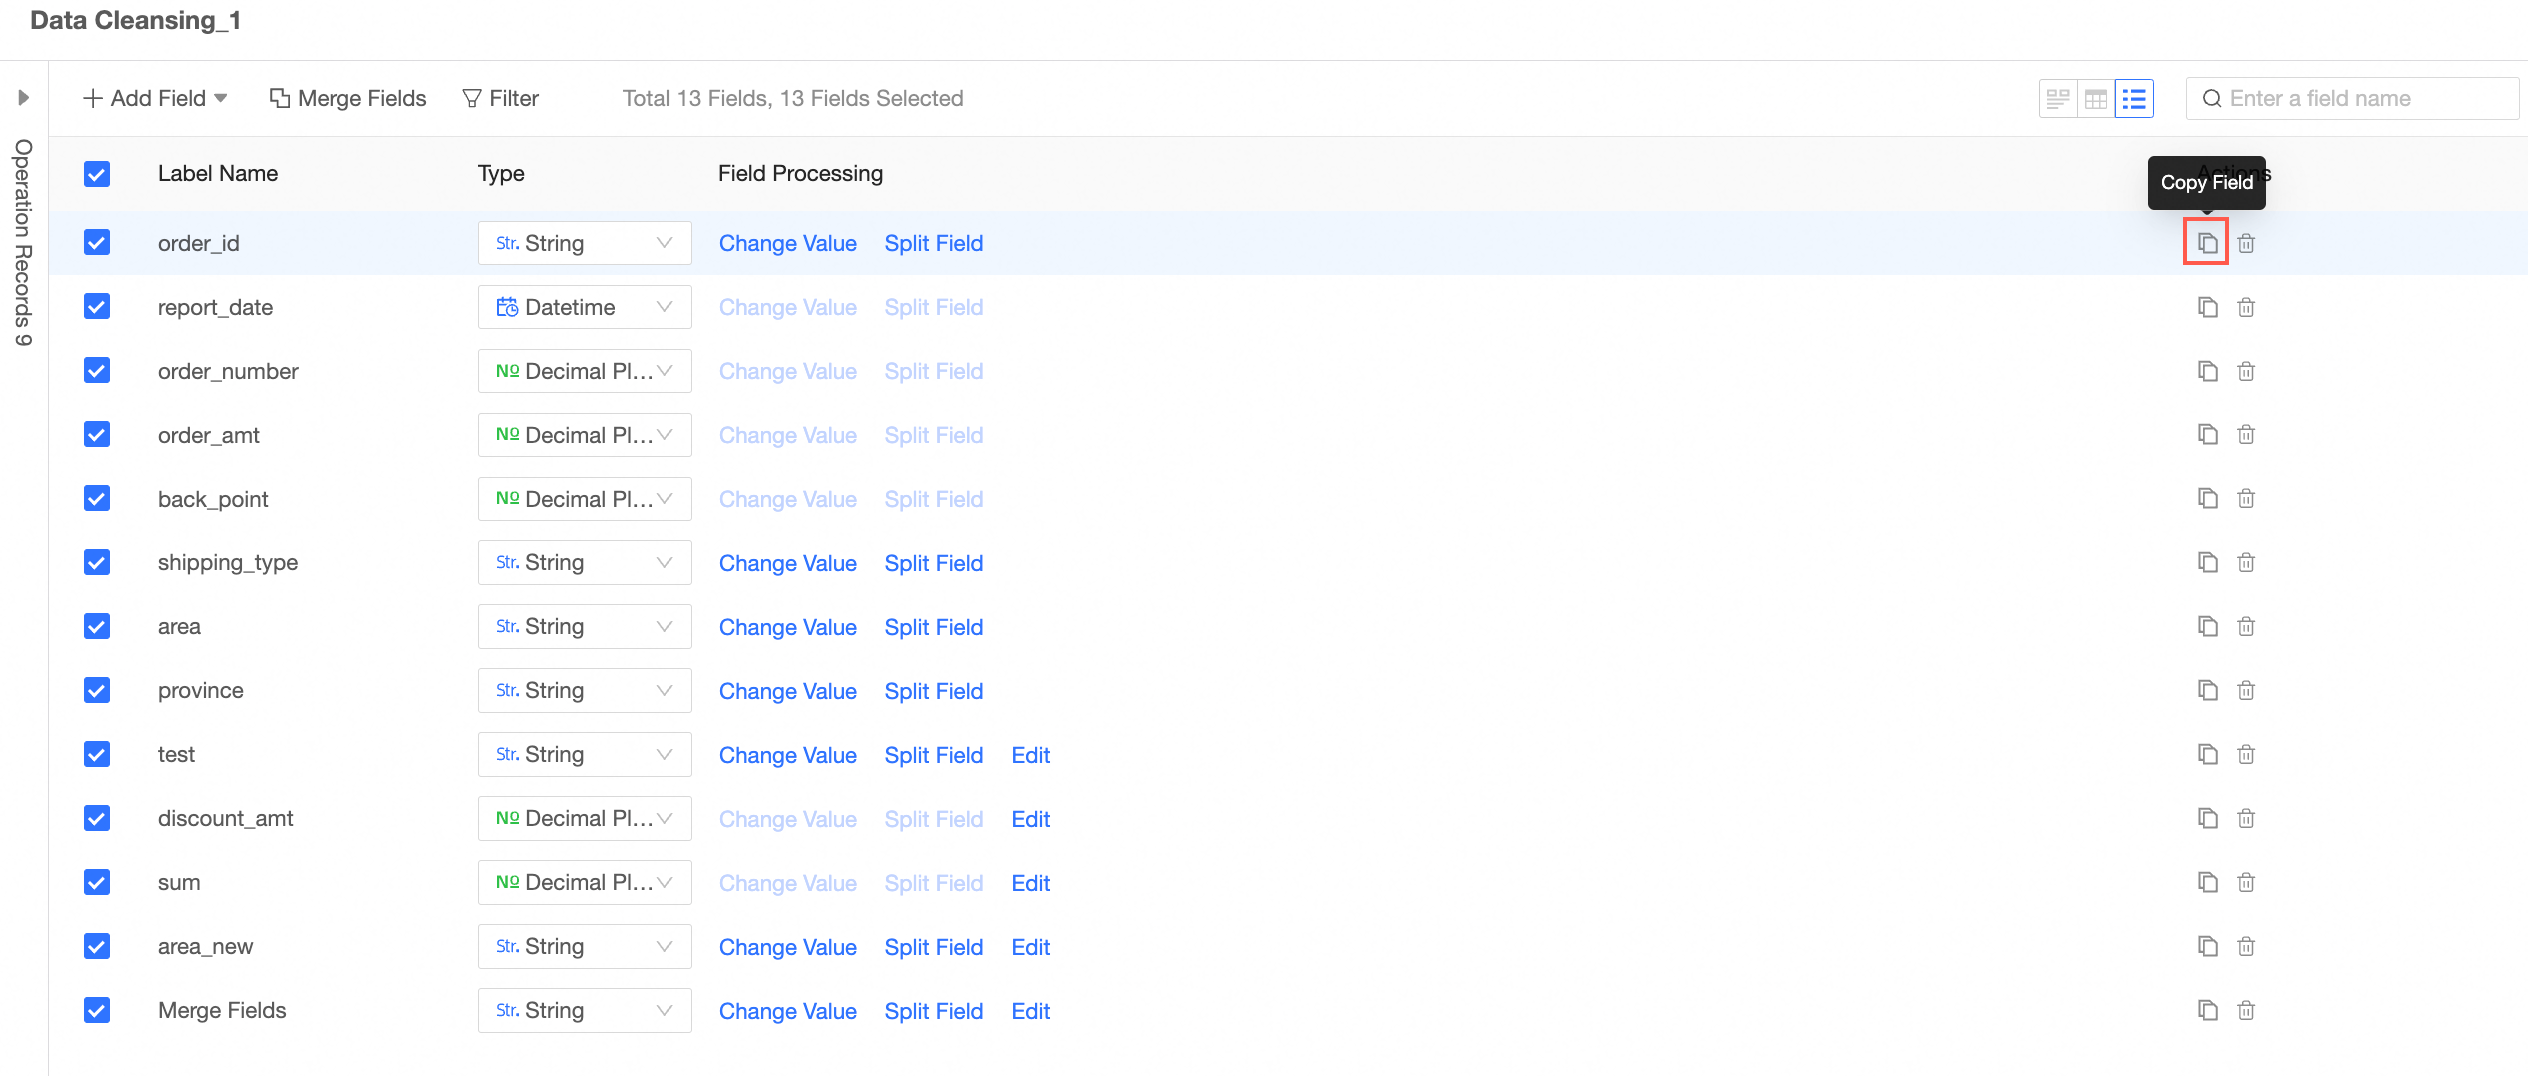
Copy Field
You can copy a field whose field expression and field type are the same to create a field of the same type. This improves data preparation efficiency.
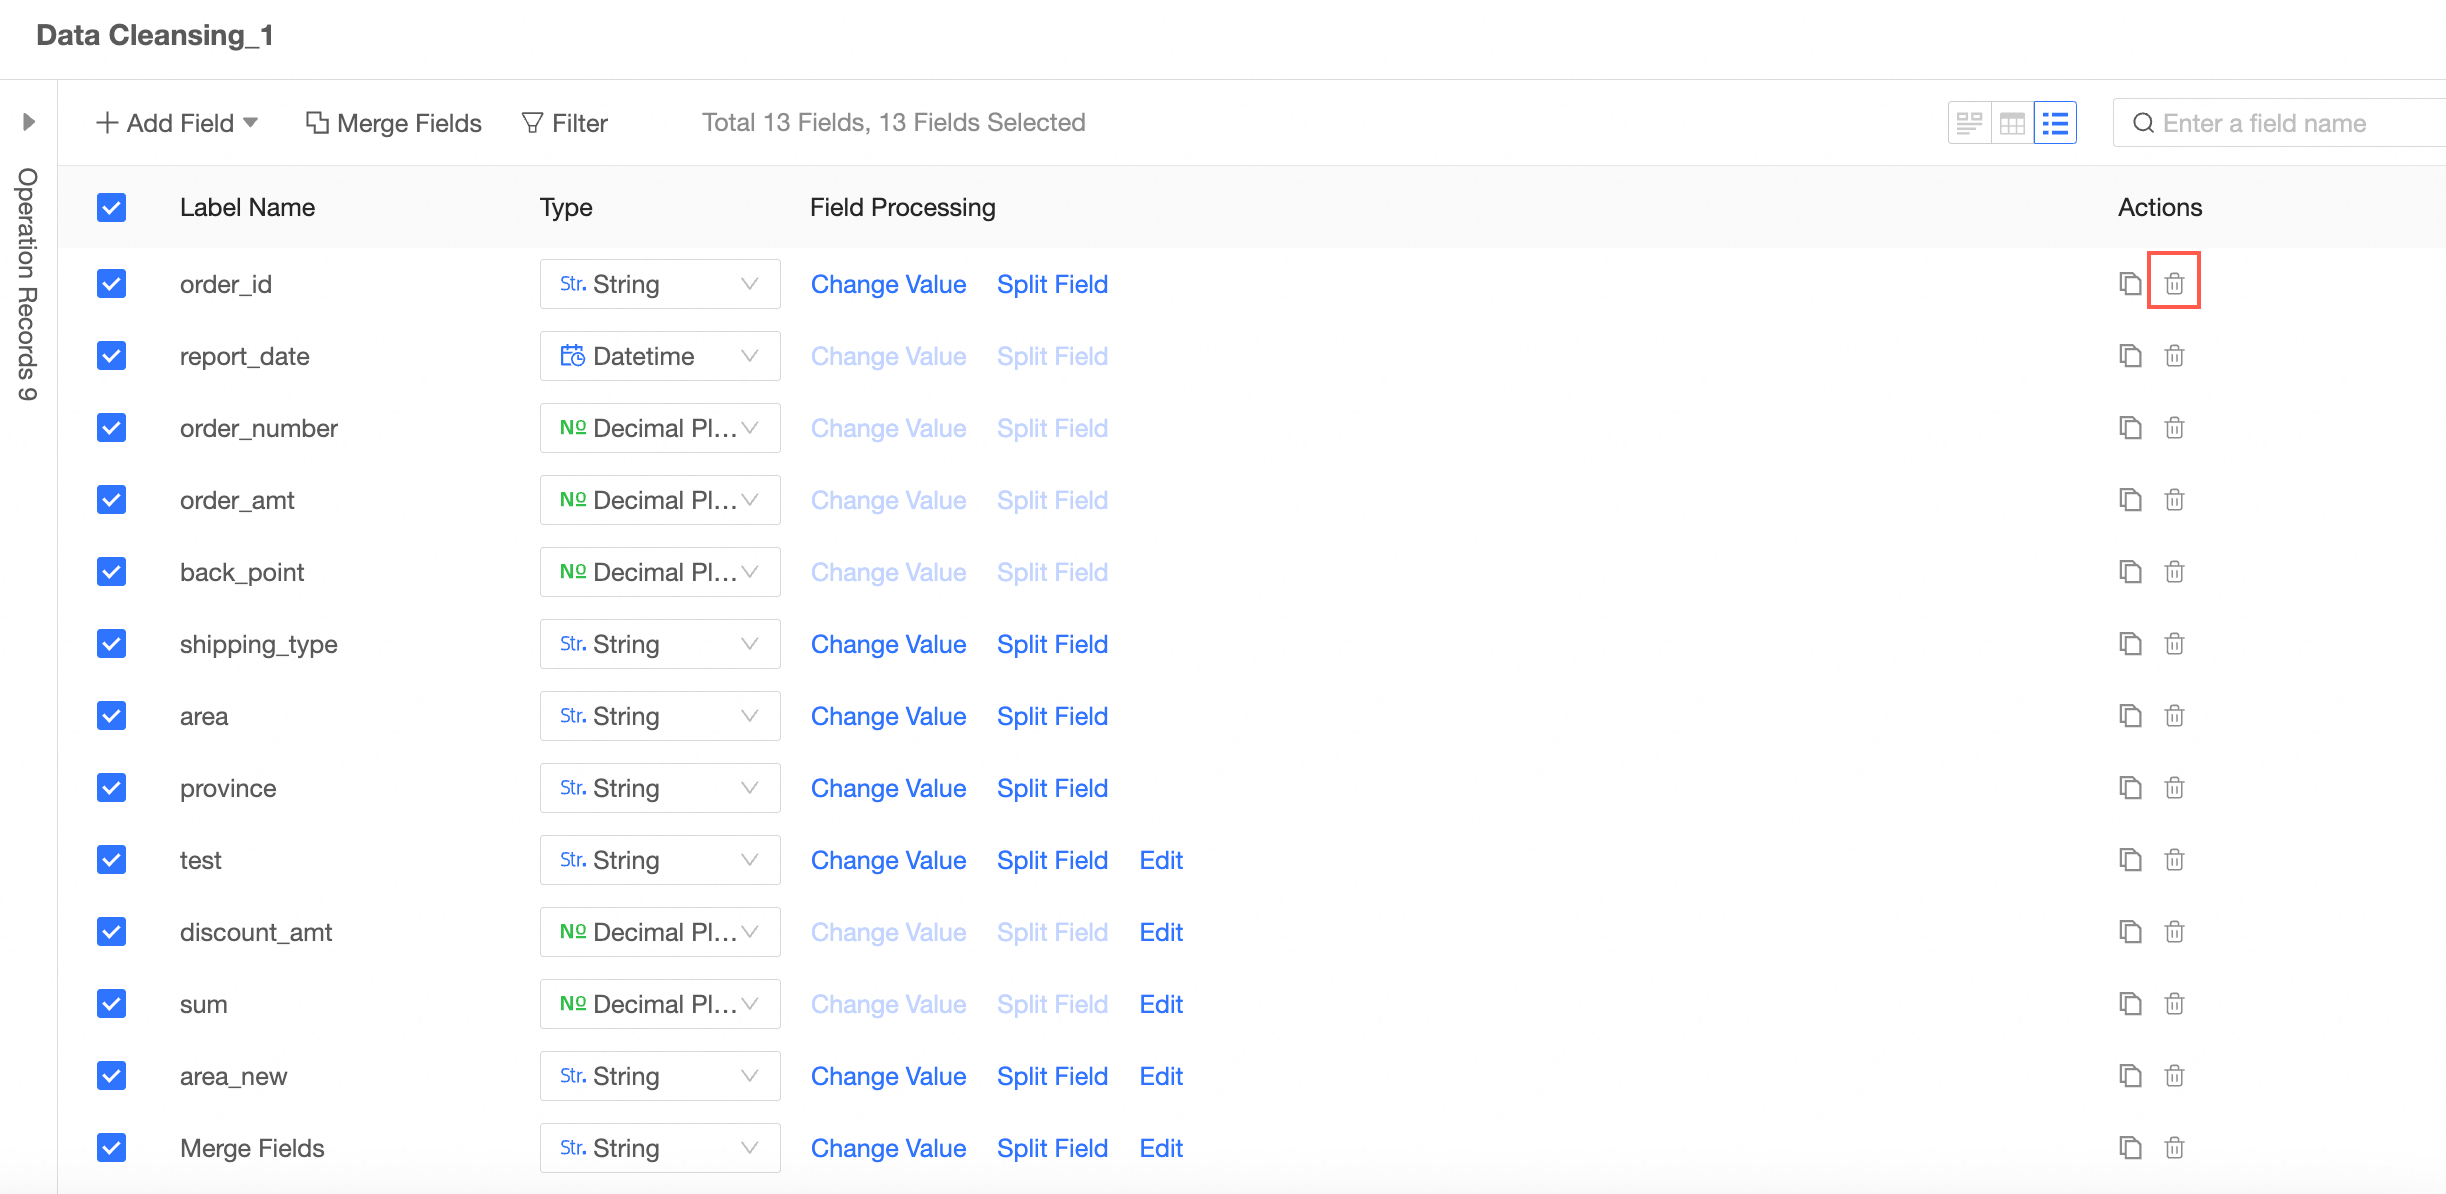
Delete Fields
For redundant fields, the data is cleaned and processed.
View data details.
You can view the following information: Data Exploration, Data Details, and Field List.
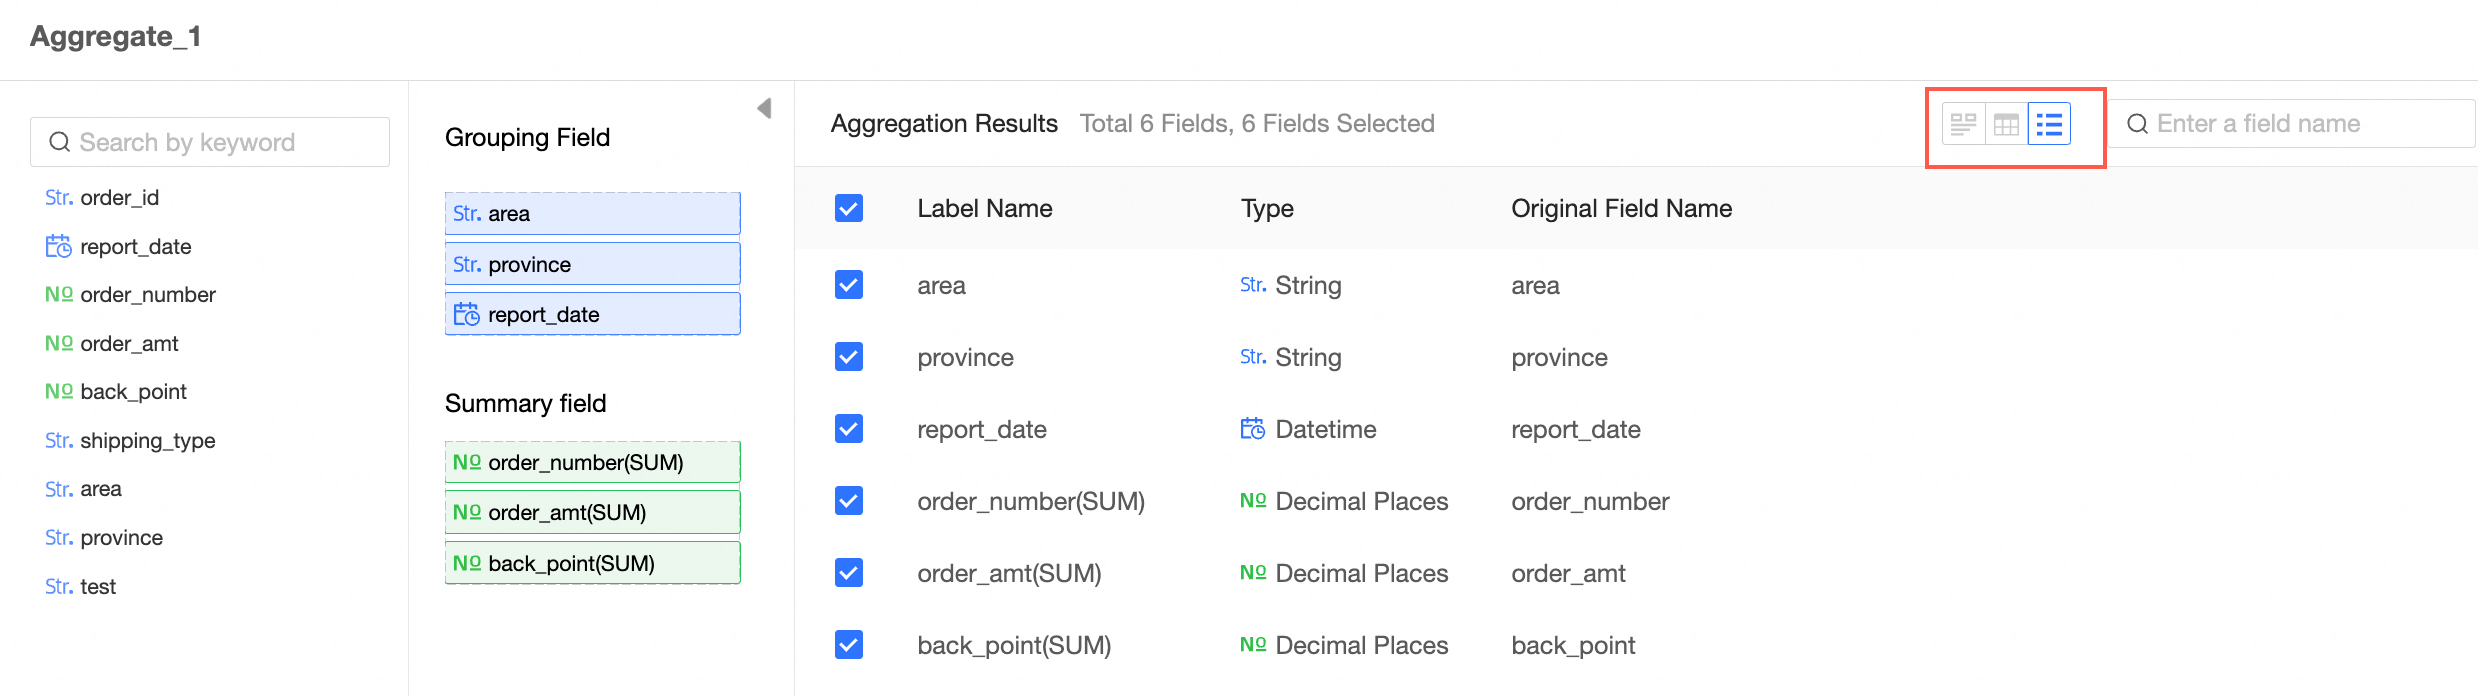
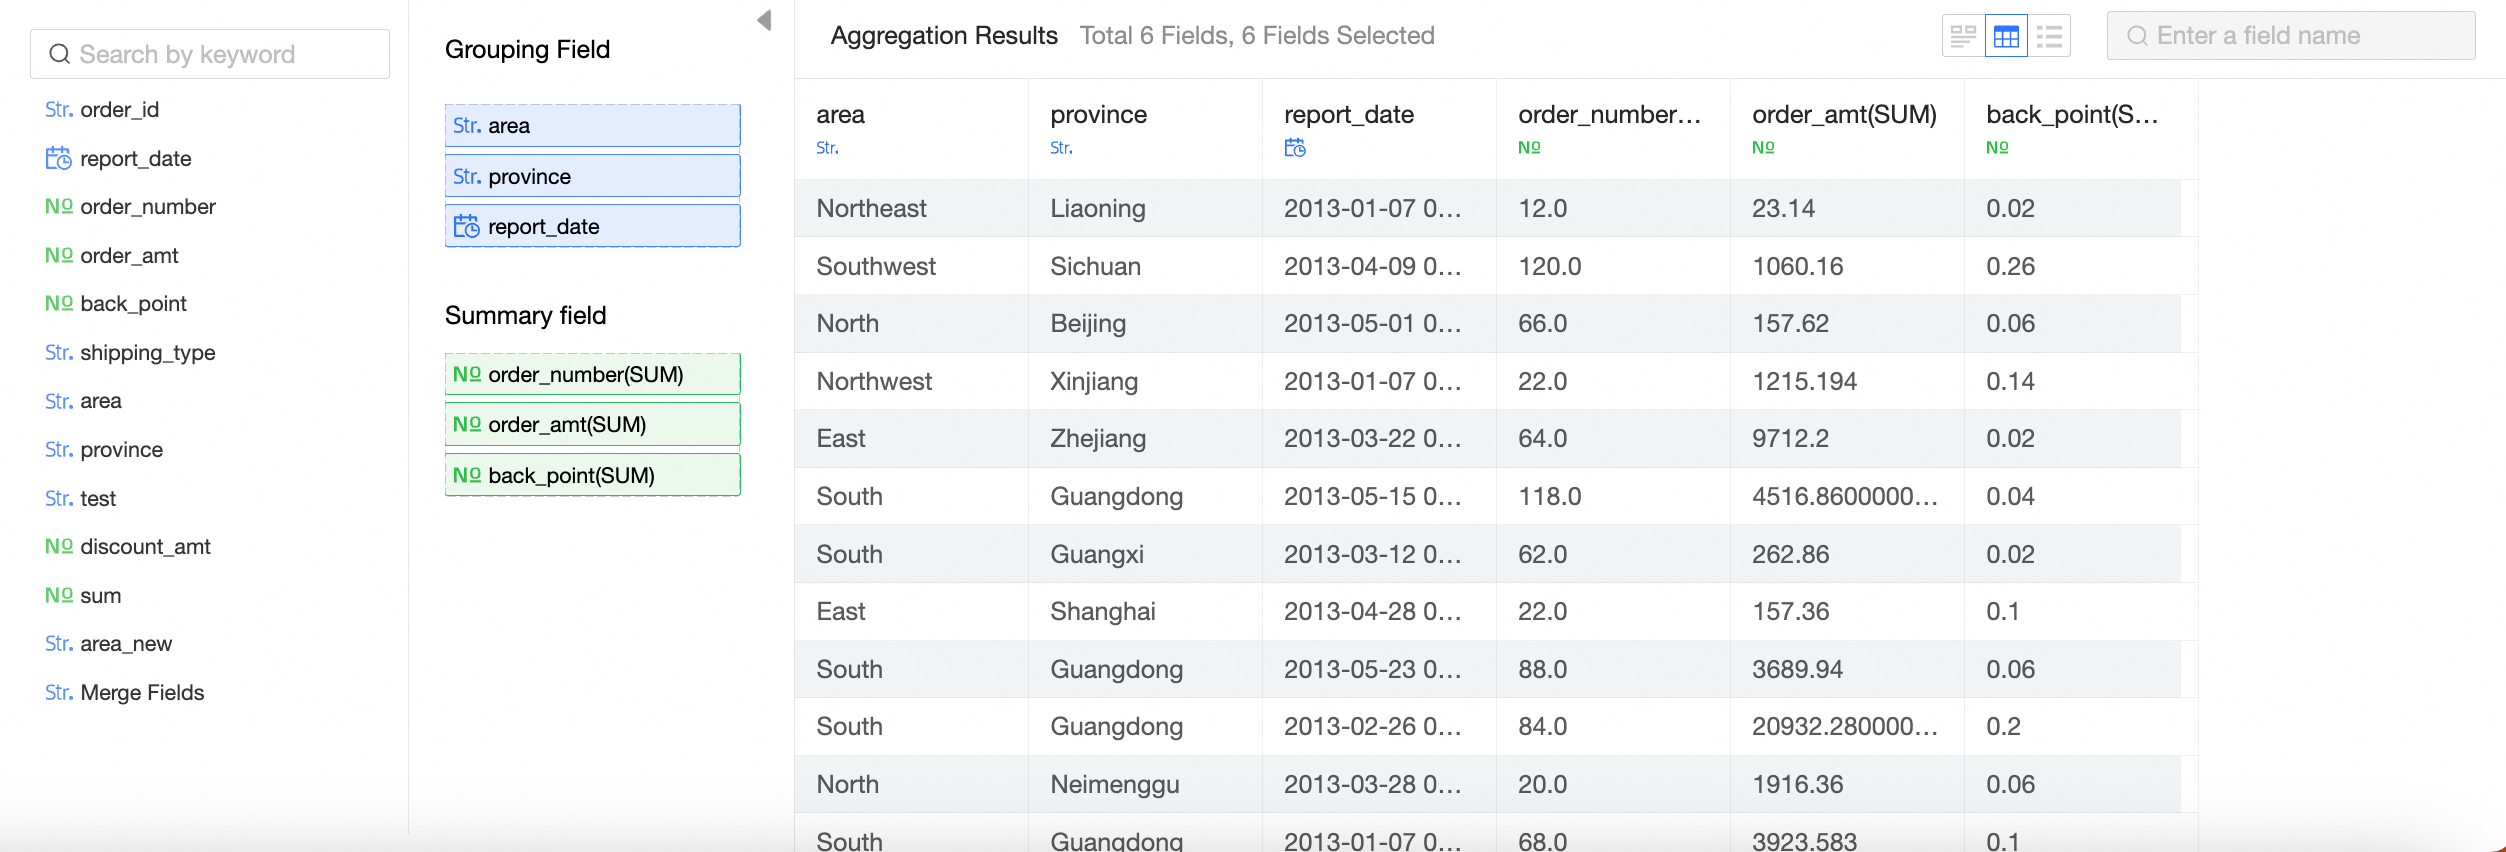
Aggregates
Summarize or average data on the specified measures based on the selected dimensions.
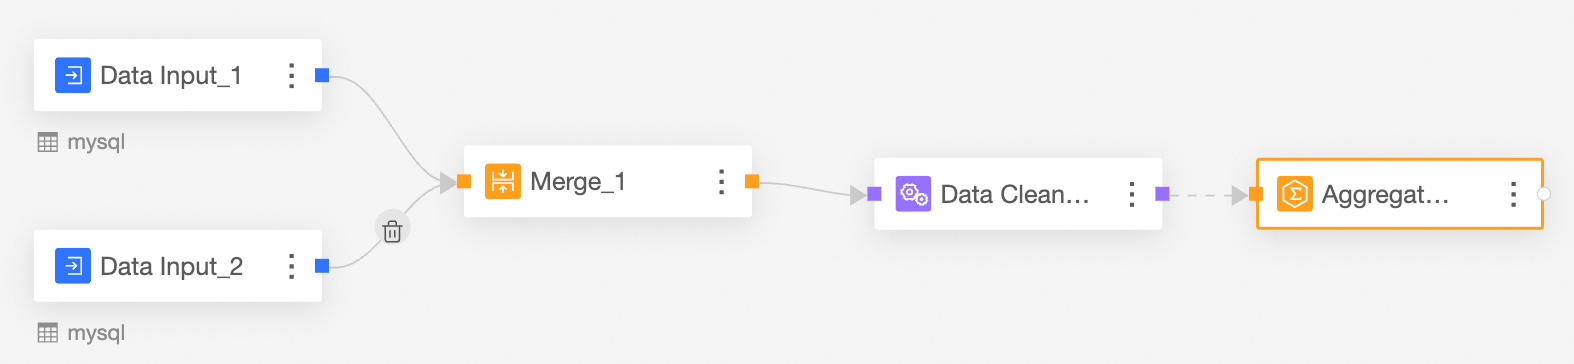
Drag Aggregate from the left-side node section to the canvas.
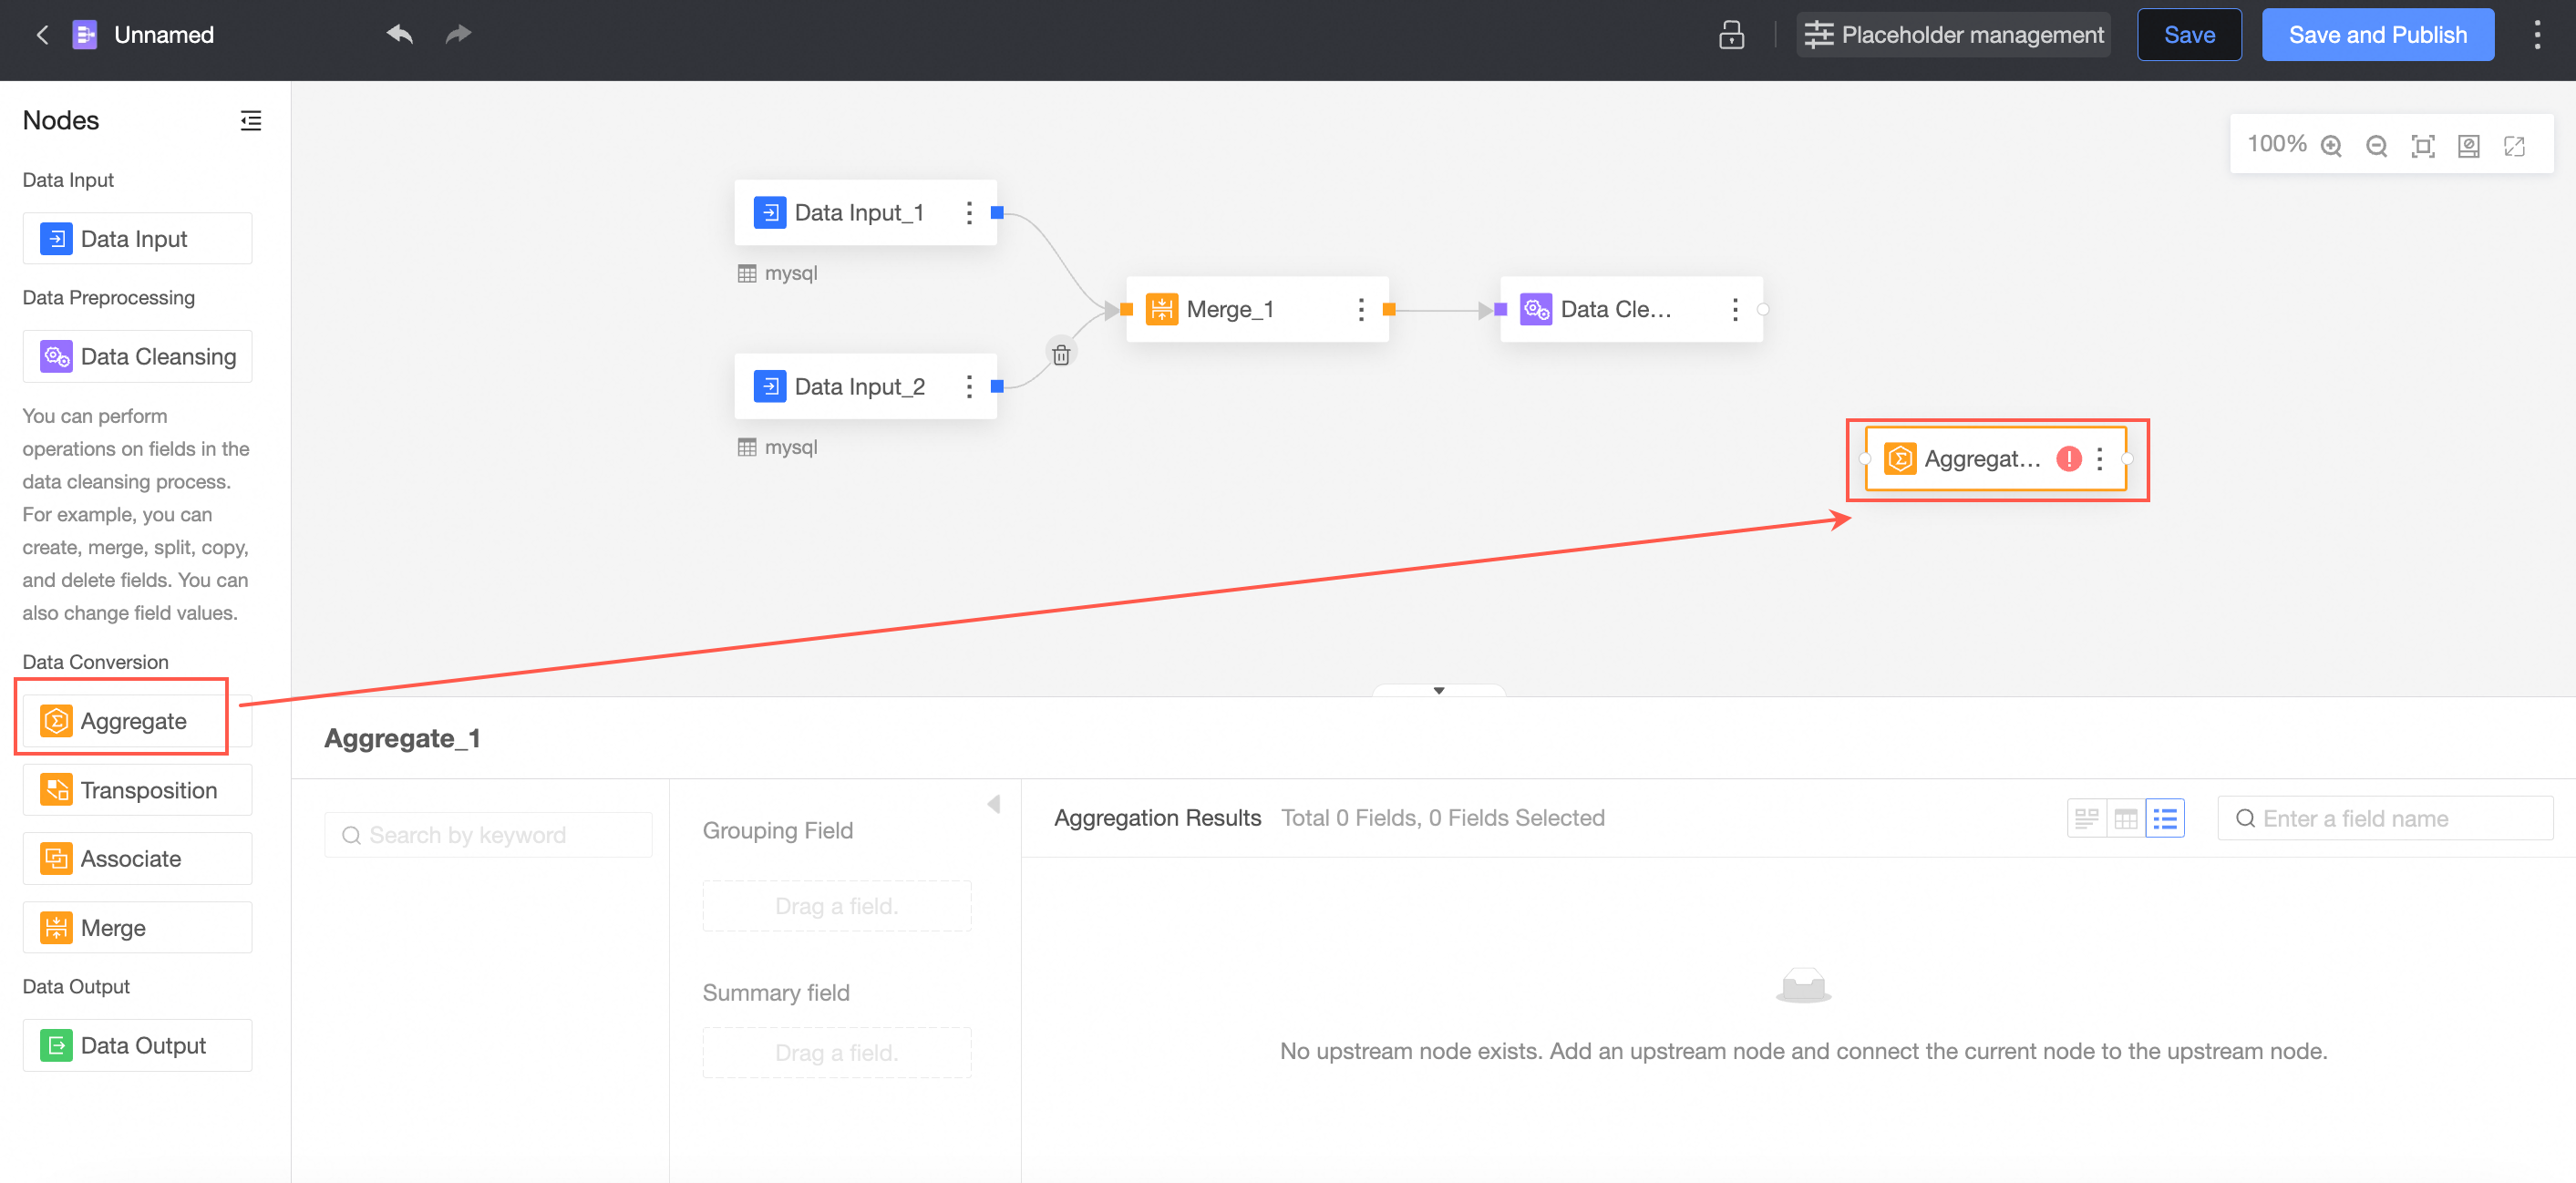
The connection requires an aggregation node.
In the Aggregate Node Configuration section, follow the instructions in the following figure to configure grouping fields and summary fields.
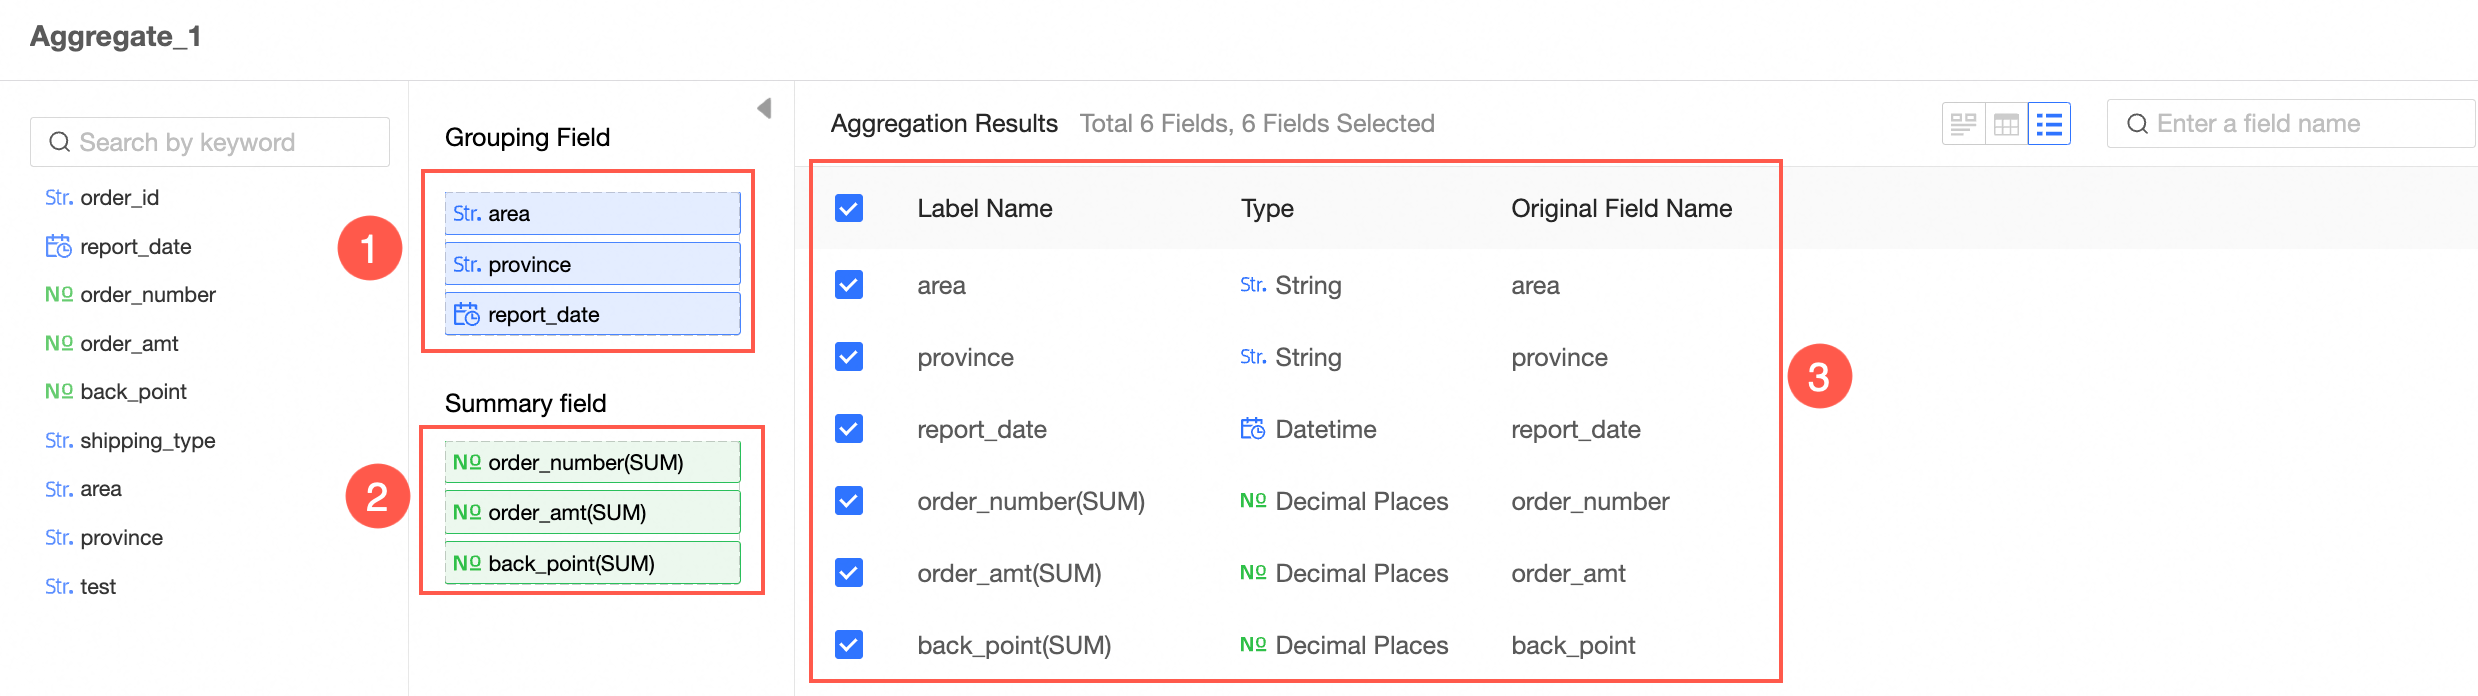
View data details.
You can view the Data Exploration, Data Details, and Field List parameters.
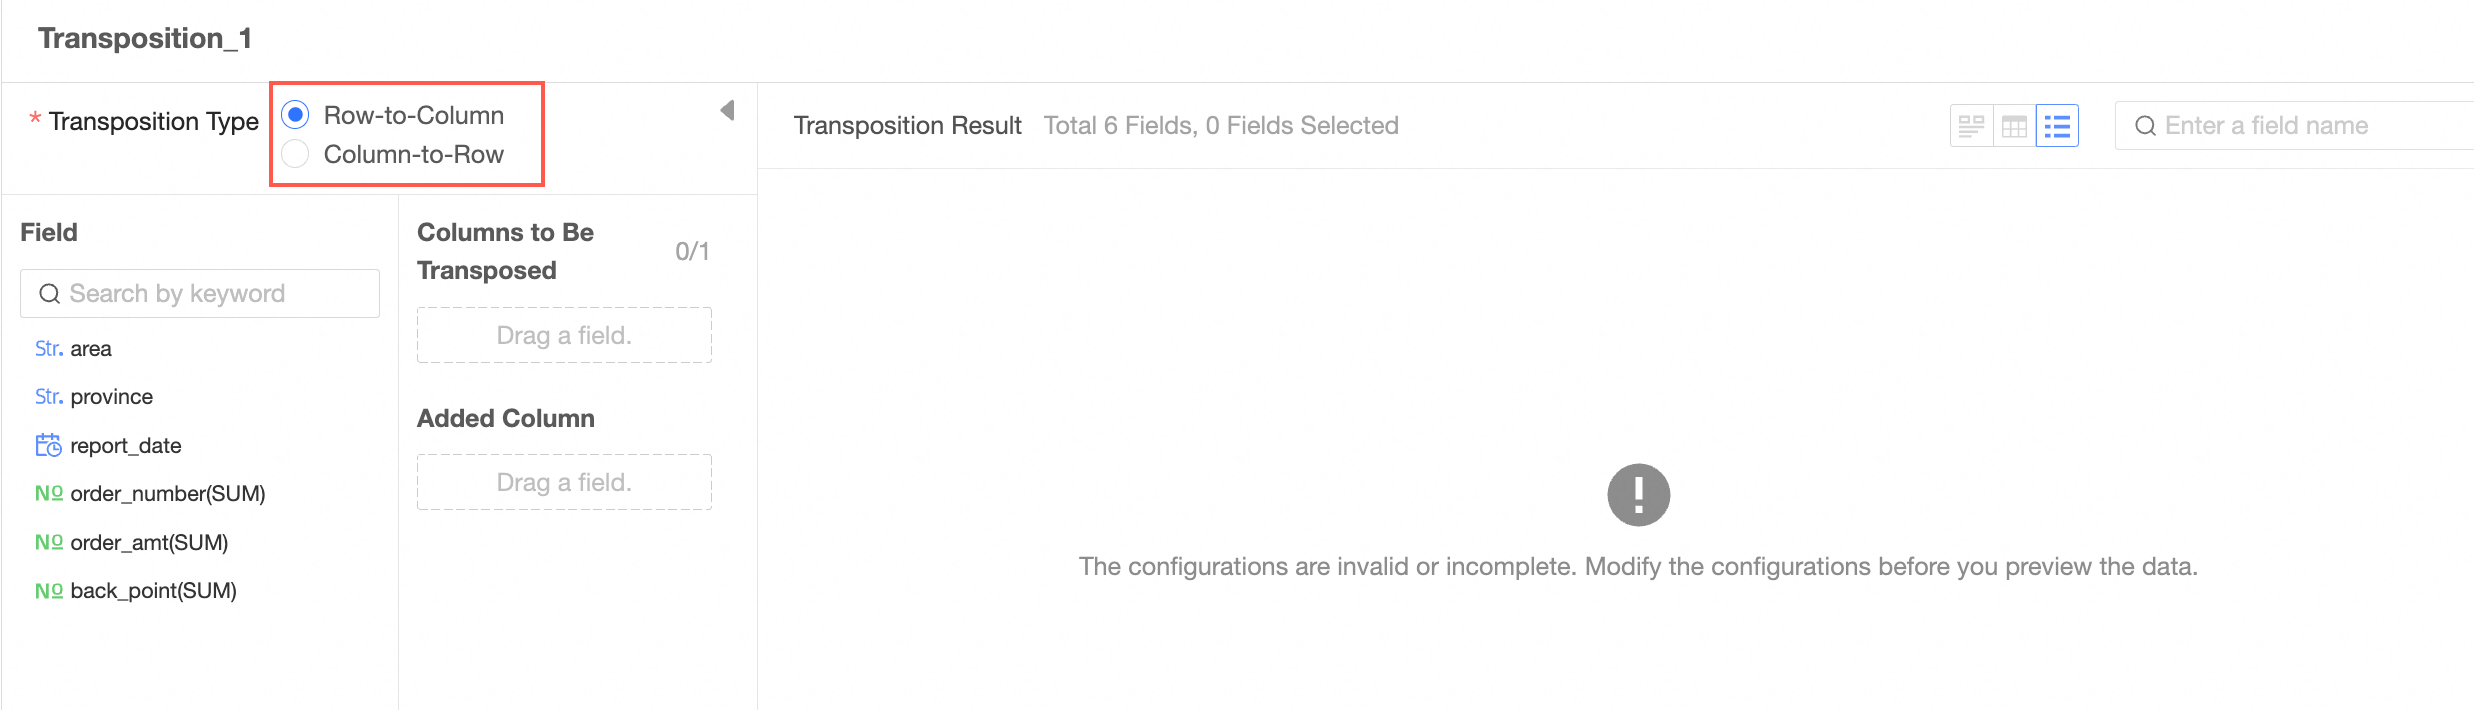
Transpose
Realize row-column transposition of data tables.
From the node operation area on the left, drag and drop the node to the canvas area.

Select a transpose type and configure the transpose. You can select Row to Column or Column to Row.
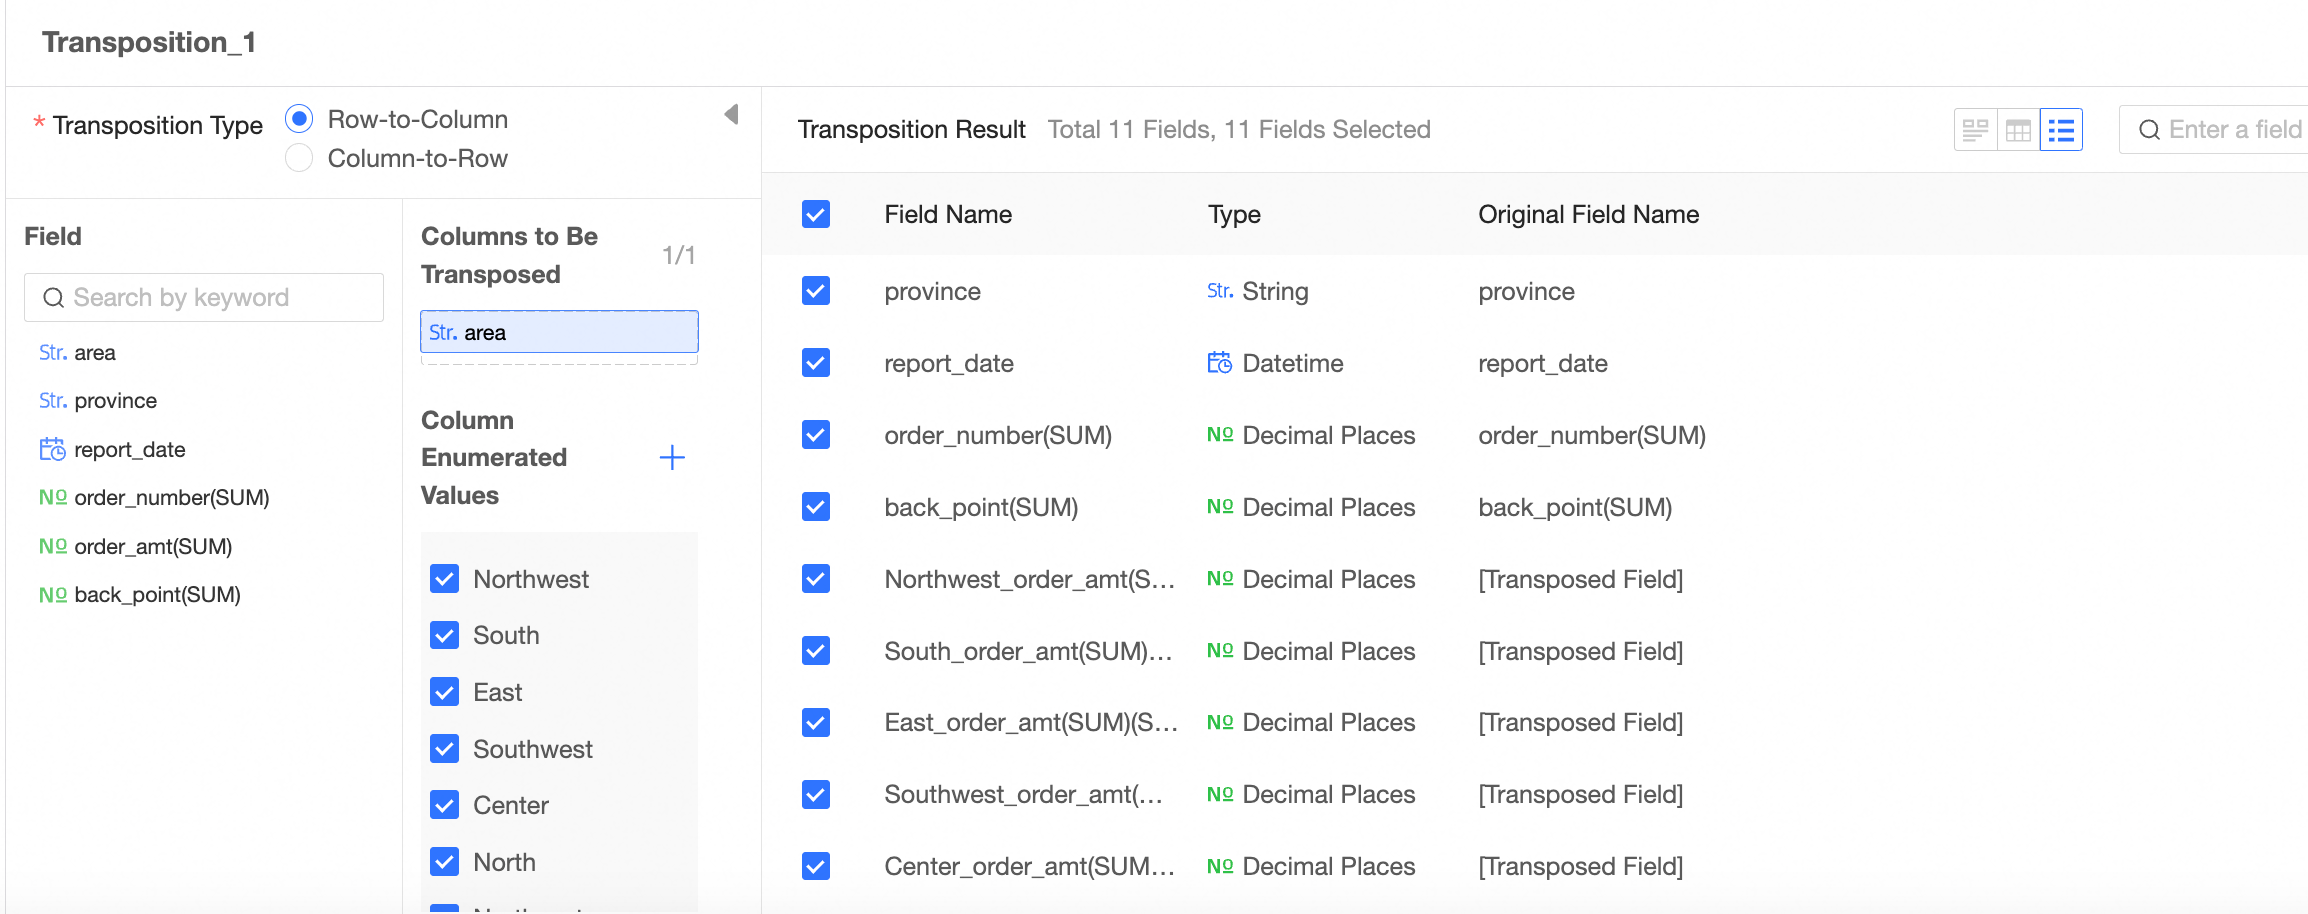
Row to Column
Drag a column to be transposed. The enumerated values of the column are automatically displayed. By default, all are selected.
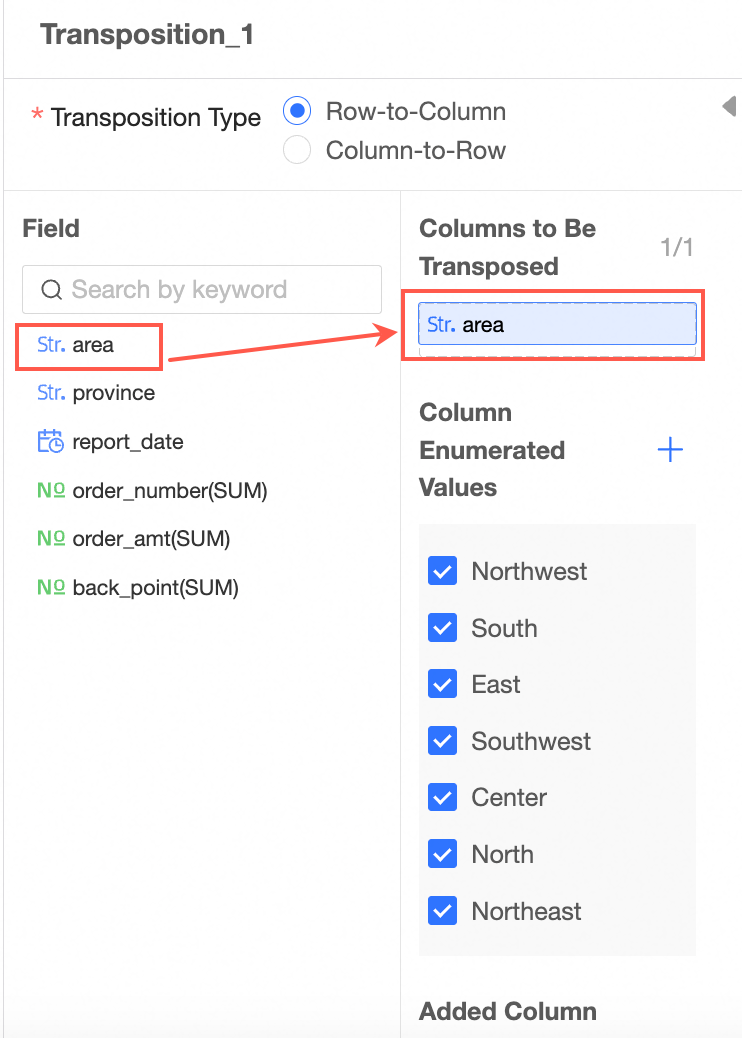 Note
NoteYou can add up to one column to be transposed.
Drag the fill column.
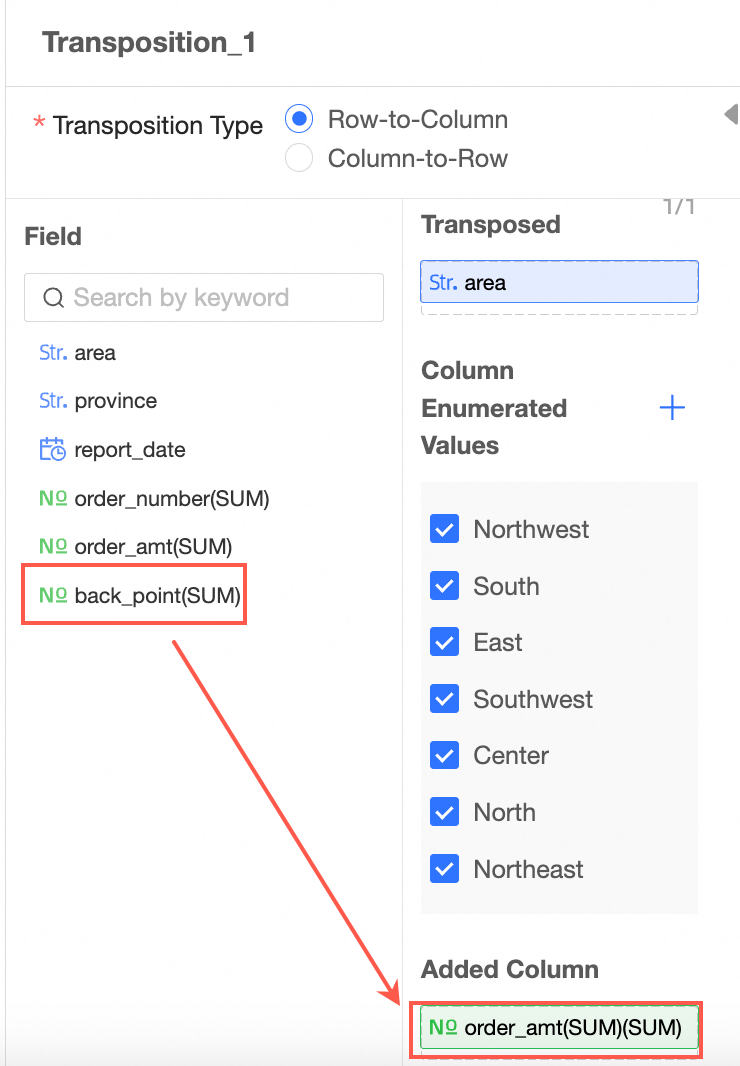
The transpose effect.
Before transposition

After transposition
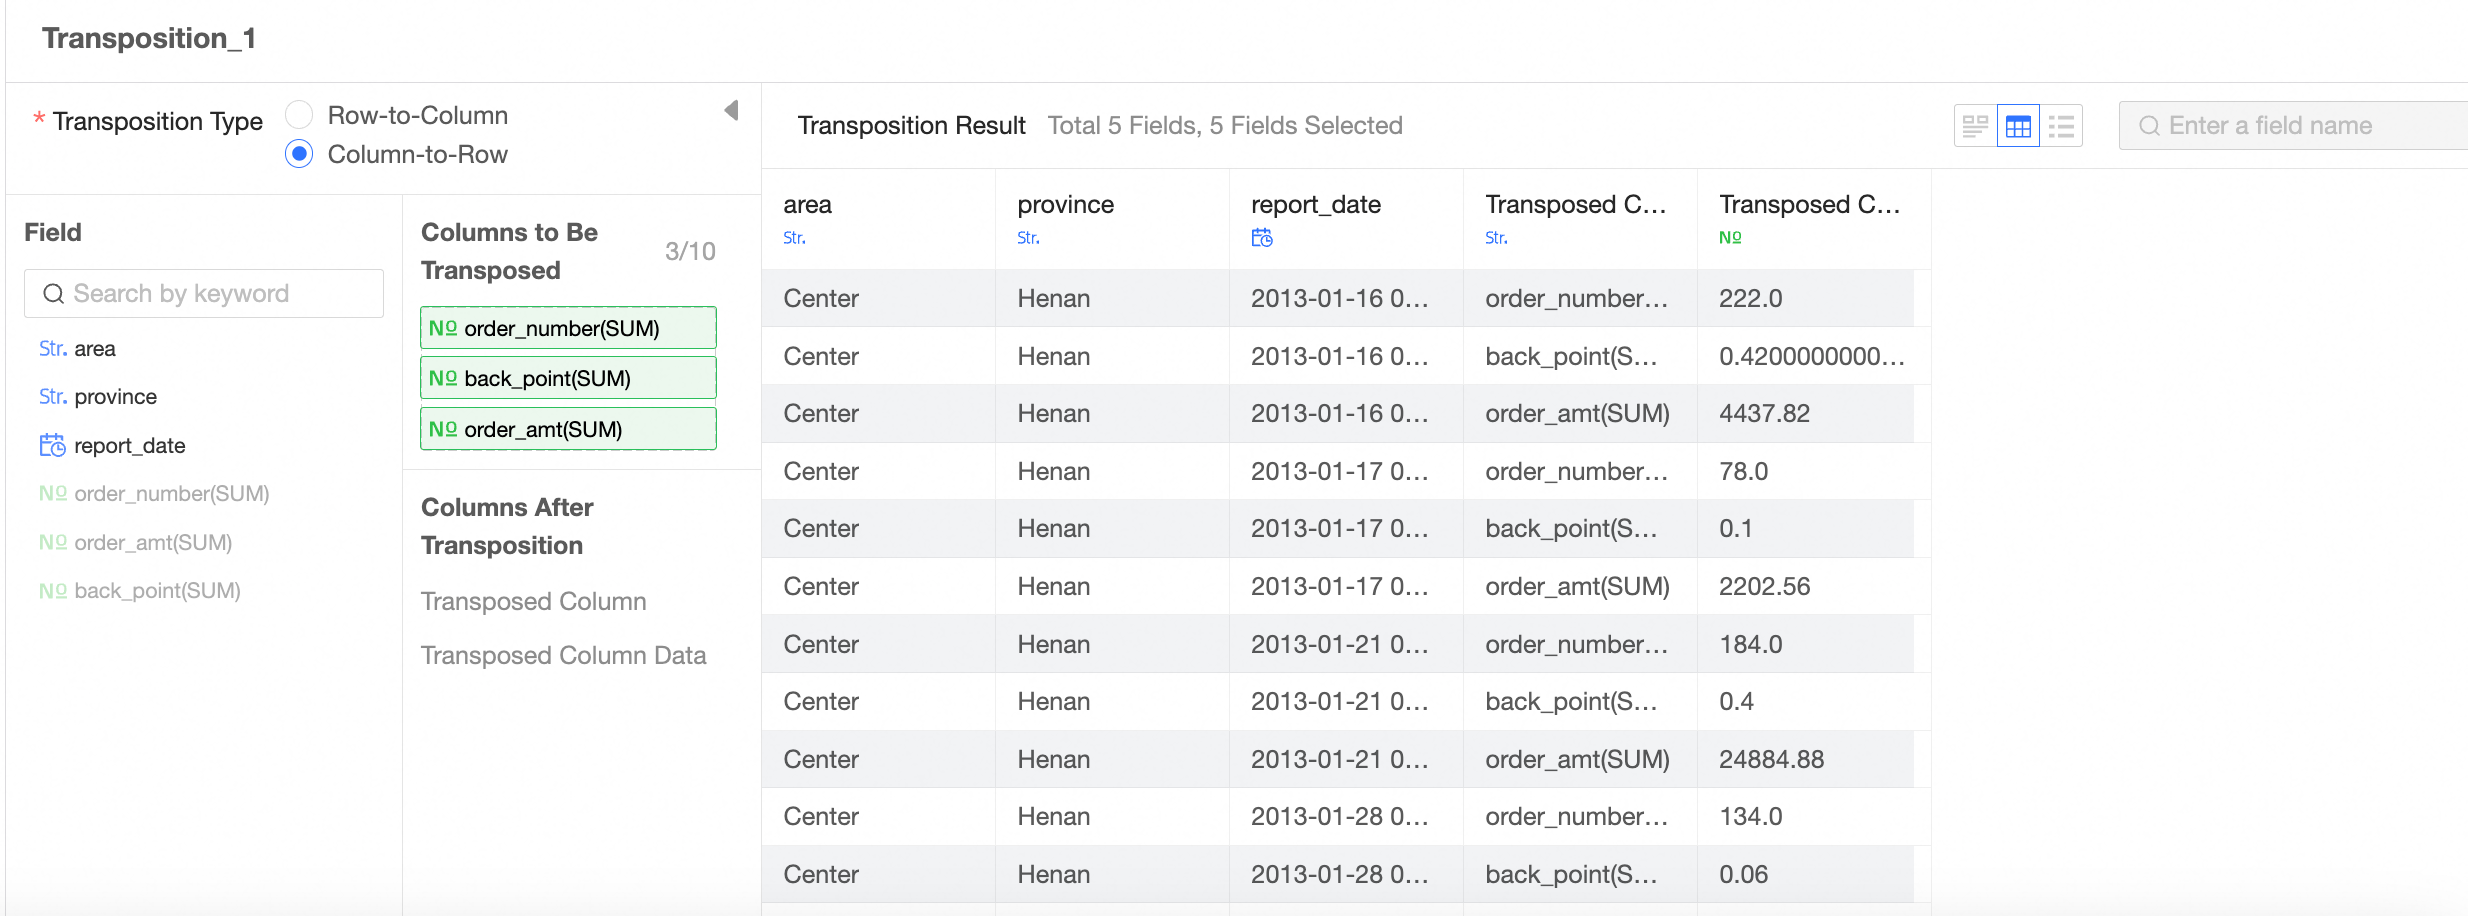
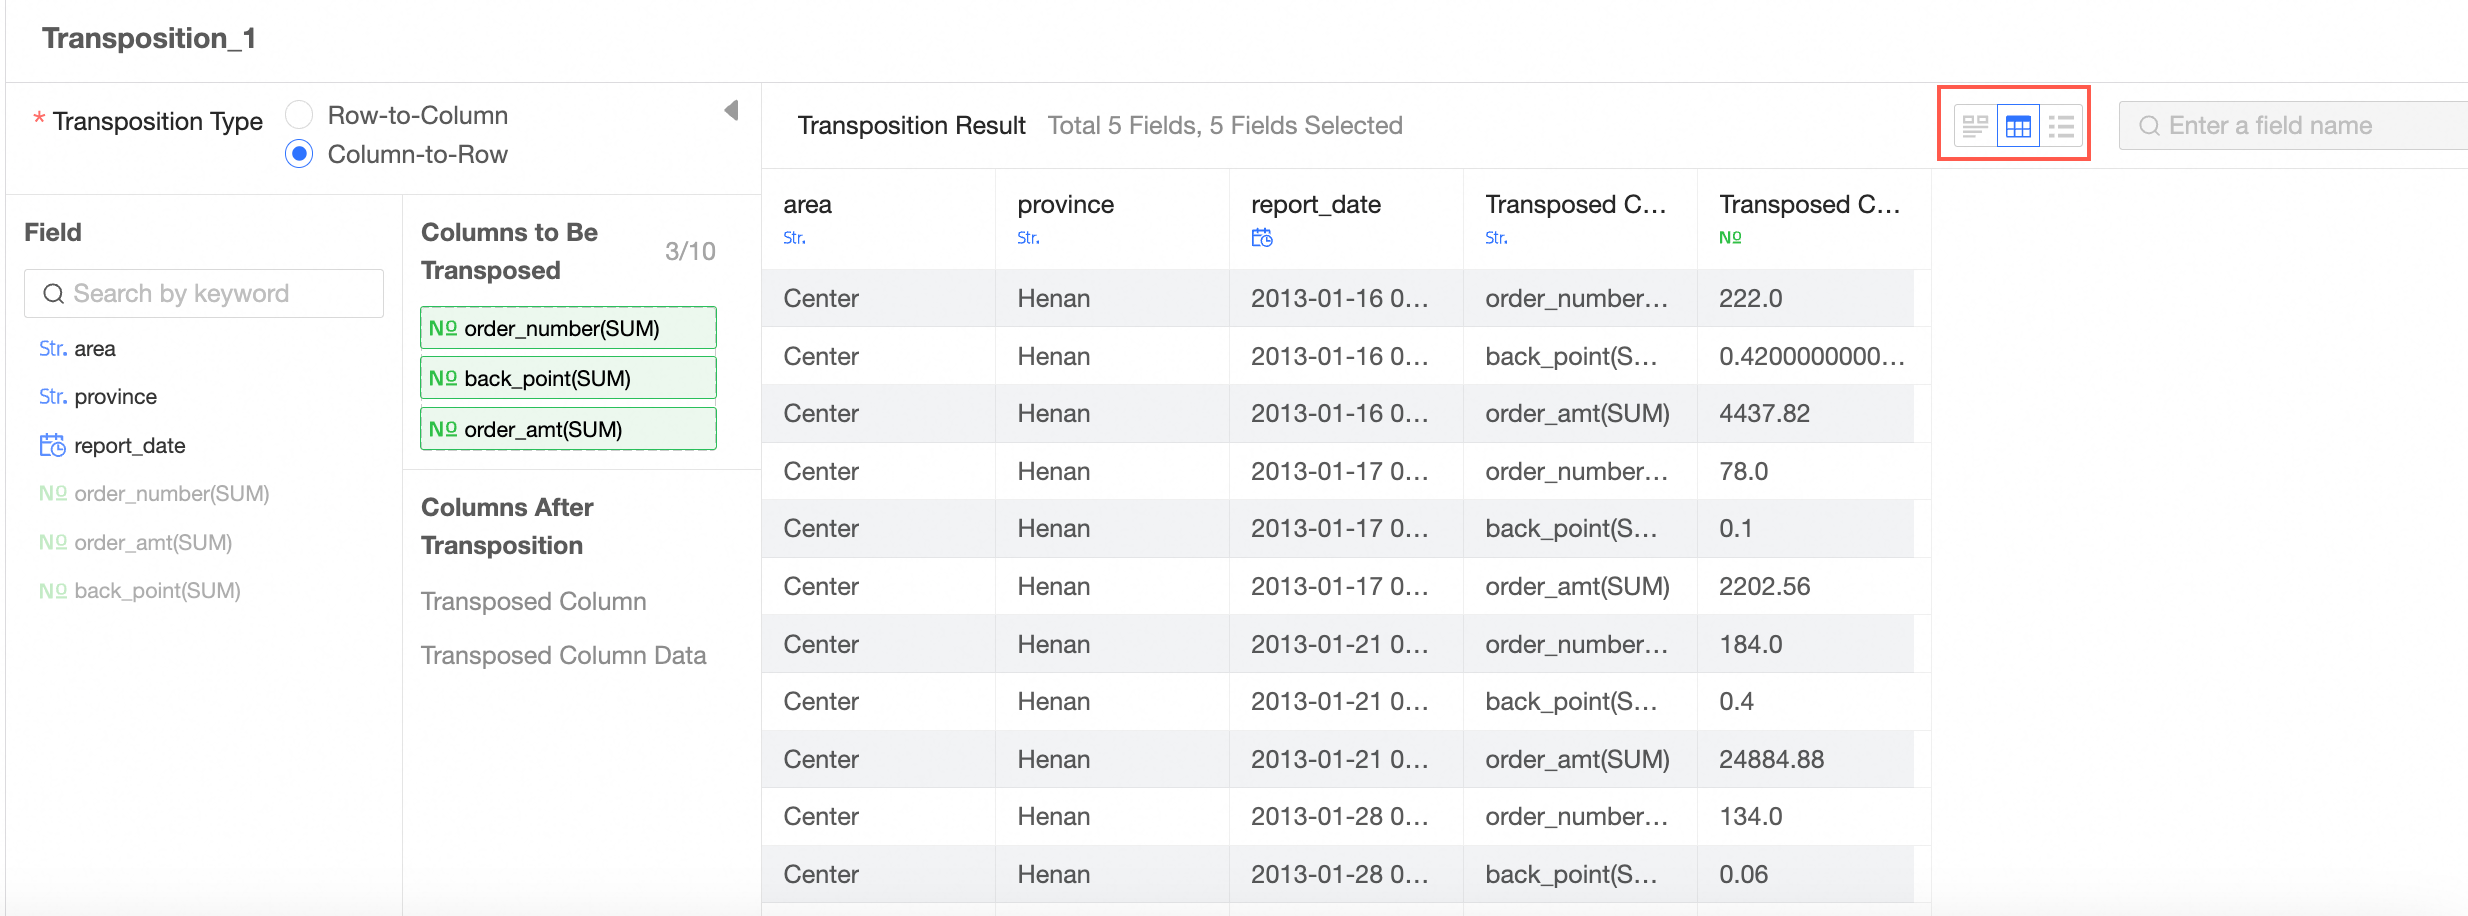
Column to row
Drag the column to be transposed.
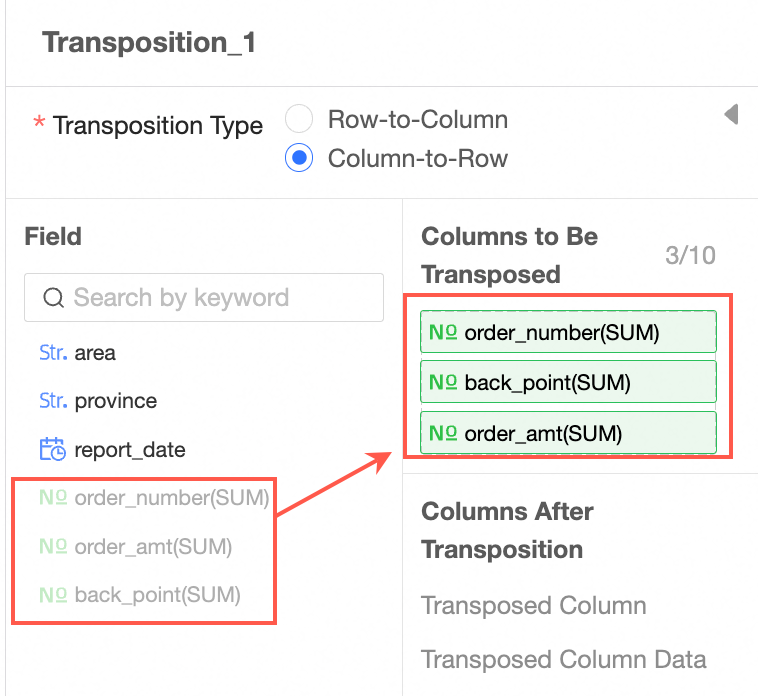 Note
NoteYou can add up to 10 columns to be transposed.
The transpose effect.
Before transposition
After transposition
View data details.
You can view the Data Exploration, Data Details, and Field List parameters.
Association
Associate two tables into a wide table and perform required data processing. The associated data is expanded on columns.
Drag Associate from the left-side node section to the canvas section.
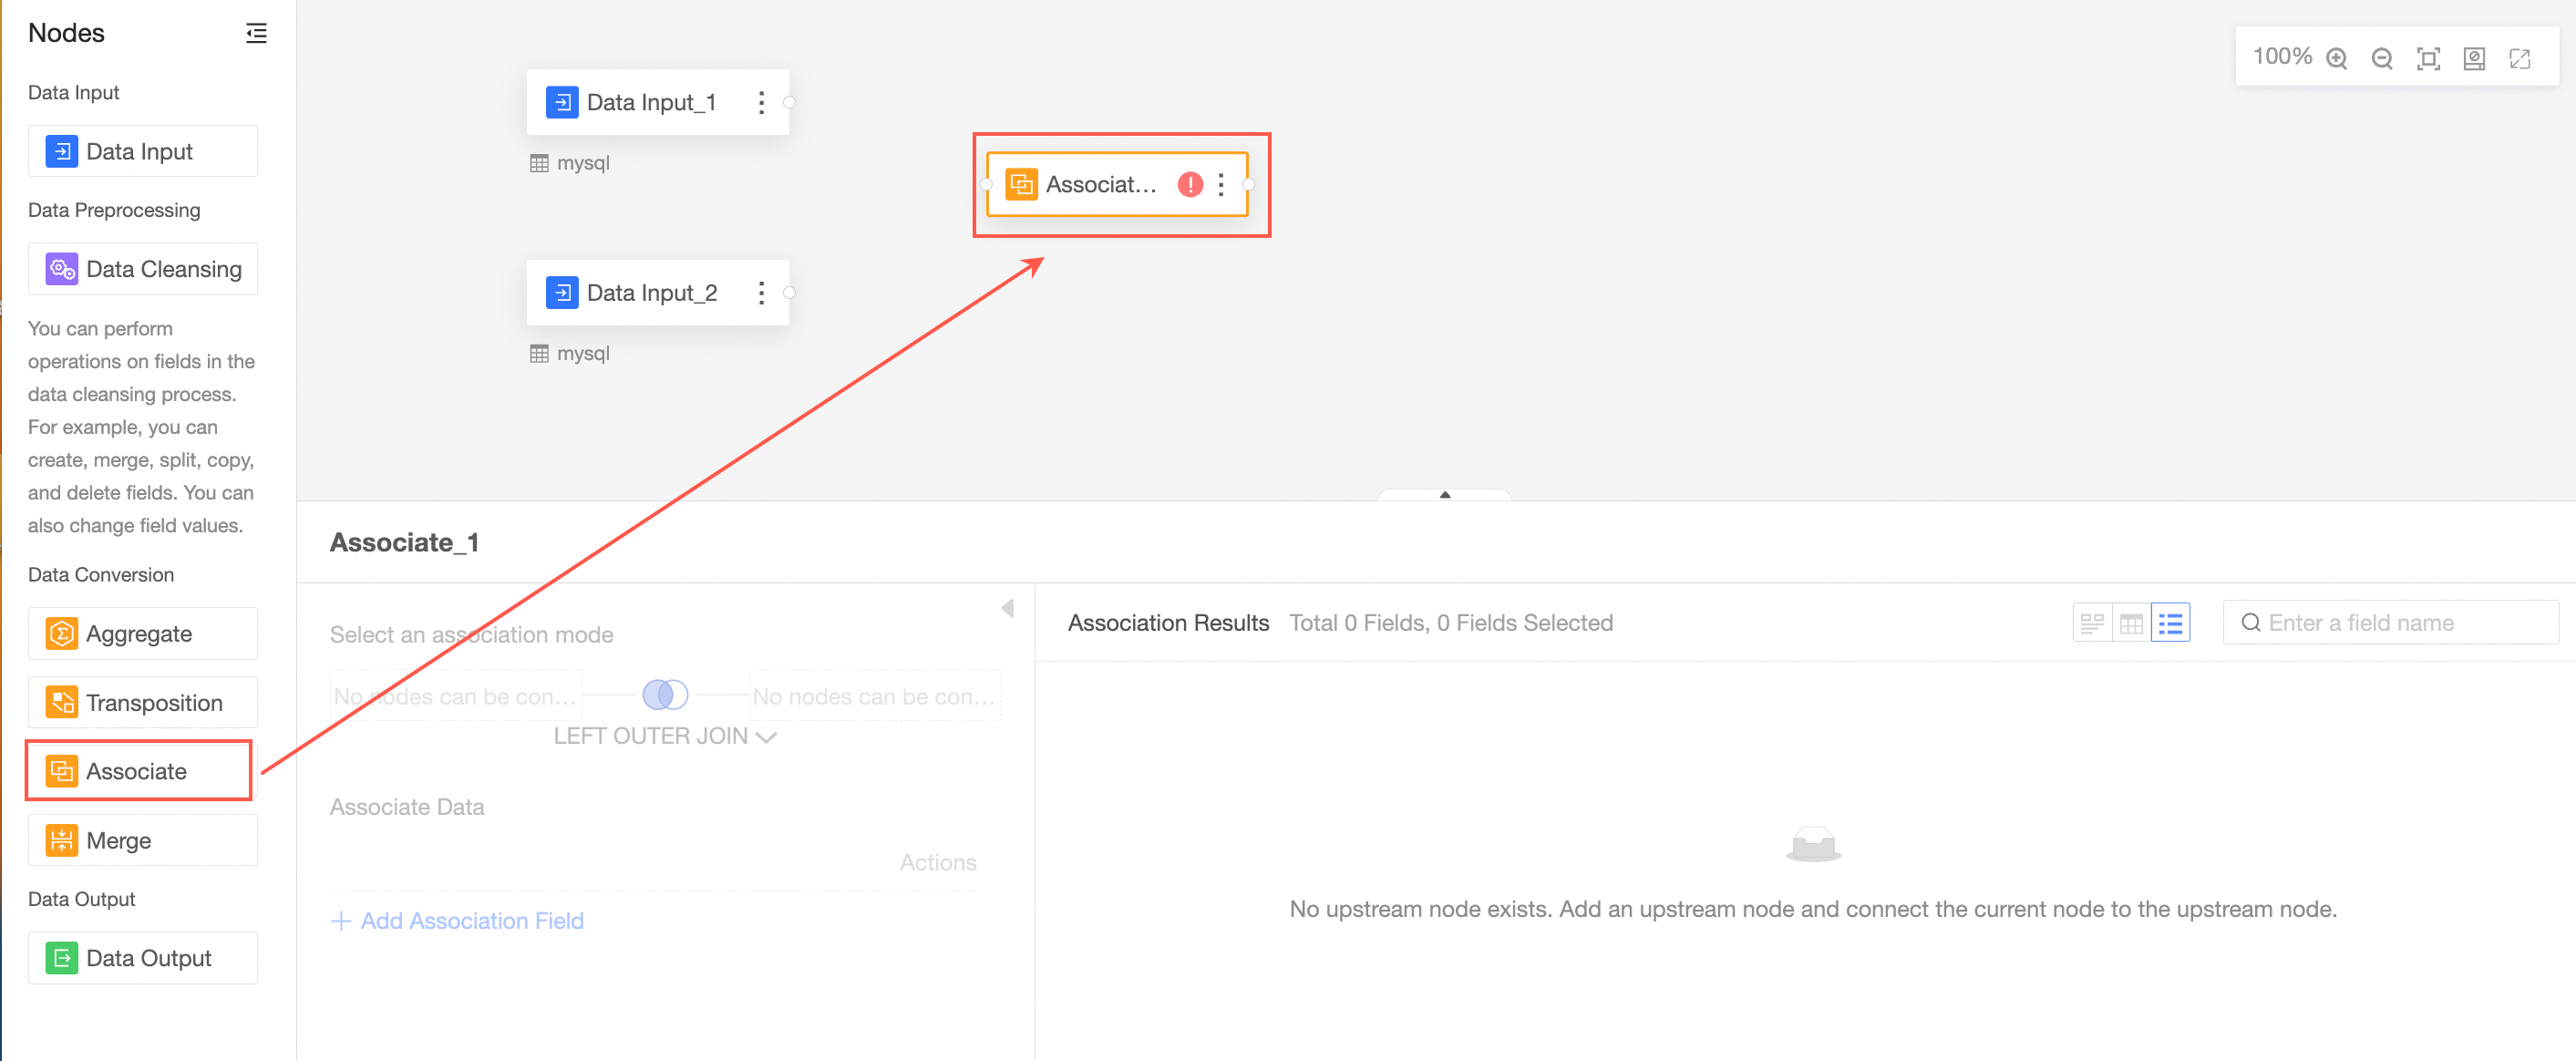
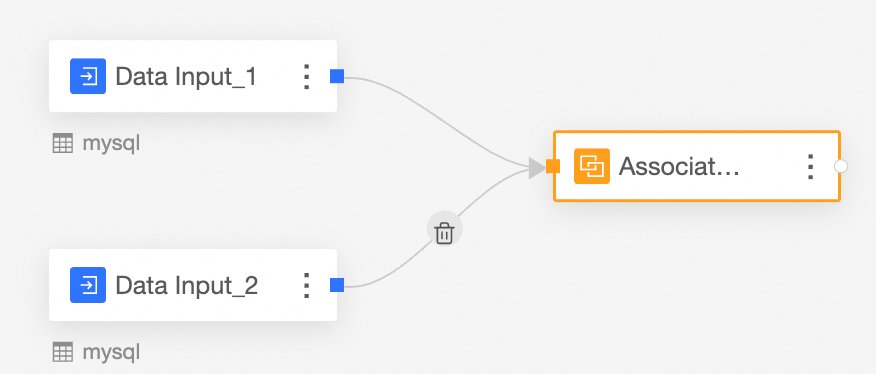
Connect the nodes to be associated.
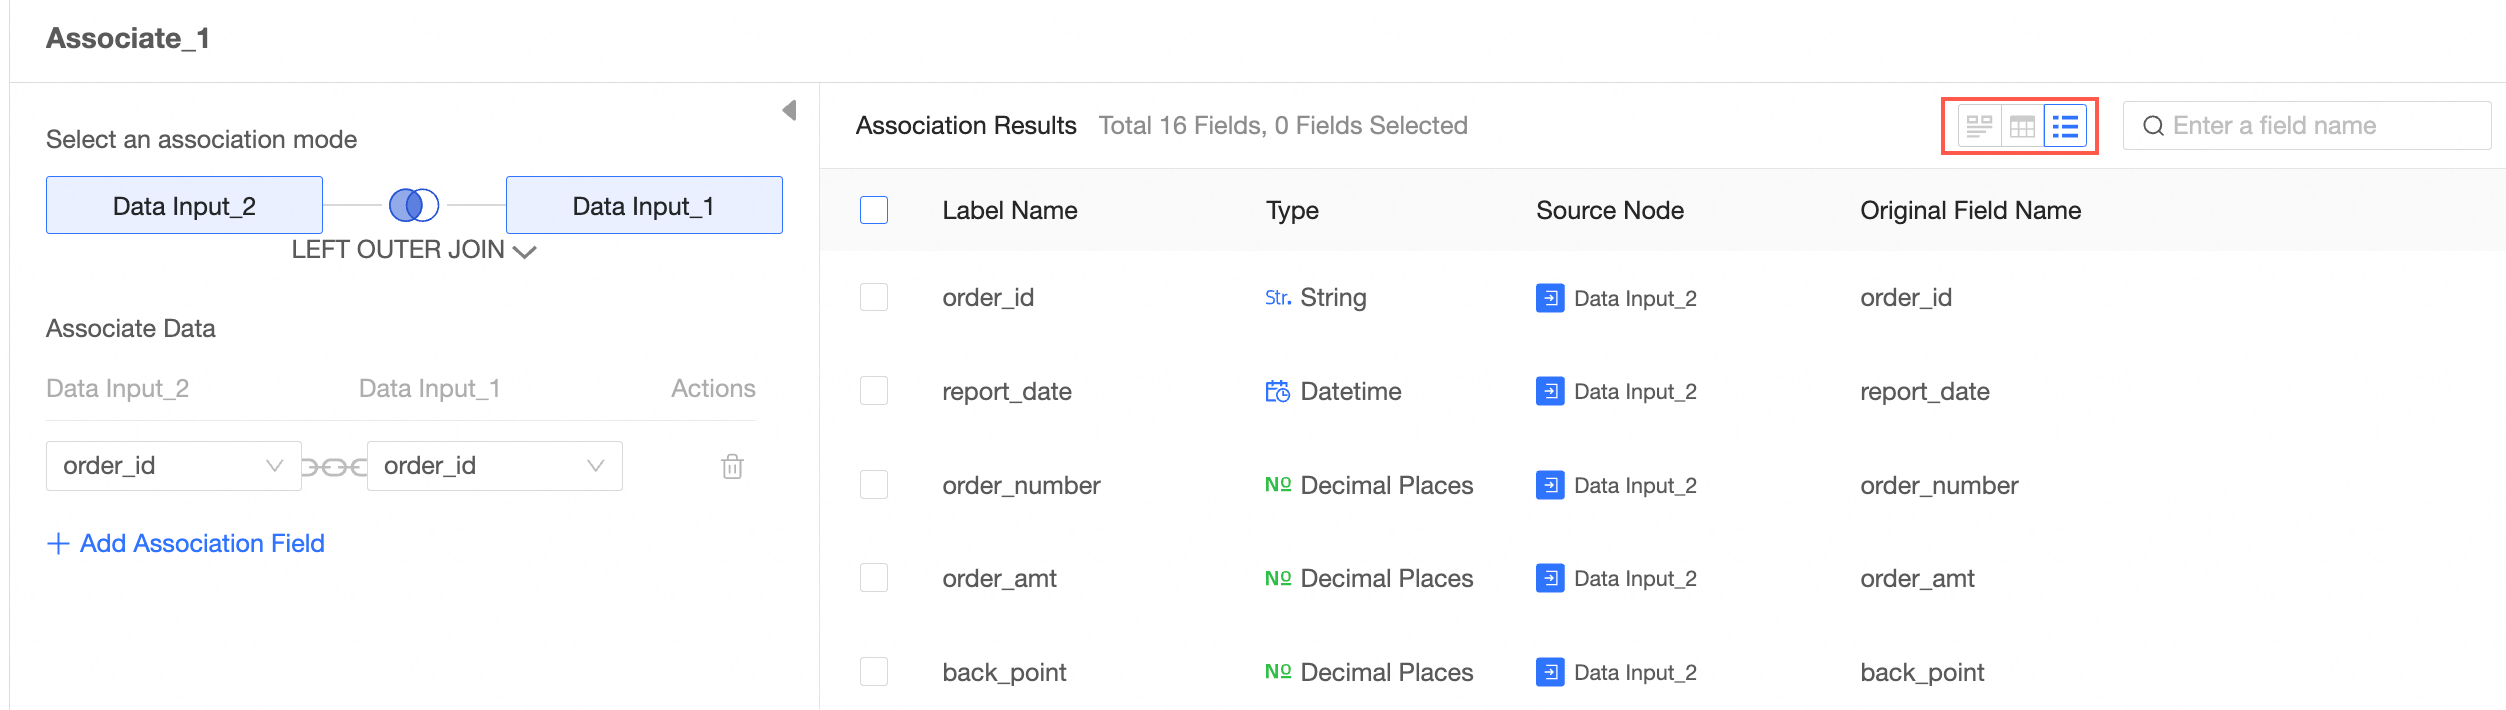
Follow the instructions in the following figure to configure the associated node.
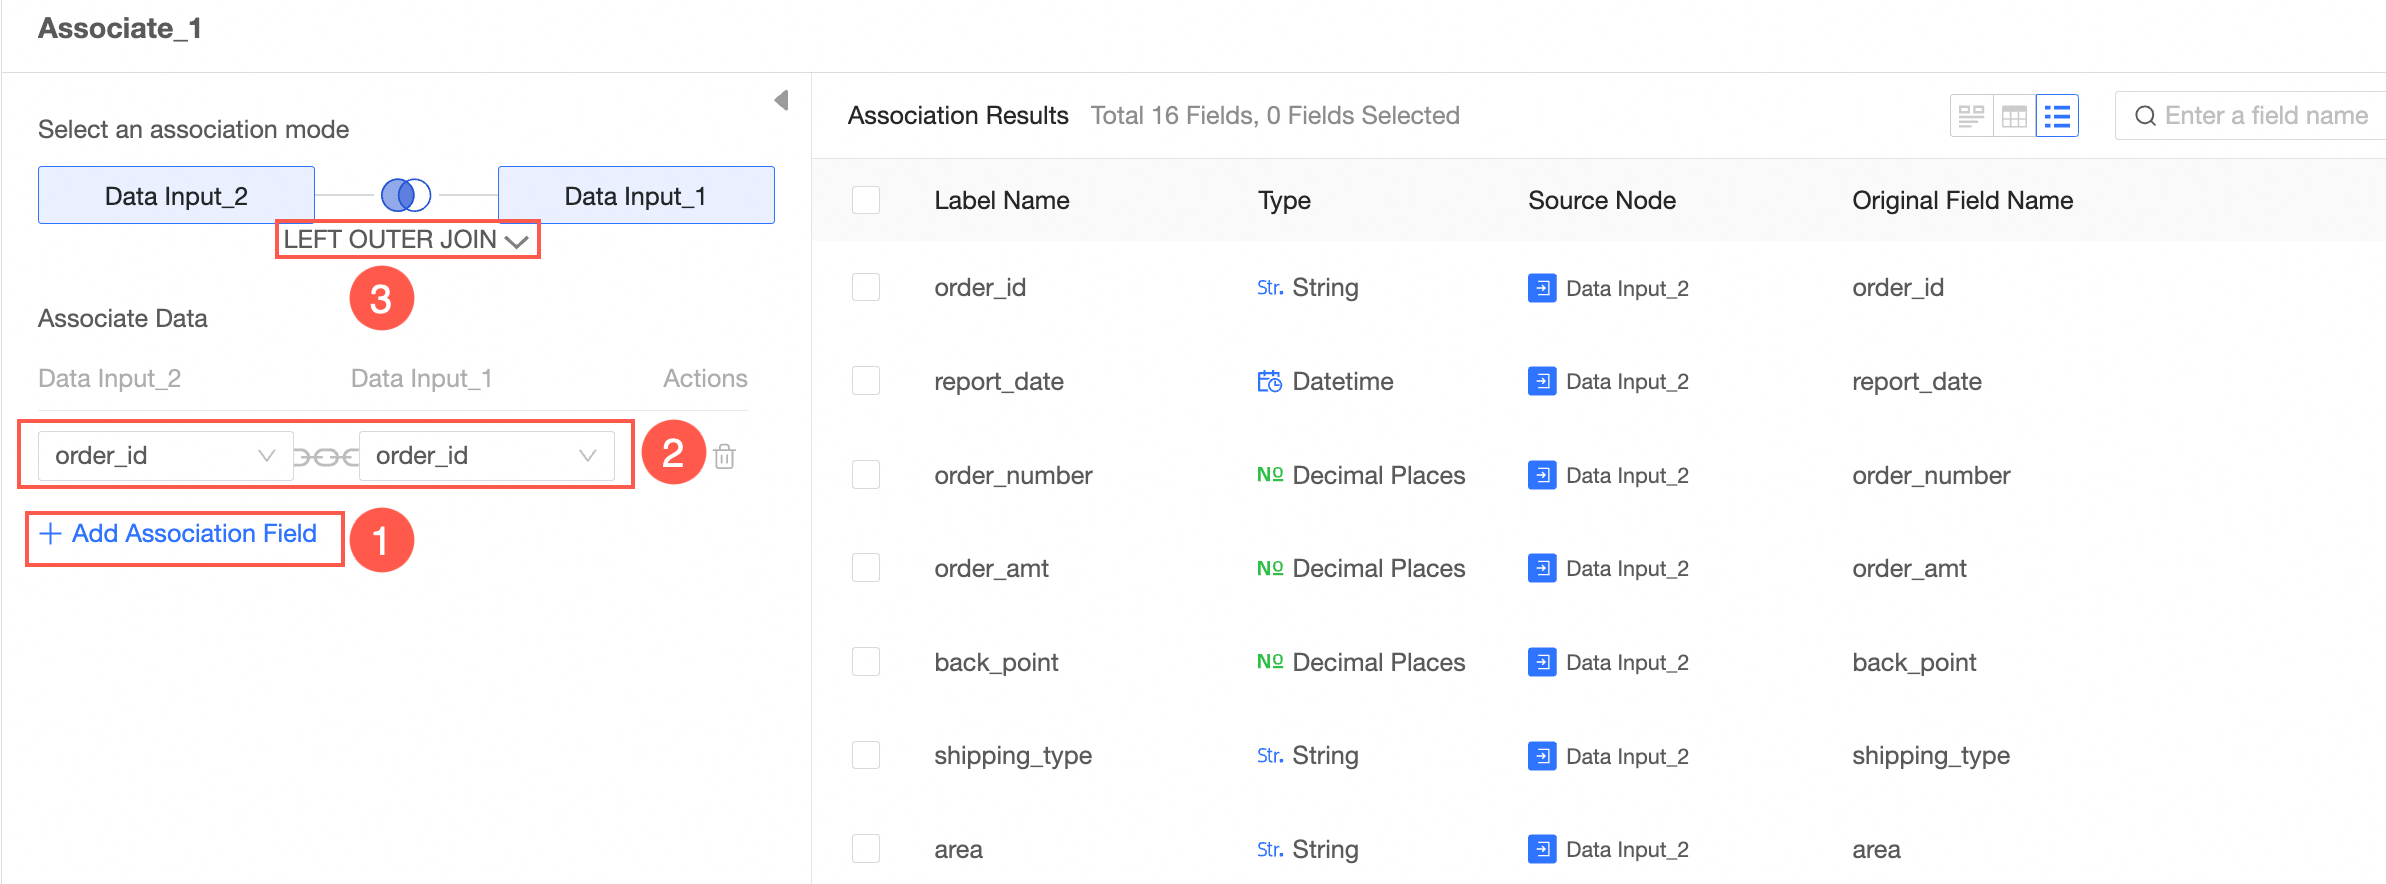
After you create an association, select the fields that you want to associate with the two tables. You can add multiple associated fields.
Four association types are provided: Inner Association, Left Association, Right Association, and Outer Association.
Inner join: When using inner join, the resulting table will contain values that match both tables.
Left associative: When you use left associative, the resulting table will contain all the values in the table on the left and the corresponding matches in the table on the right. If a value in the left table does not have a corresponding match in the right table, you will see a null value in the data view.
Right join: When you use right join, the resulting table will contain all the values in the right table and the corresponding matches in the left table. If a value in the right table does not have a corresponding match in the left table, you will see a null value in the data view.
External association: When you use full external association, the resulting table will contain all the values from both tables. If there is no match for a value in either table in the other table, you will see a null value in the data view.
If two related tables have the same field, the field will be renamed automatically.
View data details.
You can view data detection, data details, and field list.
After the data is processed, you can export the processed data. For more information, see Output data.