Quick BI integrates with DingTalk Office Automation (OA) approval, allowing you to request permissions through a DingTalk OA approval flow directly within the DingTalk application.
Prerequisites
You have enabled the Quick BI mini program in DingTalk and associated it with your Quick BI organization. For more information, see (Public Cloud) Enable the DingTalk mini program.
Procedure
-
Log on to the Quick BI console and navigate to the Approval Settings page, as shown in the following figure.

-
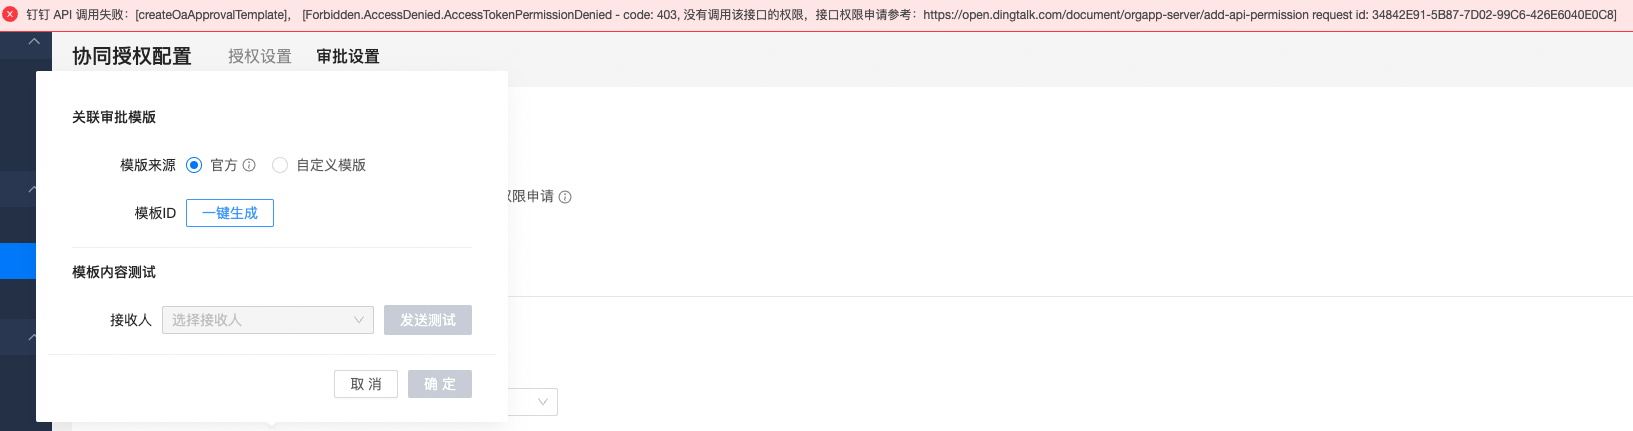
Select the DingTalk Channel Approval checkbox. In the Associate Approval Template dialog box, configure the template by setting the Template Source to Official and clicking One-click Generation. This action creates a Quick BI approval template in the OA approval application of your DingTalk organization. Click Confirm to save the template.

-
After you save the template, click Test to verify the configuration. If an OA approval instance starts successfully, the approval flow is ready.

Custom template configuration
Background
The official Quick BI approval template for DingTalk supports only peer-to-peer approval by default. You can modify the approval settings in the template to extend the approval flow.
Supported scenarios:
-
Countersigning approvals
-
Approval by direct supervisor
-
Approval by specified members
-
Approval by members selected by the initiator (required)
Procedure
Step 1: Go to the OA approval form management page
-
From the workbench, navigate to OA Approval, and then click Admin Console in the upper-right corner.

-
The form management page opens.

Alternatively, you can enter oa.dingtalk.com in your browser to open the admin console, and then click OA Approval to navigate to the form management page.
-
The official OA approval template generated by Quick BI is named "Quick BI Permission Request" or "Quick BI Approval".

Step 2: Configure the flow for the template
-
On the form management page, locate the target form and click Edit to open the template settings page.
-
As shown in the figure, click Flow Design and then select Approver.

-
On the Select Approver page, select the approver for the node. Currently, only Specified Members, Selected by Initiator, and Direct Supervisor are supported.
 Note
NoteQuick BI currently supports DingTalk approval flow templates that combine the following rules: Selected by Initiator (required), Specified Members (optional), and Direct Supervisor (optional).
(Important: The flow must include the "Selected by Initiator" rule. Otherwise, only peer-to-peer approval is supported.)
-
Click Save, and then click Publish to create the form.
Step 3: Configure countersigning
During the approval process, an approver can manually add other approvers if necessary. To use this feature, an administrator must enable the Allow Countersigning option.

For forms with countersigning enabled, navigate to the form details page on your PC or mobile device and click More > Countersign.

FAQ
Issue 1
-
Description: When creating an official DingTalk OA approval template, the following error is reported: `DingTalk API call failed[createOaApprovalTemplate], [Forbidden.AccessDenied.AccessTokenPermissionDenied - code: 403, No permission to call this API.]`
-
Cause: The OA approval permission is not enabled in DingTalk permission management.
-
Solution : Enable the following OA approval permissions:
-
Workflow instance write permission
-
Workflow template write permission
-
Workflow template read permission
-
Workflow instance read permission
-
Issue 2
-
Description: Approval results, such as Agreed or Rejected, from the DingTalk application cannot be synced to Quick BI.
-
Solution:
-
Check configuration consistency. Verify that the encryption `aes_key` and signature `token` in the DingTalk event subscription settings in Quick BI match those in your internal enterprise application in DingTalk. Click Save in the DingTalk application to confirm the settings are saved.

-
Check for network issues. Verify that the Quick BI domain name is publicly accessible.
-