You can create push tasks to reach users.
Procedure
Choose Workspace> User Marketing > Reach Marketing > PUSH.
Click Create Push Task in the upper-right corner.
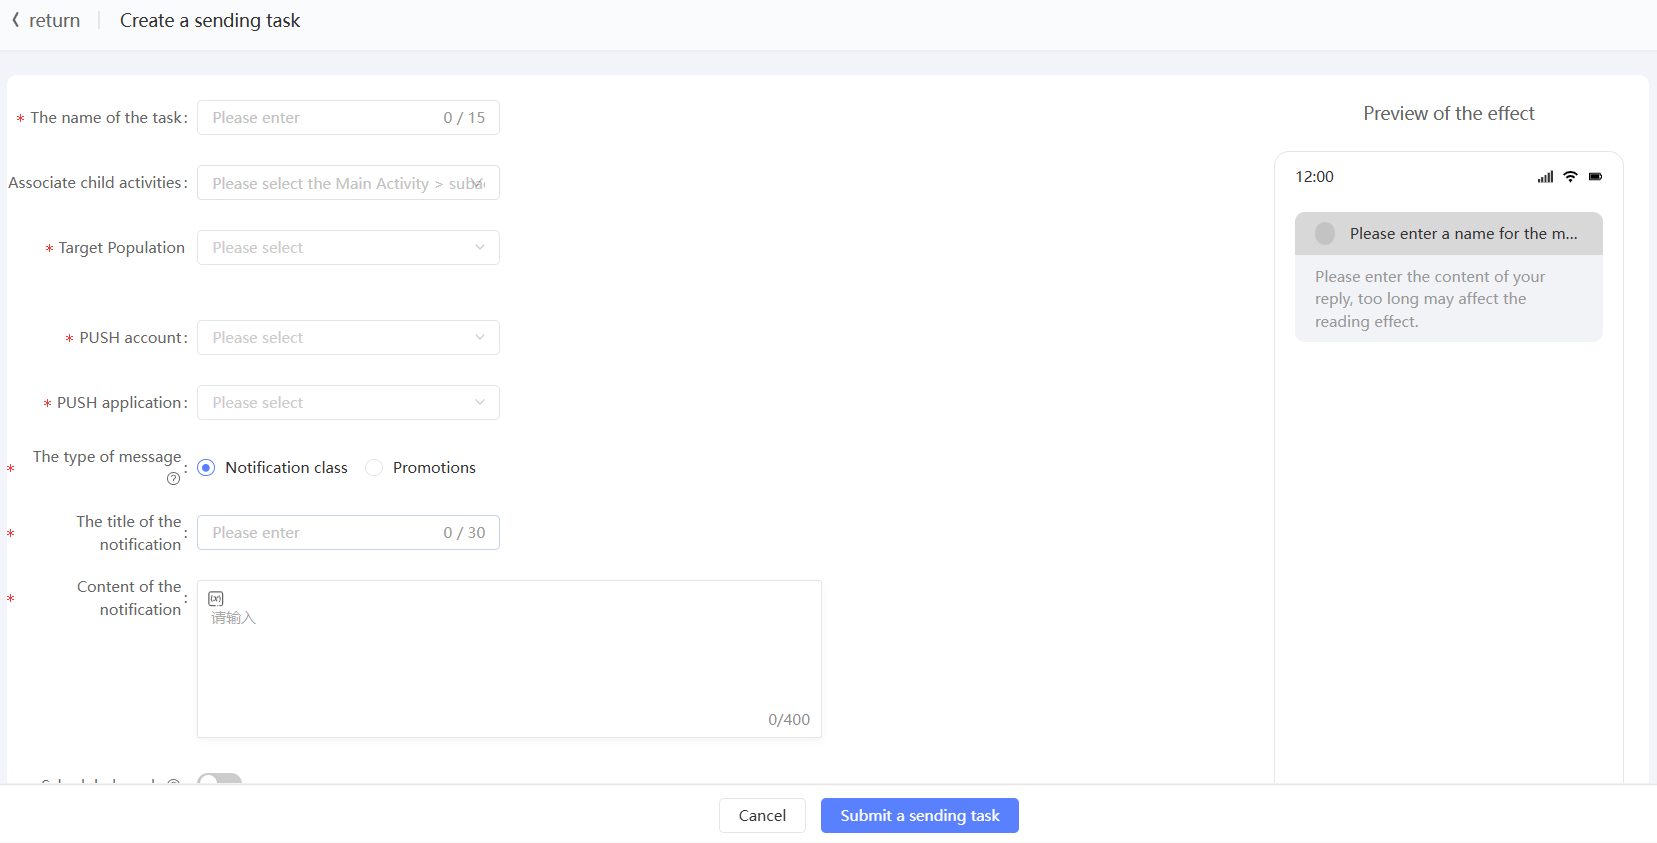
On the Create Task page, set the following parameters:
Item
Example value
Name
Enter a task name.
Associate sub-activities
Select a main campaign and select a sub-campaign under the main campaign. Separate sub-campaigns are displayed under-at the end of the main campaign list. You can associate a marketing task with a sub-campaign. For more information about marketing activities, see Marketing Campaign Documentation.
Intended audiences
Select the audience to be sent. The ID type and number associated with the audience are displayed below. The task will send PUSH to all devices after deduplication at the same time.
PUSH account
Select the attached Umeng PUSH account.
You can also click Add PUSH Account to go to the Account Management page. On the page that appears, click Account Authorization in the upper-right corner. For more information, see Account Authorization.
PUSH application
Select an application under your account. The name of the application is marked with iOS or Android.
You can also click Add PUSH Application to go to the API Management page. On this page, you can add a new application and select an application. For more information, see Create PUSH API.
The message type.
Select a message type for fatigue Control.
Notification type: not subject to fatigue control rules.
Promotion category: subject to fatigue control rules, no more messages can be sent after the upper limit of the number of messages is reached within a period of time.
Notification Title
Enter the title of the PUSH message.
Notification Content
Enter the content of the PUSH message.
A preview of the pushed content appears on the right side of the page. Pay attention to the preview effect.
You can insert variables. The variables reference the tag values of users. The content sent to different users varies with the tag values.
Click the
 icon at the location where you want to insert a variable. In the dialog box shown in the following figure, select the tag that is used by the variable and enter the variable name. In the dialog box that appears, set the value to No Content, Empty Value, or Default Value. Click Insert. The value of "Test Content" changes to "Test Content${name}".
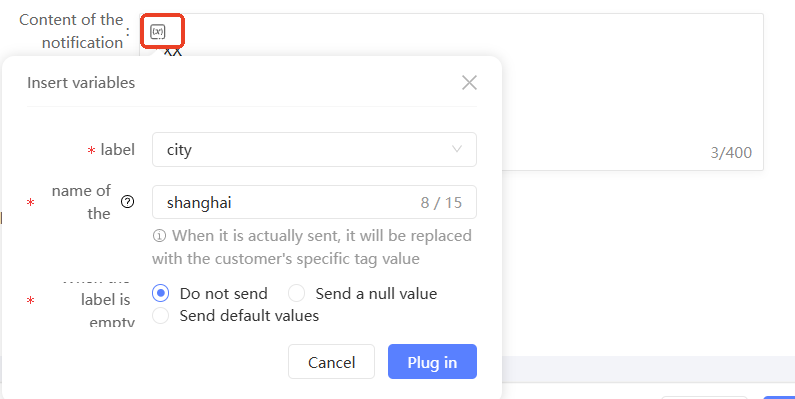
Push Wake
Specifies the wake-up mode after a user clicks a message. Valid values:
Wake the application.
Open a specified link: Only supported by Android apps. You must enter a link that starts with http or https.
Open the in-app page: only supported by Android apps. You must enter the full package name and activity name. Contact your client developer for the full package name and activity name.
Custom parameters: To open a specified page in an application by using custom parameters, you must set the key-value pairs of parameters. You can set multiple pairs. You cannot set "d" and "p" as the key of the parameter. The total number of characters in all keys and values must be less than 1000.
Push to vendor channel
Only supported by Android apps. Messages will be pushed through vendor channels to help improve the reach rate.
Turn on the switch and enter the full package name and activity name. Contact your client developer for the full package name and activity name.
Campaign
You can specify the push time when the feature is enabled.
Click Submit Sending Task.