When you need to load-test a file upload API at scale, running Apache JMeter standalone or in distributed mode introduces concurrency limits and scheduling overhead. Although JMeter supports distributed testing to spread load across multiple machines, achieving consistent scheduling and data collection remains a challenge. Additionally, JMeter's built-in reporting may not meet complex analytical needs, often requiring external tools such as Grafana and Kibana for data visualization and analysis. Performance Testing Service (PTS) distributes JMeter scripts across cloud-based engines with seamless resource scaling and cloud monitoring integration, so you can stress-test upload endpoints at high concurrency without managing test infrastructure.
How it works
Testing a file upload API on PTS takes two steps:
Build the upload script locally -- Configure an HTTP POST request in Apache JMeter and verify that the upload succeeds.
Run the script on PTS -- Upload the
.jmxfile and test files to a PTS scenario, configure load parameters, and start the test.
Prerequisites
Before you begin, make sure that you have:
Apache JMeter 5.6.3 installed on your local machine (PTS supports JMeter 5.0 and 5.6.3)
Step 1: Build the upload script in Apache JMeter
Configure the HTTP request
Create an HTTP Request sampler in your JMeter test plan.
On the Basic tab, configure the target endpoint:
Field Description Example Protocol httporhttpshttpsServer name or IP Domain name of the upload API www.example.comPort Number Service port 5000Method HTTP method -- select POSTPOSTPath Path of the upload API /uploadOn the Files Upload tab, add the file to upload:
Field Description Example File Path File name only, without the local path. This name must match the file you later upload to PTS. test.jpgParameter Name Form field name expected by the upload API fileToUploadMIME Type Media type of the file image/jpeg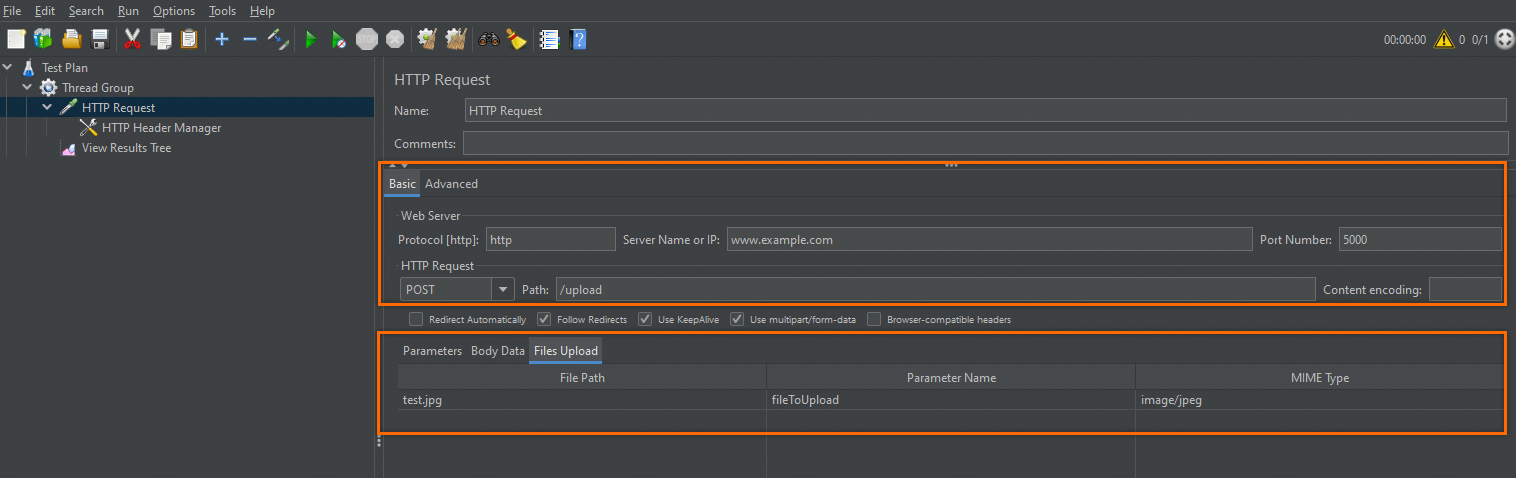
Add HTTP headers
Upload APIs typically require Cookie and Content-Type headers. If the API does not require authentication, configure only the Content-Type header.
Add an HTTP Header Manager to the sampler and set the required headers.

Verify the script locally
Run the test plan.
Open View Results Tree and confirm that the upload returns a success response.
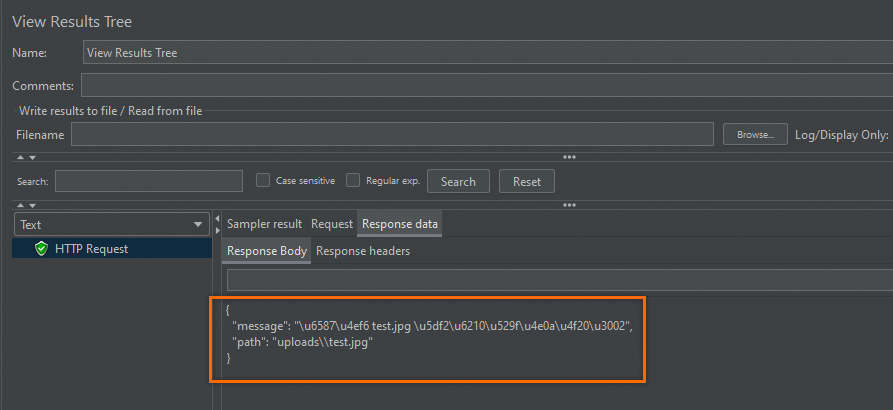
After the test passes, save and export the test plan file (for example,
uploads.jmx).
Step 2: Run the test on PTS
Create a JMeter scenario
Log on to the PTS console.
In the left-side navigation pane, choose Performance Test > Create Scenario, and then click JMeter.
Enter a scenario name.
On the Scenario Settings page, upload the
uploads.jmxfile exported in Step 1.Click Upload File and add the image file referenced in the script. The file name must exactly match the File Path value in
uploads.jmx.
Click JMeter Version and select
5.6.3.ImportantSelect the same JMeter version you used to create the script. A version mismatch can cause runtime errors.

Configure the load test
Configure the stress source and load parameters. The following example uses Alibaba Cloud VPC as the stress source.
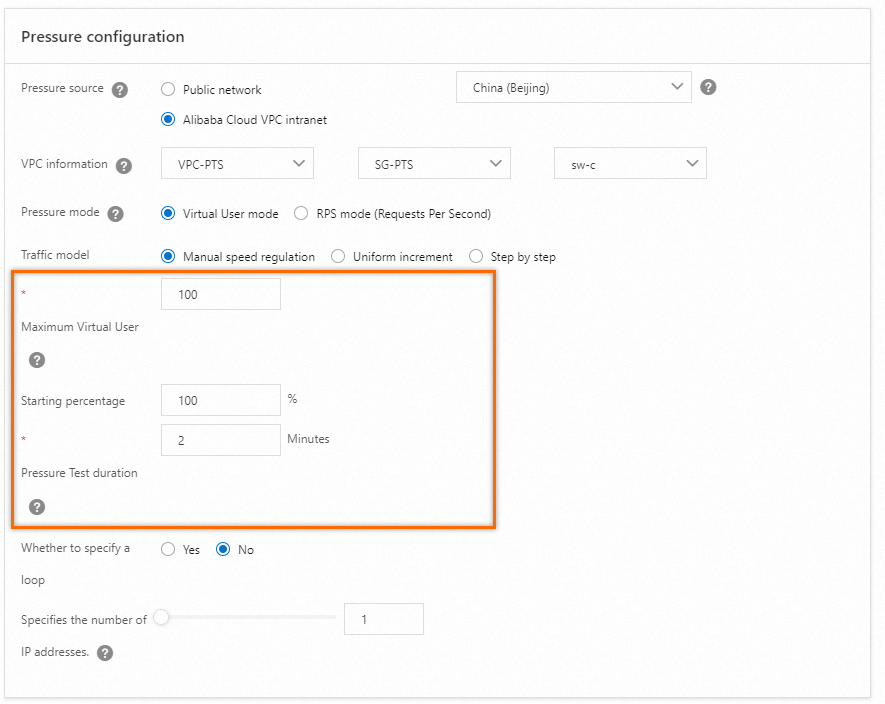
Performance testing is a paid service. You can select stress sources and stress parameters based on your needs. For more information, see Configure the stress testing model and level and Billing overview.
Debug and start the test
Debug the scenario to verify that the upload works before running the full test.
After a successful debug run, click Save and Test.
On the Tips page, select Trigger Now and Make sure that the test is approved and complies with local laws, then click Start Testing.
Analyze the results
After the test finishes, PTS generates a stress testing report that includes:
Scenario metrics
Business details
Monitoring details
API sampling logs
For a full walkthrough of the report, see View a JMeter performance testing report.