The HTTP Archive (HAR) format is a standard file format that is used to record information about HTTP requests and responses. Google Chrome, Charles, and Fiddler support the export of files in the HAR format. You can use the HAR file import feature to import the HTTP traffic that is recorded to a Performance Testing (PTS) stress testing scenario. This topic describes how to export a HAR file and then import the HAR file to the PTS console to perform stress testing.
Step 1: Export a HAR file
You can use Google Chrome, Charles, or Fiddler to export HAR files.
Method 1: Export a HAR file by using Google Chrome
Open the Google Chrome browser.
Enter the address of a web page in the address bar and go to the web page. On the web page that appears, perform an operation, right-click any area, and then select Check.
In the panel that appears, click the Network tab and click the
 icon.
icon.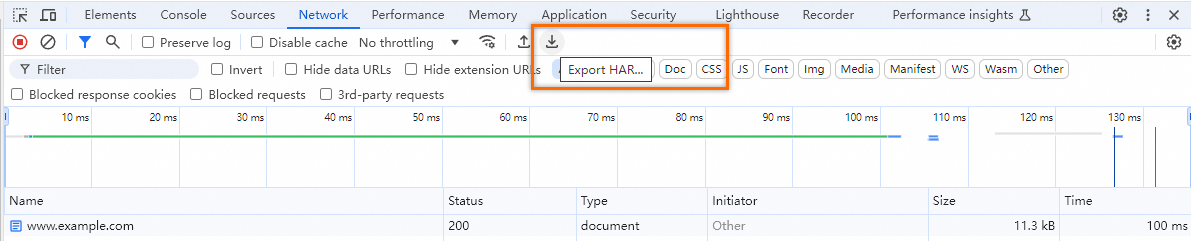
Method 2: Export a HAR file by using Charles
Open the Charles tool.
Connect to the Charles proxy by using your mobile phone.
On the Charles page, click the
 icon to start recording.
 Access an application on your mobile phone and click the
icon to stop recording. On the Charles page, click File, select Export Session, and then click Save.
Method 3: Export a HAR file by using Fiddler
Open the Fiddler tool.
On the Fiddler page, select the API operation that you want to export.
On the Fiddler page, click File, select Export Sessions, and then click Selected Sessions....
On the Select Export Format page, select HTTPArchive v1.1 and click Next.
After the preceding operations are complete, click Save.
Step 2: Use the HAR file to perform stress testing
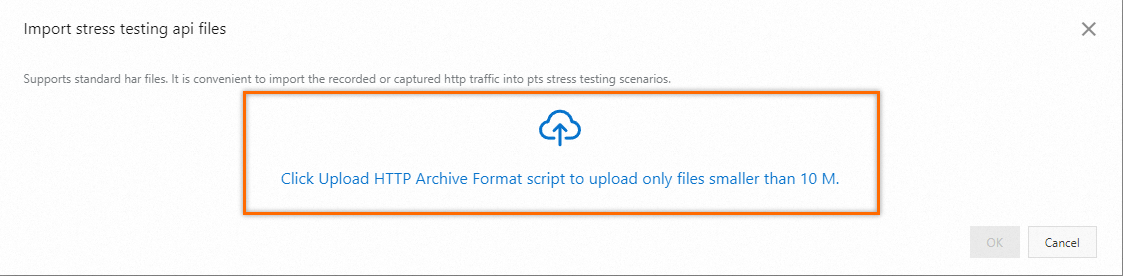
Log on to the PTS console. In the left-side navigation pane, choose Performance Test > Create Scenario. On the Create Scenario page, click HTTP Archive Format(.har).
In the Import API files dialog box, upload the exported HAR file. The size of the HAR file that you upload must be less than 10 MB.
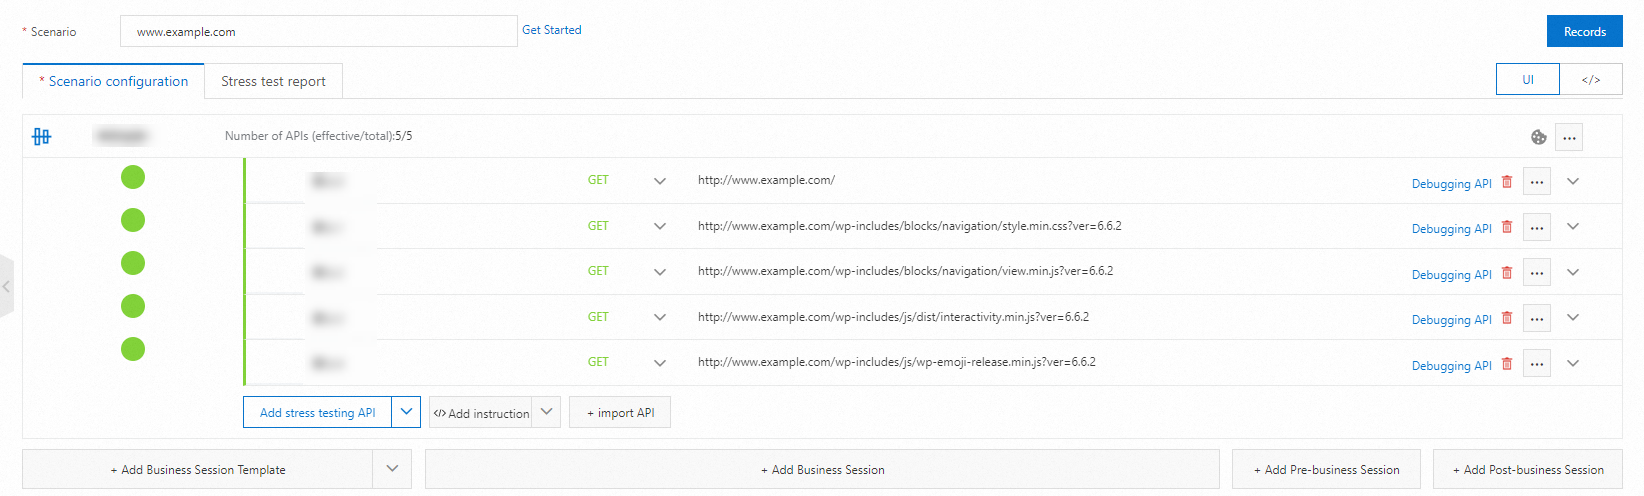
After the HAR script is uploaded, the system automatically orchestrates the related stress testing scenario.
Configure stress mode settings.
Set the maximum number of virtual users (VUs) to
10and the total test duration to1minute. Use the default settings for other parameters. You are charged for stress tests. We recommend that you configure a load level based on your business requirements. For more information, see Billing overview and Configure the stress testing model and level.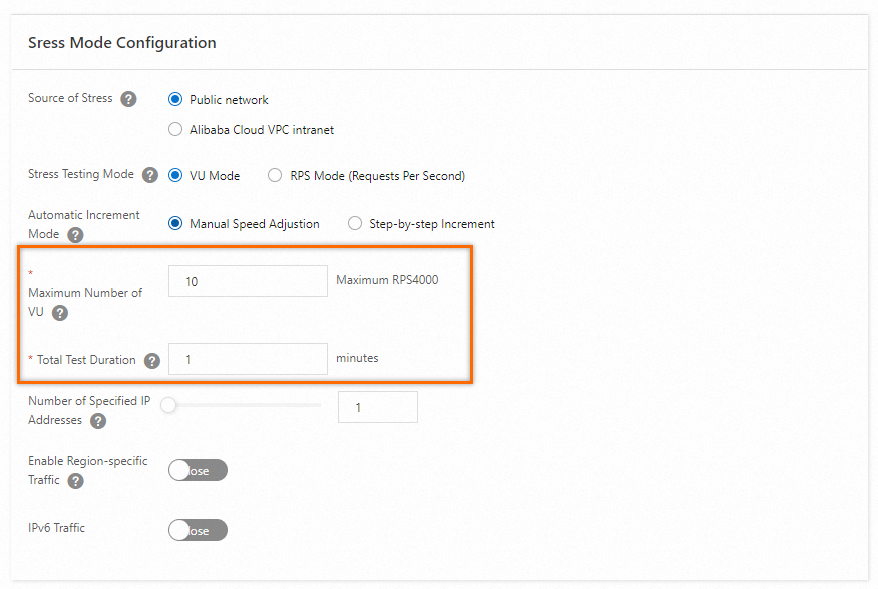
Debug the stress testing scenario and start stress testing.
Debug the stress testing scenario. We recommend that you debug the stress testing scenario before you start stress testing. This helps check whether the configurations meet your business requirements and ensure the success of stress testing.
In the lower part of the Edit Scenario page, click Save and Start. In the Note dialog box, set the Execution Cycle parameter to Execute Now, select the check box for The test is permitted and complies with the applicable laws and regulations, and then click Start Test.
Analyze the stress testing results
After the stress test is complete, the system obtains the data generated during the test, such as the stress testing scenario metrics, business details, monitoring details, and API sampling logs, and then generates a stress testing report. You can view the report on the Reports page. For more information, see View a PTS-based stress testing report. 