GanosBase provides a sparse pyramid indexing engine for fast 2D vector rendering and 3D vector tile generation. This tutorial walks through building a sparse pyramid, serving vector and raster tiles, and wiring them into a full-stack web map service.
How it works
Fast 2D vector rendering
Traditional offline tiling has two major drawbacks. First, building tiles for large datasets takes tens of hours or days. Second, map services supporting up to 16 zoom levels require tens of billions of pre-stored tiles, consuming massive storage.
GanosBase addresses both problems with a sparse pyramid: it skips tiles for data-sparse regions and applies a visibility filtering algorithm to exclude data that does not affect the rendered output. When data changes locally, GanosBase identifies the affected tiles and rebuilds only the smallest necessary range—no full rebuild required.
Benchmark (70 million housing records, standard 8-core PolarDB for PostgreSQL (Compatible with Oracle) cluster):
| Metric | Value |
|---|---|
| Sparse pyramid build time | 6 minutes |
| Incremental update (1M+ records) | < 1 minute |
| Average tile response time | < 1 millisecond |
| Disk storage | ~3 GB |
3D vector visualization
GanosBase collaborated with Alibaba Cloud's DataV team to extend the 2D vector tiling standard to support Geometry3D data. This enables visualization of large-scale 3D scenes using the same pyramid-based approach.
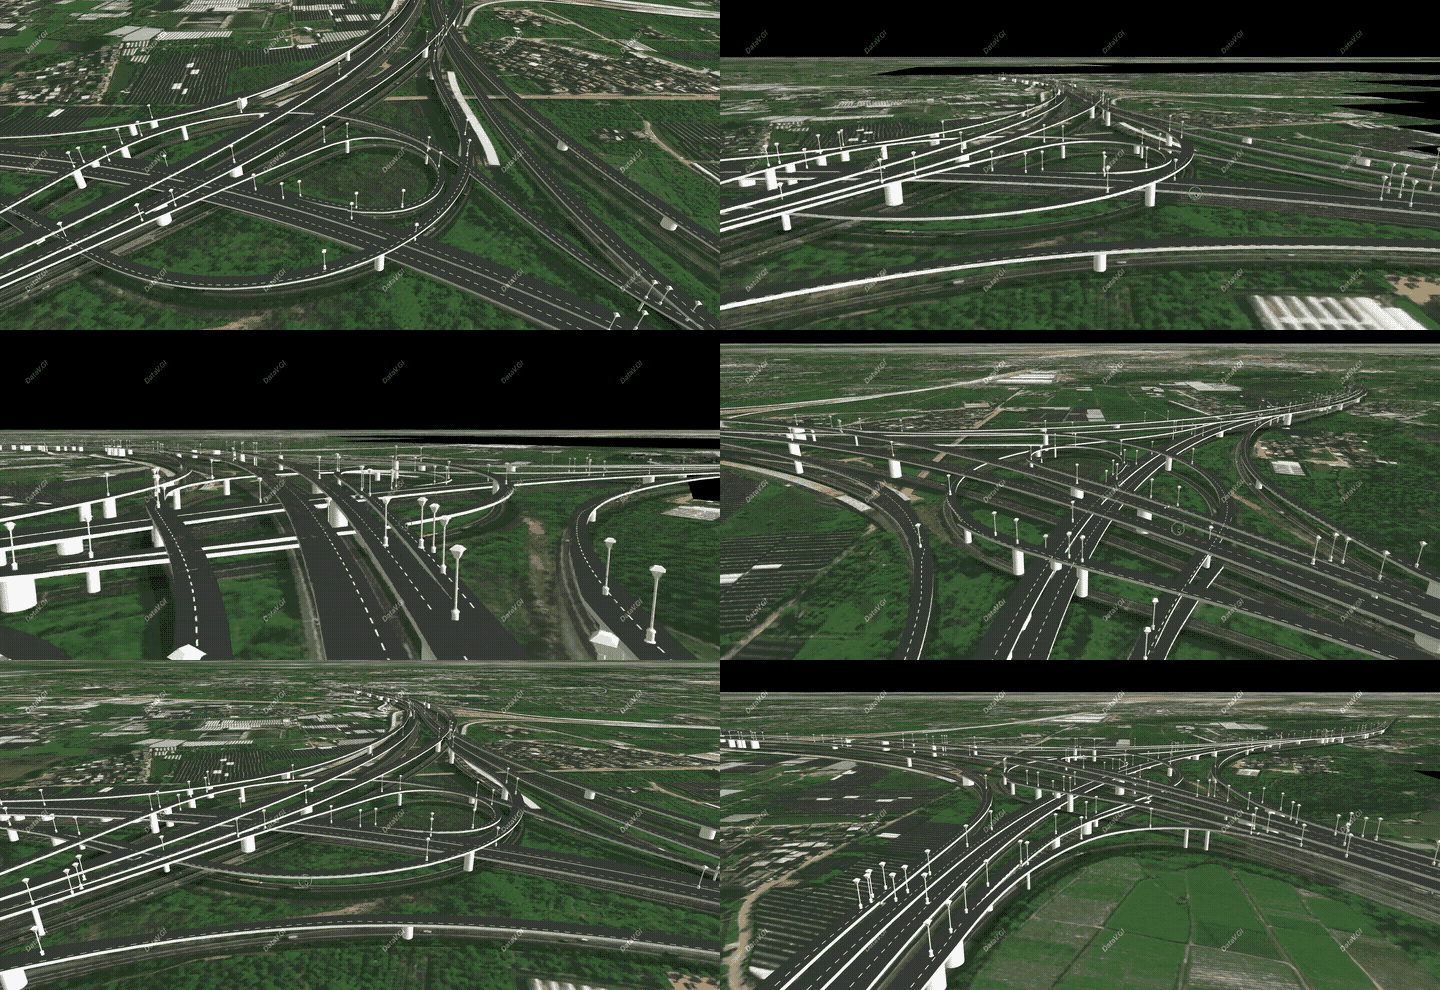
Fast 2D vector rendering
Prerequisites
Before you begin, ensure that you have:
A PolarDB for PostgreSQL (Compatible with Oracle) cluster
A data table with a primary key ID column and a Geometry attribute column
The
ganos_geometry_pyramidextension installed (see step 1 below)
Prepare the data table
Install the fast rendering extension.
CREATE EXTENSION ganos_geometry_pyramid CASCADE;Create a table with a primary key and a geometry column.
CREATE TABLE try_ganos_viz(id SERIAL NOT NULL, geom Geometry);Import your vector dataset. Use a script or tool that generates
INSERTstatements like the following. This example stores data in the WGS84 (EPSG:4326) coordinate system; other coordinate systems are also supported.INSERT INTO try_ganos_viz(geom) VALUES (ST_GeomFromText('WKT FORMAT TEXT', 4326));After importing all data, build a spatial index on the geometry column.
CREATE INDEX ON try_ganos_viz USING gist(geom);
Build a sparse pyramid
ST_BuildPyramid
ST_BuildPyramid builds a sparse pyramid on a table. For the full function reference, see ST_BuildPyramid.
Parameters
| Parameter | Description |
|---|---|
parallel | Number of parallel threads for building |
tileSize | Tile size in pixels |
tileExtend | Buffer added around each tile |
maxLevel | Maximum pyramid depth (zoom level) |
splitSize | Threshold below which a tile is built dynamically at query time rather than pre-built |
buildRules | Per-level filter conditions for controlling which features appear at which zoom levels |
Examples
Build with defaults:
SELECT ST_BuildPyramid('try_ganos_viz', 'geom', 'id', '');Build with 32 parallel threads:
SELECT ST_BuildPyramid('try_ganos_viz', 'geom', 'id', '{"parallel":32}');Build with a custom tile size and buffer:
SELECT ST_BuildPyramid('try_ganos_viz', 'geom', 'id', '{"parallel":32, "tileSize":4096, "tileExtend":128}');Tuning for performance vs. storage
splitSize and maxLevel control the trade-off between query speed and disk usage:
Lower `splitSize` (e.g., 1000): pre-builds more tiles, so fewer tiles are computed at query time. Faster queries, more storage.
Higher `splitSize` (e.g., 5000): fewer pre-built tiles, more dynamic computation at query time. Less storage, slower queries under load.
Lower `maxLevel`: reduces total pyramid height, further cutting storage at the cost of detail at high zoom levels.
The following example builds a pyramid capped at zoom level 10, with dynamic rendering for tiles containing fewer than 1,000 features:
SELECT ST_BuildPyramid('try_ganos_viz', 'geom', '{"maxLevel":10, "splitSize":1000}');Per-level feature filtering
Use buildRules to control which features appear at specific zoom levels. The following example restricts zoom levels 0–5 to features with an area greater than 100, keeping low-zoom tiles uncluttered:
SELECT ST_BuildPyramid('try_ganos_viz', 'geom', '{"maxLevel":10, "buildRules":[
    {"level":[0,1,2,3,4,5], "value":{"filter": "ST_Area(geom)>100"}}
]}');
The filter condition supports any valid SQL WHERE expression.
ST_BuildPyramidUseGeomSideLen
ST_BuildPyramidUseGeomSideLen is optimized for datasets containing many small-area features. Instead of using only the geometry column, it reads a precomputed column that stores the larger of the geometry's X-span and Y-span, which lets the pyramid builder skip small features more efficiently. For the full function reference, see ST_BuildPyramidUseGeomSideLen.
Set up the side-length column
Add a max_side_len column to try_ganos_viz and populate it:
ALTER TABLE try_ganos_viz
ADD COLUMN max_side_len DOUBLE PRECISION;

CREATE OR REPLACE FUNCTION add_max_len_values() RETURNS VOID AS $$
DECLARE
  t_curs CURSOR FOR
    SELECT * FROM try_ganos_viz;
  t_row usbf%ROWTYPE;
  gm GEOMETRY;
  x_min DOUBLE PRECISION;
  x_max DOUBLE PRECISION;
  y_min DOUBLE PRECISION;
  y_max DOUBLE PRECISION;
BEGIN
  FOR t_row IN t_curs LOOP
    SELECT t_row.geom INTO gm;
    SELECT ST_XMin(gm) INTO x_min;
    SELECT ST_XMax(gm) INTO x_max;
    SELECT ST_YMin(gm) INTO y_min;
    SELECT ST_YMax(gm) INTO y_max;
    UPDATE try_ganos_viz
      SET max_side_len = GREATEST(x_max - x_min, y_max - y_min)
    WHERE CURRENT OF t_curs;
  END LOOP;
END;
$$ LANGUAGE plpgsql;
SELECT add_max_len_values();

CREATE INDEX ON try_ganos_viz USING btree(max_side_len);
Build the pyramid
Pass the max_side_len column name as the third argument; all other parameters are the same as ST_BuildPyramid:
SELECT ST_BuildPyramidUseGeomSideLen('try_ganos_viz', 'geom', 'max_side_len', 'id', '{"parallel":32}');Update a pyramid
When the underlying data changes, call ST_UpdatePyramid with the bounding box of the updated region. GanosBase rebuilds only the affected tiles. For the full function reference, see ST_UpdatePyramid.
The following example updates all affected tiles (assuming maxLevel=16) in the region bounded by longitude 0–20° and latitude -10°–30°:
SELECT ST_UpdatePyramid('try_ganos_viz', 'geom', 'id', ST_MakeEnvelope(0,-10,20,30, 4326), '{"updateBoxScale":100000}');To skip large-scale tile levels and update only finer-grained tiles, use a smaller updateBoxScale:
SELECT ST_UpdatePyramid('try_ganos_viz', 'geom', 'id', ST_MakeEnvelope(0,-10,20,30, 4326), '{"updateBoxScale":2}');ST_UpdatePyramidautomatically inherits the parallelism setting from the originalST_BuildPyramidorST_BuildPyramidUseGeomSideLencall. For large-scale data changes, we recommend that you rebuild the pyramid by callingST_BuildPyramidorST_BuildPyramidUseGeomSideLendirectly.
Get vector tiles
Vector tiles (MVT format) preserve feature attributes, support seamless client-side zoom, and produce better visual output than raster tiles. GanosBase retrieves them via ST_Tile. For the full function reference, see ST_Tile.
Both statements below return the tile at zoom level 1, x-coordinate 1, and y-coordinate 0 (the tile covering China):
SELECT ST_Tile('try_ganos_viz', '1_1_0');

SELECT ST_Tile('try_ganos_viz', 1, 0, 1);
Get raster tiles
Raster tiles are image-based (PNG) tiles rendered server-side. They are widely supported and place no rendering burden on the client, making them a good fit for lightweight scenarios that do not require dynamic client-side symbolization. GanosBase renders them via ST_AsPng. For the full function reference, see ST_AsPng.
The following example renders tile 1_1_0 with the specified fill and line styles and returns the result as a PNG:
SELECT ST_AsPng('try_ganos_viz', '1_1_0', '{"point_size":5, "line_width":2, "line_color":"#003399FF",
                "fill_color":"#6699CCCC", "background":"#FFFFFF00"}');
3D vector visualization
Prerequisites
Before you begin, ensure that you have:
A PolarDB for PostgreSQL (Compatible with Oracle) cluster
The
ganos_geometryextension installed (see step 1 below)
Prepare the data table
Install the 3D vector visualization extension.
CREATE EXTENSION ganos_geometry CASCADE;Create a table with a primary key and a geometry column.
CREATE TABLE try_ganos_viz3d(id SERIAL NOT NULL, geom Geometry);Use
ST_GeomFromText,ST_GeomFromWKT, orST_GeomFromWKBto import Geometry3D data into the table.
Get 3D vector tiles
3D tile generation uses two functions: ST_AsMVTGeom3D converts Geometry3D coordinates into the MVT coordinate space, and ST_AsMVT3D aggregates those rows into a single tile layer.
ST_AsMVTGeom3D
ST_AsMVTGeom3D extends PostGIS's ST_AsMVTGeom to handle 3D coordinates. It transforms Geometry3D data into the MVT coordinate space and optionally clips it to the tile bounding box. For the full function reference, see ST_AsMVTGeom3D.
SELECT ST_AsText(
  ST_AsMVTGeom3D(
    ST_Transform('SRID=4326; LINESTRING(-10 -10 30, -10 -20 30)'::geometry, 3857),
    ST_TileEnvelope(1, 0, 0)
  )
) AS geom;
Expected output:
geom
------------------------------------------------------------------------------------
 MULTILINESTRING Z ((3868.44444444444 4324.7197219642 30,3868.44444444444 4352 30))
(1 row)
ST_AsMVT3D
ST_AsMVT3D aggregates multiple rows of Geometry3D data into a single 3D vector tile layer, mirroring how PostGIS's ST_AsMVT works for 2D data. For the full function reference, see ST_AsMVT3D.
The following CTE converts 3D geometries to MVT coordinate space with ST_AsMVTGeom3D, then aggregates them into a tile with ST_AsMVT3D:
WITH mvtgeom AS
(
  SELECT ST_AsMVTGeom3D(
    ST_Transform('SRID=4326; MULTIPOLYGON(((100 50 0, -100 50 1, -100 -50 2, 100 -50 3, 100 50 0)), ((0 0 0, 1 0 1, 2 2 2, 0 0 0)))'::geometry, 3857),
    ST_TileEnvelope(1, 0, 0)) AS geom,  'test' AS name
)
SELECT ST_AsMVT3D(mvtgeom.*) FROM mvtgeom;
Expected output:
st_asmvt3d
----------------------------------------------------------------------------------------------------------------------------------------------------------------------------------------------------------------------------------------------------
 \x1a760a0764656661756c74125812020000180322500d8044a842b83116ff23d80105802400080f0d810481041d162e000e2e590e0f0dd920dc0405168024d70106c727f3160d0f0dc827f4160e1600f31615c72700080f0d0000001600cc1808c80300000f1a046e616d6522060a04746573742880207802
(1 row)
Build a full-stack web map service
This section shows how to build a full-stack web map service using GanosBase vector pyramids. The service consists of a PolarDB database, a Python backend, and a Mapbox-based frontend.
Architecture
The three layers communicate as follows:

Database: holds the spatial data and the sparse pyramid; serves tiles via
ST_TileandST_AsPngBackend (Python/Flask): wraps the SQL calls in HTTP endpoints, manages a connection pool for concurrent tile requests
Frontend (Mapbox GL JS): renders vector and raster tile layers in the browser

Database
Import map data and build the sparse pyramid as described in Fast 2D vector rendering.
Backend
The backend exposes two tile endpoints:
/vector/mvt/{z}/{x}/{y}— vector tiles from apointstable/vector/png/{z}/{x}/{y}— raster tiles from ausbfbuildings table
ReallyThreadedConnectionPool wraps psycopg2's ThreadedConnectionPool with a semaphore to handle concurrent tile requests without blocking. When psycopg2 returns binary data, encoding it as a hex string and converting back with binascii.a2b_hex is more efficient than direct binary transfer.
Save the following as Vector.py and run with python Vector.py to start the service on port 5000.
# -*- coding: utf-8 -*-
# @File : Vector.py

import json
from psycopg2 import pool
from threading import Semaphore
from flask import Flask, jsonify, Response, send_from_directory
import binascii

# Connection parameters.
CONNECTION = "dbname=<database_name> user=<user_name> password=<user_password> host=<host> port=<port>"


class ReallyThreadedConnectionPool(pool.ThreadedConnectionPool):
    """
    A connection pool for multi-threading, improving response in high-concurrency scenarios such as map tiles.
    """
    def __init__(self, minconn, maxconn, *args, **kwargs):
        self._semaphore = Semaphore(maxconn)
        super().__init__(minconn, maxconn, *args, **kwargs)

    def getconn(self, *args, **kwargs):
        self._semaphore.acquire()
        return super().getconn(*args, **kwargs)

    def putconn(self, *args, **kwargs):
        super().putconn(*args, **kwargs)
        self._semaphore.release()


class VectorViewer:
    def __init__(self, connect, table_name, column_name, fid):
        self.table_name = table_name
        self.column_name = column_name
        # Create a connection pool.
        self.connect = ReallyThreadedConnectionPool(5, 10, connect)
        # Define the pyramid table name.
        self.pyramid_table = f"{self.table_name}_{self.column_name}"
        self.fid = fid
        self.tileSize = 512
        # self._build_pyramid()

    def _build_pyramid(self):
        """Create a pyramid"""
        config = {
            "name": self.pyramid_table,
            "tileSize": self.tileSize
        }
        sql = f"select st_BuildPyramid('{self.table_name}','{self.column_name}','{self.fid}','{json.dumps(config)}')"
        self.poll_query(sql)

    def poll_query(self, query: str):
        pg_connection = self.connect.getconn()
        pg_cursor = pg_connection.cursor()
        pg_cursor.execute(query)
        record = pg_cursor.fetchone()
        pg_connection.commit()
        pg_cursor.close()
        self.connect.putconn(pg_connection)
        if record is not None:
            return record[0]


class PngViewer(VectorViewer):
    def get_png(self, x, y, z):
        # Default parameters.
        config = {
            "point_size": 5,
            "line_width": 2,
            "line_color": "#003399FF",
            "fill_color": "#6699CCCC",
            "background": "#FFFFFF00"
        }
        # When using psycopg2, returning binary data as a hexadecimal string is more efficient.
        sql = f"select encode(st_aspng('{self.pyramid_table}','{z}_{x}_{y}','{json.dumps(config)}'),'hex')"
        result = self.poll_query(sql)
        # Convert the hexadecimal string back to binary data.
        result = binascii.a2b_hex(result)
        return result


class MvtViewer(VectorViewer):
    def get_mvt(self, x, y, z):
        # When using psycopg2, returning binary data as a hexadecimal string is more efficient.
        sql = f"select encode(st_tile('{self.pyramid_table}','{z}_{x}_{y}'),'hex')"
        result = self.poll_query(sql)
        # Convert the hexadecimal string back to binary data.
        result = binascii.a2b_hex(result)
        return result


app = Flask(__name__)


@app.route('/vector')
def vector_demo():
    return send_from_directory("./", "Vector.html")

# Define table names, field names, etc.


pngViewer = PngViewer(CONNECTION, 'usbf', 'geom', 'gid')


@app.route('/vector/png/<int:z>/<int:x>/<int:y>')
def vector_png(z, x, y):
    png = pngViewer.get_png(x, y, z)
    return Response(
        response=png,
        mimetype="image/png"
    )


mvtViewer = MvtViewer(CONNECTION, 'points', 'geom', 'gid')

@app.route('/vector/mvt/<int:z>/<int:x>/<int:y>')
def vector_mvt(z, x, y):
    mvt = mvtViewer.get_mvt(x, y, z)
    return Response(
        response=mvt,
        mimetype="application/vnd.mapbox-vector-tile"
    )


if __name__ == "__main__":
    app.run(port=5000, threaded=True)
Replace the placeholder values in CONNECTION:
| Placeholder | Description |
|---|---|
<database_name> | Name of your PolarDB database |
<user_name> | Database user |
<user_password> | Database password |
<host> | Cluster endpoint |
<port> | Port (default: 5432) |
The same pattern applies in any language: wrap the ST_Tile or ST_AsPng SQL call in an HTTP handler and you have a working tile server.
Frontend
The frontend uses Mapbox GL JS to render both tile types. Create Vector.html in the same directory as Vector.py, then access it at http://localhost:5000/vector after starting the backend.
The example includes both vector and raster layers — remove whichever you do not need.
<!DOCTYPE html>
<html>
  <head>
    <meta charset="UTF-8" />
    <title></title>
    <link
      href="https://cdn.bootcdn.net/ajax/libs/mapbox-gl/1.13.0/mapbox-gl.min.css"
      rel="stylesheet"
    />
  </head>
  <script src="https://cdn.bootcdn.net/ajax/libs/mapbox-gl/1.13.0/mapbox-gl.min.js"></script>
  <script src="https://cdn.bootcdn.net/ajax/libs/axios/0.21.0/axios.min.js"></script>
  <body>
    <div id="map" style="height: 100vh" />
    <script>
      const sources = {
        osm: {
          type: "raster",
          tiles: ["https://b.tile.openstreetmap.org/{z}/{x}/{y}.png"],
          tileSize: 256,
        },
      };
      const layers = [
        {
          id: "base_map",
          type: "raster",
          source: "osm",
          layout: { visibility: "visible" },
        },
      ];
      const map = new mapboxgl.Map({
        container: "map",
        style: { version: 8, layers, sources },
      });
      map.on("load", async () => {
        map.resize();

        // Add a raster tile data source.
        map.addSource("png_source", {
          type: "raster",
          minzoom: 1,
          tiles: [`${window.location.href}/png/{z}/{x}/{y}`],
          tileSize: 512,
        });
        // Add a raster tile layer.
        map.addLayer({
          id: "png_layer",
          type: "raster",
          layout: { visibility: "visible" },
          source: "png_source",
        });

        // Add a vector tile data source.
        map.addSource("mvt_source", {
          type: "vector",
          minzoom: 1,
          tiles: [`${window.location.href}/mvt/{z}/{x}/{y}`],
          tileSize: 512,
        });

        // Add a vector tile layer and apply styles to the vector tiles.
        map.addLayer({
          id: "mvt_layer",
          paint: {
            "circle-radius": 4,
            "circle-color": "#6699CC",
            "circle-stroke-width": 2,
            "circle-opacity": 0.8,
            "circle-stroke-color": "#ffffff",
            "circle-stroke-opacity": 0.9,
          },
          type: "circle",
          source: "mvt_source",
          "source-layer": "points_geom",
        });

      });
    </script>
  </body>
</html>
What's next
ST_BuildPyramid — full function reference
ST_BuildPyramidUseGeomSideLen — optimized pyramid build for small-feature datasets
ST_UpdatePyramid — incremental pyramid updates
ST_Tile — vector tile retrieval
ST_AsPng — raster tile rendering
ST_AsMVTGeom3D — 3D geometry to MVT coordinate space
ST_AsMVT3D — 3D vector tile aggregation