This topic describes how to enable and disable the PolarDB for AI feature.
Supported versions
Your cluster must meet the following requirements:
When you create the cluster, Database Edition is set to Enterprise Edition and Edition is set to Cluster Edition.
The database engine version of your cluster is MySQL 8.0.1 or later.
PolarProxy is 2.7.5 or later.
For more information about how to view or update the database engine version and PolarProxy, see Revision version management.
Enable the PolarDB for AI feature
Add an AI node
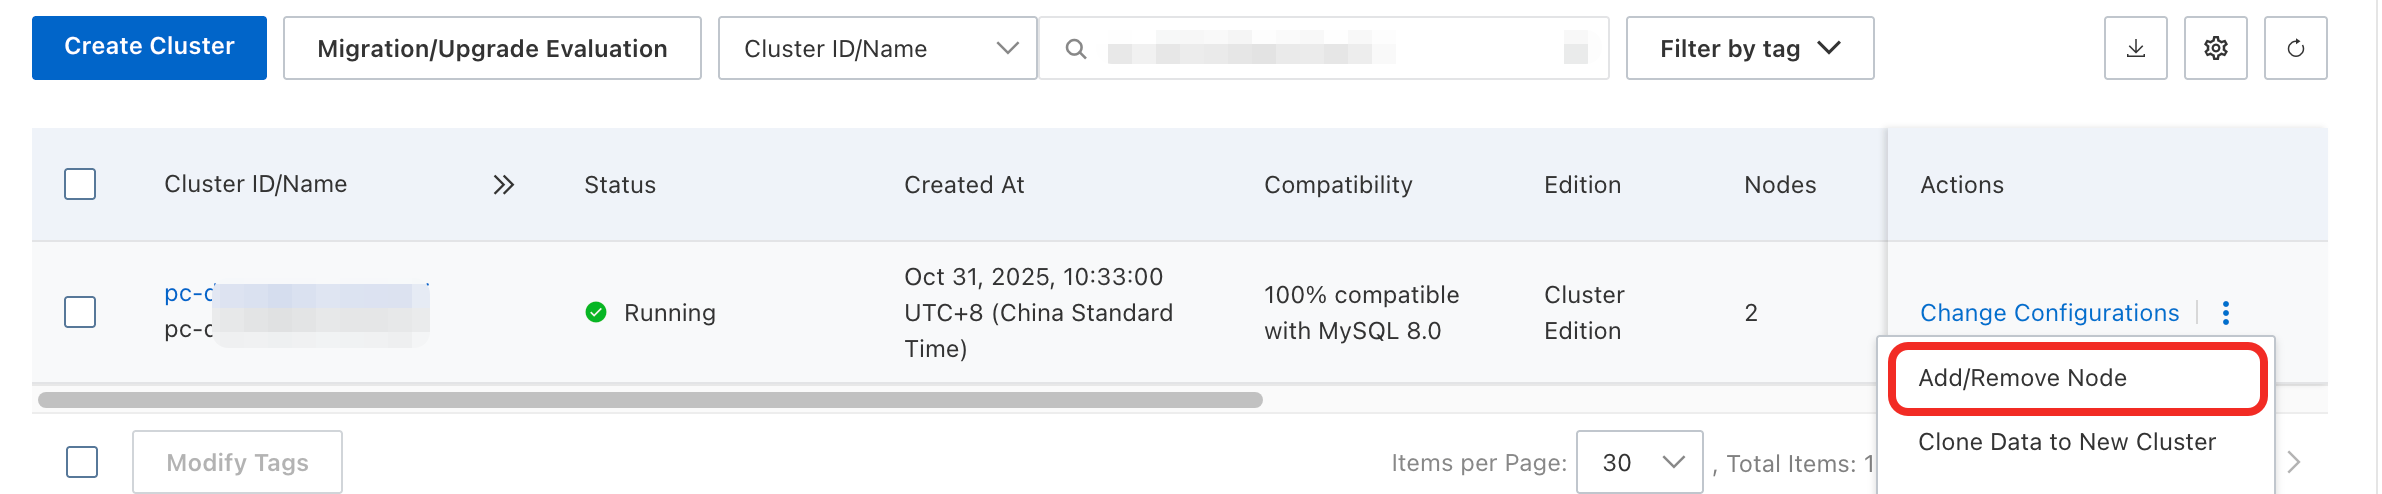
Log on to the PolarDB console. In the navigation pane on the left, click Clusters. Select the region where the cluster is deployed, and then click the ID of the cluster to open the cluster details page.
Open the Add/Remove Node page using one of the following methods:
Click Add/Remove Node in the Actions column of the target cluster.
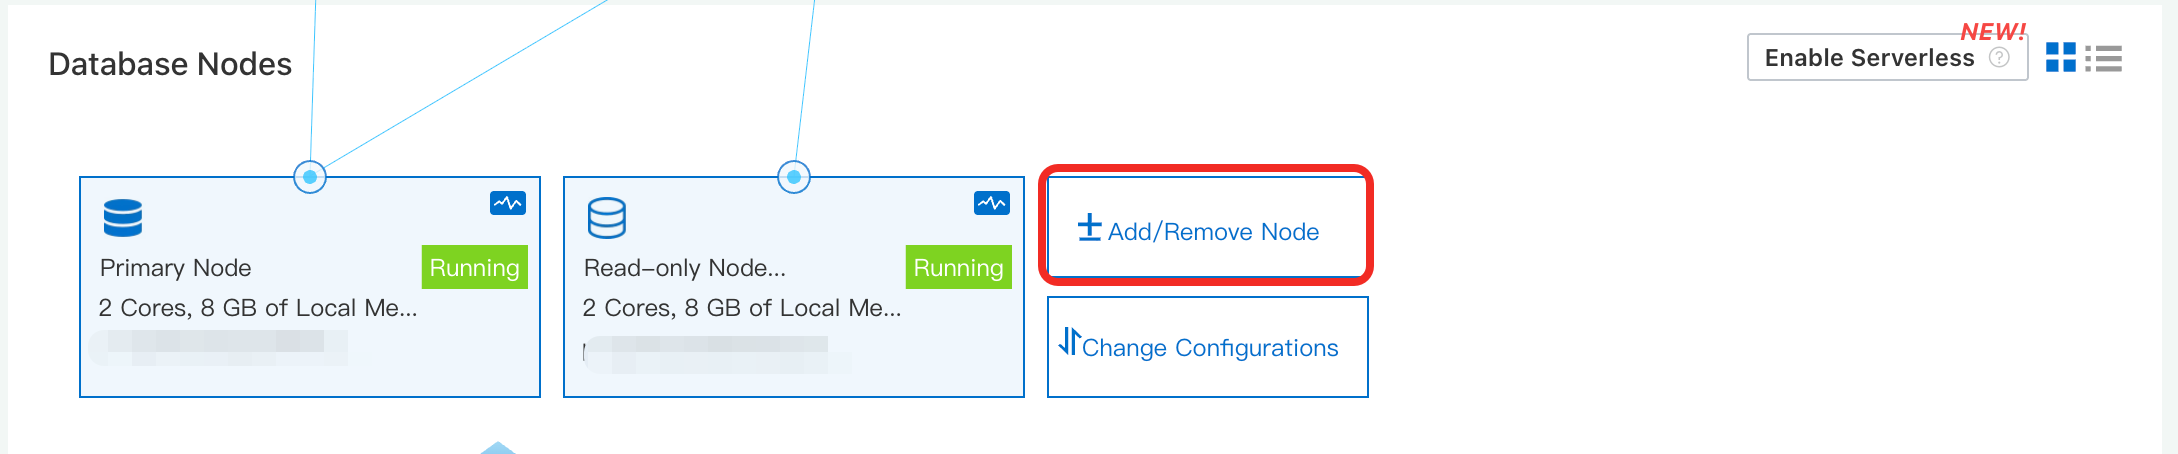
Click the ID of the target cluster. On the Basic Information page, in the Database Nodes section, click Add/Remove Node.
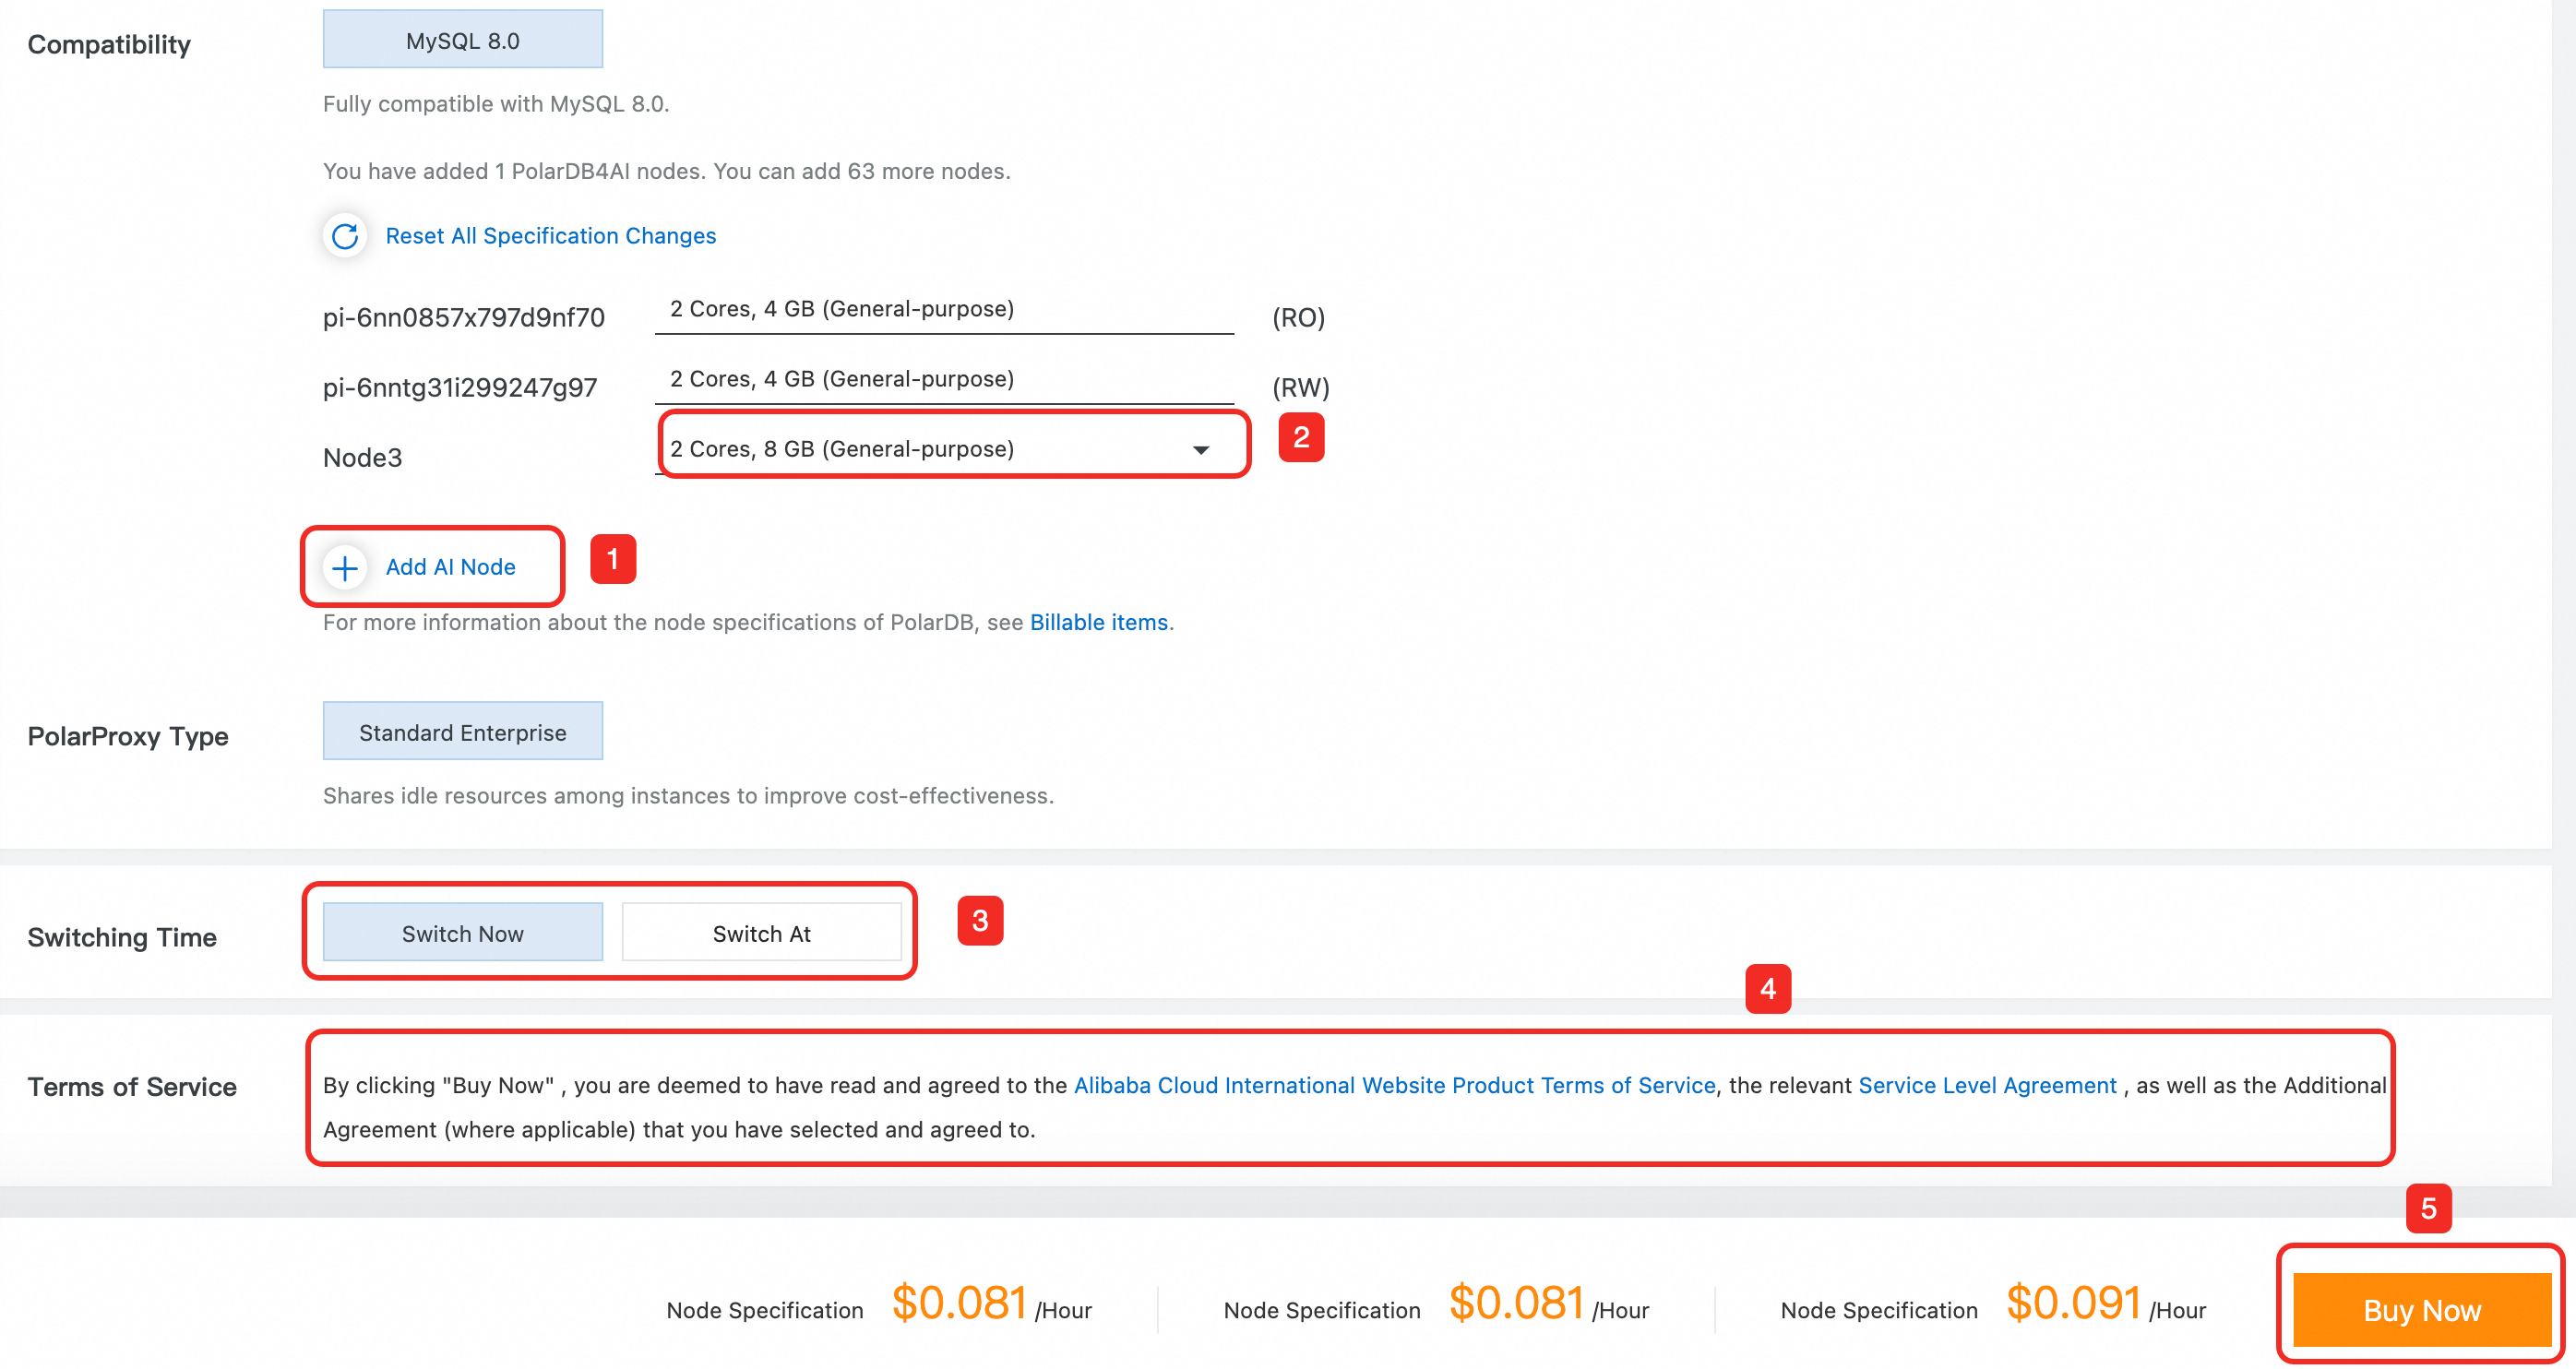
In the Add/Remove Node dialog box, select the Add AI Node option and click OK.
Click Add AI Node, select the AI node specifications and a switchover time. Review the Terms of Service and Service-Level Agreement (SLA), and then click Buy Now to complete the payment.
NoteSelect one of the following specifications: 2 cores and 8 GB of memory, 4 cores and 16 GB of memory, 8 cores and 16 GB of memory, 8 cores and 32 GB of memory, 16 cores and 64 GB of memory, 16 cores and 128 GB of memory, 32 cores and 128 GB of memory, 8 cores and 30 GB of memory + one GU30, or 16 cores and 125 GB of memory + one GU100.
After you complete the payment, return to the cluster details page. The AI node is added when its status changes to Running.

Set the database account for connection
In the Database Nodes section, find the AI node. In the dialog box that appears, select the standard account that you created, enter the Database Password, and click Confirm.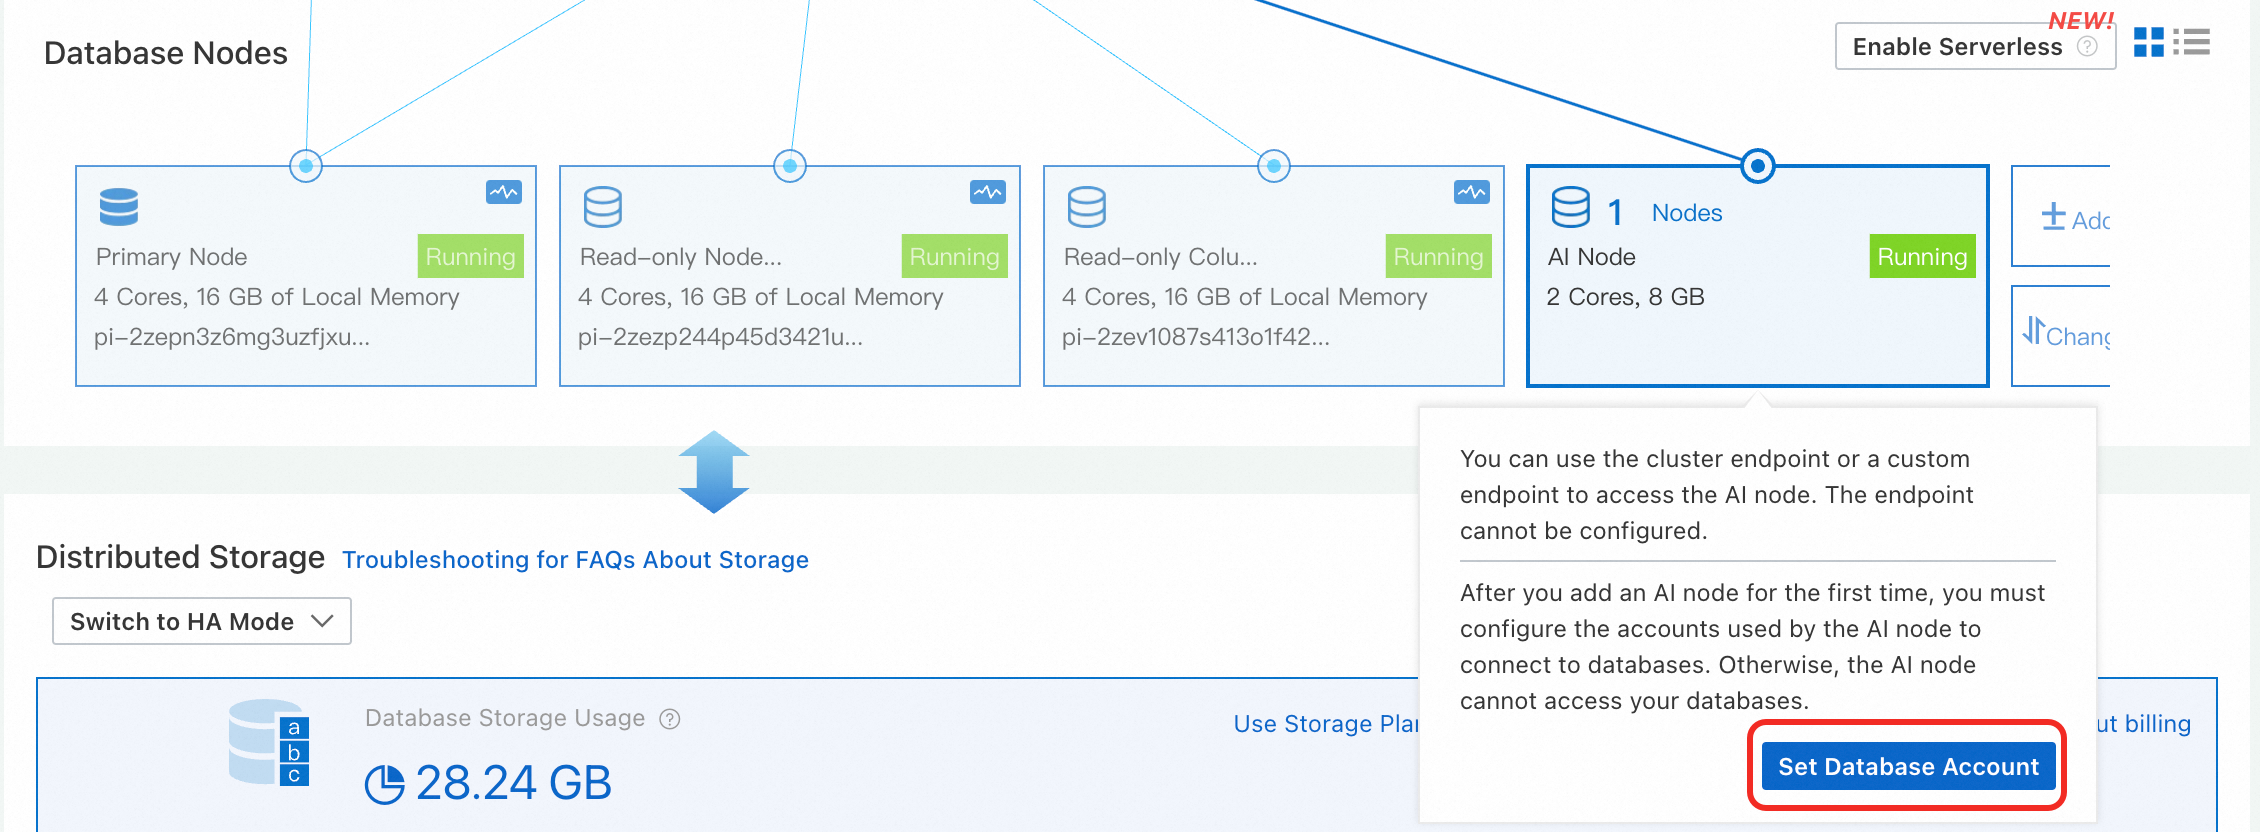
Disable the PolarDB for AI feature
When you release an AI node, data associated with the node, such as vector tables, is also purged. To prevent data loss, back up the data before you release the node.
Log on to the PolarDB console. In the navigation pane on the left, click Clusters. Select the region where the cluster is deployed, and then find the target cluster.
Open the Add/Remove Node page using one of the following methods:
Click Add/Remove Node in the Actions column of the target cluster.
Click the ID of the target cluster. On the Basic Information page, in the Database Nodes section, click Add/Remove Node.
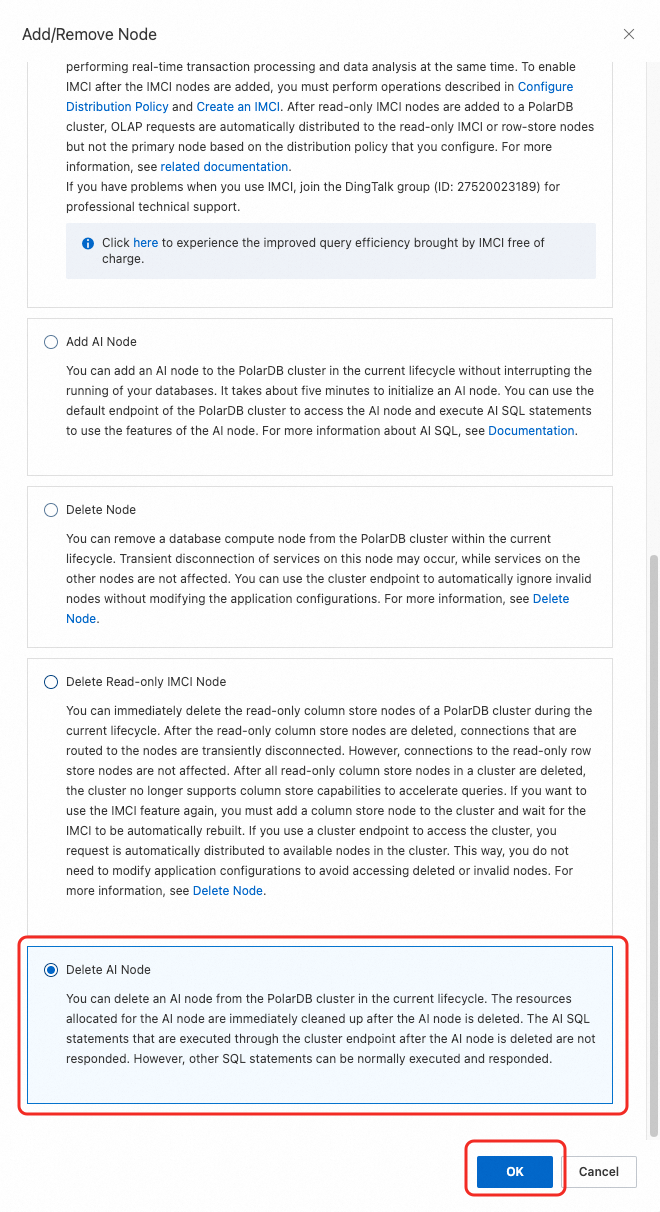
Select Delete AI Node and click OK.
Click the
 icon to delete the AI node and select a switchover time. Review the Terms of Service and Service-Level Agreement (SLA), and then click Buy Now to complete the payment.
FAQ
If you do not see PolarDB for AI in the navigation pane on the left of the cluster details page, check whether your cluster meets the requirements described in the Scope section.
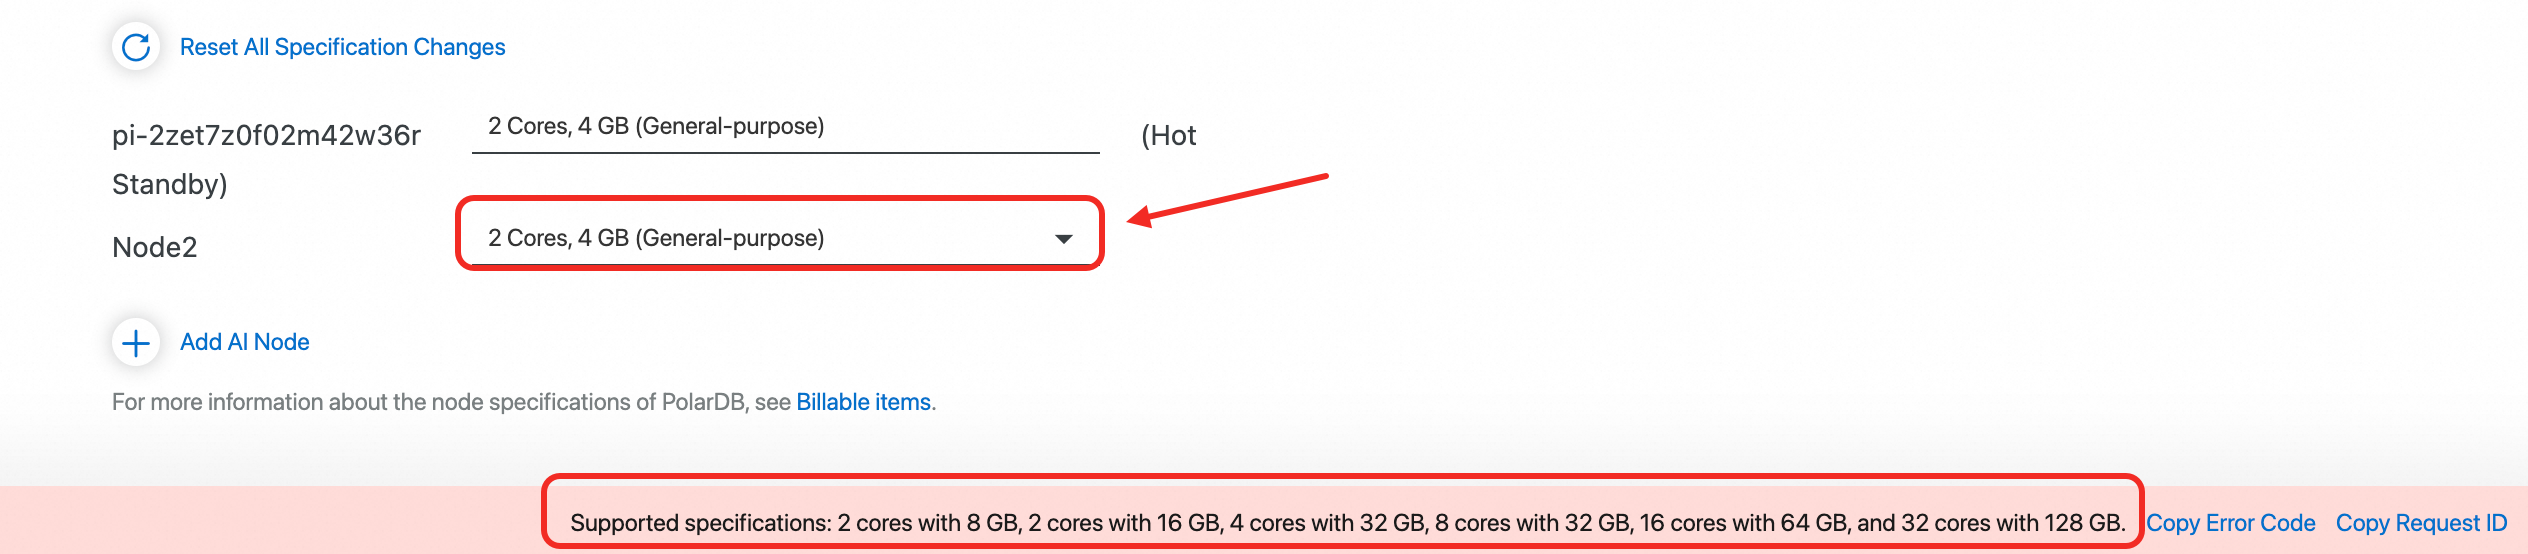
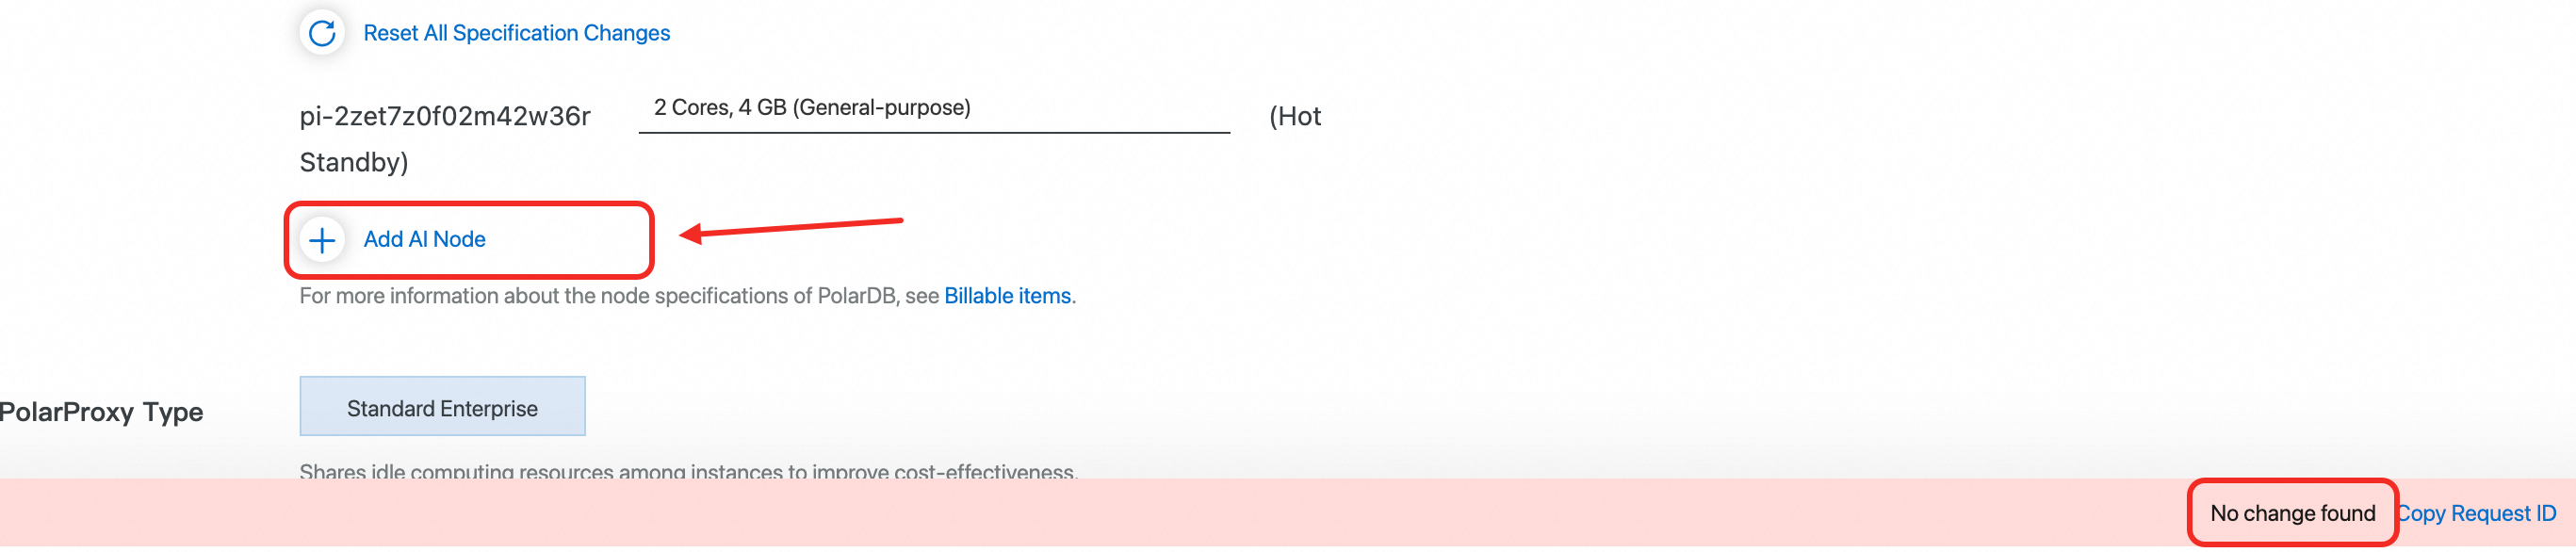
If you cannot purchase an AI node on the purchase page, modify the configuration as prompted. For example:
If you receive a No specification change error, click the Add AI Node button and select specifications for the AI node.
Under Select The Following Specifications, click a specification for the node.