Add read-only nodes to scale out read capacity when read traffic increases, or remove idle read-only nodes during off-peak periods to reduce costs. The cluster endpoint automatically load-balances read requests across all read-only nodes, so your application connection strings stay unchanged.
Read-only nodes handle onlySELECTrequests. All write operations (INSERT,UPDATE,DELETE) go to the primary node (read/write node). If write performance is the bottleneck, upgrade the primary node's specifications instead of adding read-only nodes.
Prerequisites
Before you begin, make sure that:
The cluster uses Subscription or Pay-as-you-go billing
The cluster is in the Running state, meaning no other configuration changes (such as spec changes or minor version upgrades) are in progress
Limitations
Node quantity limits
| Edition | Max read-only nodes | Min required |
|---|---|---|
| Enterprise Edition – Cluster Edition | 15 | 1 (cannot remove the last one) |
| Enterprise Edition – Multi-master Cluster (Limitless) Edition | 15 global read-only nodes + 63 read/write nodes | — |
| Standard Edition | 7 | — |
Node specification limits
New read-only nodes must meet both of the following requirements:
Memory must be at least half the primary node's memory.
CPU cores must meet the minimum based on the primary node's CPU:
Primary node CPU cores Minimum read-only node CPU cores 2 2 4 4 8 4 16 8 32 16 64 32 88 64 120 64
Multi-master Cluster (Limitless) Edition clusters are not subject to the above CPU and memory limits. For columnstore index read-only nodes, use specifications higher than the primary node to handle the additional analytical workload.
Add nodes
Adding a read-only node takes about 5 minutes and does not affect the cluster. If you add multiple nodes at the same time, they are processed in parallel.
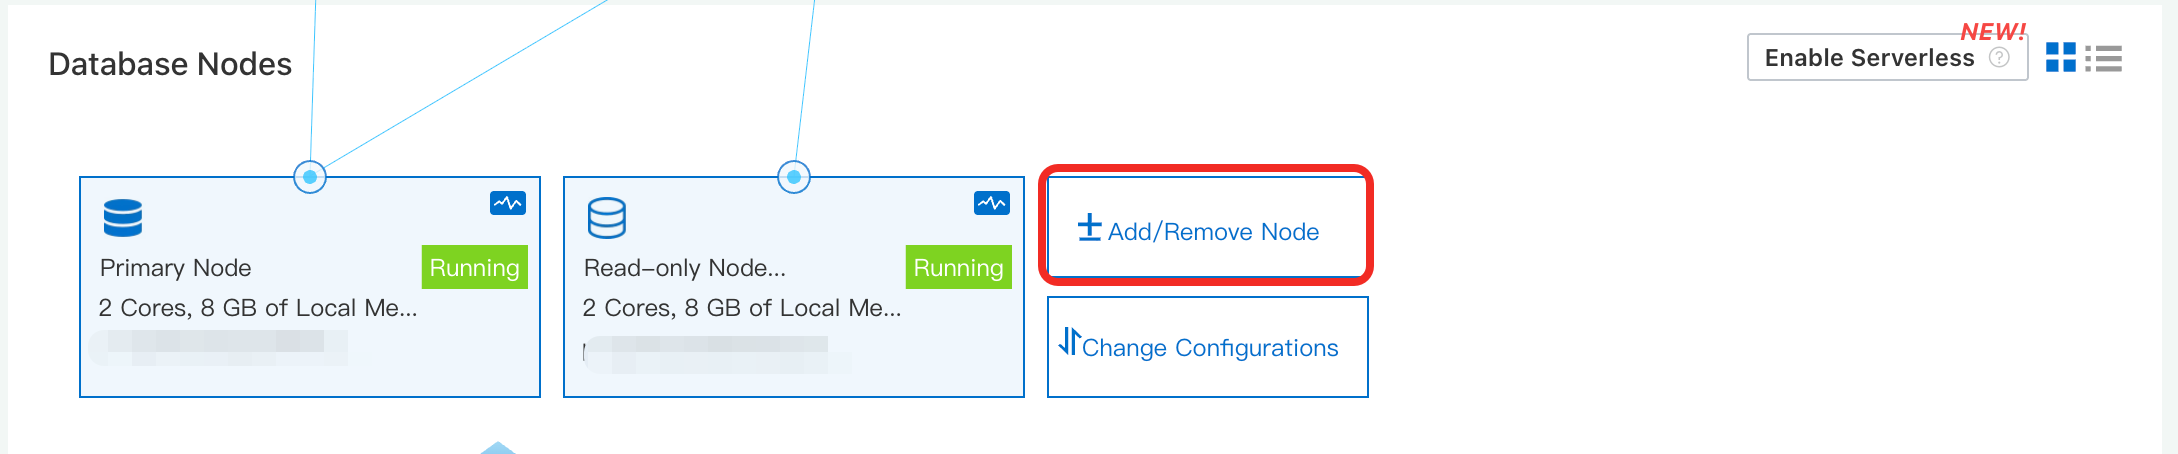
Log in to the PolarDB console. In the left navigation pane, click Clusters and select the region where your cluster is located.
Open the Add/Remove Node wizard using either of the following methods:
In the Actions column of the target cluster, click Add/Remove Node.
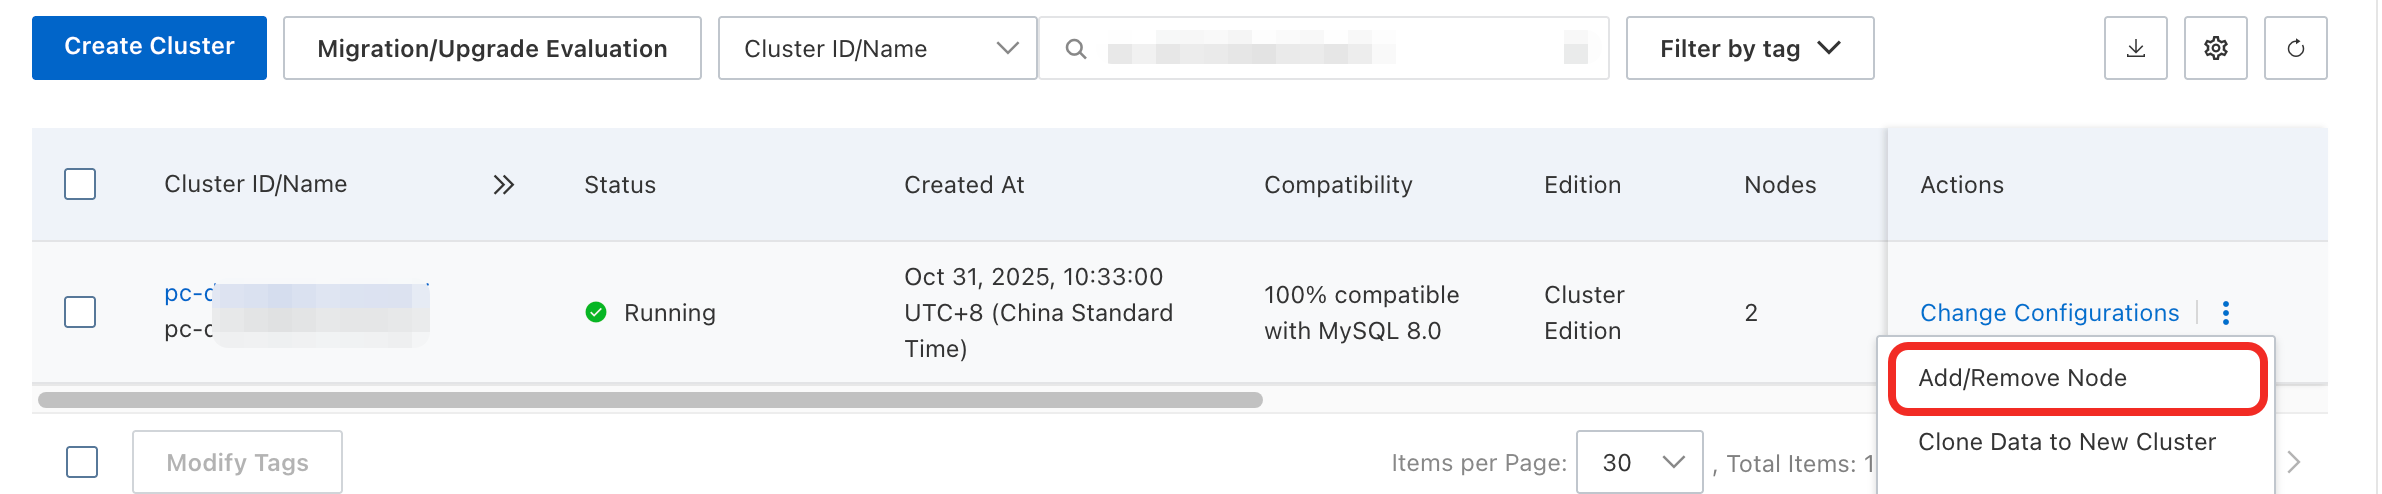
Click the cluster ID to go to the Basic Information page. In the Database Nodes section, click Add/Remove Node.
Select Add Node (Add Global Read-Only Node) and click OK.
The dialog box also lets you add other node types: Add Read-Write Node, Add AI Node, Add Read-only IMCI Node, or Add Search Node. - Only Multi-master Cluster (Limitless) Edition clusters support adding read/write nodes. - To add columnstore index read-only nodes, AI nodes, or search nodes, check the version requirements for each feature.
On the Upgrade/Downgrade page, review your Current Configuration. Click the
 icon to add a node and select its specifications. Click the icon multiple times to add several nodes at once.
Set when the change takes effect:
Apply Immediately: The change takes effect right away.
Scheduled Switch: Select a time within the next 24 hours. The task completes within 30 minutes after the specified time. View or cancel the task on the Scheduled Tasks page.
Read the terms of service, click Buy Now, and complete the payment. The task runs at the scheduled time.
(Optional) If you added a specialized node type, complete the post-setup steps for that type:
Read/write node: Create a database on the new node using
CREATE DATABASE <name> [POLARDB_WRITE_NODE master_id];. For details, see Instructions for Multi-master Clusters.AI node: Run AI SQL statements by prepending
/*polar4ai*/. For more scenarios, see Data-Agent.Columnstore index read-only node: Create a columnstore index by adding the
COLUMNAR=1comment to a table or column. See Add a columnstore index.Search node: Use Elasticsearch-compatible REST APIs to create indexes and search data. See Instructions for intelligent search.
Remove nodes
Removing a read-only node causes a brief connection interruption on that node. Other nodes are not affected. Perform this operation during off-peak hours and make sure your application has an automatic reconnection mechanism. If your application connects through the cluster endpoint, PolarDB automatically removes the deleted node from the endpoint—no application configuration changes are needed.
Before you remove: node-type considerations
Before removing certain node types, take the following actions to prevent data loss or service disruption:
Read/write nodes (Multi-master Cluster)
Read/write nodes (Multi-master Cluster)
Switch the endpoints of all databases on the node to other available read/write nodes before you remove it.
If you skip this step, those databases become inaccessible. To restore access, reassign a read/write node to the affected databases using:
ALTER DATABASE <name> POLARDB_WRITE_NODE <new_master_id>;To identify which databases are on the node and reassign them:
Query the database distribution on the read/write node:
SELECT * FROM INFORMATION_SCHEMA.INNODB_CC_GLOBAL_LOCK_INFO
WHERE LOCK_MODE = 'SLS_X' AND MASTER_ID = <master_id>;
For each database returned, switch it to another read/write node:
If the query returns a row with name
mysql/global_ddl_lockand typeTable, this is internal metadata. Skip it.ALTER DATABASE <name> POLARDB_WRITE_NODE <new_master_id>;
AI nodes
AI nodes
Back up any data you need before removing the last AI node. Removing the last AI node immediately purges the node and all associated data, including vector tables. After removal, AI SQL statements sent to the cluster receive no response; other SQL statements are not affected.
Columnstore index read-only nodes
Columnstore index read-only nodes
Removing the last columnstore index read-only node disables columnstore query acceleration. To resume columnstore performance, add another columnstore index node and wait for the index to rebuild automatically. The cluster endpoint automatically removes failed nodes.
Search nodes
Search nodes
Back up any data you need before removing all search nodes. Removing all search nodes immediately purges the nodes and their associated data. After removal, REST API requests receive no response; other SQL statements are not affected. For backup instructions, see Data backup.
Remove procedure
Log in to the PolarDB console. In the left navigation pane, click Clusters and select the region where your cluster is located.
Open the Add/Remove Node wizard using either of the following methods:
In the Actions column of the target cluster, click Add/Remove Node.
Click the cluster ID to go to the Basic Information page. In the Database Nodes section, click Add/Remove Node.
Select the deletion option that matches the node type you want to remove—Delete Node (Delete Global Read-Only Node), Delete Read-Write Node, Delete AI Node, Delete Read-only IMCI Node, or Delete Search Node—and click OK.
On the Upgrade/Downgrade page, click the minus icon
 next to the node you want to remove. Select multiple nodes to remove them at the same time.
Set when the change takes effect:
Apply Immediately: The change takes effect right away.
Scheduled Switch: Select a time within the next 24 hours. The task completes within 30 minutes after the specified time. View or cancel the task on the Scheduled Tasks page.
Read the terms of service, click Buy Now, and complete the payment. The task runs at the scheduled time.
Billing
Adding or removing nodes affects only compute node fees. Storage and other resource fees are unchanged.
Pay-as-you-go: New nodes are billed hourly from creation until release. Remove nodes at any time to stop billing.
Subscription: When you add a node, you pay for the period from the addition date to the cluster's expiration date. When you remove a node, the system calculates the remaining value and issues a refund. See Refund amount calculation.
FAQ
The console shows "Insufficient resources" when I try to add a node.
The specifications you selected are sold out in the current zone. Try a slightly lower specification first. To prevent this from recurring, change the cluster's zone to a zone with more available capacity.
The console shows "no specification change" after I open the Add/Remove Node wizard.
You haven't added or removed any nodes yet. Click the ![]() icon to add a node, or click the minus icon
icon to add a node, or click the minus icon ![]() next to a node name to remove it.
next to a node name to remove it.
The console shows `The number of DB nodes is incorrect` when I try to remove a node.
PolarDB Cluster Edition requires at least one read-only node to maintain high availability (HA) and automatic failover. Keep at least one read-only node in the cluster.
Can I remove all regular read-only nodes and keep only a columnstore index read-only node?
No. At least one regular read-only node must exist before you can add or keep a columnstore index read-only node.
Does PolarDB support adding read/write nodes?
Only Multi-master Cluster (Limitless) Edition clusters support adding read/write nodes. Other editions do not support this feature.
What's next
Measure the performance impact of node count changes: Performance testing (OLTP)
Learn about In-Memory Column Index (IMCI) for columnstore index read-only nodes: IMCI overview
Learn about the search node feature: Intelligent search (PolarSearch)
Learn about the AI node feature: PolarDB for AI
API reference
| API | Description |
|---|---|
| CreateDBNodes | Adds nodes to a PolarDB cluster |
| DeleteDBNodes | Removes nodes from a PolarDB cluster |