You can restore data from specific databases or tables to any point in time within the log retention period. This restoration process uses a full data backup, which is a snapshot, and the subsequent Redo logs. If you know when an incorrect operation occurred, you can use this method to restore the affected database or table to its state before the operation.
Prerequisites
A backup set must be available. Point-in-time recovery first restores a full data backup that was created before your selected point in time. Then, it applies incremental data from Redo logs to restore the data to the selected point in time. To accelerate the recovery, you can enable enhanced backup. This shortens the backup cycle and increases backup density.
Scenarios
Cluster editions
The database and table restoration feature supports PolarDB Enterprise Edition and Standard Edition, but requires specific cluster revision versions. The following table lists the minimum revision versions required for different scenarios.
Basic Features: The minimum revision version required to support database and table restoration.
GDN primary cluster/New restoration process: The minimum revision version required to use the feature on a global database network (GDN) primary cluster or to benefit from the speed optimization of the new restoration process.
NoteThe new restoration flow for the database and table restoration feature is an enhancement that optimizes the speed of restoring data to the original cluster. For more information about the mechanism and speed, see Overall Flow and Estimated Time.
Edition Series | MySQL Version | Architecture | Basic Features (Minimum Revision Version) | GDN Primary Cluster/New Restoration Process (Minimum Revision Version) |
Enterprise Edition (Cluster Edition) | 5.6 | X86 |
|
|
5.7 | X86 |
|
| |
8.0.1 | X86 |
|
| |
8.0.2 | X86 |
|
| |
Standard Edition | 5.6 | X86 |
|
|
5.7 | X86 |
|
| |
8.0.1 | X86 |
|
| |
Yitian (ARM) |
|
| ||
8.0.2 | X86 |
|
|
You can view the kernel version of your cluster in the Configuration Information section on the Basic Information page of your PolarDB for MySQL cluster.
Other limitations
The database and table restoration feature has the following limitations:
Clusters:
The feature is not supported for Multi-master Cluster (Limitless) Edition clusters or secondary clusters in a global database network (GDN).
Database and table restoration is not supported for clusters with more than 50,000 tables in either of the following cases:
The storage type is enterprise SSD (ESSD).
The cluster has no read-only (RO) nodes.
Table schemas and indexes:
Tables that contain a global secondary index (GSI) are not supported.
Restoring a columnstore index (IMCI) is not supported.
Storage engines: Only tables that use the InnoDB storage engine can be restored.
Data status: Tables that are archived as cold data cannot be restored.
If your current cluster does not support the database and table restoration feature, you can use full restoration to restore data to a new cluster, and then migrate the data to the source cluster.
Usage notes
Point-in-time recovery restores databases or tables to a specific point in time. After the recovery is complete, the data in the tables is identical to the data at that point in time.
You can restore databases and tables only from level-1 backups. You cannot restore from level-2 backups.
Only the tables you select are restored. Make sure to select all tables that you need to restore.
NoteIf you are unsure which tables to restore, perform a full cluster restoration.
You can use the database and table restoration feature even if the cluster contains more than 50,000 tables, including system tables.
If you choose to restore specific tables instead of a full database, you can restore up to 100 tables at a time. If you choose to restore a full database, all tables within that database are restored.
NoteTo restore many tables, perform a full cluster restoration.
The database and table restoration feature does not restore triggers.
The database and table restoration feature does not restore foreign keys.
Restore data during off-peak hours.
Step 1: Check the point in time when data was deleted or modified accidentally
If you know when data was deleted or modified accidentally, you can skip this step. If you do not know the specific point in time when data was deleted or modified accidentally, you can choose one of the following methods to check.
Method 1: SQL Explorer
If the SQL Explorer feature of PolarDB for MySQL Cluster Edition is enabled, you can view audit logs to obtain the point in time when data was deleted or modified accidentally.
You can check only SQL logs generated after the SQL Explorer feature is enabled. Therefore, if SQL Explorer is not enabled in the cluster, you can check the point in time when data was deleted or modified accidentally by using method 2.
Method 2: Obtain and parse binary logs remotely
- Enable the binary logging feature. For more information, see Enable binary logging. Note You must first enable binary logging for your cluster before you view and obtain binary logs. Otherwise, the human error message
You are not using binary loggingis returned. - Install MySQL on your on-premises server and connect MySQL to your cluster through the MySQL client. For more information, see Connect to a cluster. This topic takes a Linux operating system as an example.

- Run the following command on the client that is connected to your cluster to view binary logs:
The following result is returned:show binary logs;+------------------+-----------+ | Log_name | File_size | +------------------+-----------+ | mysql-bin.000005 | 2639 | +------------------+-----------+ 1 row in set (0.00 sec) - Run the following command on the client to obtain binary logs and save the logs to your on-premises server. This topic takes a Linux operating system as an example. To obtain binary logs and save the logs to your on-premises server, you must run the EXIT command to exit MySQL before you run the following command.
 Run the following command:
mysqlbinlog -u <username> -p <password> -h <endpoint> --read-from-remote-server --raw mysql-bin.******Parameter Description Example -uThe account name of your cluster. test_api-pThe password of your account. If you do not enter the password of your account, you will be required to enter the password after you run the preceding command. TestPwd123-hThe public endpoint of your cluster. Note- If the endpoint of your cluster uses the default port number 3306, you do not need to specify the port number. Otherwise, you must specify a port number after the endpoint.
- You can connect to only the public-facing endpoints of the primary endpoint or cluster endpoints to remotely obtain binary logs. Cluster endpoints include the default cluster endpoint and custom cluster endpoints. For more information about how to apply for a public endpoint, see Manage the endpoints of a cluster.
test-polardb.rwlb.rds.aliyuncs.com--rawYou can specify this parameter to print binary logs in the original format. The parsed data is not displayed. --rawmysql-bin.******The name of the binary log that you obtain by running the show binary logs;command. The name is displayed in theLog_namefield.mysql-bin.000005Example:mysqlbinlog -utest_api -p -htest-polardb.rwlb.rds.aliyuncs.com --read-from-remote-server --raw mysql-bin.000005 - Run the following command to view the details of binary logs by using mysqlbinlog:
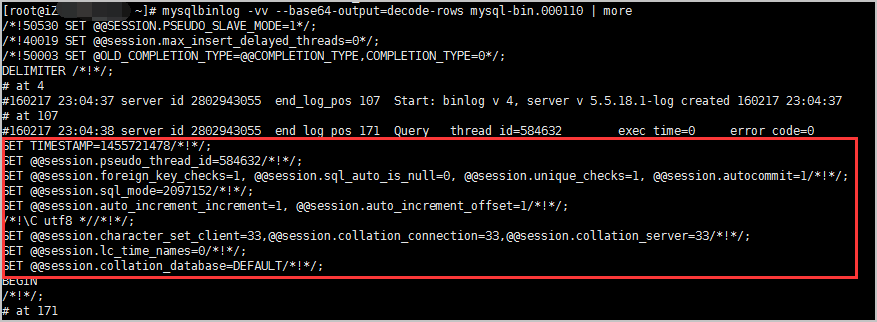
mysqlbinlog -vv --base64-output=decode-rows mysql-bin.****** | moreNote-vv: allows you to view SQL statements and remarks.--base64-output=decode-rows: allows you to parse binary logs.
The following figure shows the details of a binary log.
- After you obtain the binary log files, see mysqlbinlog-Utility for Processing Binary Log Files to parse binary logs.
Step 2: Start the database and table restoration
Log on to the PolarDB console, click Clusters in the navigation pane on the left, select the Region where the cluster is deployed, and then click the cluster ID to open the cluster details page.
In the left-side navigation pane, choose , and then click Restore Databases/Tables.
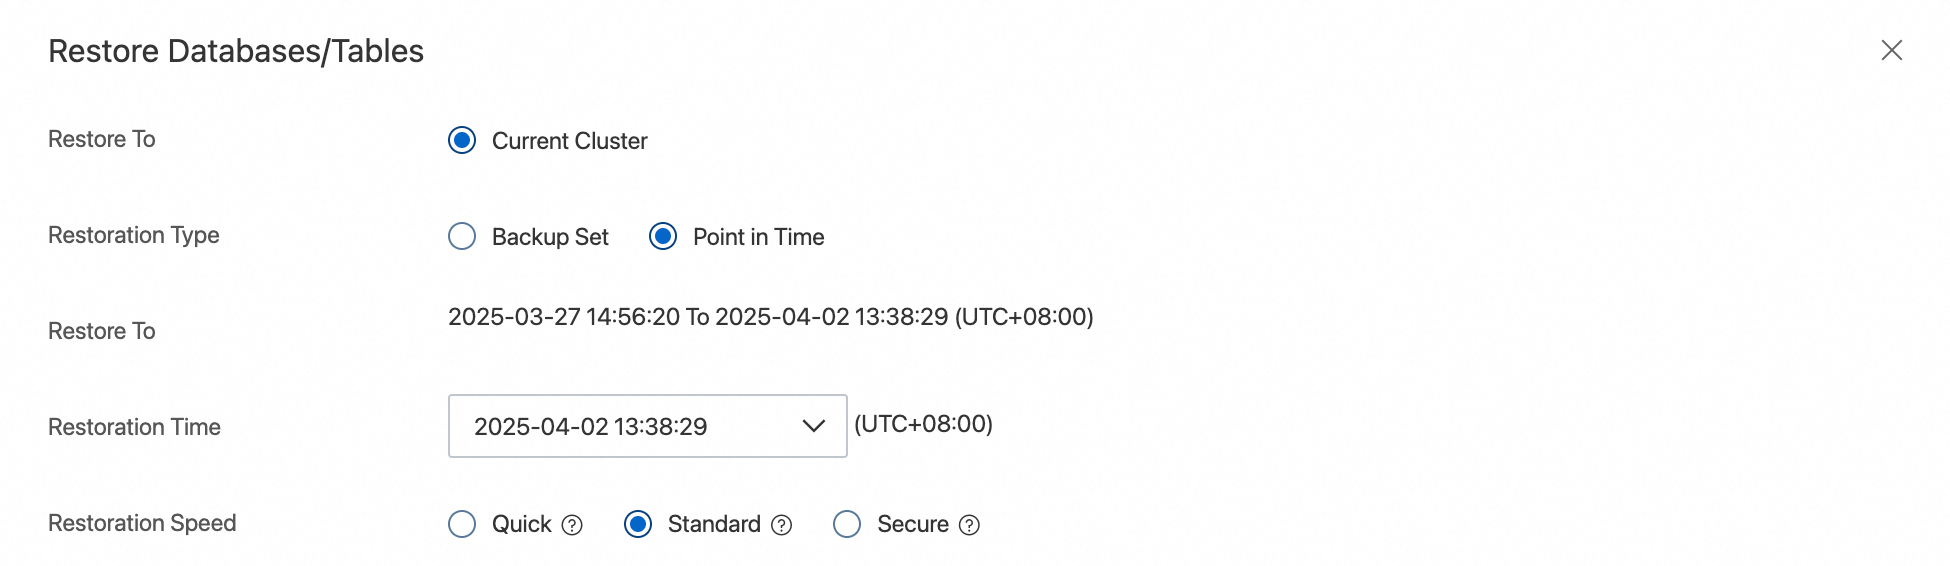
In the dialog box that appears, set the Restoration Type parameter to Point in Time and set the Restoration Time parameter to the point in time to which you want to restore data.
 Note
NoteThe point in time you specify for the Restoration Time parameter must fall within the range of the Restore To parameter. To use the Point in Time restoration method, make sure that the full backup set that is closest to the specified point in time contains the tables that you want to restore. The time range of the Restore To parameter depends on the value of the Log Retention Period (Days) parameter. The default value is seven days.
Select a restoration speed option based on your business requirements. The restoration speed options include Quick, Standard, and Secure. Each option consumes a different level of input/output operations per second (IOPS) to restore data to the current cluster. The estimated restoration duration for each restoration speed option can be found in the reference test data for database and table restoration speed.
Quick: consumes a large number of IOPS (approximately 60%) for restoring data to the current cluster. We recommend you select this option during off-peak hours.
Standard (recommended): consumes a moderate number of IOPS (approximately 30%) for restoring data to the current cluster.
Secure: consumes a small number of IOPS (approximately 15%) for restoring data to the current cluster. This may significantly slow down the restoration process.
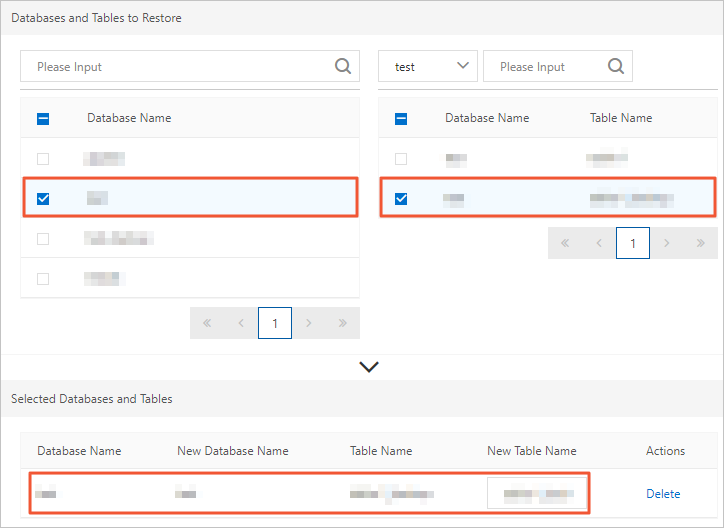
On the left side of the Databases and Tables to Restore section, select the database that you want to restore. On the right side, select the tables that you want to restore.
 Note
NoteIf you do not specify a name for a destination database or table, the system automatically generates a new database or table name by suffixing the name of the original database and table with
_backup. For example, if the name of an original table istest, the destination table is automatically namedtest_backup.If you do not select a table after you select a database, all tables in the database are restored.
Verify that you have accurately identified and selected the databases or tables you want to restore, and then click OK.
Step 3: Compare and verify the data
After the database and table restoration is complete, log on to your cluster to compare and verify the data.
You can log on to the cluster using Data Management Service (DMS), another client, or the command line. This topic describes how to log on to the cluster using DMS to verify the data. For information about other methods, see Connect to a database cluster.
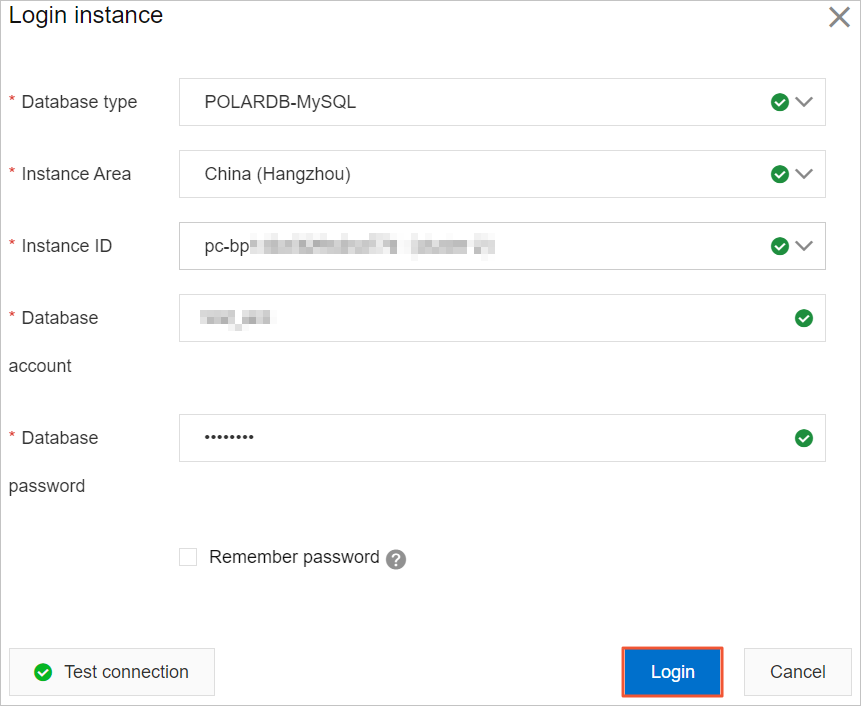
In the upper-right corner of the Basic Information page of the cluster, click Log on to Database.

In the dialog box that appears, enter the Database Account and Database Password for the cluster, and then click Log On.
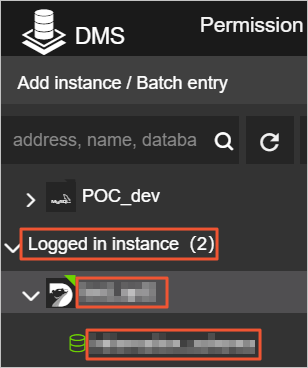
After you log on to DMS, refresh the page. In the navigation pane on the left, click Logged-in Instance.
In the Logged-in Instance list, click the name of the target cluster. Find and double-click the name of the target database to manage it.
Find the data that was affected by the incorrect operation. Confirm that the data has been restored to its state before the incorrect operation and that other data is also consistent with its state before the operation.