Restore specific databases or tables from a backup set (snapshot) to recover from accidental deletions or modifications, without restoring the entire cluster.
Prerequisites
Before you begin, ensure that you have:
At least one backup set (snapshot) for your cluster
A cluster running Enterprise Edition (Cluster Edition) or Standard Edition — see Supported versions below
Supported versions
Database and table restoration requires specific kernel versions. The table below lists the minimum kernel versions for each edition.
Column definitions:
Basic features — minimum version to use database and table restoration
GDN primary cluster/New restoration process — minimum version to use the feature on a global database network (GDN) primary cluster, or to benefit from the speed optimizations in the new restoration process
The new restoration process optimizes restore speed for the original cluster. For details on the mechanism and expected timing, see Overall flow and estimated time.
| Edition | MySQL version | Architecture | Basic features | GDN primary cluster/New restoration process |
|---|---|---|---|---|
| Enterprise Edition (Cluster Edition) | 5.6 | X86 | 5.6.1.0.25 | 5.6.1.0.42 |
| Enterprise Edition (Cluster Edition) | 5.7 | X86 | 5.7.1.0.8 | 5.7.1.0.36 |
| Enterprise Edition (Cluster Edition) | 8.0.1 | X86 | 8.0.1.1.14 | 8.0.1.1.46 |
| Enterprise Edition (Cluster Edition) | 8.0.2 | X86 | 8.0.2.2.0 | 8.0.2.2.26 |
| Standard Edition | 5.6 | X86 | 5.6.1.0.42 | 5.6.1.0.42 |
| Standard Edition | 5.7 | X86 | 5.7.1.0.30 | 5.7.1.0.30 |
| Standard Edition | 8.0.1 | X86 | 8.0.1.1.38.2 | 8.0.1.1.38.2 |
| Standard Edition | 8.0.1 | Yitian (ARM) | 8.0.1.1.41 | 8.0.1.1.41 |
| Standard Edition | 8.0.2 | X86 | 8.0.2.2.21 | 8.0.2.2.21 |
To view your cluster's kernel version, go to the Basic Information page and check the Configuration Information section.
Limitations
The following configurations and table types are not supported. If your cluster or tables fall into any of these categories, use full restoration to restore data to a new cluster, then migrate the data back to the source cluster.
Cluster configurations:
Multi-master Cluster (Limitless) Edition clusters
Secondary clusters in a global database network (GDN)
Clusters with more than 50,000 tables when either of the following applies:
Storage type is enterprise SSD (ESSD)
The cluster has no read-only nodes
Table types:
Tables with a global secondary index (GSI)
Tables with a columnstore index (IMCI)
Tables using storage engines other than InnoDB
Tables archived as cold data
Usage notes
Point-in-time recovery restores databases or tables to a specific point in time. After recovery is complete, the data in the restored tables is identical to the data at that point in time.
Only level-1 backups are supported. Level-2 backups cannot be used for database and table restoration.
Only the tables you explicitly select are restored. If you are unsure which tables to restore, perform a full cluster restoration instead.
You can use the database and table restoration feature even if the cluster contains more than 50,000 tables, including system tables. Note that certain conditions still apply — see Limitations above.
When restoring individual tables (not a full database), up to 100 tables can be restored per operation. To restore more tables at once, perform a full cluster restoration.
When restoring a full database, all tables in that database are restored.
Triggers and foreign keys are not restored.
Schedule restoration during off-peak hours to reduce impact on production workloads.
Step 1: Start database and table restoration
Log in to the PolarDB console, click Clusters in the left navigation pane, select the Region where your cluster is deployed, and click the cluster ID.
In the left navigation pane, choose Settings and Management > Backup and Restoration, then click Restore Databases/Tables.
In the dialog box, set Restoration Type to Backup Set and select a backup set from the dropdown list. Select a restoration speed based on your workload: For estimated restoration times at each speed, see Reference test data for database and table restoration speed.
Speed IOPS consumption When to use Quick ~60% Off-peak hours — completes fastest but has the highest impact on running workloads Standard (recommended) ~30% Default choice for most scenarios — balances speed and performance impact Secure ~15% When minimizing impact on production is the priority — restoration takes significantly longer 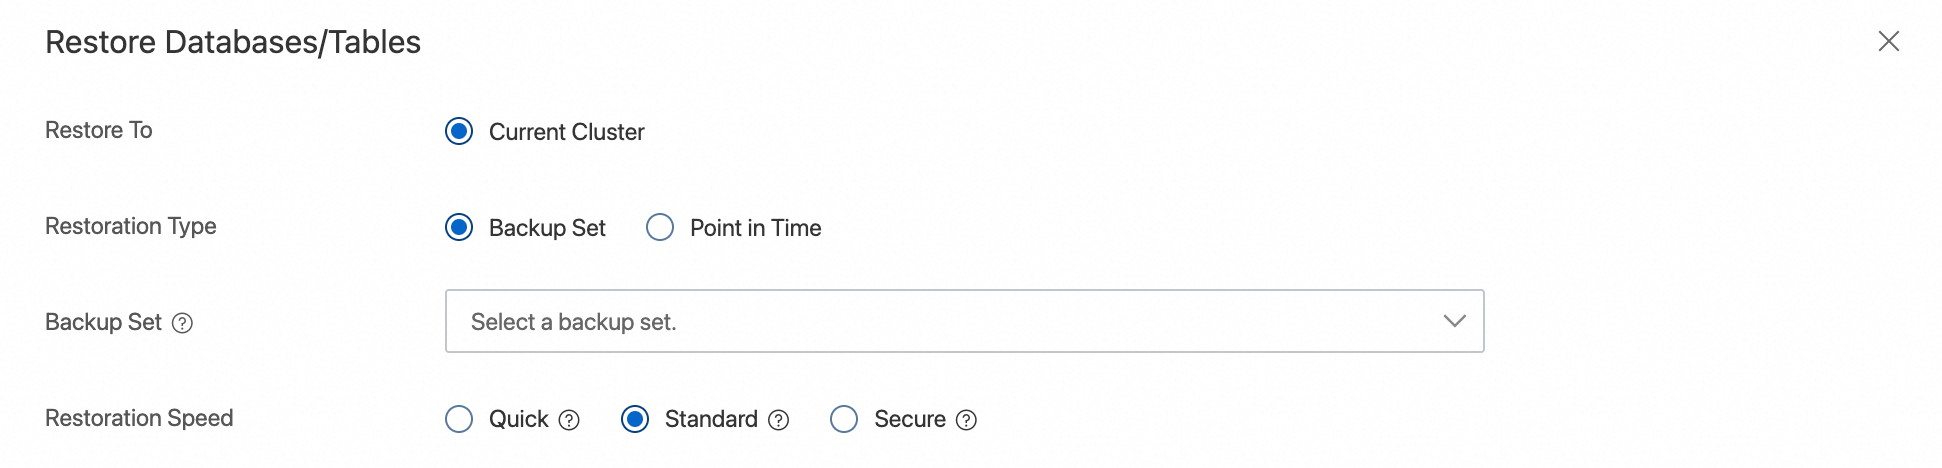
In the Databases and Tables to Restore section, select the database on the left, then select the tables to restore on the right.
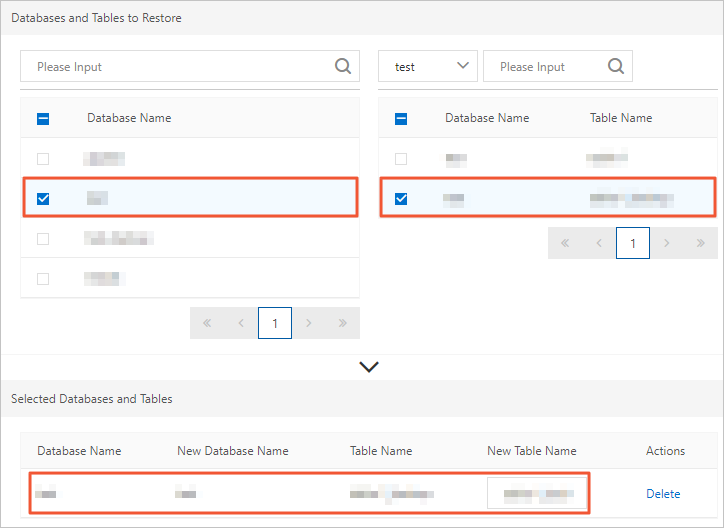
If no destination name is specified, the system adds a
_backupsuffix to the original name. For example, a table namedtestis restored astest_backup.If you select a database without selecting specific tables, all tables in that database are restored.
Confirm your selections and click OK.
Step 2: Verify restored data
After restoration completes, log in to your cluster and verify that the data matches the expected state from the backup set.
This section describes verification using DMS. For other connection methods, see Connect to a cluster.
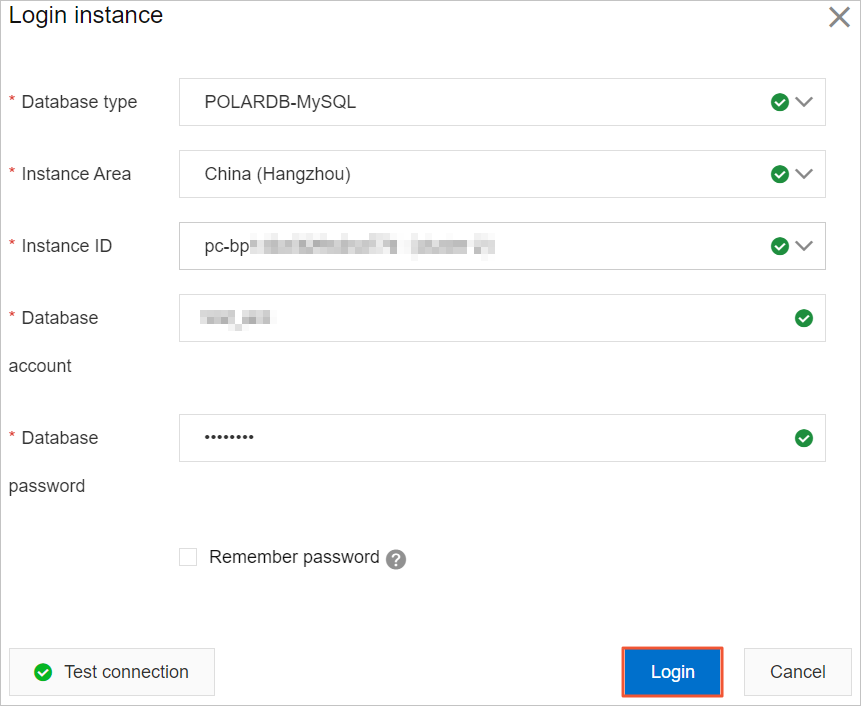
On the Basic Information page, click Log on to Database in the upper-right corner.

Enter the database account and database password for your cluster, then click Login.
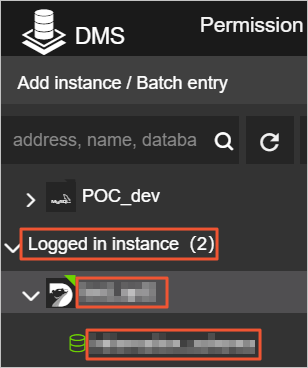
After logging in to DMS, refresh the page. In the left navigation pane, click Logged in instance.
In the Logged in instance list, click the cluster and double-click the database to manage.
Locate the rows that were accidentally deleted or modified. Confirm that the data has been restored and that all other data is consistent with its state before the accidental operation.
What's next
If the restored data looks correct, remove the
_backuptables or databases that are no longer needed to free up storage.If your cluster does not support database and table restoration, use full restoration to restore to a new cluster, then migrate the data back.