Process job packages through labeling, quality inspection, and acceptance to obtain labeled data.
Prerequisites
A labeling job has been created. For more information, see Create a labeling job.
Limitations
Only administrators and annotation administrators can perform labeling operations. To request the required permissions, see Manage workspace members.
Procedure
-
Go to the iTAG page.
-
Log on to the PAI console.
-
In the left-side navigation pane, click Workspaces. On the Workspaces page, click the name of the workspace that you want to manage.
-
In the left-side navigation pane, choose .
-
-
On the iTAG page, click Go to the iTAG Page in the upper-right corner to open iTAG.
-
Inspect labeling quality.
-
In the left-side navigation pane, click Quality Inspection Task.
-
Review, modify, or reject labeled job packages.
-
-
Accept labeling results.
-
In the left-side navigation pane, click Acceptance Task.
-
Accept, modify, or reject job packages.
-
-
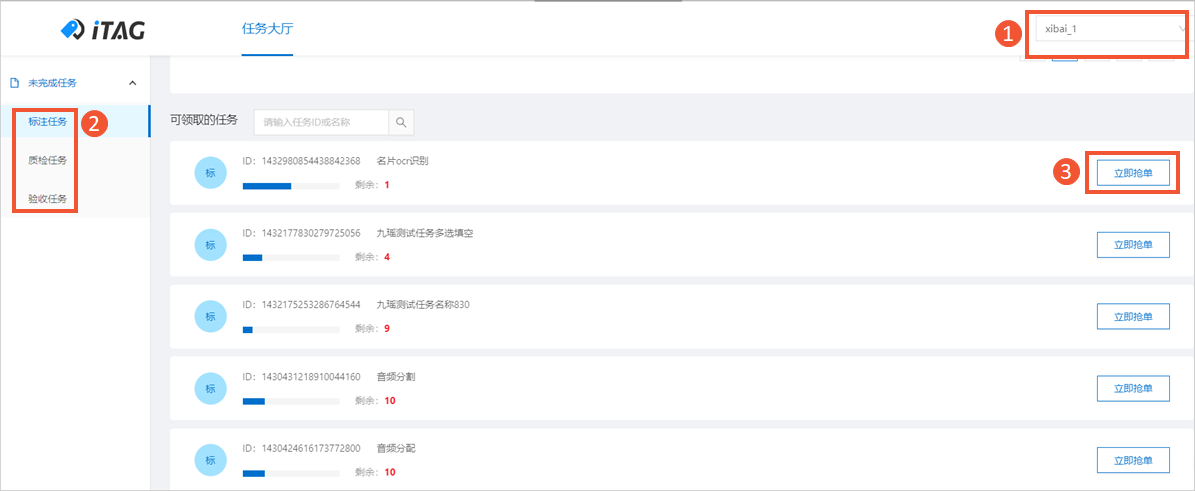
Claim a labeling job.
-
In the upper-right corner of iTAG, select a workspace.
-
In the left-side navigation pane, click Label Task, Quality Inspection Task, or Acceptance Task.
-
In the Assignment Available section, find the job and click Grab the Order immediately.
-
-
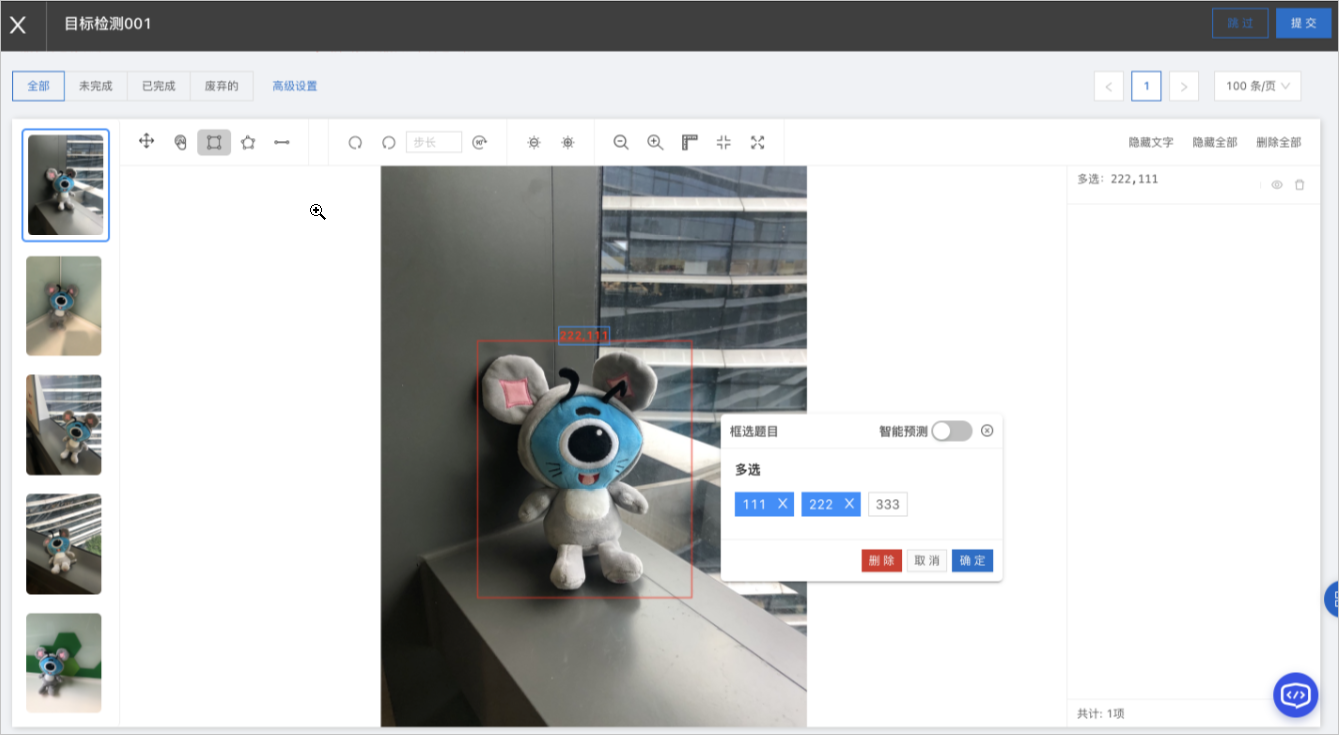
Label data.
-
On the labeling page, select a tool and label the data.
Click a thumbnail in the task list on the left to switch between tasks in the job package.
-
After labeling all tasks, click Submit in the upper-right corner.
-
-
Inspect labeling quality.
-
In the left-side navigation pane, click Quality Inspection Task.
-
Review, modify, or reject labeled job packages.
-
-
Accept labeling results.
-
In the left-side navigation pane, click Acceptance Task.
-
Accept, modify, or reject job packages.
-
Next steps
Export labeling results from completed jobs for model training. For more information, see Export labeling results.